Setting Up SCC-AC Using Guided Setup
Setup Organization
In Salesforce Setup, search for Partner Telephony Setup in Quick Find, select No. 6 (Set Up More Amazon Connect Features), and then choose Configure. You will be redirected to the SCC-AC Guided Setup page. It should look like this:
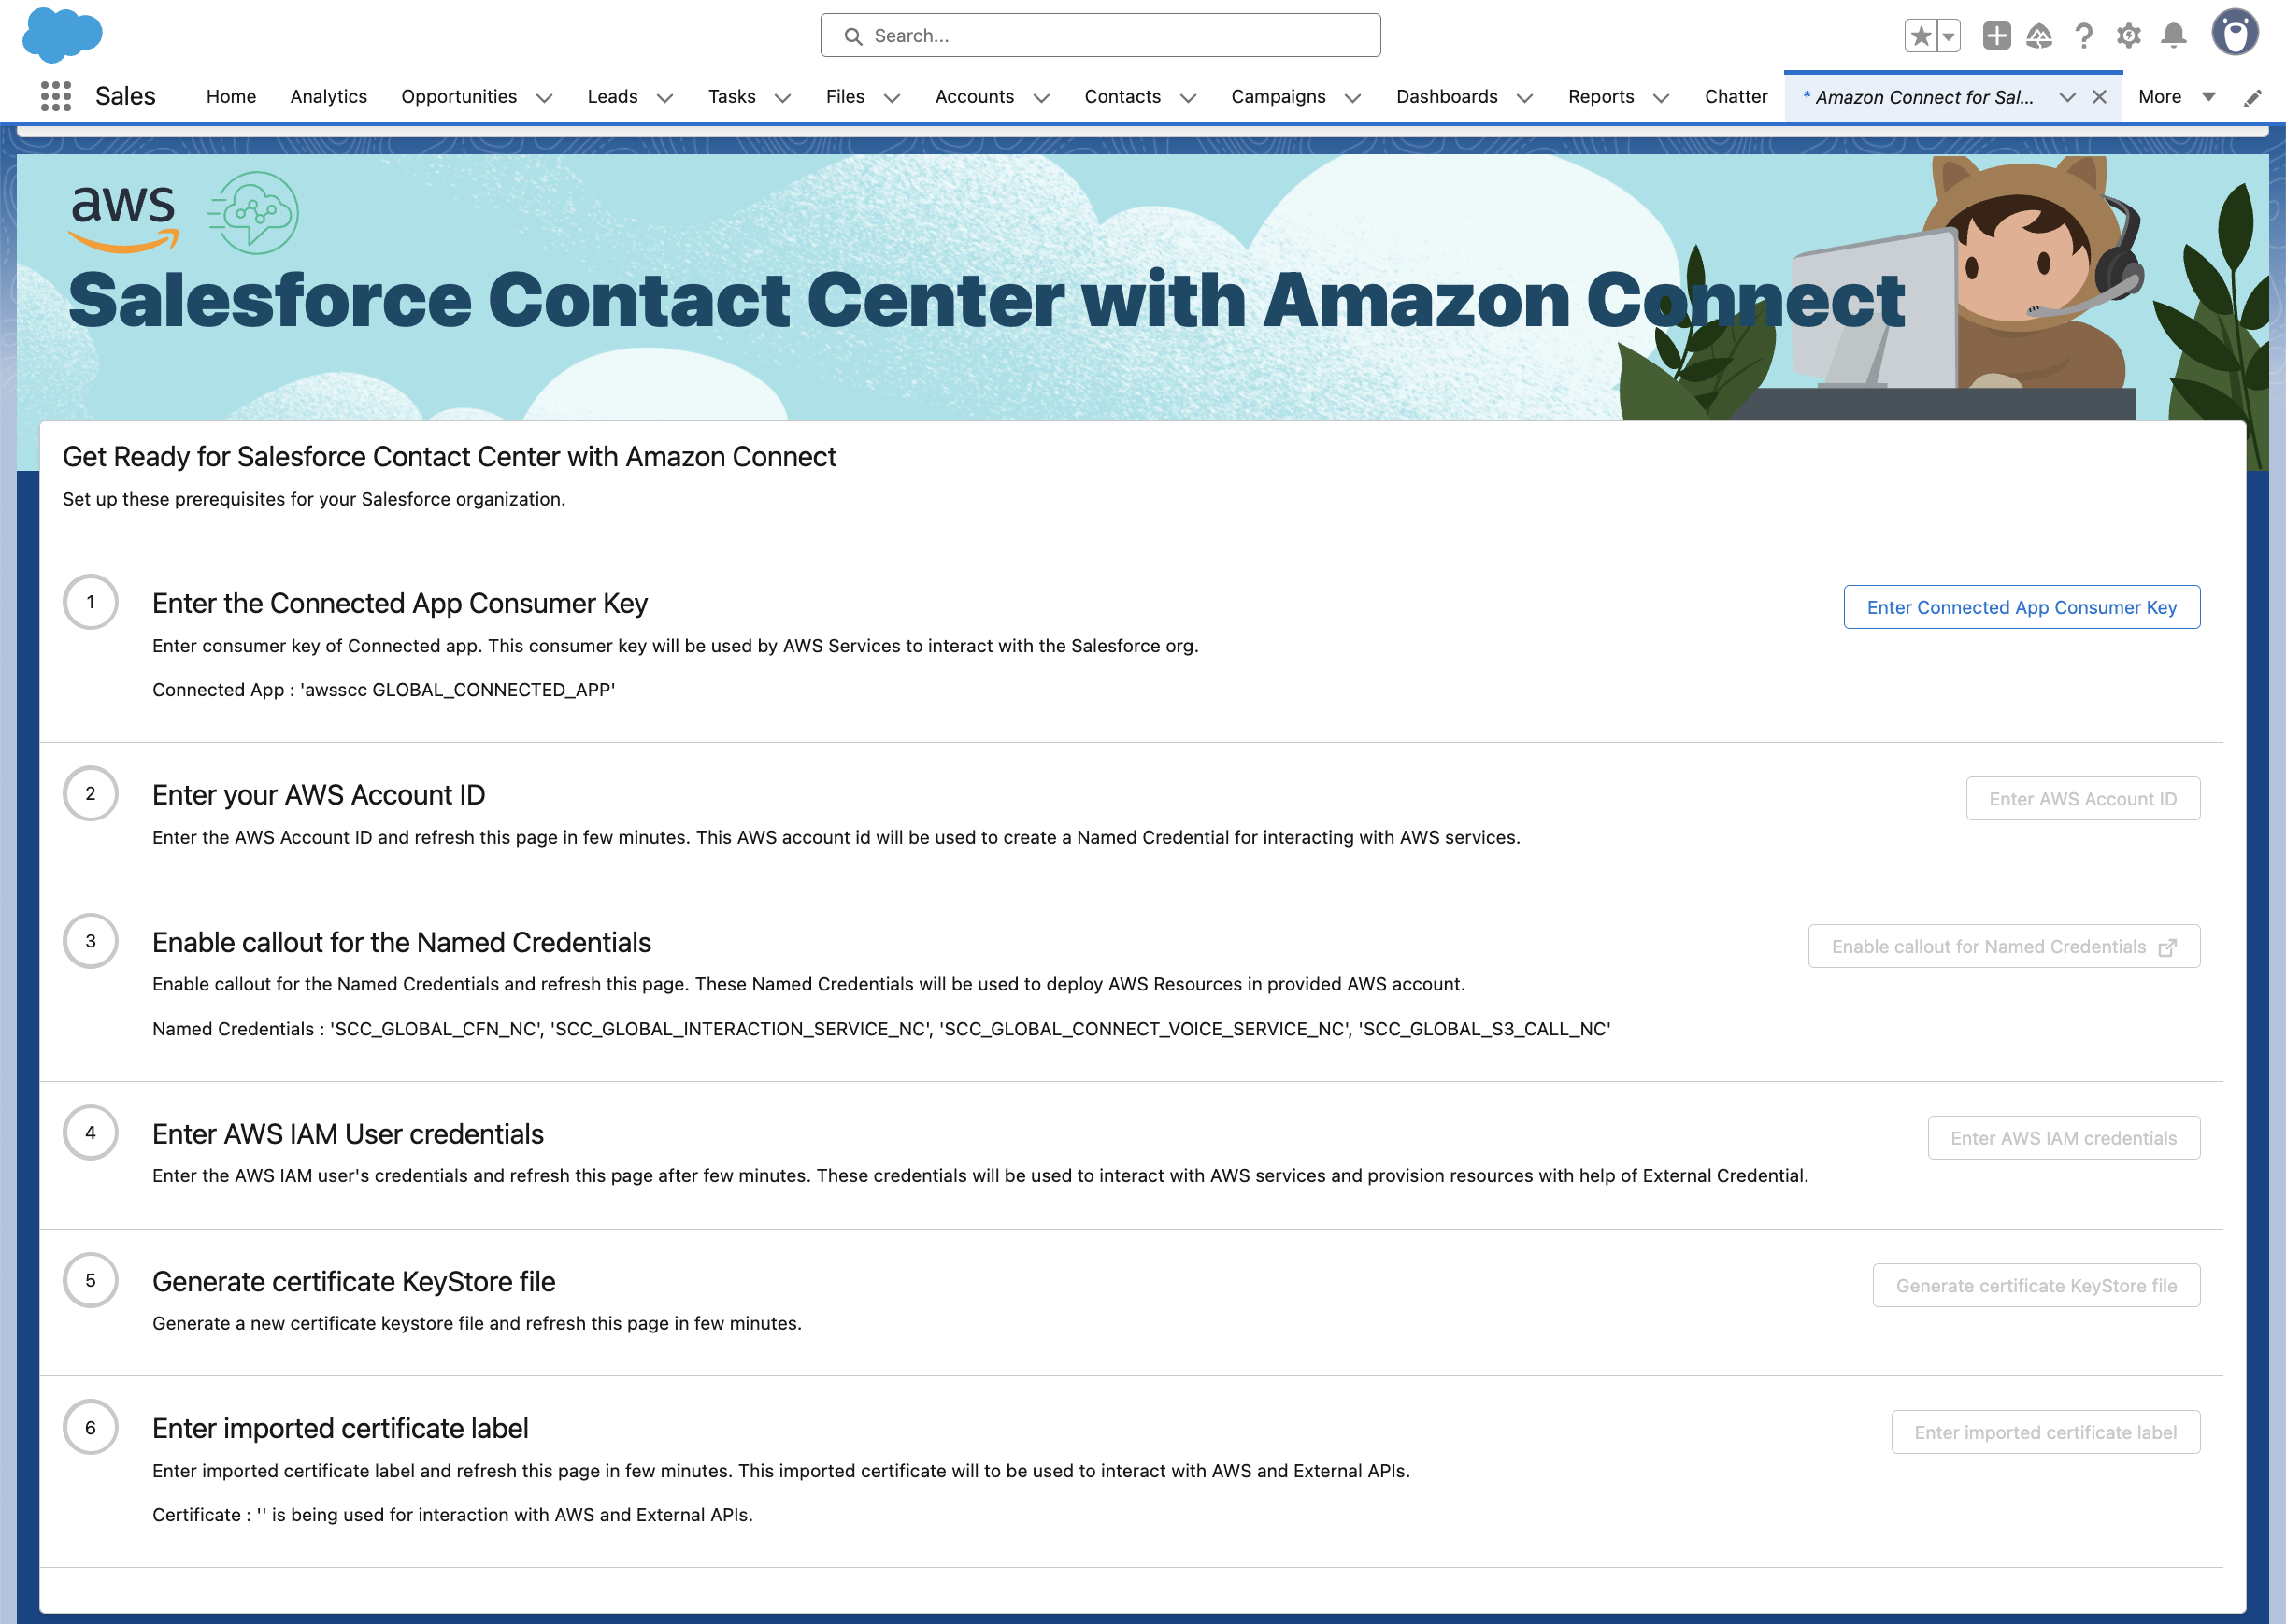
1) Enter the Connected App Consumer Key
- Retrieve the awsscc GLOBAL_CONNECTED_APP Consumer Key that was stored previously.
- Choose Enter Connected App Consumer Key and enter the consumer key.
2) Enter your AWS Account ID
- Retrieve your AWS Account ID.
- Choose Enter AWS Account ID and enter your AWS Account ID.
IMPORTANT: This step creates global resources needed for SCC-AC on the given Account ID and Salesforce org. This includes creation of SCCAC ApiAccessUser. Keep in mind to always have this user active and periodically rotate the certificate. Failing to keep this user active may lead to production outages.
3) Enable callouts for the Named Credentials
- Choose Enable callouts for Named Credentials. Make sure you have popups enabled for your org on your internet browser of choice.
- You will be redirected to the Named Credentials page of Setup. If the page does not automatically open, go to Salesforce Setup page, search for Named Credentials and choose it.
- You should see all of these new Named Credentials:
- SCC_GLOBAL_CFN_NC
- SCC_GLOBAL_CONNECT_VOICE_SERVICE_NC
- SCC_GLOBAL_INTERACTION_SERVICE_NC
- SCC_GLOBAL_S3_CALL_NC
- On each of the aforementioned Named Credentials, under the Actions section, choose the dropdown arrow and select Edit.
- Turn on the Enabled for Callouts flag.
- Come back to the SCC-AC Guided Setup page and refresh. If you see a green check mark next to Enable callout for Named Credentials button you can proceed to next step.
- If the button is not greyed out and no green check mark is displayed then not all Named Credentials have been enabled for callouts. Re-verify all above Named Credentials have been enabled for callouts.
4) Enter AWS IAM User credentials
- Retrieve SCCAC-Setup-User IAM User credentials, both the Access Key and Secret Access Key. These credentials should have been stored previously.
- Choose Enter AWS IAM credentials button and enter the SCCAC-Setup-User IAM User Access Key and Secret Access Key.
- In the future, for rotation of IAM User's credential follow : IAM User's Credential Rotation
- This will trigger a CloudFormation deployment in your AWS Account in us-east-1 region. Wait until the SCC-GLOBAL-STACK-{SalesforceOrgId} CloudFormation stack deployment succeeds.
- Refresh the SCC-AC Guided Setup page and verify that a green check mark has appeared next to Enter AWS IAM credentials button.
Post-completion: Update SCC-AC Secret Manager secret
- Before heading to the next section, you will need to update the secret on AWS Secret Manager with new values.
- On the AWS console, navigate to Secret Manager service.
- Choose SCCAC-Secret-{SalesforceOrgId} and once the secret opens, choose Retrieve secret value on the Secret Value section of the secret.
- Choose Edit and replace the following values:
- CERTIFICATE_KEY_PASSWORD_PLACE_HOLDER with a password of your own choice. Remember this password since you will use it on a future step.
- CONNECTED_APP_CONSUMER_SECRET_PLACE_HOLDER with the awsscc GLOBAL_CONNECTED_APP Consumer secret previously retrieved.
5) Generate certificate Keystore file
- On the guided setup page in Salesforce, choose Generate certificate KeyStore file.
- This will trigger a CloudFormation deployment in your AWS Account in us-east-1 region. Wait until the SCC-GLOBAL-CERTIFICATE-STACK-{Timestamp} CloudFormation stack deployment succeeds.
- Refresh the SCC-AC Guided Setup page and verify that a green check mark has appeared next to Generate certificate KeyStore file button.
Post-completion: Download certificate Keystore file and upload it to Salesforce
- Before heading to the next section you will need to download and upload the generated certificate file.
- On the AWS Console, navigate to S3 service.
- Search for a bucket with a name with format sccac-{YOUR_AWS_ACCOUNT}-bucket-{SalesforceOrgId}. Choose it and verify that it has one .jks file with name with format scc_certificate_{Timestamp}.jks
- Download that certificate file to your computer.
- On your Salesforce org, go to Salesforce Setup, search for Certificate and Key Management and choose it.
- Choose Import from Keystore. Upload your downloaded certificate and under Keystore Password, enter your password of choice created in step 6.iv. Choose Save.
- Write down and save your certificate label named scc_certificate_{Timestamp}. You will use it in the next step.
6) Enter imported certificate label
- Choose Enter imported certificate label and enter your certificate label name saved before.
- This will trigger a CloudFormation deployment in your AWS account in us-east-1 region. Wait until the SCC-GLOBAL-CERTIFICATE-APPLIED-RESOURCE-STACK-{SalesforceOrgId}-{Timestamp} CloudFormation stack deployment succeeds.
- Refresh the SCC-AC Guided Setup page and verify that a green check mark has appeared next to Enter imported certificate label button. The button will not be disabled, because you can update the certificate using this button in the future in case your certificate expires.
Setup Contact Centers
In the list of contact centers, choose the Contact Center for which you would like to set up SCC-AC. It should look like this:
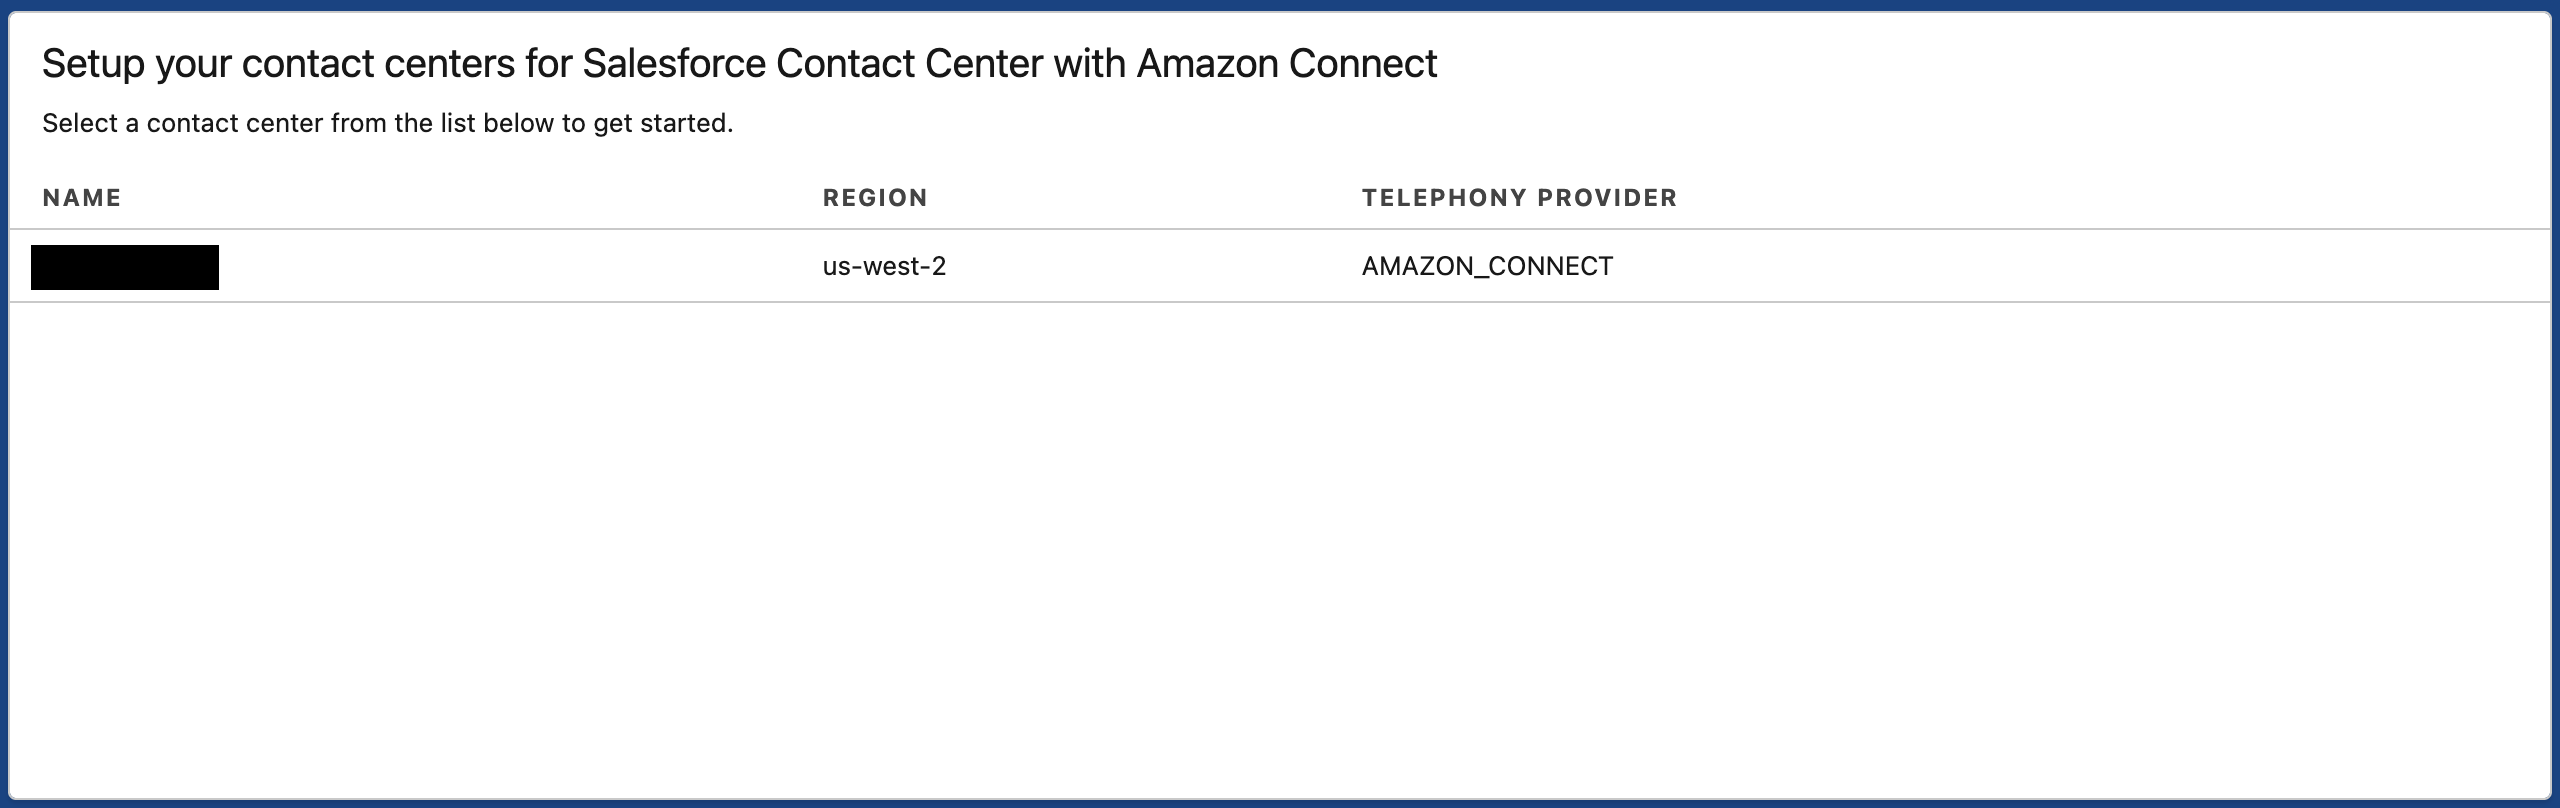
Repeat the following steps for each of the contact centers you would like to setup.
1) Enable Contact Center
- Choose the Enable this contact center for Salesforce Contact Center with Amazon Connect flag to create the named credentials for your contact center to interact with AWS services.
2) Enable callouts for the Named Credentials
- Choose Enable callouts for Named Credentials. Make sure you have popups enabled for your org on your internet browser of choice.
- You will be redirected to the Named Credentials page of Setup. If the page does not automatically open, go to Salesforce Setup page, search for Named Credentials and choose it.
- You should see all of these new Named Credentials:
- SCC_CONTACT_CENTER_CFN_NC_{ContactCenterId}
- SCC_CONTACT_CENTER_CONNECT_API_NC_{ContactCenterId}
- On each of the aforementioned Named Credentials, under the Actions section, choose the dropdown arrow and select Edit.
- Turn on the Enabled for Callouts flag.
- Come back to the SCC-AC Guided Setup page and refresh. If you see a green check mark next to Enable callout for Named Credentials button you can proceed to next step.
- If the button is not greyed out and no green check mark is displayed then not all Named Credentials have been enabled for callouts. Re-verify all above Named Credentials have been enabled for callouts.
3) Enter AWS IAM User credentials
- Retrieve SCCAC-Setup-User IAM User credentials, both the Access Key and Secret Access Key. These credentials should have been stored previously.
- Choose Enter AWS IAM credentials button and enter the SCCAC-Setup-User IAM User Access Key and Secret Access Key.
- In the future, for rotation of IAM User's credential follow : IAM User's Credential Rotation
- This will trigger a CloudFormation deployment in your AWS account in the region you chose for your contact center. Wait until both SCC-CONTACT-CENTER-STACK-{ContactCenterId} and SCC-CONTACT-CENTER-SECRET-REPLICATION-STACK-{ContactCenterId} CloudFormation stack deployments succeed.
- Refresh the SCC-AC Guided Setup page and verify that a green check mark has appeared next to the Enter AWS IAM credentials button.
Known issues with Guided Setup
- We have no way of changing AWS Account ID in case the user entered it incorrectly without having to go through Workbench.
- We have no way of changing Connected App Consumer Key in case the user entered it incorrectly without having to go through Workbench. WARNING Manually updating Connected App Consumer Key through Workbench would lead AWS Secret SCCAC-Secret-{SalesforceOrgId} override during AWS resource update.
- If the SCC-GLOBAL-CERTIFICATE-APPLIED-RESOURCE-STACK-{SalesforceOrgId}-{Timestamp} CloudFormation deployment fails, refer to the CloudWatch logs for the SCC-ExternalCredentialManagementFunction Lambda function on your AWS Console for more information.
- If the error mentions invalid_grant: no client credentials user enabled, please make sure that the awsscc GLOBAL_CONNECTED_APP has client credentials enabled, and that it’s running as SCCAC Administrator under Client Credentials Flow.