Amazon Elasticsearch
Deployment Steps with CDK
Install and bootstrap AWS CDK
Please skip this step if you already have CDK installed and bootstrapped.
npm install -g aws-cdk
npm install -g typescript

cdk bootstrap aws://YOUR_ACCOUNT_ID/YOUR_AWS_REGION
Deploying CDK project
- Clone the repository from Github
git clone git@github.com:amazon-connect/amazon-connect-call-quality-monitoring.git
- Move into the directory of the stack which will deploy the resources
cd Amazon-connect-monitoring/monitoring-stack-cdk
- Set your CCP URL (required) and SAML URL (optional)
export CCP_URL=YOURURL
If your Amazon Connect requires SAML federation please provide SAML login URL in the SAML URL parameter (OPTIONAL).
export SAML_URL=YOUR_SAML_ID_URL
- Install the required NPM packages
npm install
- Deploy the CDK project
cdk deploy --require-approval never
CcpUrl: The URL in the format https://*/ccp-v2.
Note that the CCP-v2 must be used.
Please allow up to 45 minutes for the solution to deploy.
Once the CDK app has finished to deploy. You will see the following outputs in your terminal
Outputs:
ConnectMonitoringStack.CLOUDFRONTURL = https://xxxxxxxxxxx.cloudfront.net
ConnectMonitoringStack.COGNITOURL = https://us-west-2.console.aws.amazon.com/cognito/users?region=us-west-2#/pool/xxxxxxxxxxxxx/users
ConnectMonitoringStack.KIBANAURL = https://xxxsssssssssssssssss.us-west-2.es.amazonaws.com/_plugin/kibana/
-
Cloudfront URL you must allowlist in the Amazon Connect application whitelisting setting.
-
URL to create a user from the created Amazon Cognito User Pool (COGNITOURL)
-
Kibana URL (KIBANAURL) where you can open up the dashboard
Creating a user in the user pool is necessary to access Kibana. Following the Kibana URL, you will gain access to the visual user interface for the data stored in ElasticSearch.
- Click the UserCreationUrl and follow the steps create a user for Kibana
- Cognito here is used to manage access to Kibana, the users created in the Cognito User pool are sepereate users to the users from Amazon Connect.
- Go to AWS Console → Amazon Connect, choose the Connect instance and insert the Cloudfront URL in the application integration section by clicking on the “add origin” button.
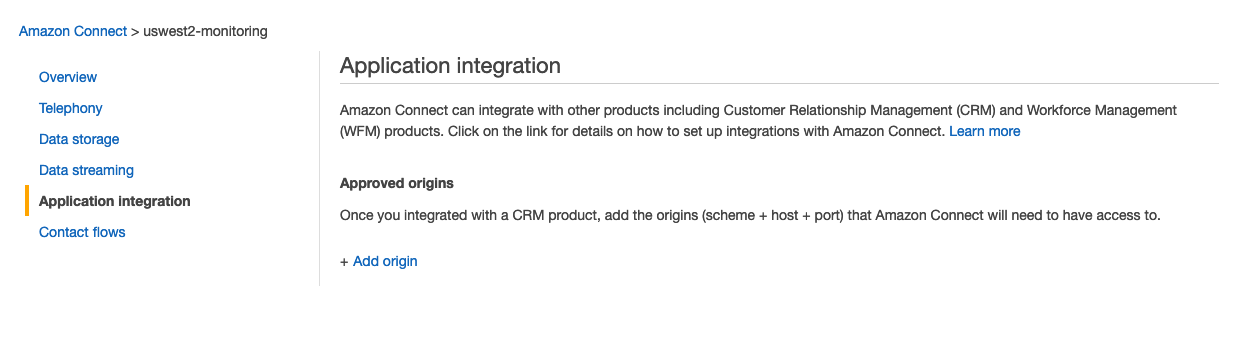
Add Origin
- Click the Cloudfront URL, this should open the custom CCP website.
- Login with your connect user and make/receive a call
- Metrics will be published and visible in you the Kibana Dashboard
For more details on how to use the solution please check out the user guide.