Amazon Connect AI Agent Assistance Setup
Agentic AI (Amazon Connect Assistant) Setup
-
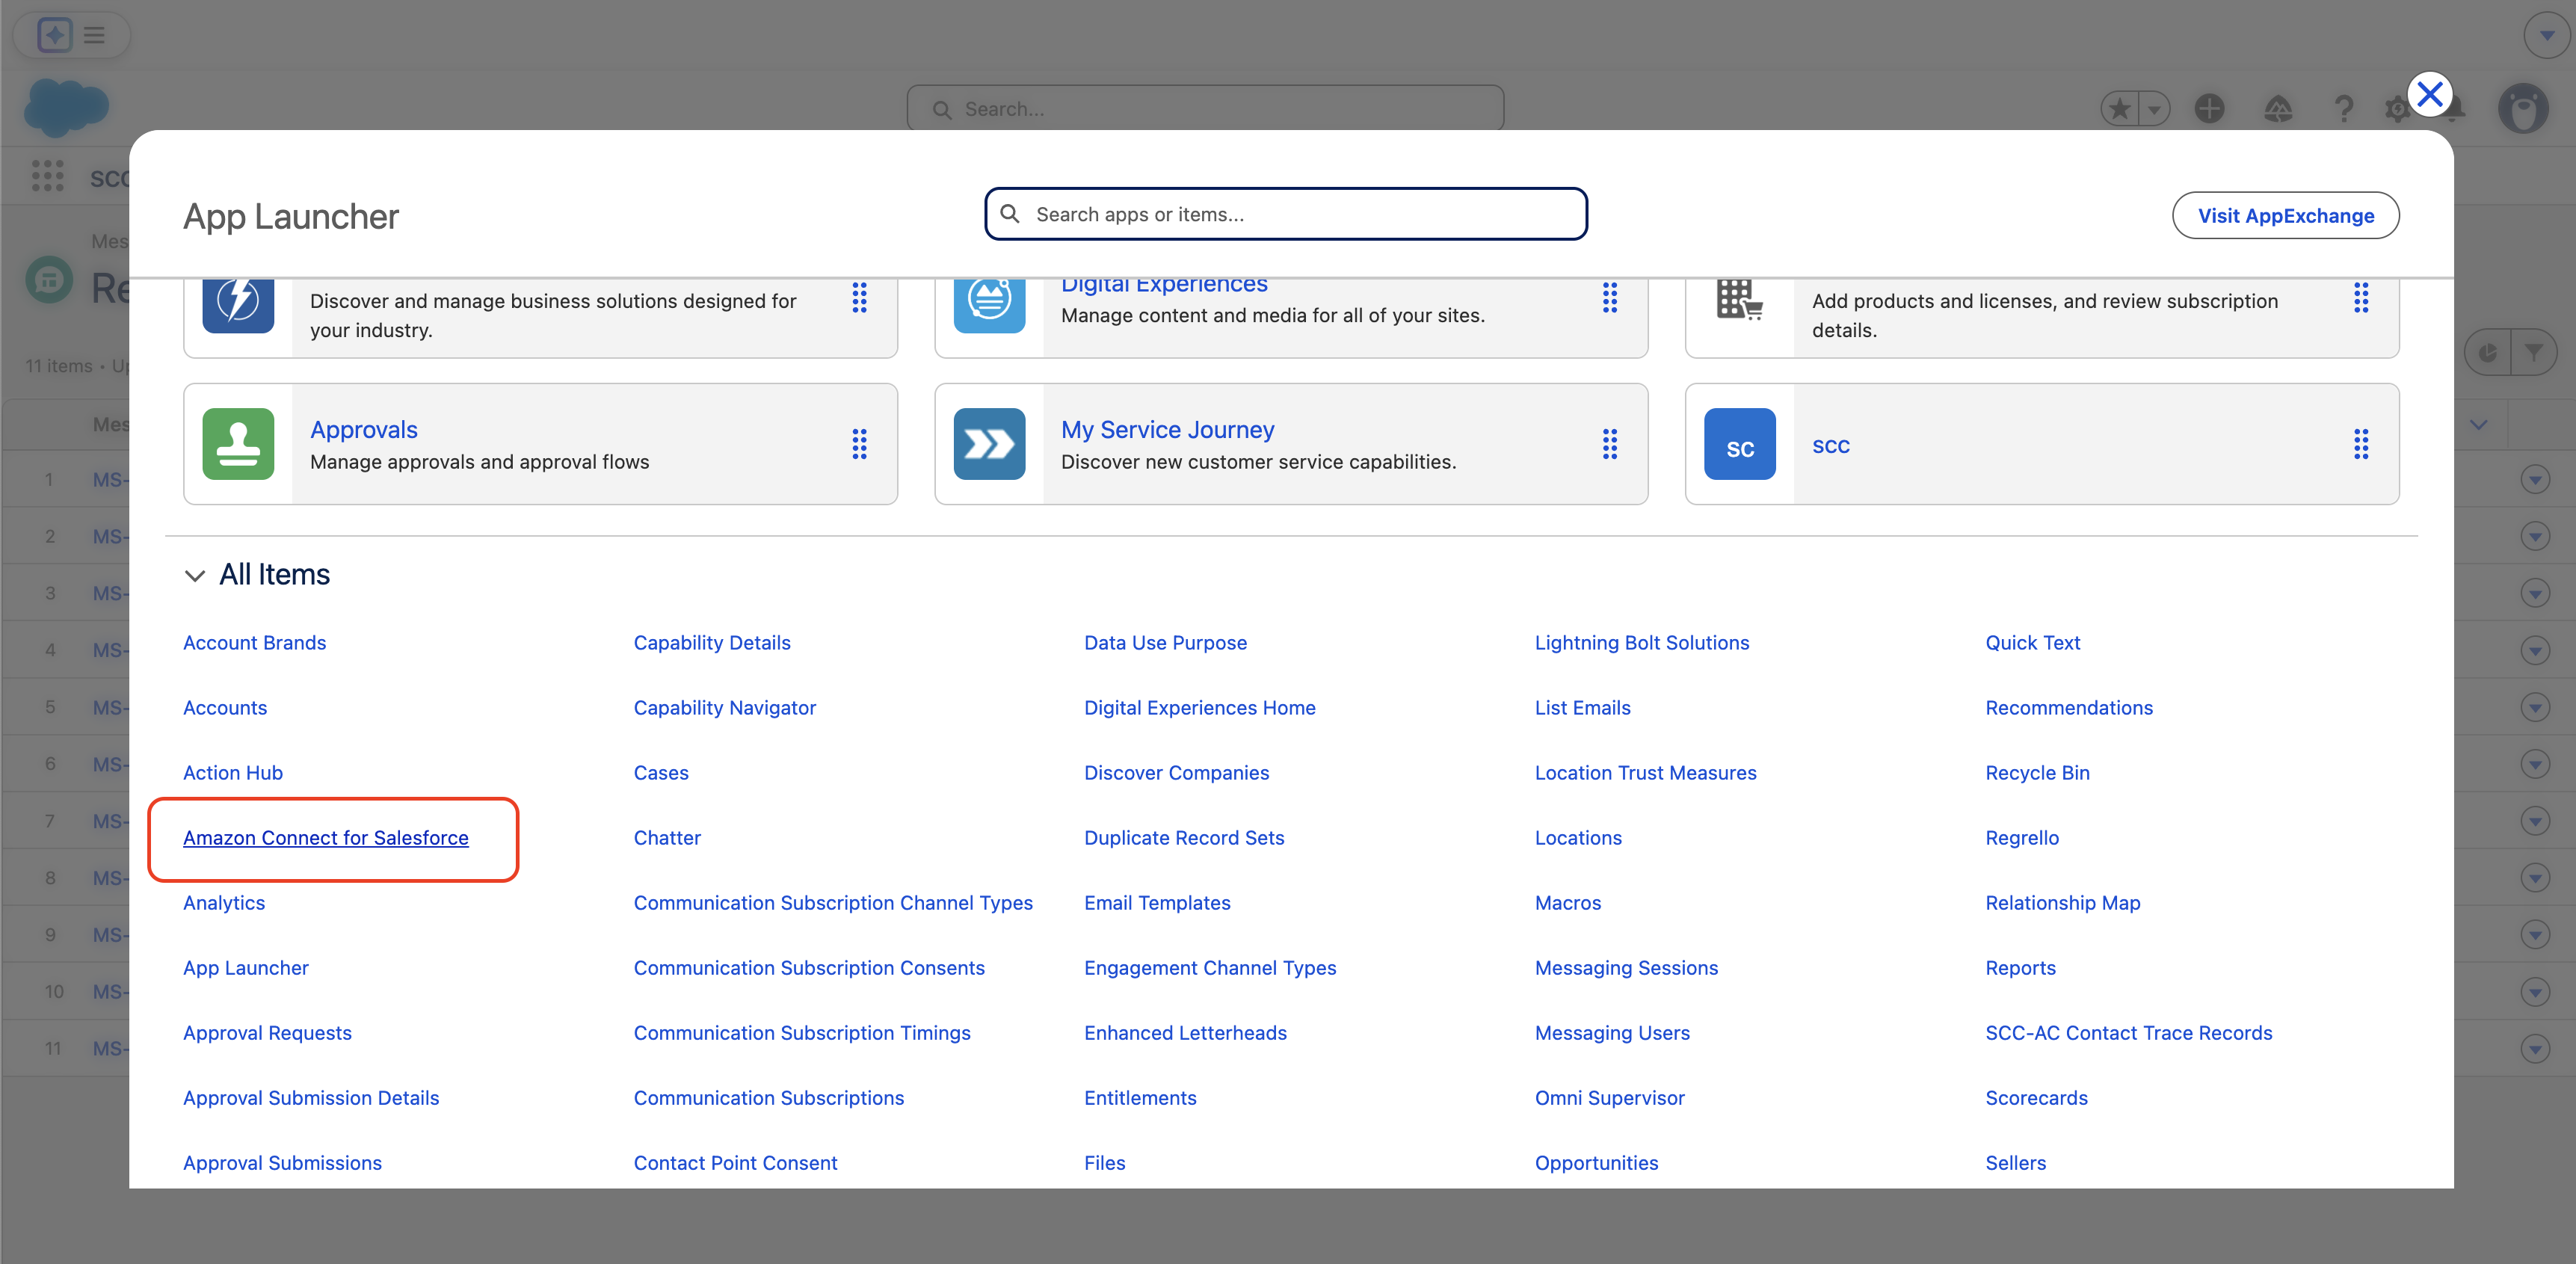
Go to your Contact Center Guided Setup by navigating to the App Launcher in your Salesforce org and choose Amazon Connect for Salesforce.
-
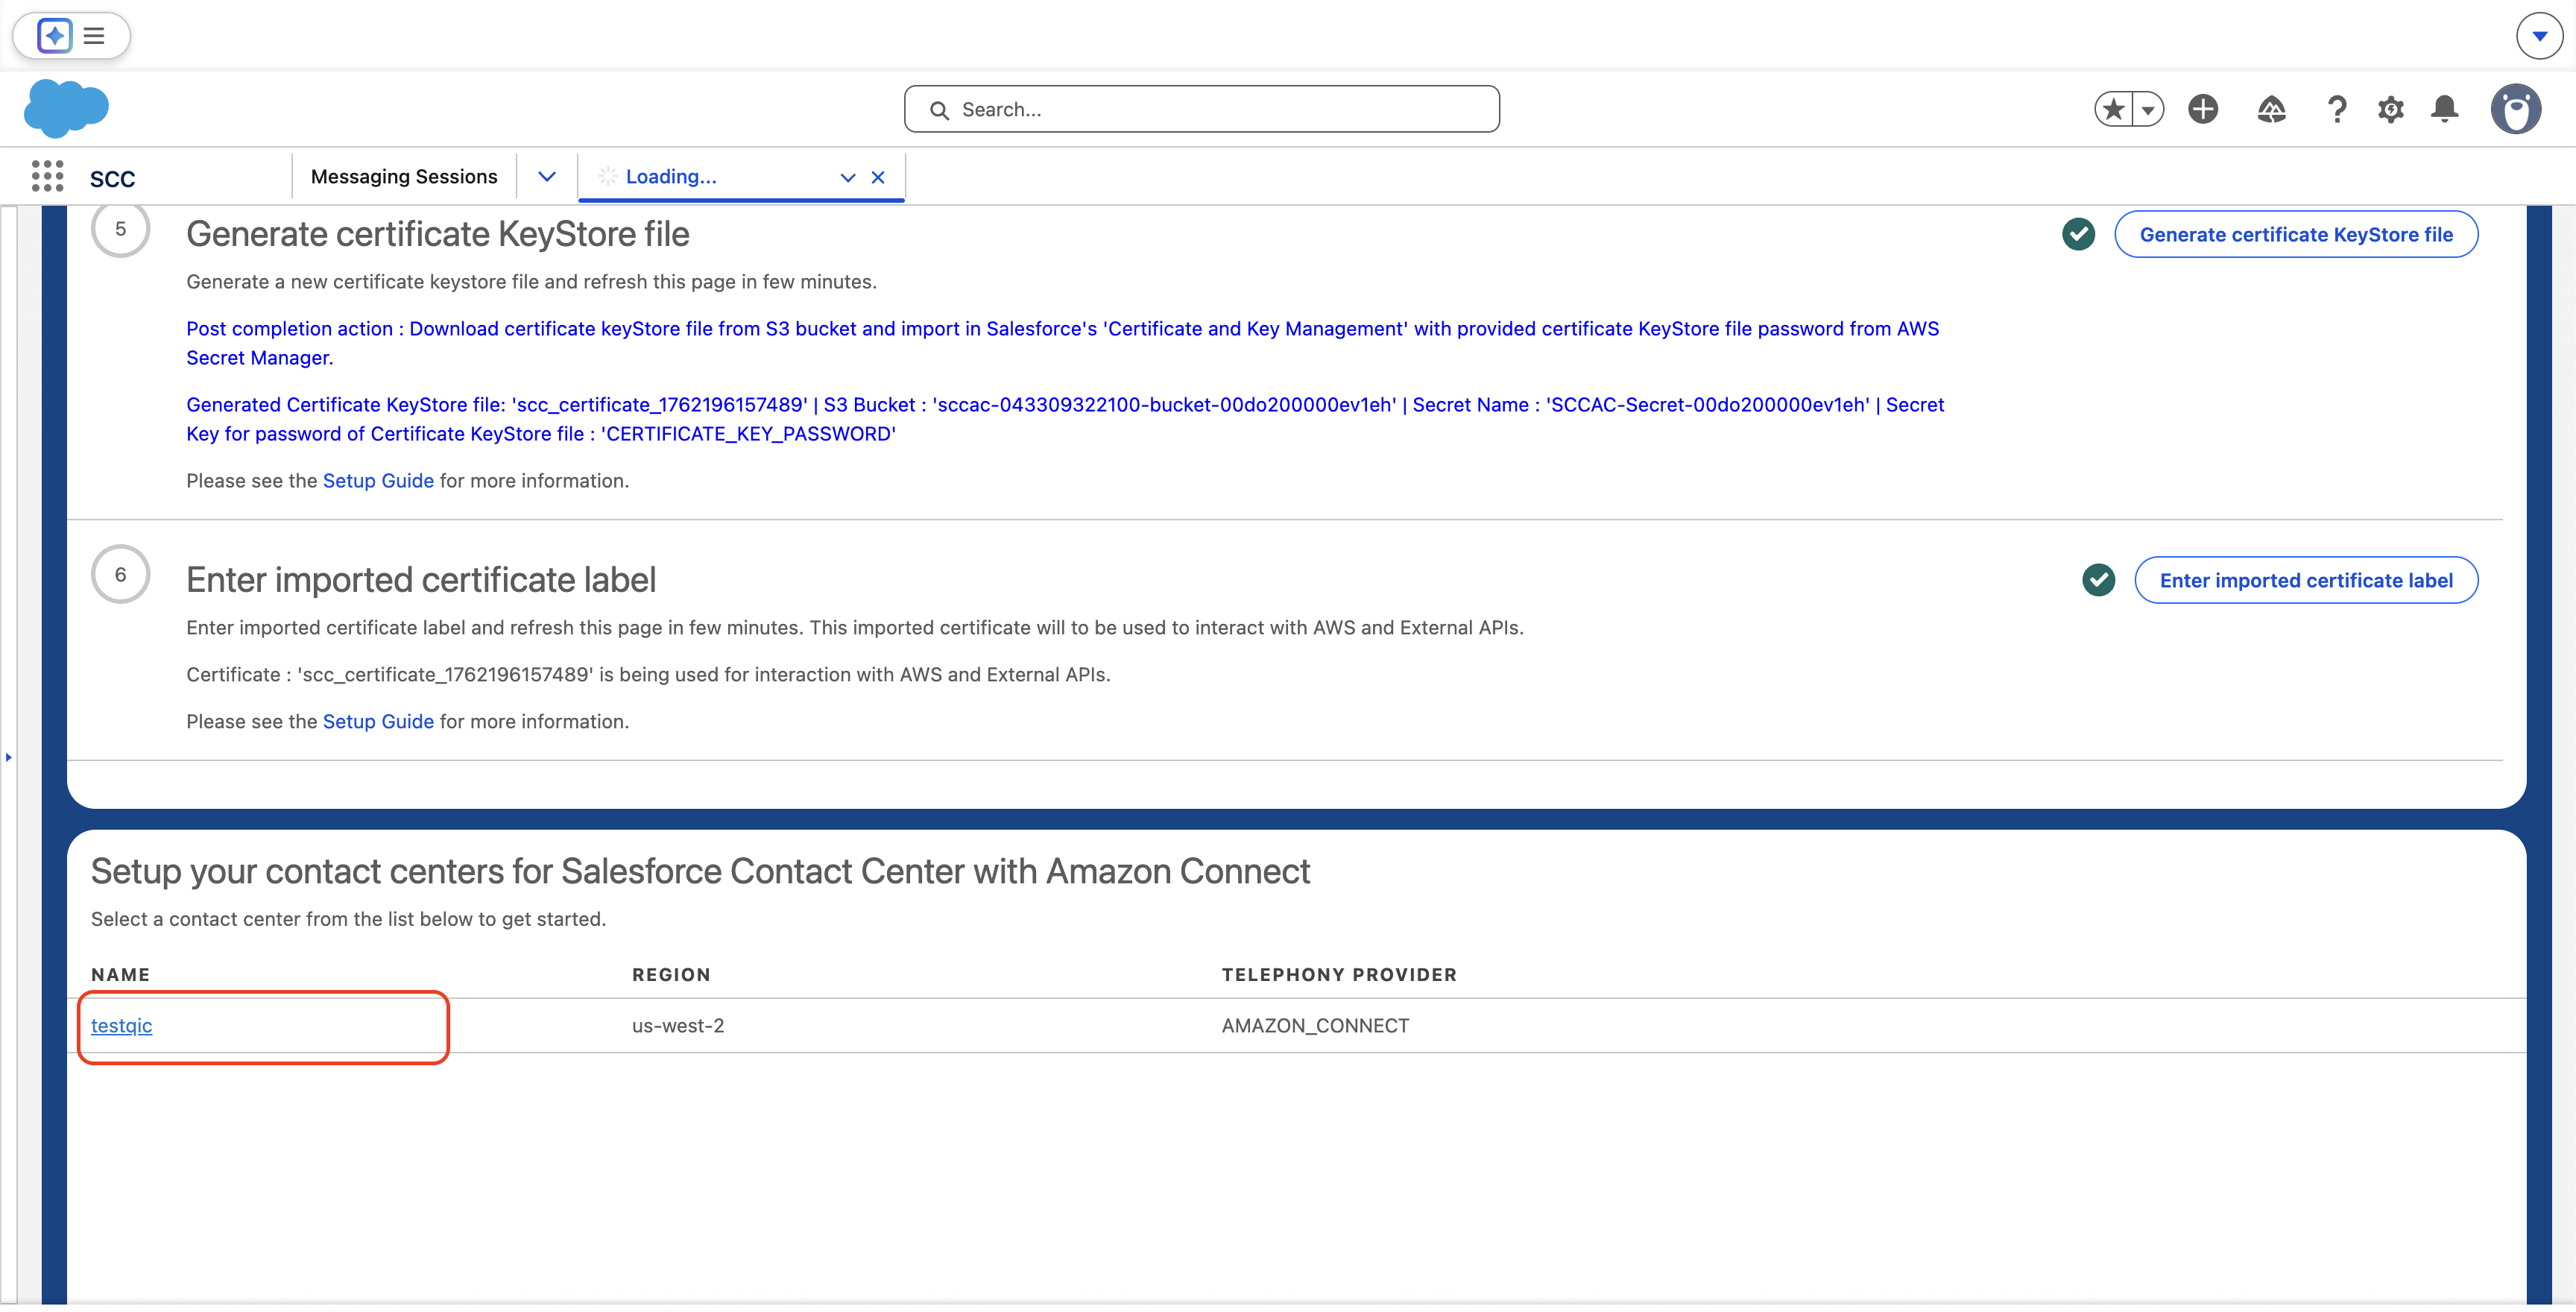
Select the contact center you want to enable Connect Assistant in your Salesforce org.
-
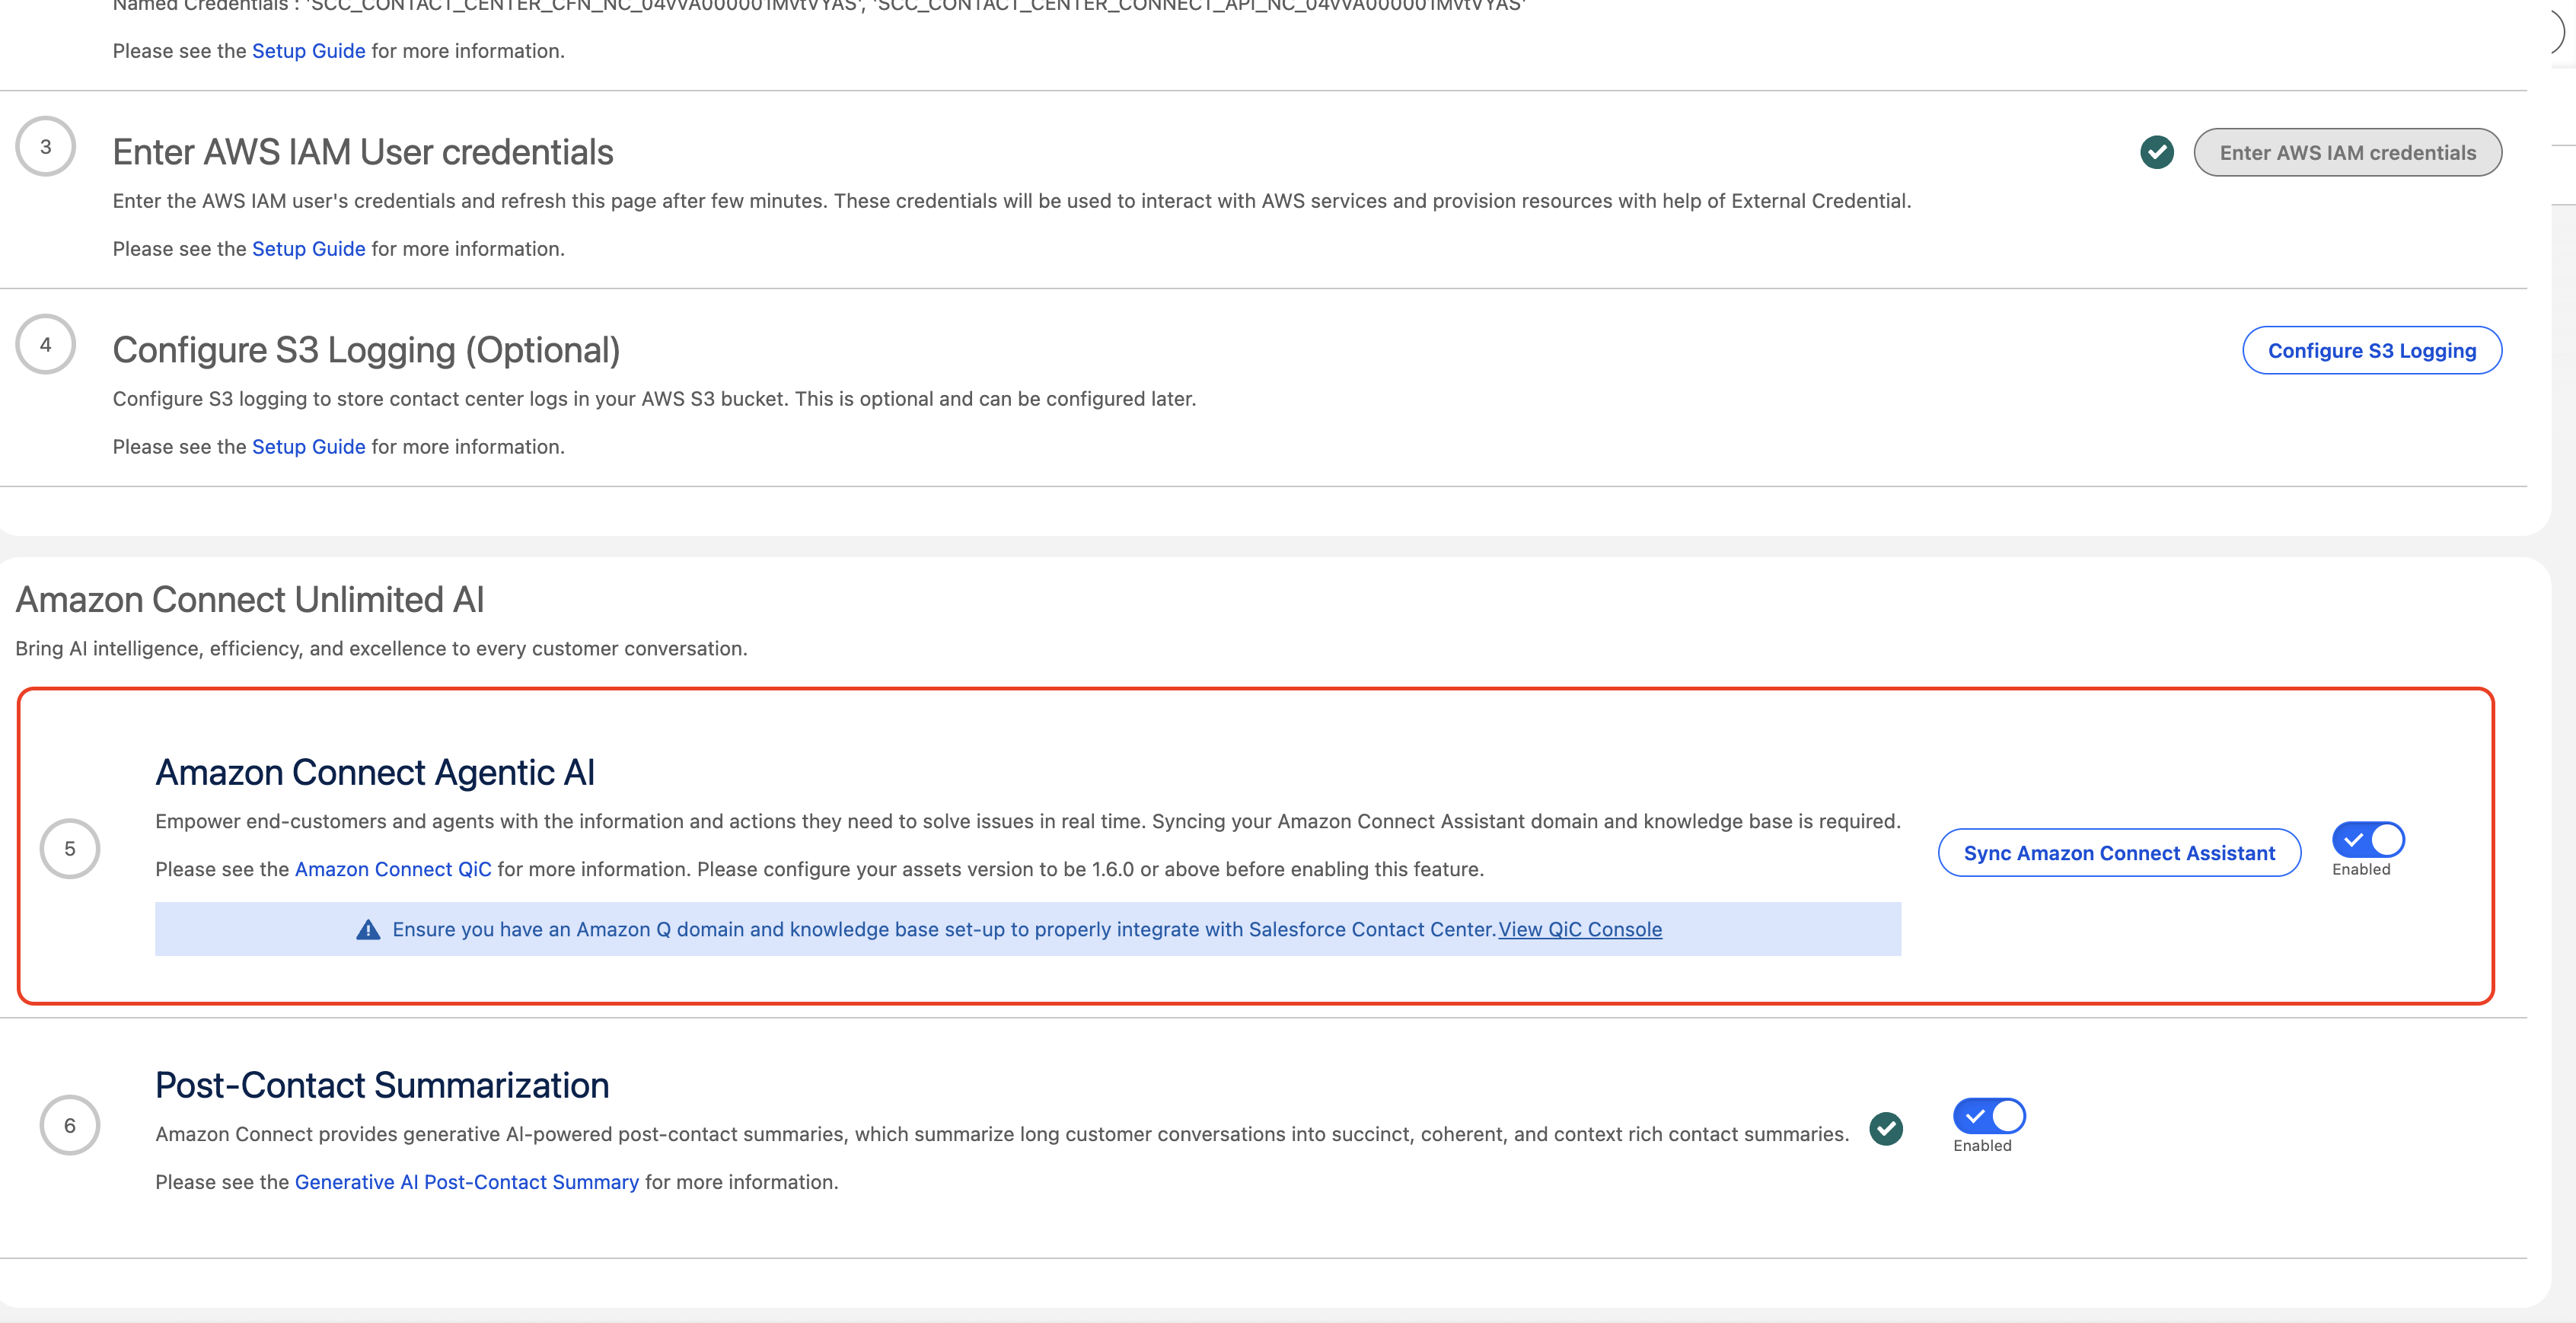
Scroll down and select the toggle to enable Amazon Connect Agentic AI.
-
Follow the prompts and notes provided in the step.
-
Before choosing the Sync Amazon Connect Assistant button, set up Amazon Connect Assistant in your instance. You can do this by manually going to your Connect instance AWS Console or by choosing the View QiC Console link in the step notes. This link takes you to your instance's AWS Amazon Connect Console Amazon Q page.
-
IMPORTANT: Make sure the IAM user you used when completing the Contact Center Setup has the following IAM permissions:
connect:UpdateContactFlowContent- Required to update contact flows during setupconnect:ListIntegrationAssociations- Required to validate Amazon Q Assistant and Knowledge Base integrations
If you have disabled your SCCAC-Setup-User created during the SCCAC Setup, create a new IAM user with these permissions:
{
  "Version": "2012-10-17",
  "Statement": [
    {
      "Sid": "AmazonQInConnectSetup",
      "Effect": "Allow",
      "Action": [
        "connect:UpdateContactFlowContent",
        "connect:ListIntegrationAssociations"
      ],
      "Resource": [
        "arn:aws:connect:*:<AWS_ACCOUNT_ID>:instance/*"
      ]
    }
  ]
} -
After you have completed the Amazon Q setup in your instance, go back to your Salesforce org's Contact Center Guided Setup. On the Amazon Connect Assistant step, choose Sync Amazon Connect Assistant, which triggers the creation of a SCC sample flow to use for QiC.
-
Note: If you have deleted your Agentic AI (Amazon Q) resource through qconnect CLI or API, make sure to also update the configuration in the Amazon Connect AWS console for your instance configuration.
- Log into your Amazon Connect instance.
- Choose Routing, choose Flows, and locate SCCAC - Sample Inbound Flow - QiC - ContactCenterId. Select the flow, choose Save dropdown, choose Save As, and enter a name for your SCCAC Sample Inbound Flow - QiC.
- Find the Set contact attributes block at the beginning that sets the
channelAddressIdentifierattribute. - Choose the block, and replace the value
CHANNEL_ADDRESS_IDENTIFIER_PLACEHOLDERwith the Channel Address Identifier listed in Salesforce for the messaging channel you'd like to use to handle contacts routed using this contact flow. - Choose Save on the bottom, and in the upper-right, choose Save and then Publish to make your changes live.
-
Go to your SCC Lightning App in Setup and App Manger, created from this step.
-
Go to Utility Items (Desktop Only) on App Settings. Choose Add Utility Item and add Amazon Connect Assistant under custom components.

- Check Start automatically.
- Enter your desired height and width (for example, Panel Width as 440 and Panel Height as 680) for the QiC utility item and choose Save.
-
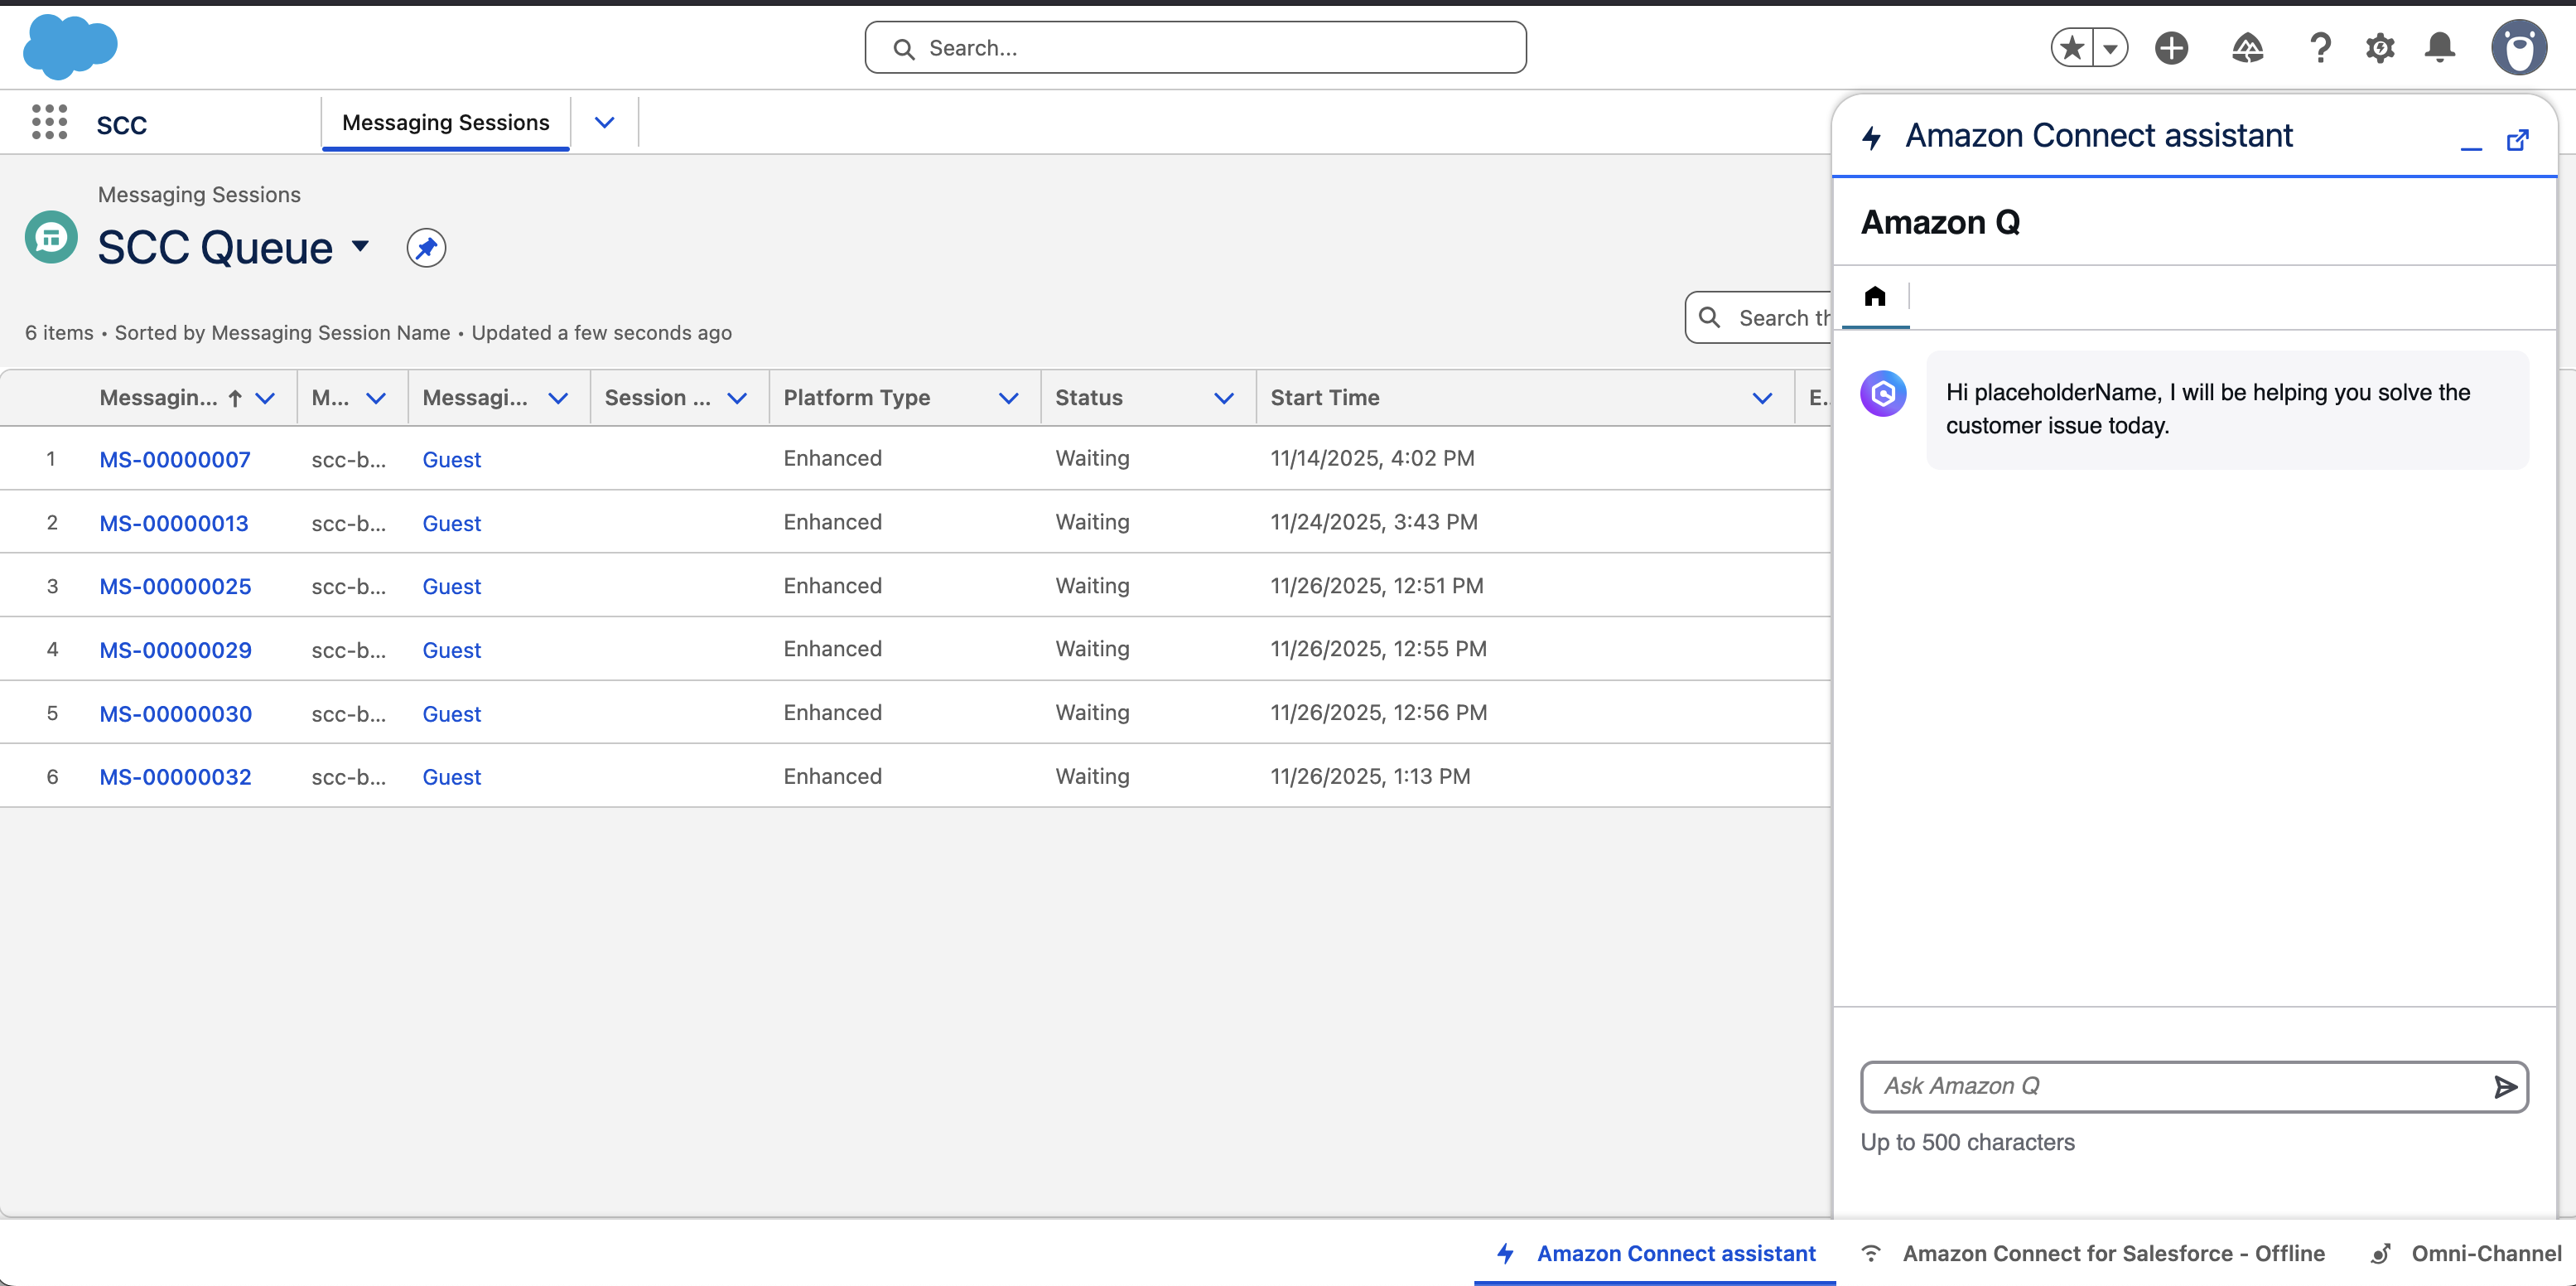
Go to the SCC Lightning App. You should be able to see the Connect Assistant in your utility items.
-
To enable the feature for other users, clone SCCAC Agentic AI Agent Placeholder permission set as SCCAC Agentic AI Agent under Setup and Permission Sets. Add users to the cloned permission set.
-
Enable the Agentic AI in Amazon Connect for the Security Profile of your users. For more information, see AWS Public Doc.
Salesforce as Data Source for Connect assistant
If you have configured your Amazon Q knowledge base/data integration with Salesforce (see Guide), follow the steps below.
-
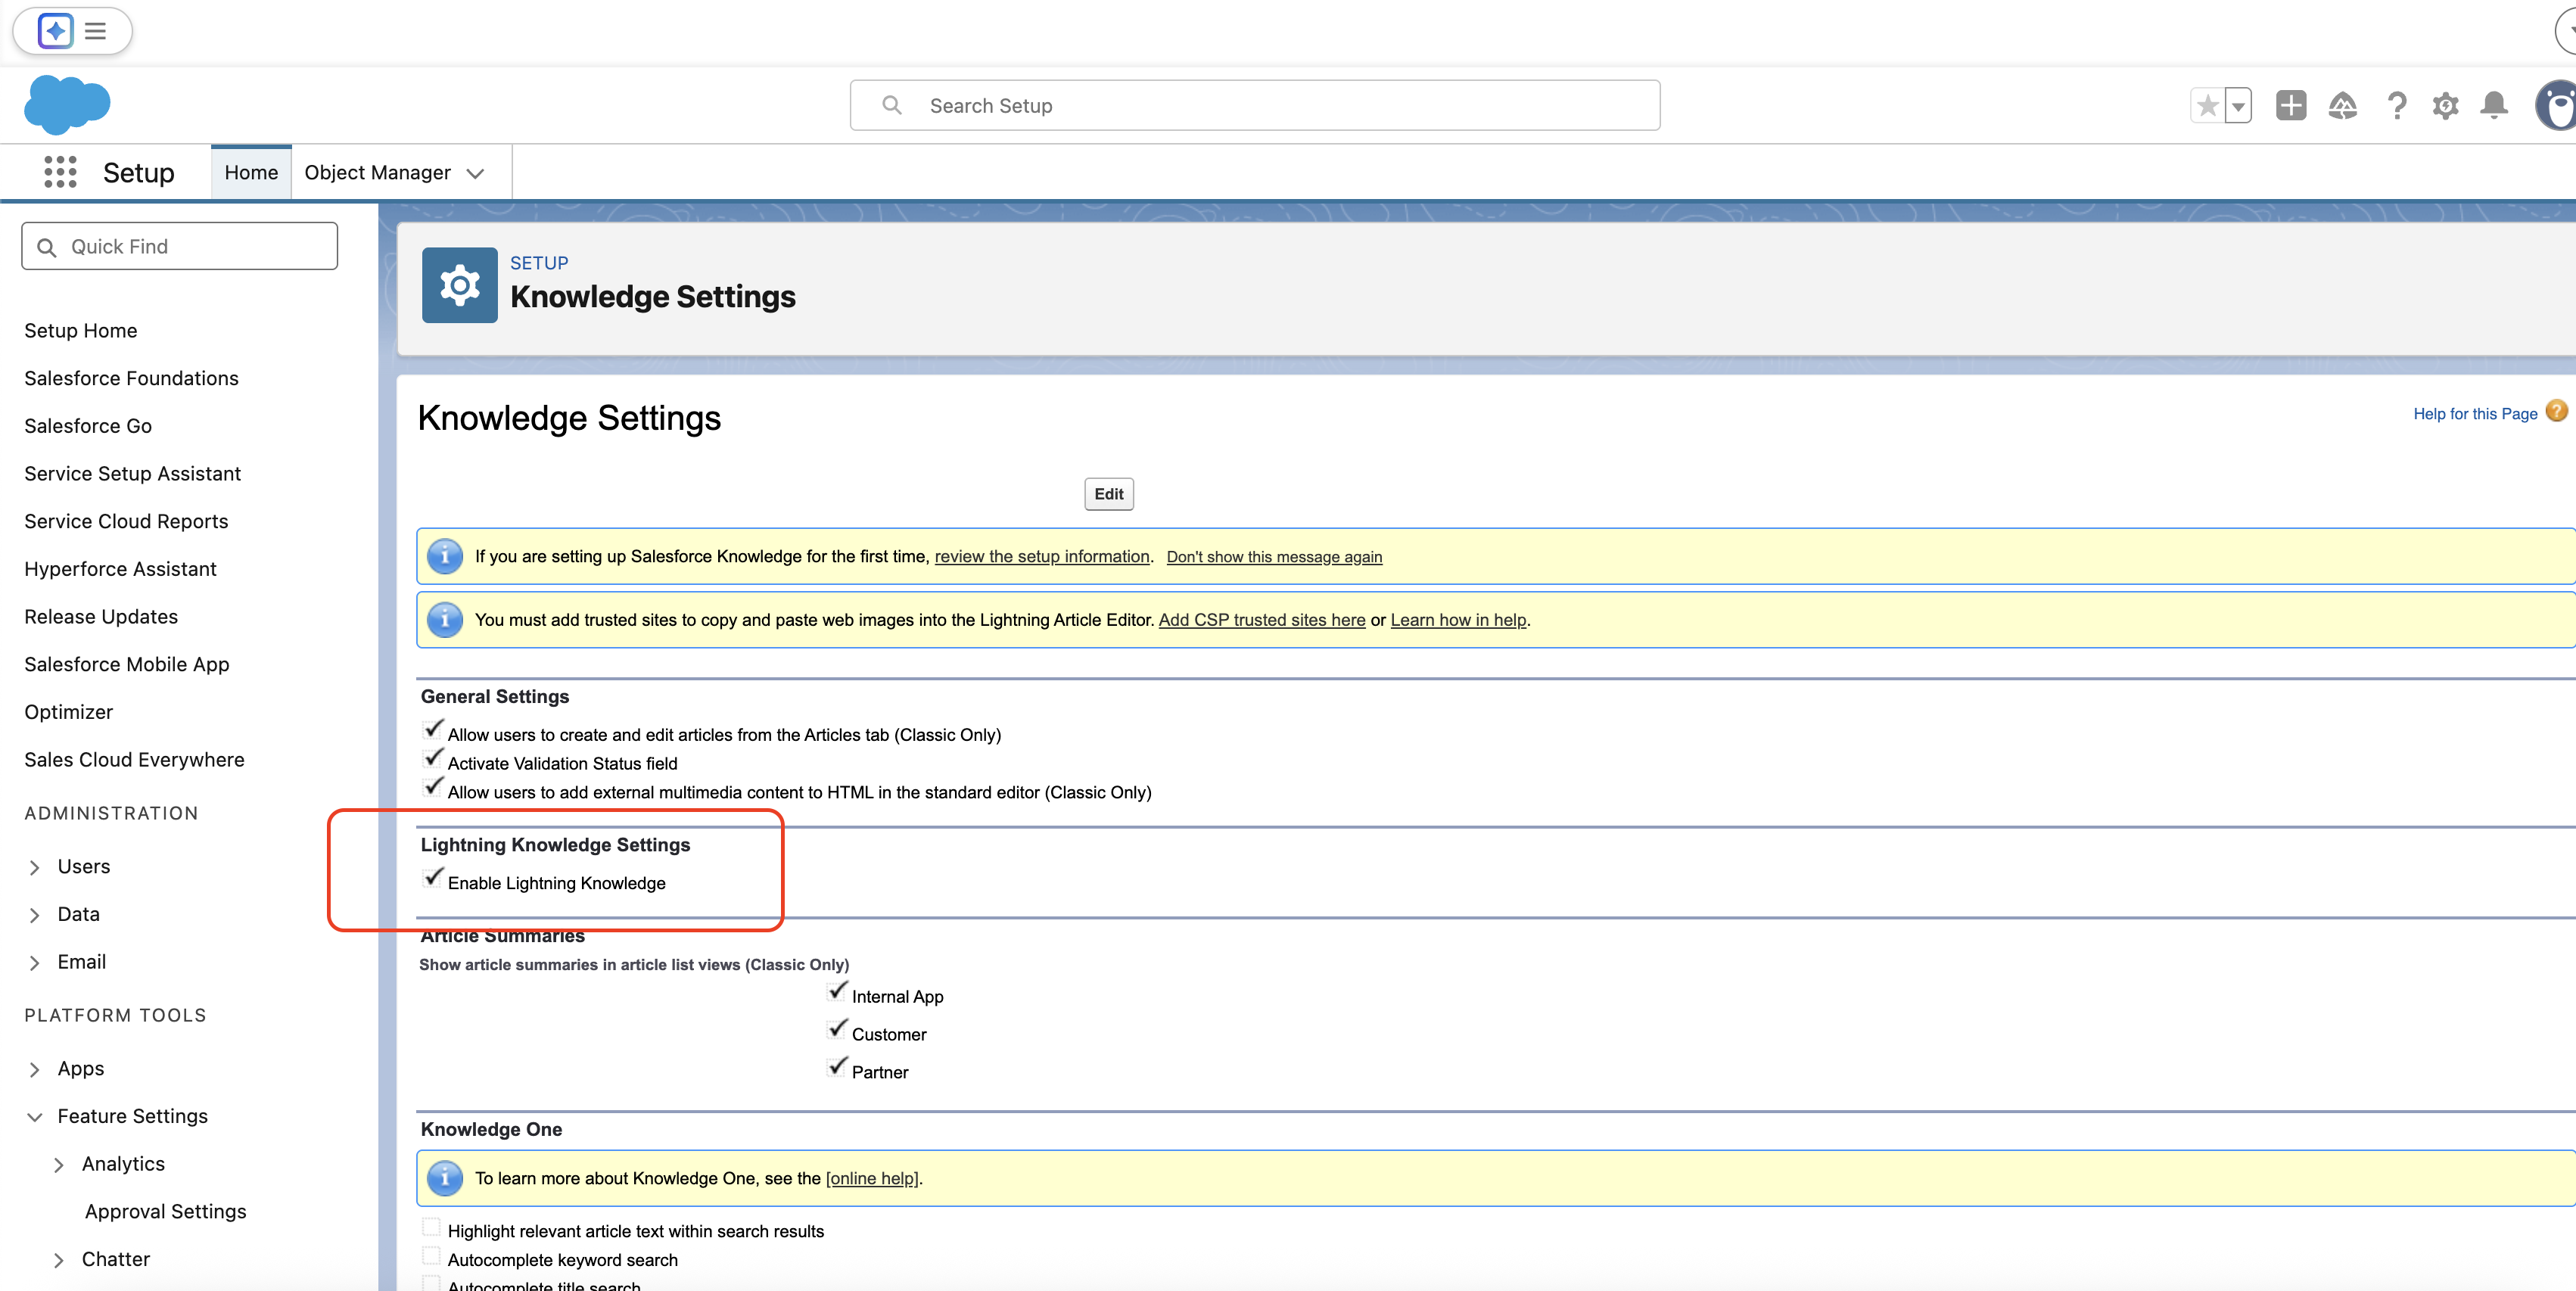
For Salesforce knowledge base data integrations, check Enable Lightning Knowledge in your Salesforce org's Setup under Knowledge Settings.
-
Select Setup and Permission Sets. Then select SCC Administrator permission set and Object Settings.
-
Select the Knowledge object with the Object API name as
awsac__Knowledge__kav. -
Add Modify All Records on Object Permissions and Edit Access on Field Permissions.
-
If you want agents to have access to the Knowledge articles, follow these steps:
- On your SCCAC Agentic AI Agent permission set, select Object Settings.
- Select the Knowledge object with the Object API name as
awsac__Knowledge__kav. - Add View All Records and View All Field in Object Permissions.
- Add Read Access to fields on Field Permissions.
Disable Amazon Connect assistant utility item auto-popup
As default behavior, the Amazon Connect assistant utility item is set to pop-up automatically when the agent switches between message session tabs and when a new recommendation or intent is received during an active chat, so agents will not miss any new incoming recommendations. This provides the optimal use of the assistant feature. If you want to opt-out to this default behavior, follow these steps:
- Choose Setup, Custom Code, and Custom Metadata Types.
- Locate the metadata type SCCAC Feature and choose Manage Records under the Action column.
- Find the record QInConnect_Contact_CenterID and choose Edit in the Action column.
- In the Configuration text field, configure the following settings:
- To disable auto-expansion on record switch, locate the key
utilityBarAutoExpandOnRecordSwitch, and change its value fromtruetofalse. - To disable auto-expansion on recommendation, locate the key
utilityBarAutoExpandOnRecommendation, and change its value fromtruetofalse.
- To disable auto-expansion on record switch, locate the key
- Choose Save to apply your changes.
Test your Agentic AI Implementation
Before testing, make sure you have completed the steps on Agentic AI (Amazon Connect Assistant) Setup and have completed the SCCAC contact center setup.
Start a test chat and use Amazon Connect Agentic AI
- With Omni-Channel opened with an Active status for the agent under test, open a new incognito browser window (or use a different browser) and log into your AWS account.
- Log into your Amazon Connect instance with administrator privileges.
- Choose Test chat on the home page of the Amazon Connect instance (or visit the /test-chat path).
- Choose the test settings button at the top of the page, and ensure the SCCAC - Sample Inbound Flow - QiC - ContactCenterId is selected as the contact flow. ChooseApply.
- (Optional) To test with a custom clientId value, you can pass it in the Contact Attributes field as a JSON object (i.e.
{"clientId": "testId"}). - If everything is configured correctly, a new chat session begins when you choose Apply, and your Salesforce agent should see an incoming chat in Omni-Channel.
- Accept the incoming chat contact and open the Amazon Connect assistant utility item on the bottom.
- Test chat conversation with context that has information available on your configured knowledge base (For example, on your knowledge base you have information about how to set up XYZ bike. You can have your end-user chat ask a question: "Can you give me information on how to set up XYZ bike?").
- On the agent's conversation on Salesforce, with the Amazon Connect assistant utility item open, it should provide a real-time recommendation based on the end-user ask.
Start a test voice and use Amazon Connect Agentic AI
- With Omni-Channel opened with an Active status for the agent under test, open a new incognito browser window (or use a different browser) and log into your AWS account.
- Log into your Amazon Connect instance with administrator privileges.
- Go to your SCV inbound contact flow and make sure you have the Agentic AI block (formerly known as Amazon Q) added with your assistant ARN in your flow path.
- Go to Channels > Phone Numbers in the Connect left hand side navigation bar.
- Claim a phone number and assign your SCV Inbound flow that includes the Agentic AI block.
- Add this phone number in your SCV Partner Contact Center channels. See Salesforce Documentation.
- With SCV configured correctly, a new voice call should reach your Salesforce agent in Omni-Channel.
- Accept the incoming voice contact and open the Amazon Connect assistant utility item on the bottom if it is not open already.
- Test voice conversation with context that has information available on your configured knowledge base (For example, on your knowledge base you have information about how to set up XYZ bike. You can have your end-user chat ask a question: “Can you give me information on how to set up XYZ bike?”).
- On the agent’s conversation on Salesforce, with the Amazon Connect assistant utility item open, it should provide a real-time recommendation based on the end-user ask.