CTI Adapter Configuration
The CTI Adapter installed by the managed package provides a number of features that change or enhance the functionality of the integration. By default, many of these features have been configured during install with a default setting. This section will detail the options available.

CTI Adapter Details
CTI Adapter Name: provide a unique name for this CTI adapter definition
Amazon Connect Instance: This was configured in a previous section. This is the instance url for your Amazon Connect instance.
Amazon Connect Instance Region: This is the code for the region that you have deployed your Amazon Connect instance to. This is required for the Amazon Connect chat APIs to work correctly. If you do not use the chat feature of Amazon Connect, this field is not necessary
Custom Ringtone: This allows for overriding the built-in ringtone with any browser-supported audio file accessible by the user.
Call Center Definition Name: This was configured in a previous section. This is the internal name of the Call Center configured in Salesforce setup. This value links the CTI Adapter to the Call Center, and ultimately to the agents.
Softphone Popout Enabled: Salesforce supports softphone pop out in Console and Lightning Experience modes. When the softphone is popped out, it opens in a new browser window external to the Salesforce UI. This is helpful in use cases where the call controls are regularly needed but the agent also needs full access to the entire console.
Debug Level: For future use
Medialess: Amazon Connect supports running in VDI environments, however best practice is to send the actual audio stream via a separate CCP. Selecting the medialess option will configure the Salesforce CCP to run in medialess mode, which provides the data that Salesforce needs for screenpop while the audio is streamed to a local CCP. See more information here
Presence Sync Enabled: This setting allows the adapter to use the presence rules to sync state from Amazon Connect to Salesforce Omni-Channel.
Early Get User Media (GUM): When enabled, the CCP will capture the agent's browser microphone media stream before the contact arrives to reduce the call setup latency. If disabled, CCP will only capture agent media stream after the contact arrives.
Note: Enabling this feature may lead to draining in wireless headset batteries and/or impacted music/video audio quality when the agent is not on the call. Link to streams documentation
Audio Device Settings Turning this setting on allows the Agent to setup a custom audio device for their speaker, microphone and ringer in the adapter (Speaker and Ringer settings not available on Firefox). You may have to add this field to the layout manually. See troubleshooting.
Phone Type Settings Turning this setting on allows the Agent to change their Phone Type in the CCP. You may have to add this field to the layout manually. See troubleshooting
Single Sign On Settings
The Amazon Connect CTI Adapter supports single sign on(SSO) via SAML integration. This allows customers that use a SAML provider for authentication into Amazon Connect. You will need the SSO URL for your provider and the Relay State settings for your Amazon Connect instance.
For general information on configuring SAML for Amazon Connect, please refer to: Amazon Connect Administrator Guide: Configure SAML for Identity Management in Amazon Connect.
If you wish to use Salesforce as your identity provider for Single Sign On, please follow the setup instructions in Appendix B - Configuring Salesforce as Your Identity Provider.
For information about configuring specific SAML providers to work with Amazon Connect:
Once you have your SAML integration working with Amazon Connect, you will need to create the Amazon Connect Single Sign On URL and validate that it works correctly, then configure the Lightning CTI adapter and login the agent.
Note: With the new Amazon Connect instance urls (
*.my.connect.aws) you must put the full URL into theAmazon Connect Instancefield in the AC CTI Adapter record for SSO to work. Ex: usinghttps://myinstance.my.connect.awsinstead ofmy instance.
Identify the SSO URL components
In order to authenticate with Amazon Connect, you need your IdP login URL from your SAML provider and a relay state URL that will redirect the authenticated user to your Amazon Connect instance.
Your IdP Login URL will resemble the following (Salesforce is shown):
https://mXXXXXXrun-dev-ed.my.salesforce.com/idp/login?app=0sp0N000000Caid
The 'RelayState' will be in the following format (replace us-west-2 with the region you are using):
https://us-west-2.console.aws.amazon.com/connect/federate/InstanceId?destination=%2Fconnect%2FccpConfigure the CTI Lightning Adapter in Salesforce
Now we are ready to complete the last step in the configuration process: Adding the SSO settings to the Lightning Adapter. This will configure the adapter to authenticate via SSO and redirect to the Amazon Connect Contact Control Panel once authentication completes.
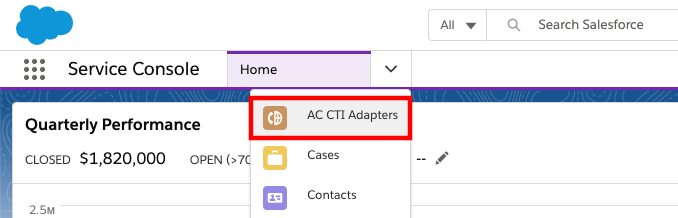
Log in into your Salesforce org and go to the Service Console
Expand the navigation menu by selecting the down arrow and choose AC CTI Adapters.
Select ACLightningAdapter
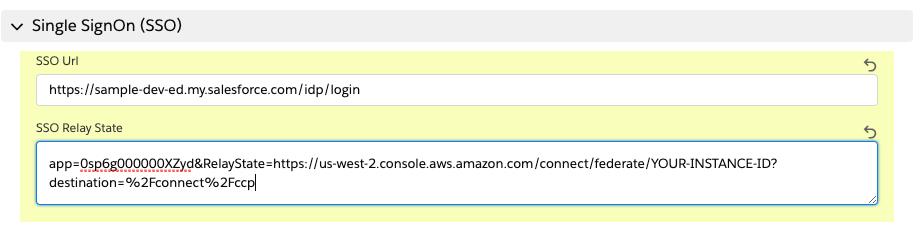
Scroll down to the Single SignOn (SSO) section and choose the pencil icon of either field to edit

For the SSO Url, paste your IdP login URL up to the first question mark (if one exists). A couple of examples are provided:
Salesforce:
https://mXXXXXXrun-dev-ed.my.salesforce.com/idp/login?app=0sp0N000000CaidMicrosoft ADFS:
https://sts.yourcorp.com/adfs/ls/idpinitiatedsignon.aspxPaste this portion of the URL into the SSO Url field

For the SSO Relay State:
IF you had a question mark in your login URL, paste everything AFTER the question mar into the SSO Relay state field, then add &RelayState= to the end, and append your relay state URL. For example:
app=0sp0N000000Caid&RelayState=https://us-west-2.console.aws.amazon.com/connect/federate/InstanceId?destination=%2Fconnect%2FccpIF you did not have a Question Mark, then enter &RelayState= into the SSO Relay State field and append your relay statue URL to it. For example:
&RelayState=https://us-west-2.console.aws.amazon.com/connect/federate/instanceId?destination=%2Fconnect%2FccpExample of a completed SSO section (Salesforce is shown)
Choose Save
Refresh your browser to make the changes take effect
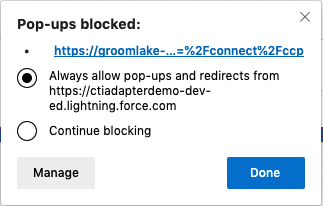
a. NOTE: If you receive a blocked popup warning, select the warning and change the setting to always allow popups from your Salesforce org, then refresh the browser again
Select the phone icon in the console toolbar to open the CCP Note: You may also receive popups to allow notifications and microphone access. Please accept both.
Click the Sign into CCP button
You should now see the authenticated and logged in CCP
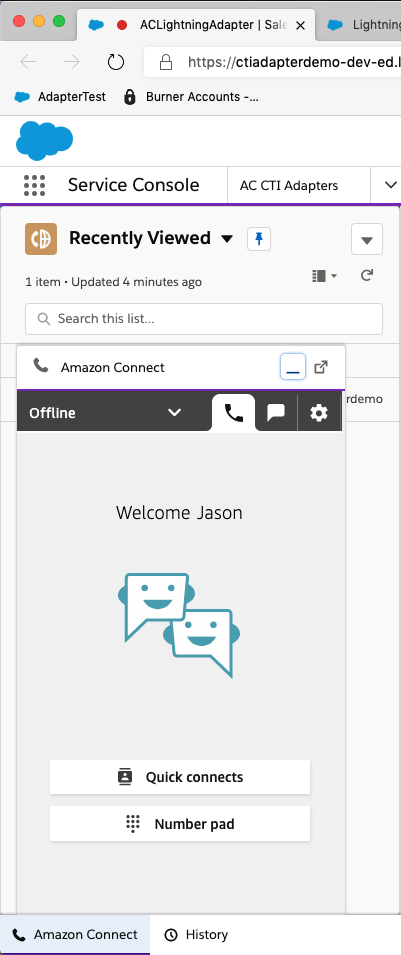
SSO Configuration is complete