Outbound Campaign Calls
The package allows for running Outbound Call Campaigns using Salesforce Omni Channel routing and Amazon Connect. To enable outbound campaigns, the Custom Object called Amazon Connect Call Campaign, which comes bundled with the Adapter, must be configured to be routed by Salesforce Omni.
Outbound call campaigns are a feature of the package that utilizes Omni-Channel routing and Amazon Connect. To use the Call Campaigns, we must first configure the following items:
Create a Queue for users to manage a workload and configure it for the custom object.
Create a Service Channel and configure it for the custom object.
Create a Routing Configuration.
Associate the Routing Configuration with the Agents and the Queue.
Create a Presence Status and Configuration and assign it to the Users.
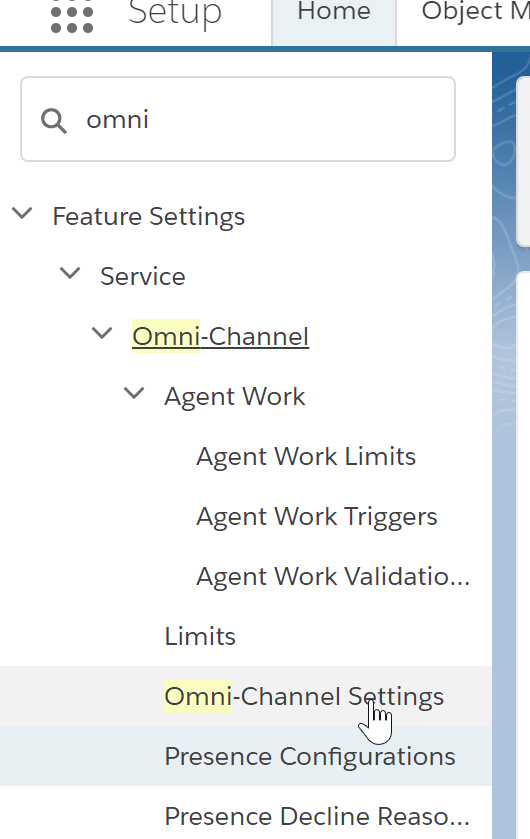
First, we must enable omni-channel. To do this, navigate to "Setup" and type "omni" into the Quick Find box, then select "Omni-Channel Settings" from the menu.
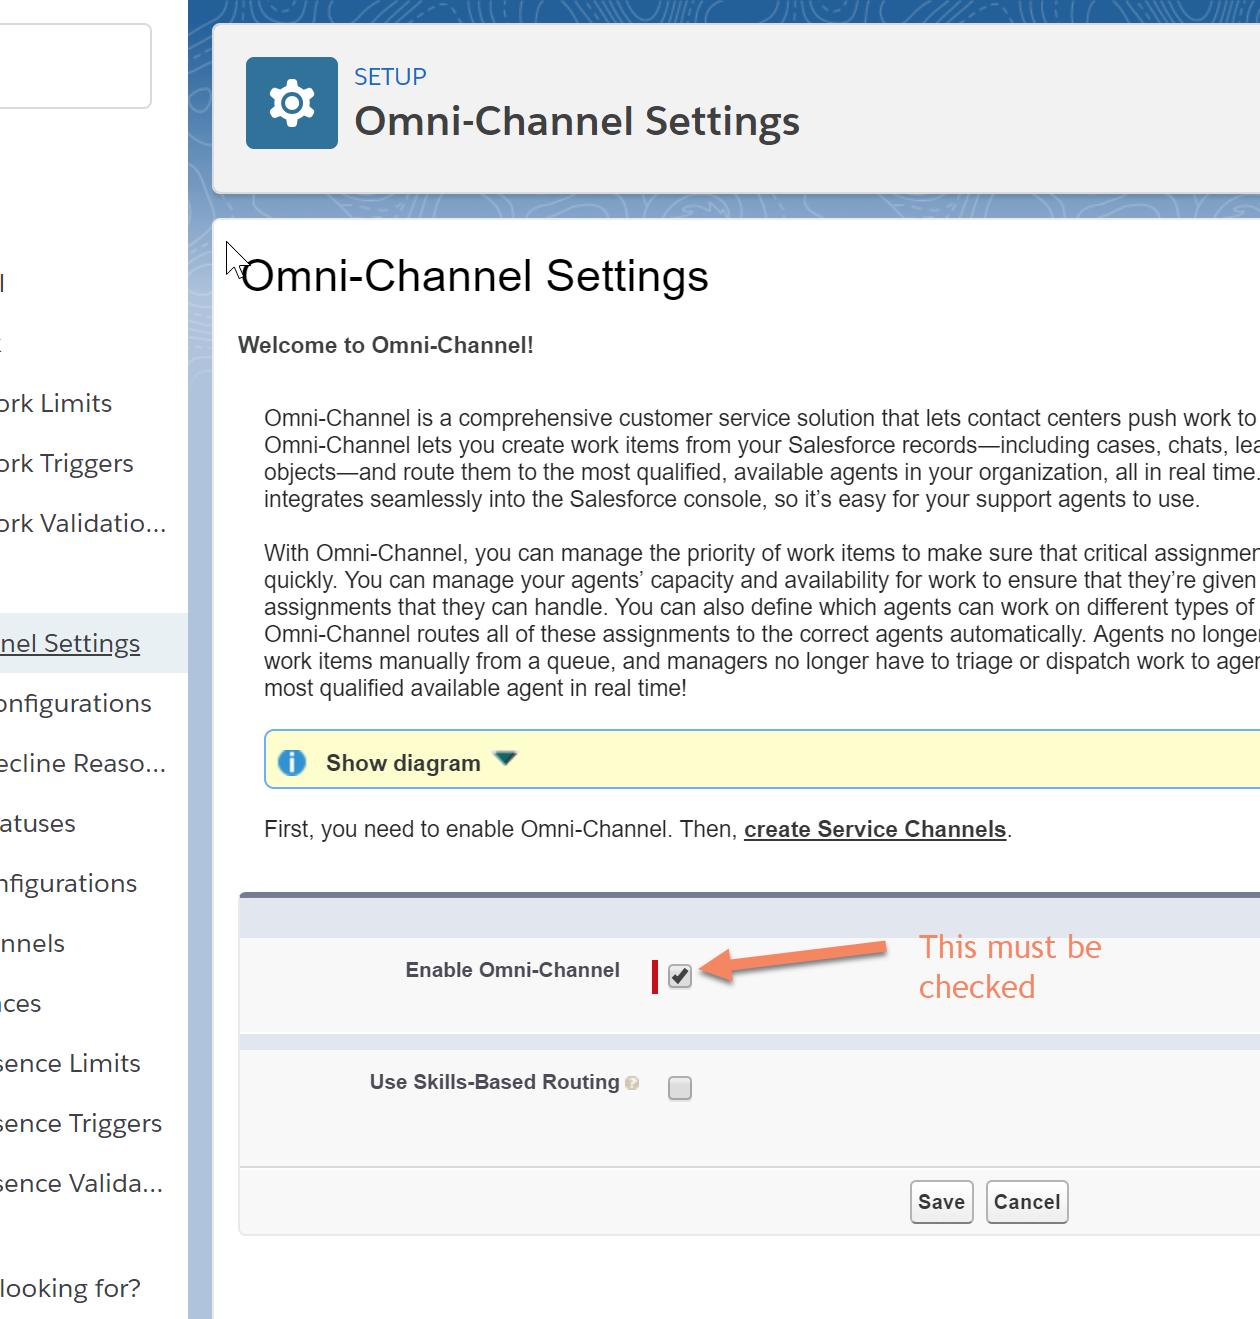
Place a check in the checkbox for "Enable Omni-Channel".
Create a Queue
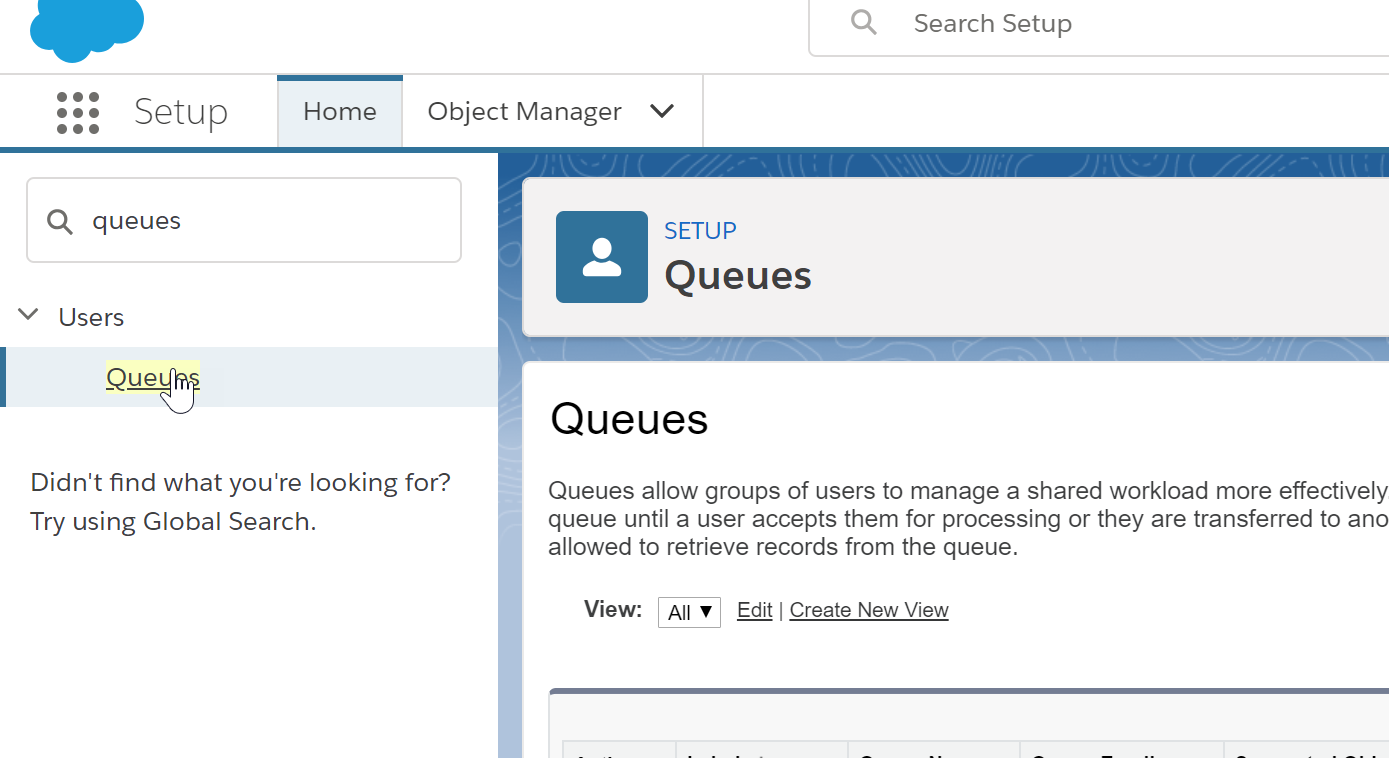
Navigate to "Setup" and type "queue" into the Quick Find box, then select "Queues" from the menu.
You may see some entries if you are already using Omni-Channel for other things in your instance. We want to create a new queue for the purpose of handling these outbound call campaigns.
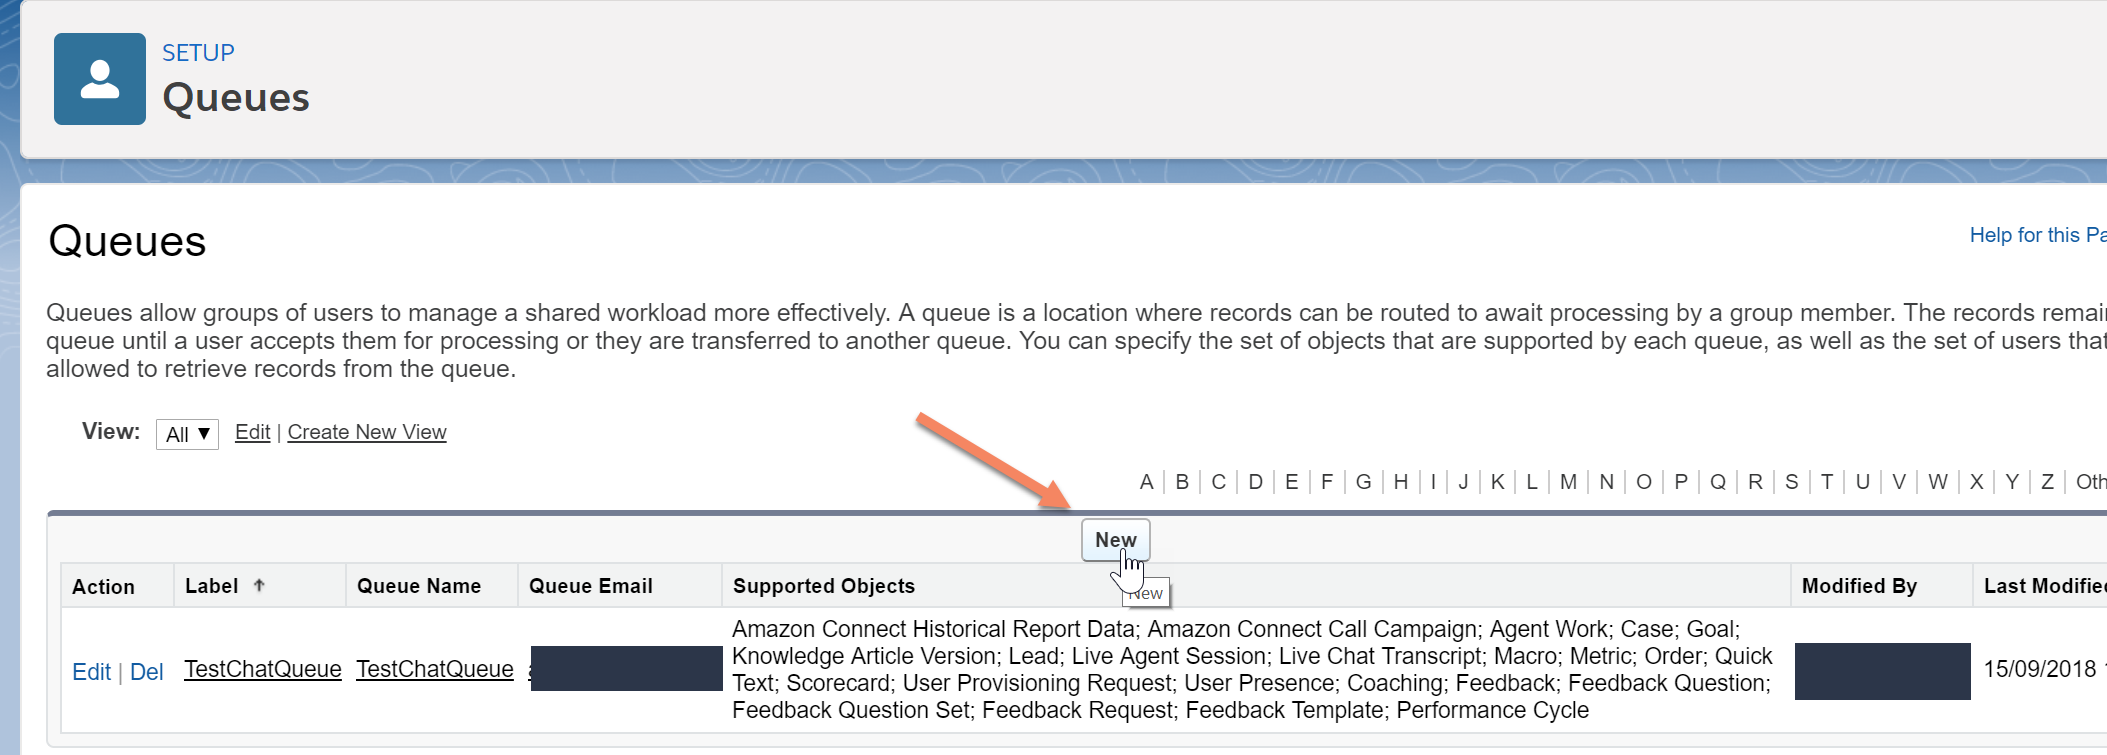
On the Queues screen, click the "New" button. Fill-in the required fields and then scroll down the screen until you see "Supported Objects". Select the Amazon Connect Call Campaign object and click the "Add" button.
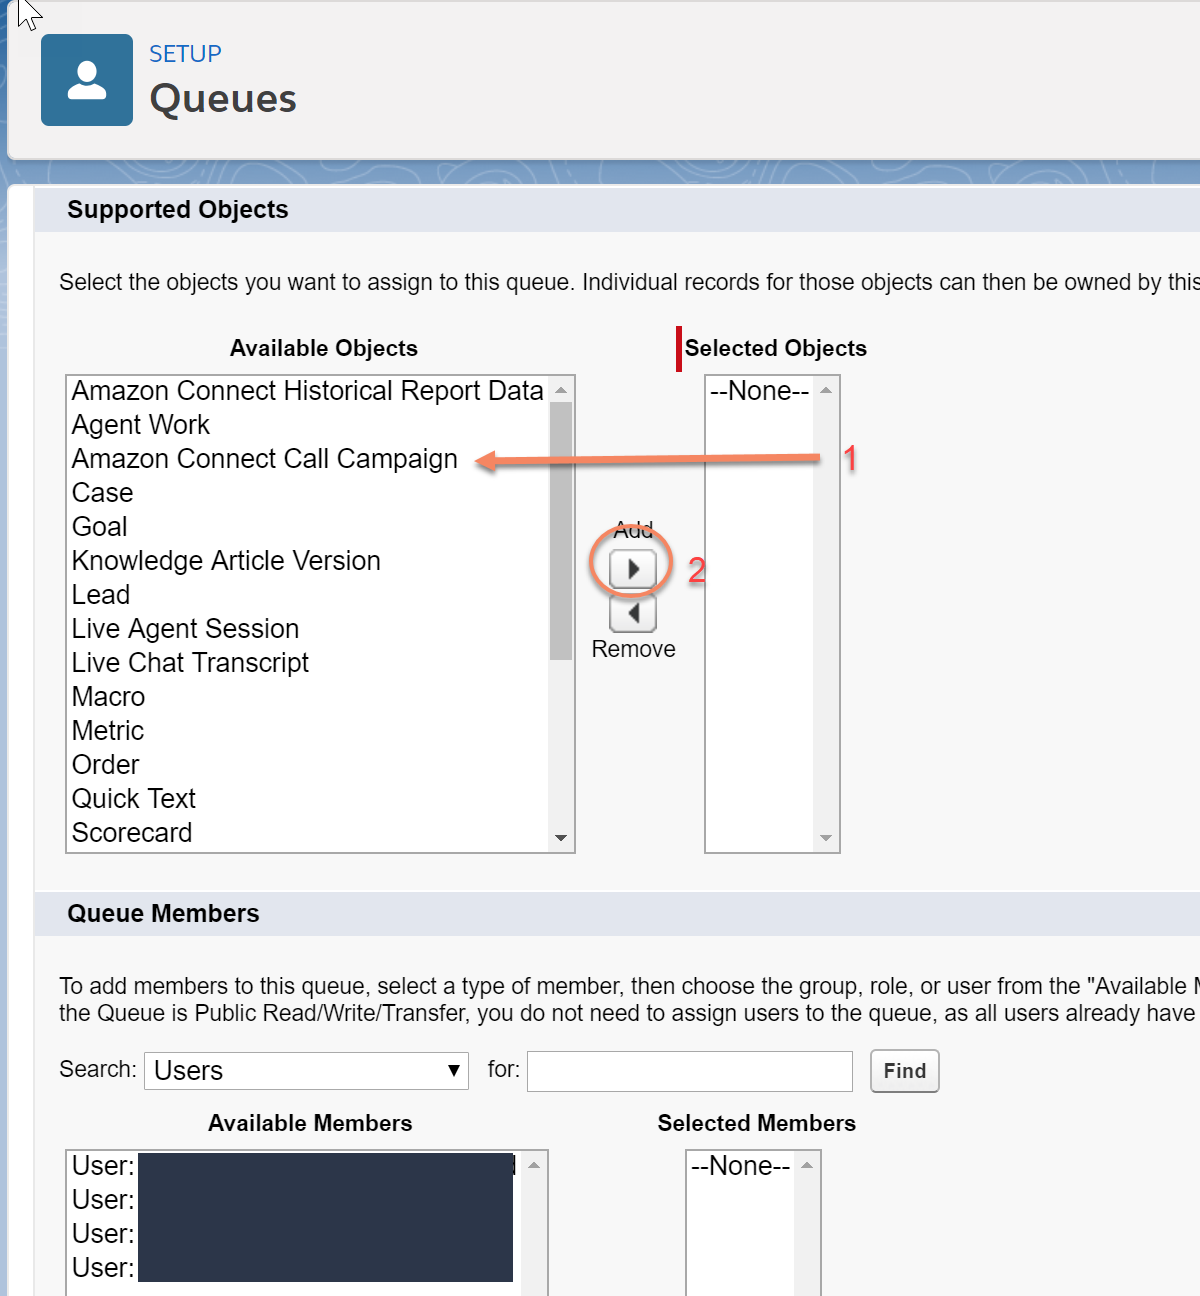
Scroll down to the Queue members to select the members of the queue. You can assign the queue by Public Groups, Roles, Roles and Subordinates, or Users. If you need to wade through many users, groups, or roles, feel free to use the "Find" feature.
Once you have found the entity you'd like to add, select it and click Add, just like we did with the object in the previous step.
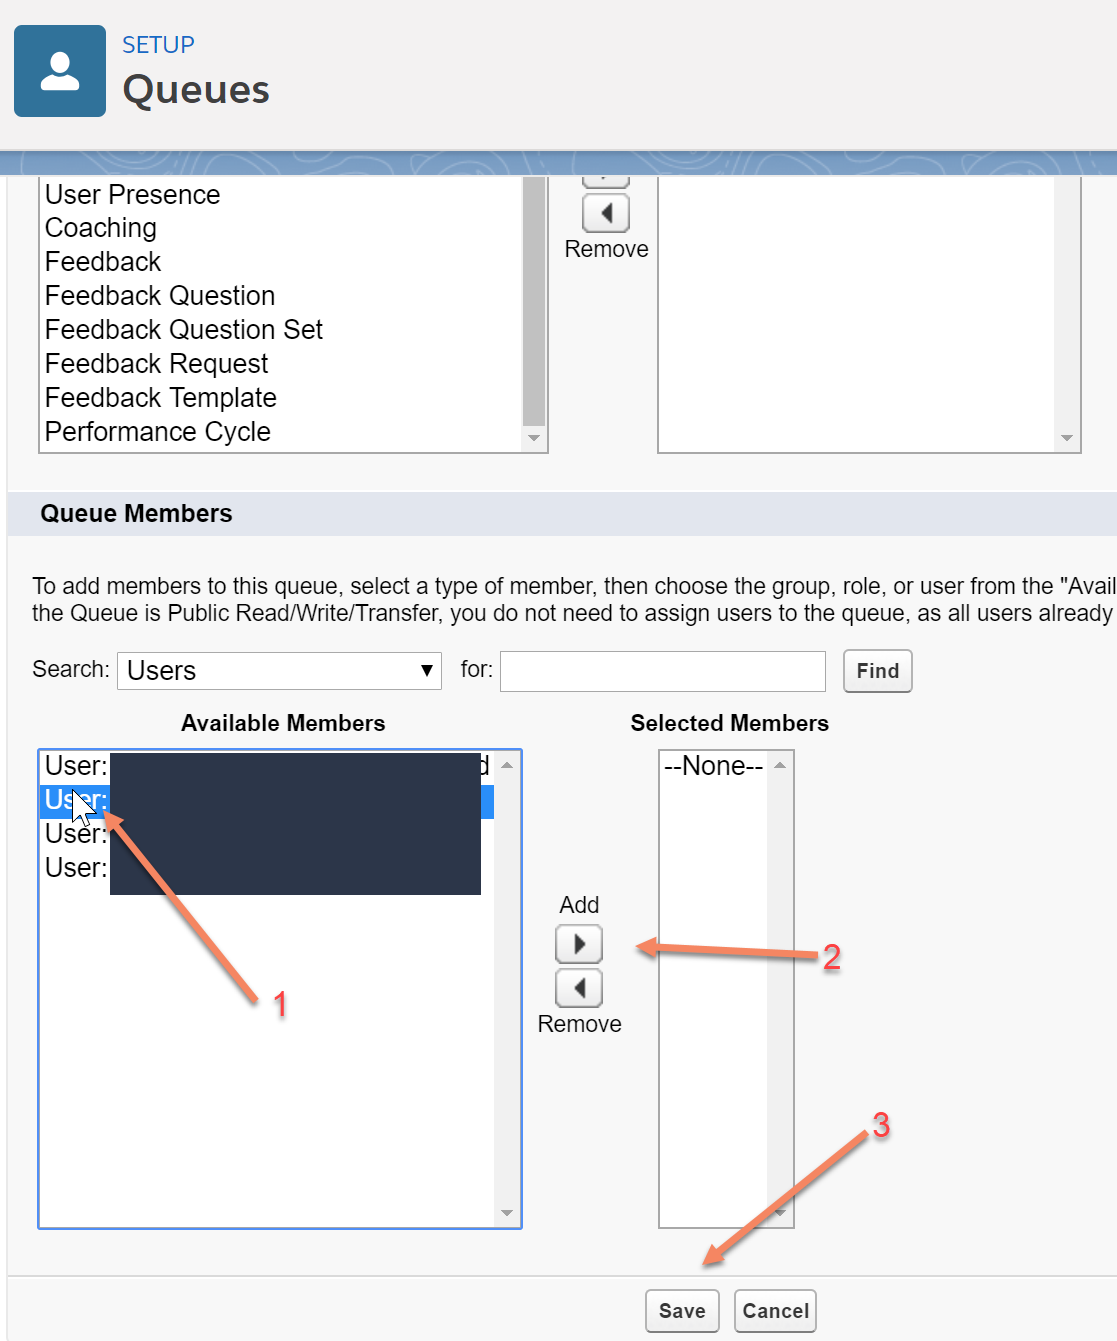
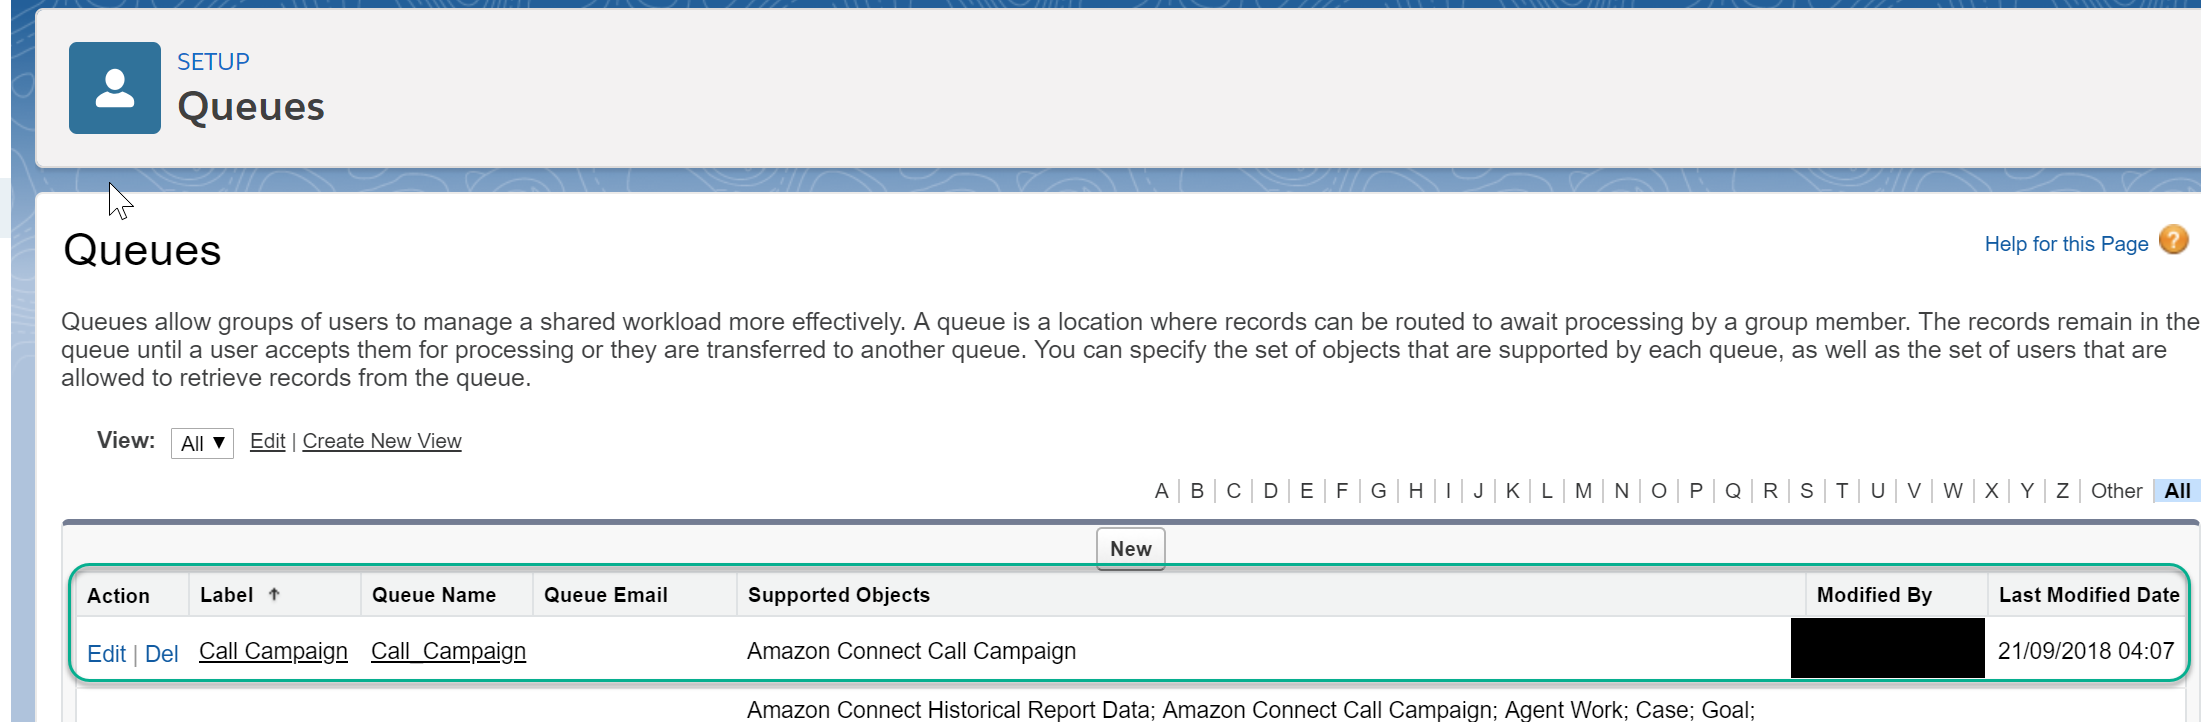
Now, our queue has been created and assigned to users.
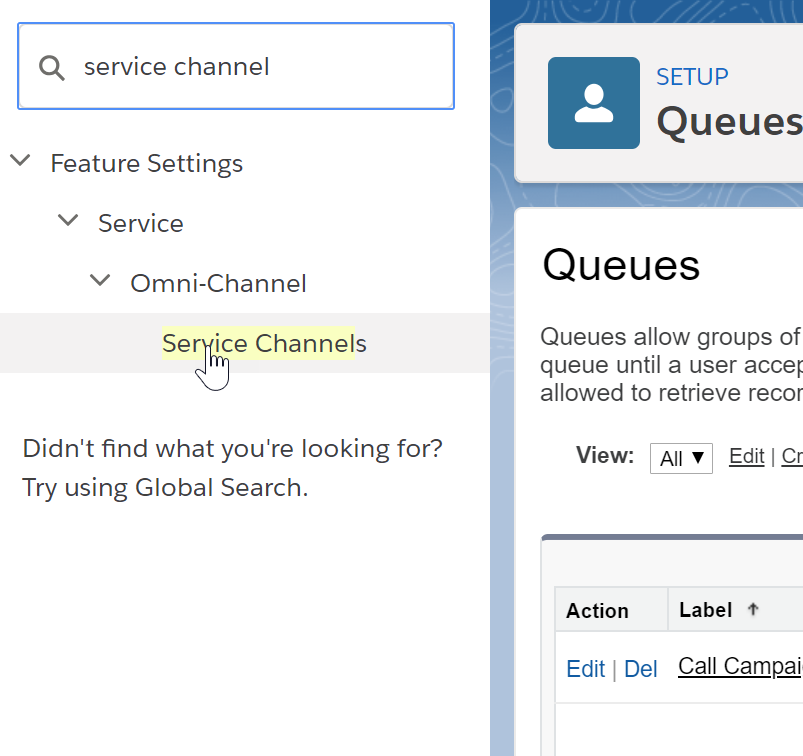
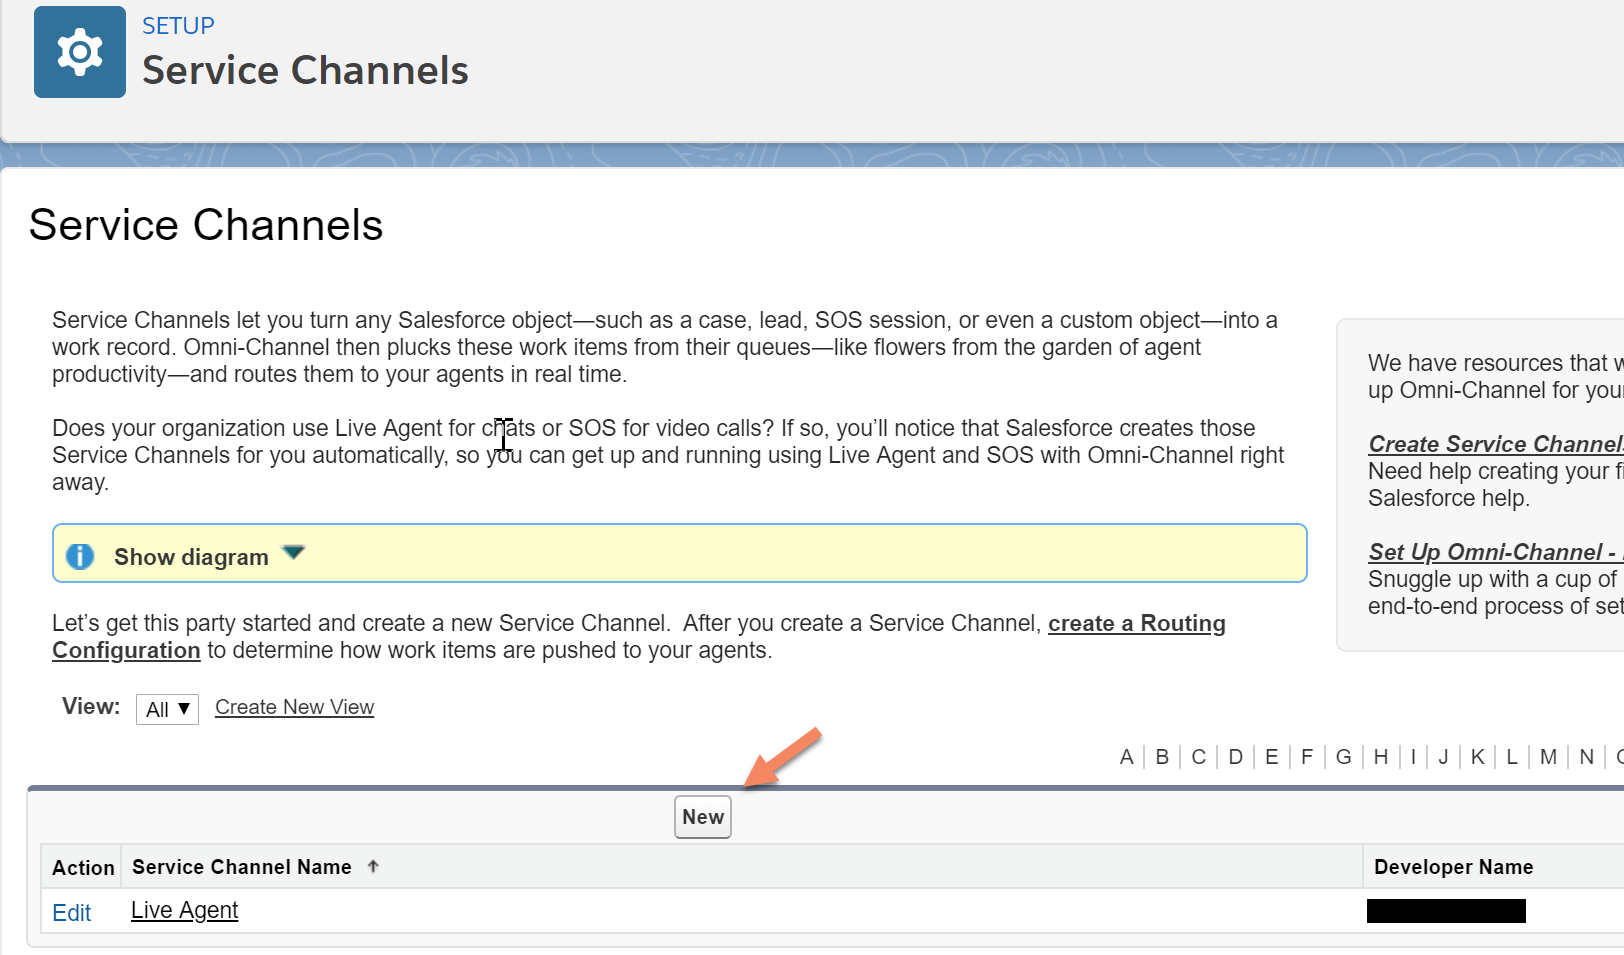
Create a Service Channel
Click into the Setup search box in the left navigation panel and type "Service Channel". Then click "Service Channels".
Click "New" to create our new Service Channel.
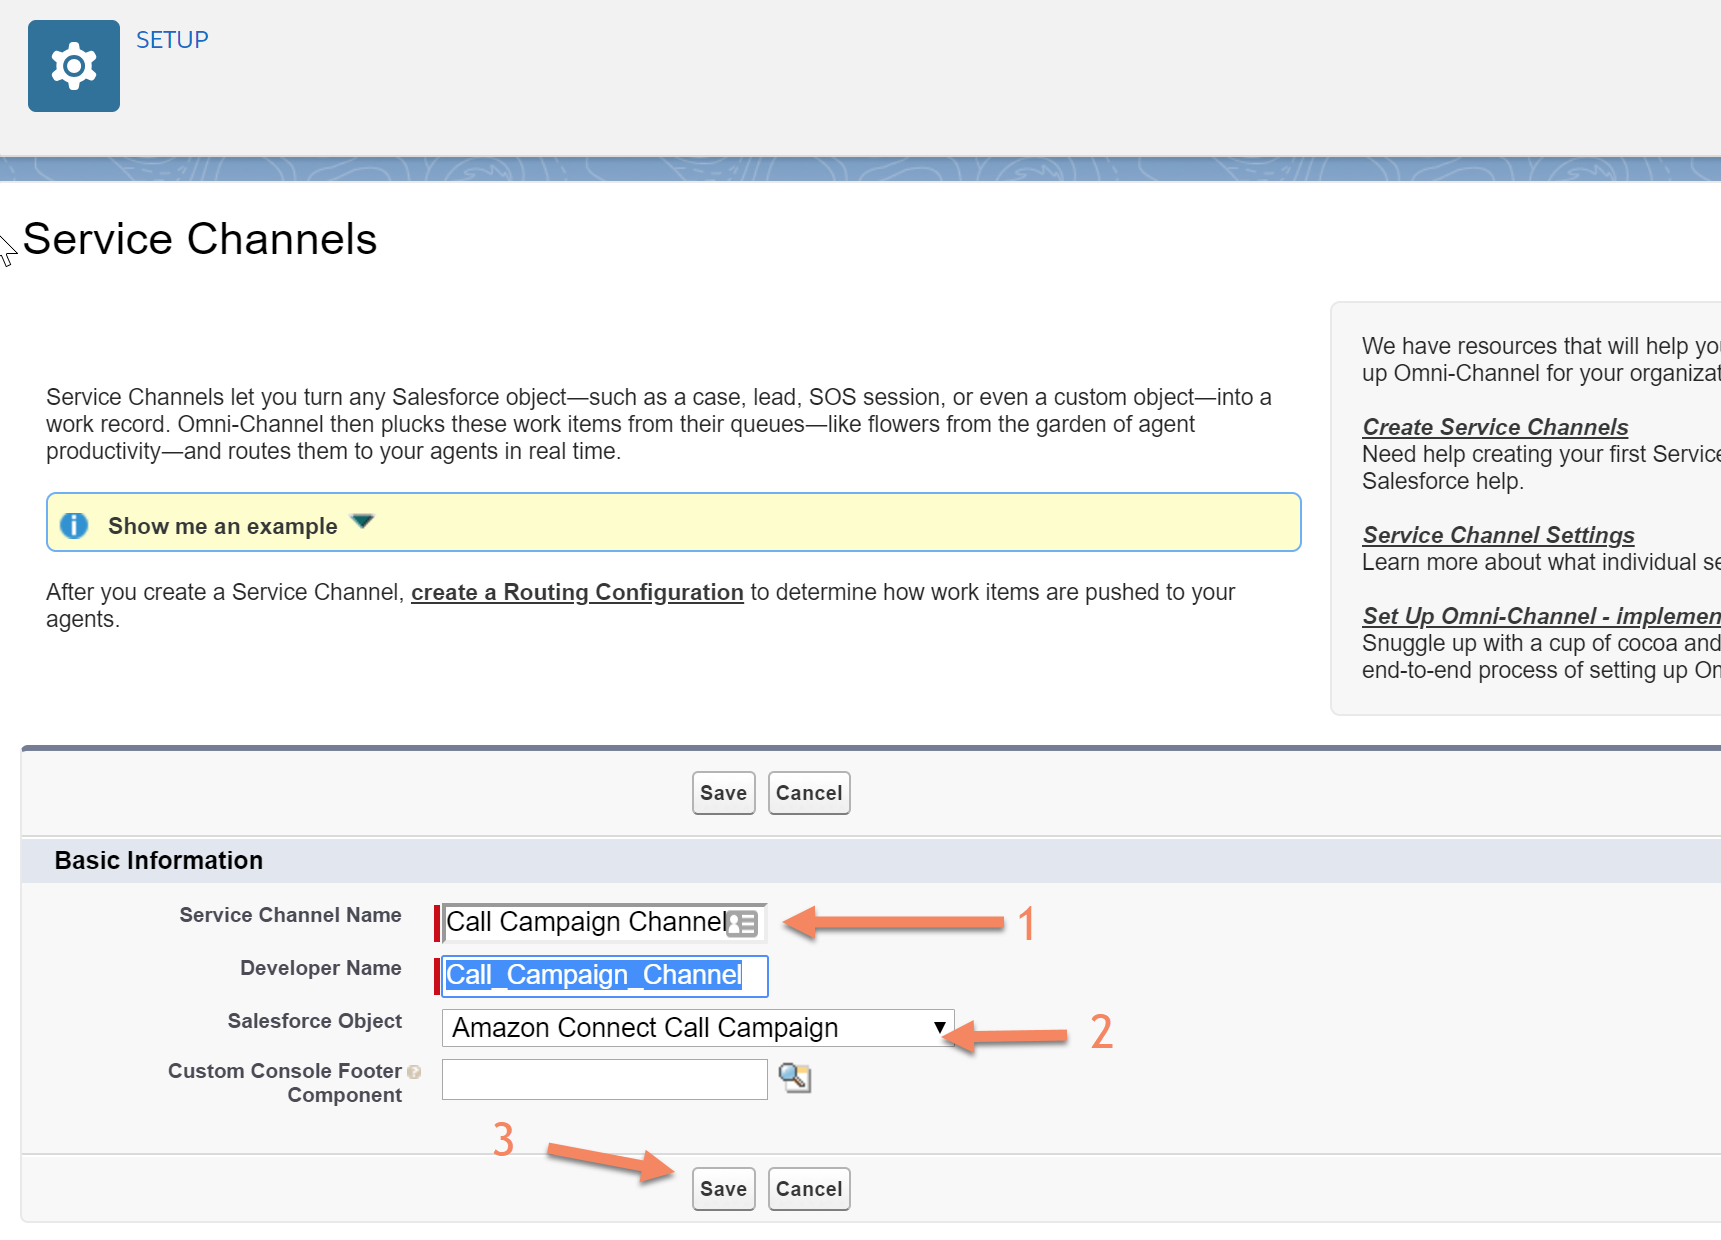
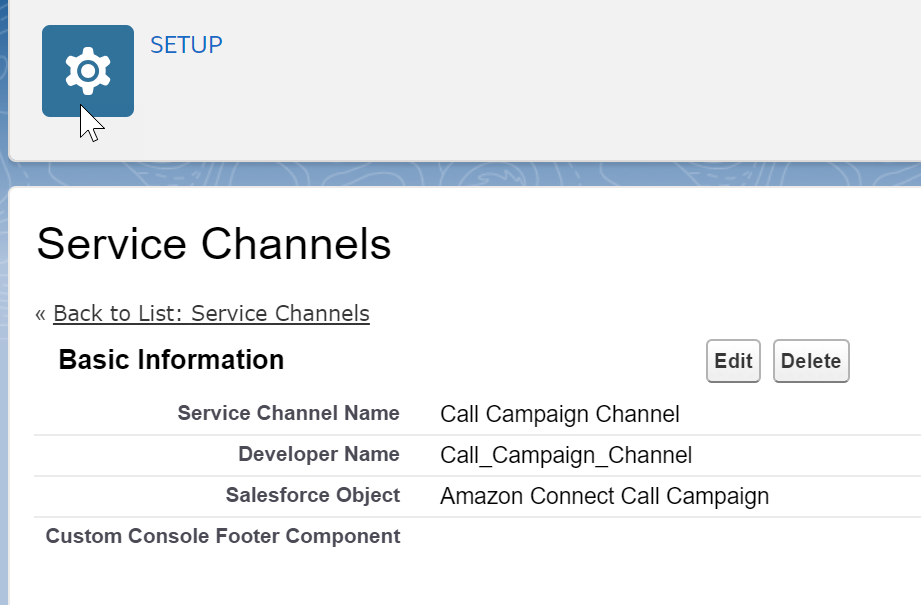
In the new Service Channel form, enter your desired Service Channel Name (step 1). The Developer Name field will auto-populate based on the Service Channel Name content. Then, select the [Amazon Connect Call Campaign]{.ul} object (step 2). Finally, save the new Service Channel (step 3).
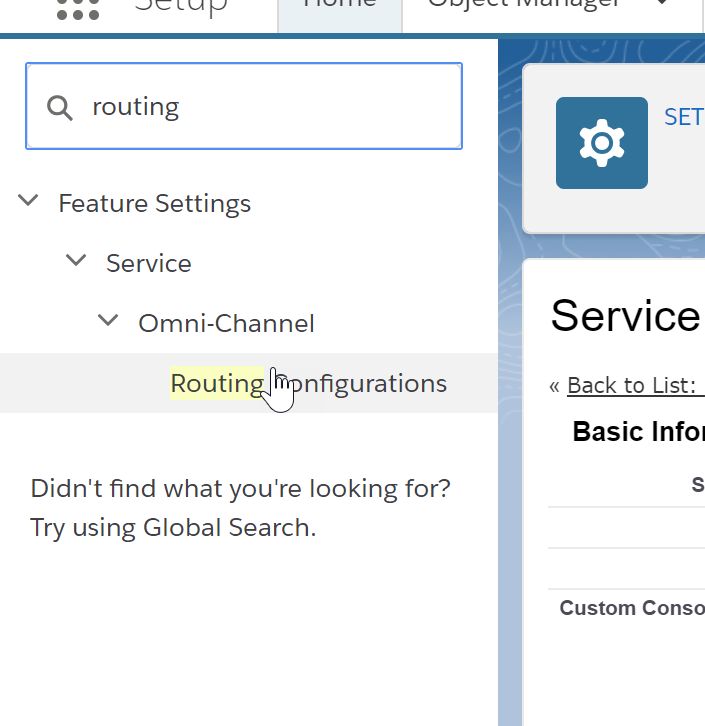
Create a Routing Configuration
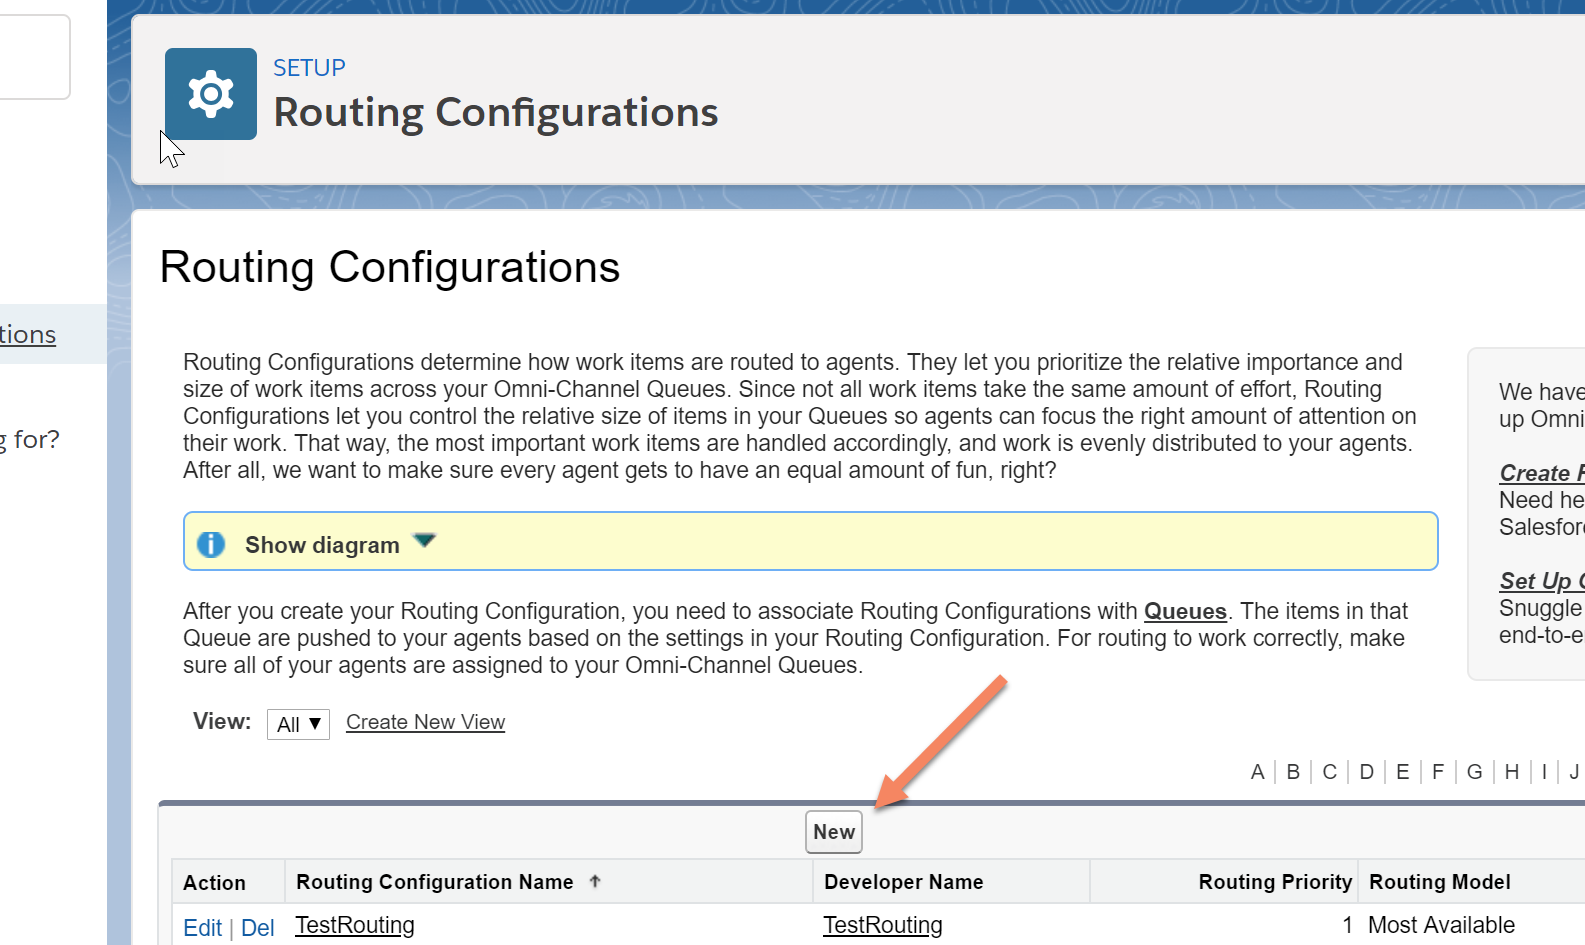
Now, we need to create a routing configuration. Enter "routing" into the search box in the left navigation and click "Routing Configurations".
- On the Routing Configurations landing page, click "New".
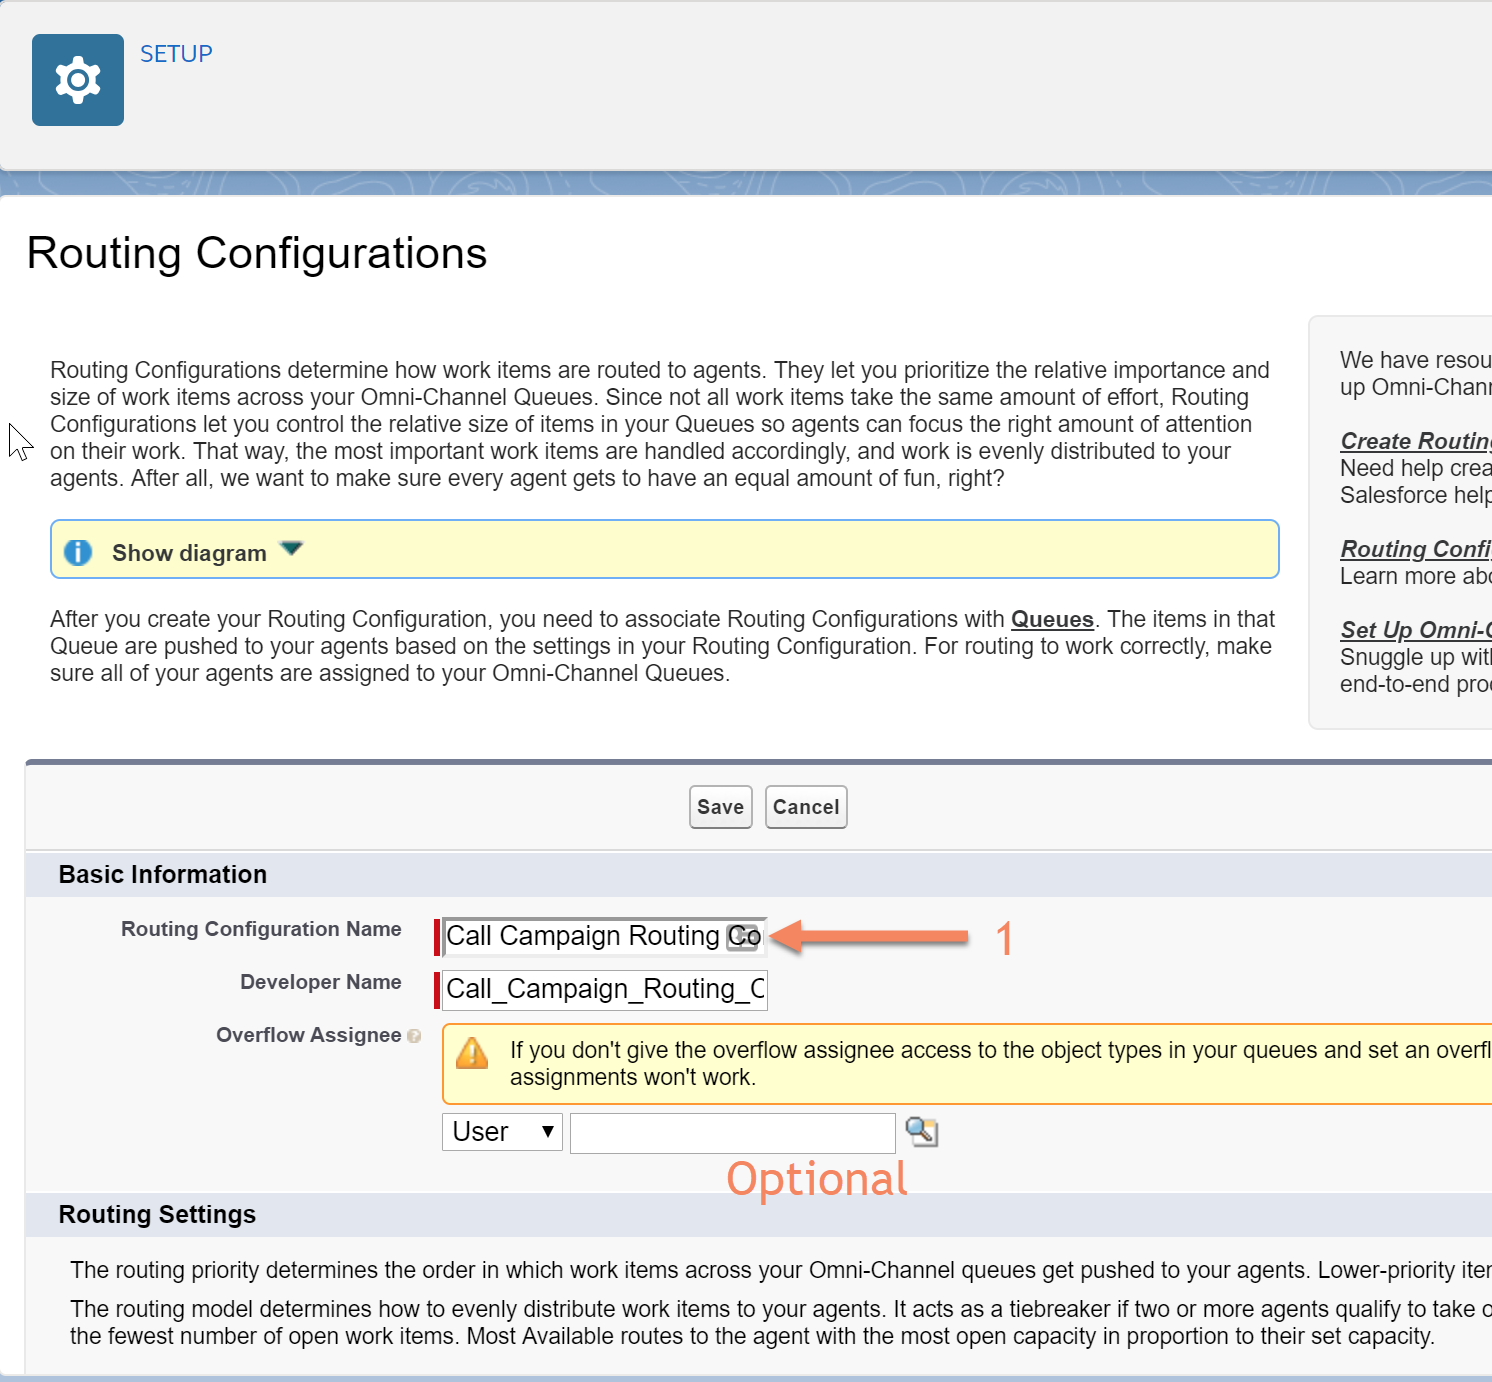
Enter the Routing Configuration Name (step 1), and the Developer Name will auto-populate. If you'd like to set an Overflow Assignee, you can optionally do that at this point. The overflow assignee will receive work if your organization reaches its Omni-Channel limits. This setting has no effect until the limits are reached.
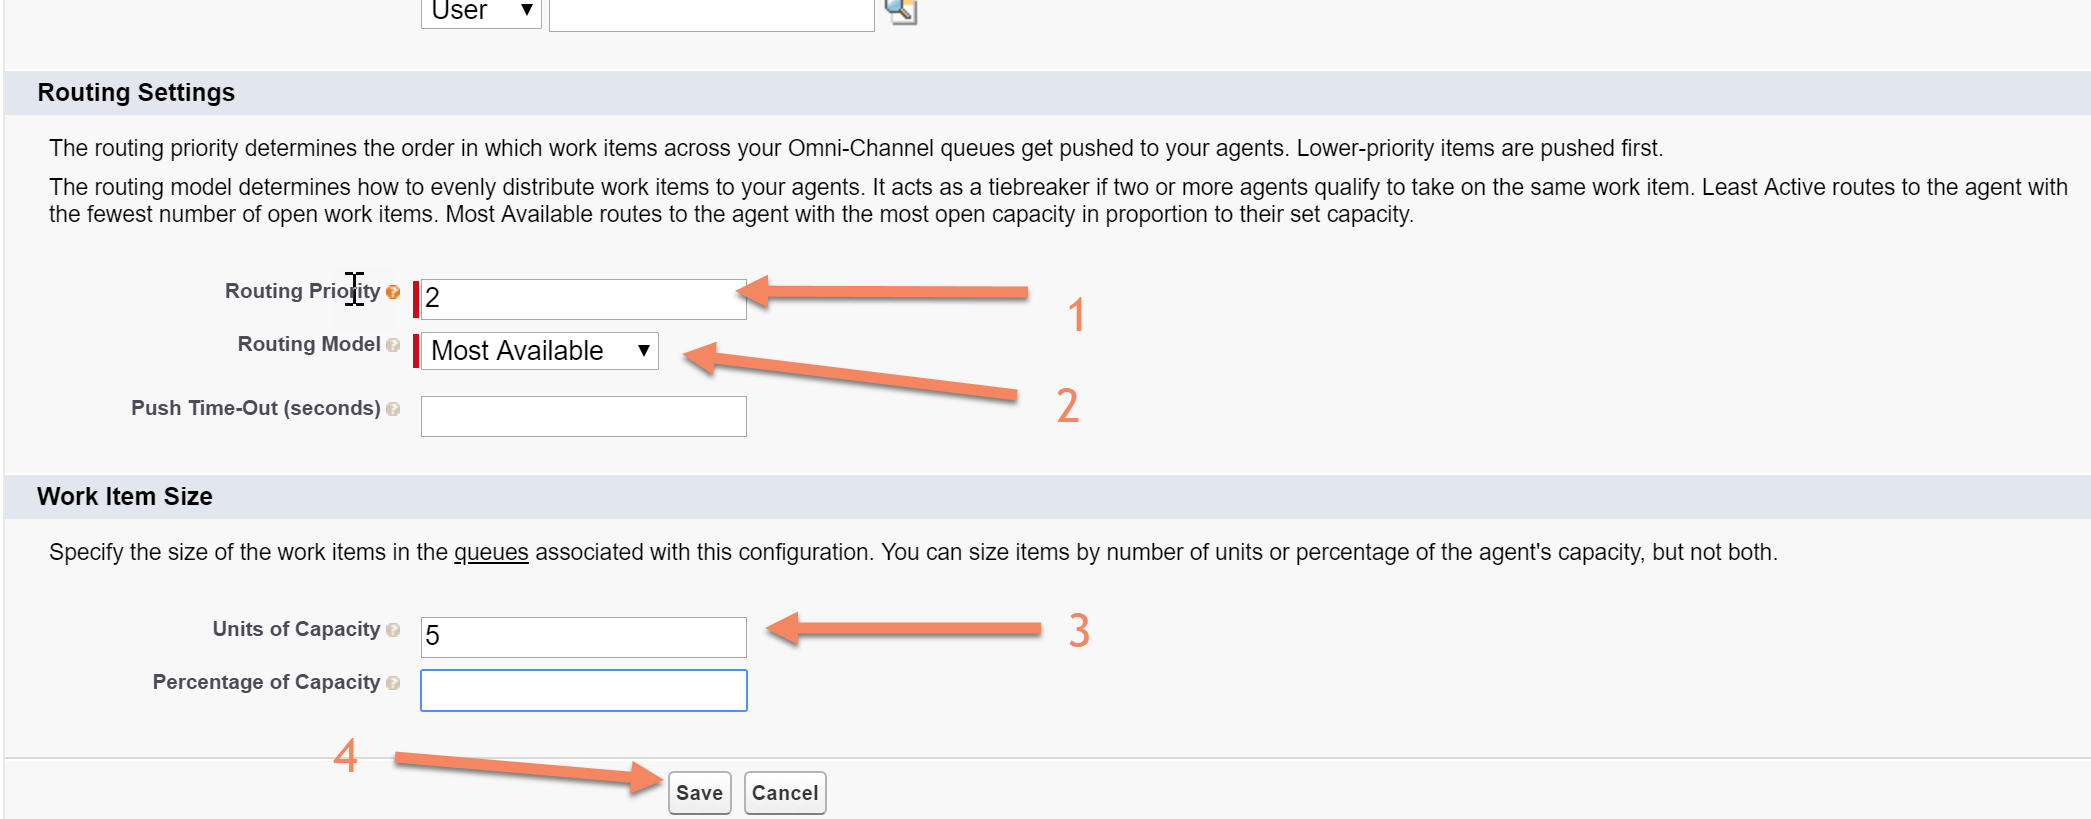
Next, you must configure the Routing Settings. First, (step 1) enter the priority of the work across the Omni-Channel queues. Second (step 2), select the model to use to act as the tie-breaker between agents. Third, (step 3) specify the units of capacity or percentage of capacity of the work items in the queue. Finally, (step 4), click "Save".
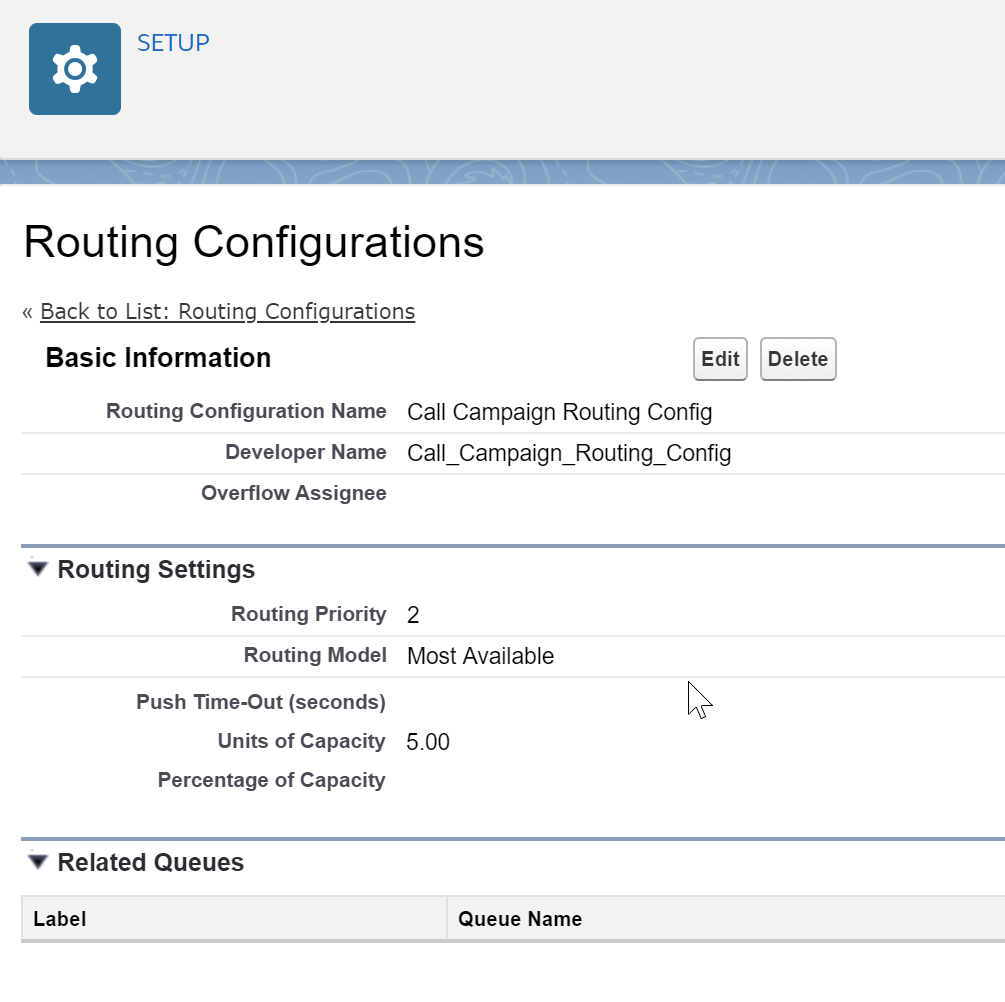
You have created your Routing Configuration.
Now, we need to assign the Routing Configuration to our queue. From the Quick Find in Setup, enter "queues" and then select "Queues" (step 1).
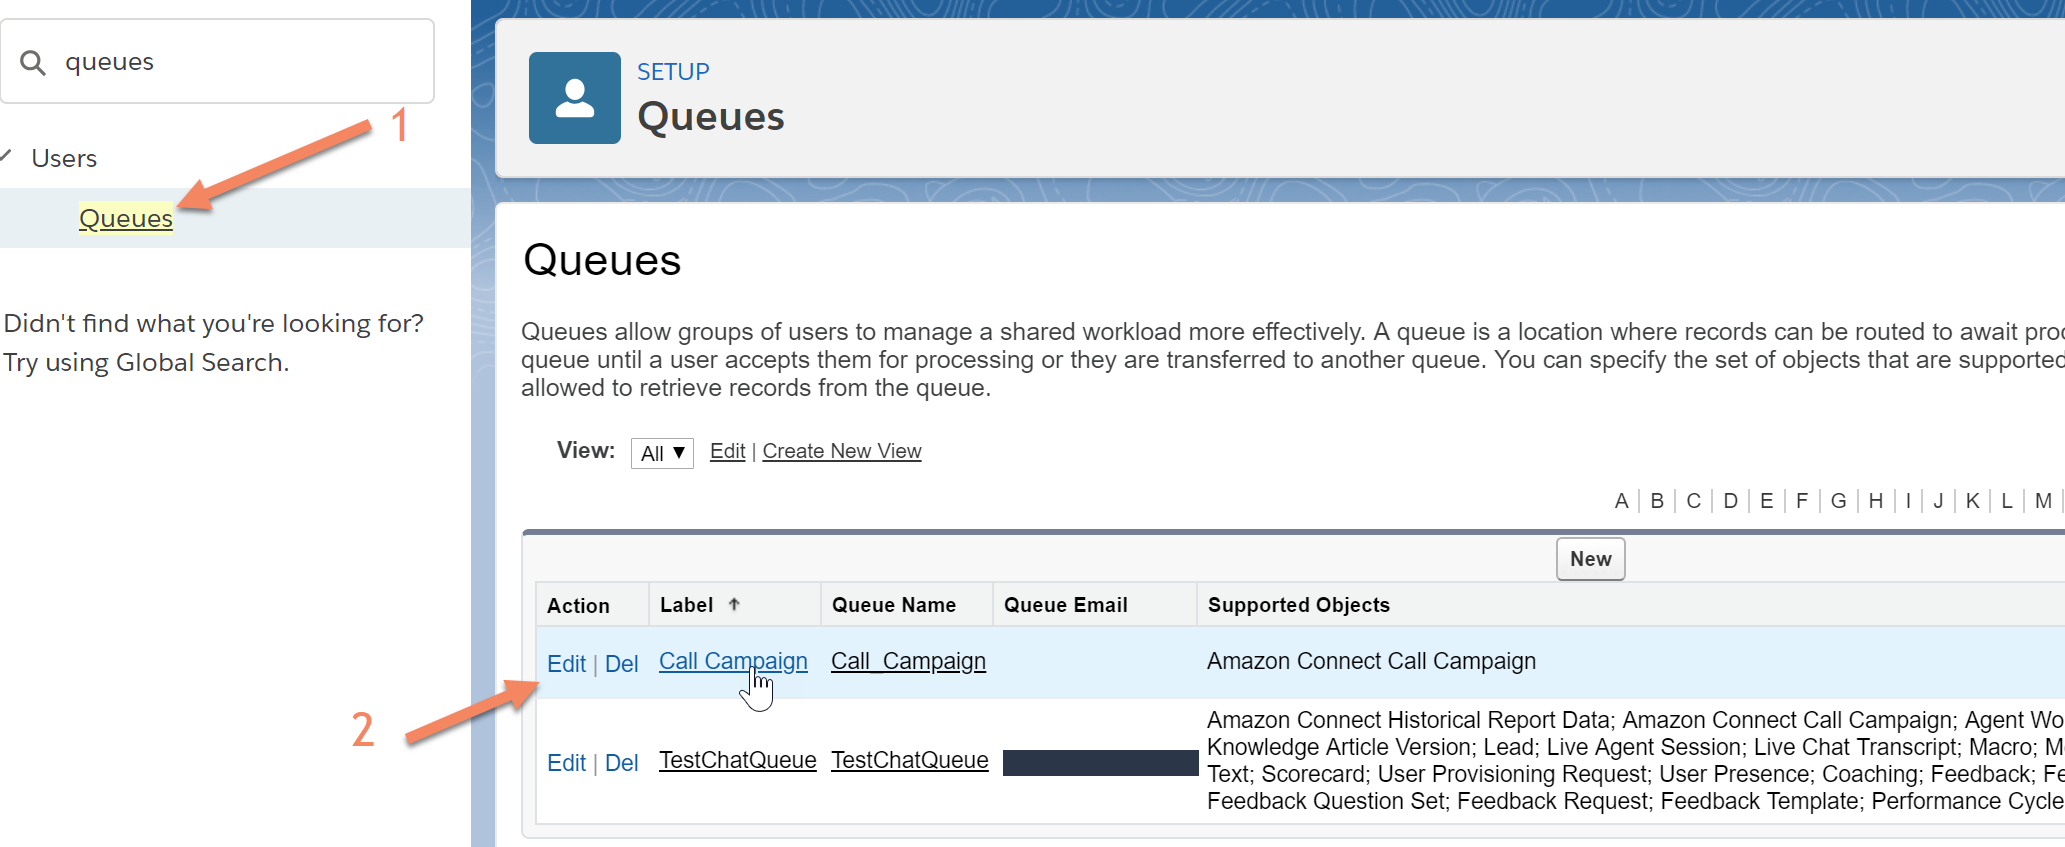
Click on the "Edit" link next in the row of the queue that was created earlier (step 2).

Use the magnifying glass button to search for our new Routing Configuration created earlier.
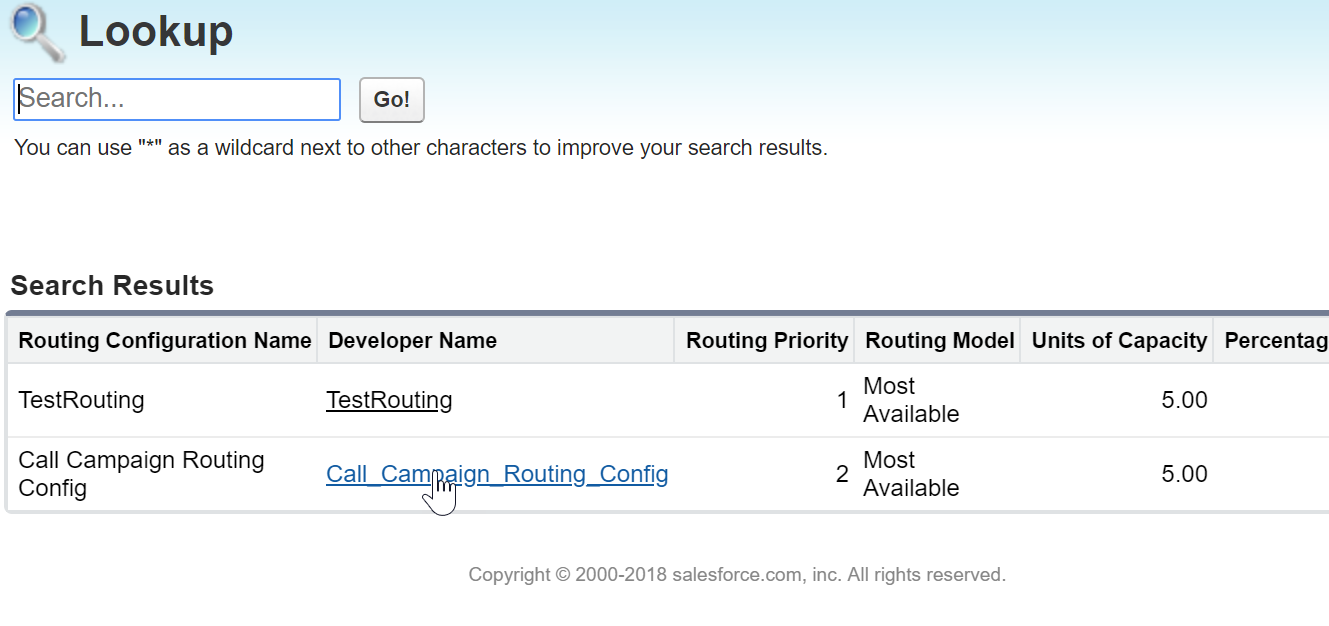
Select our Routing Configuration from the Lookup window.
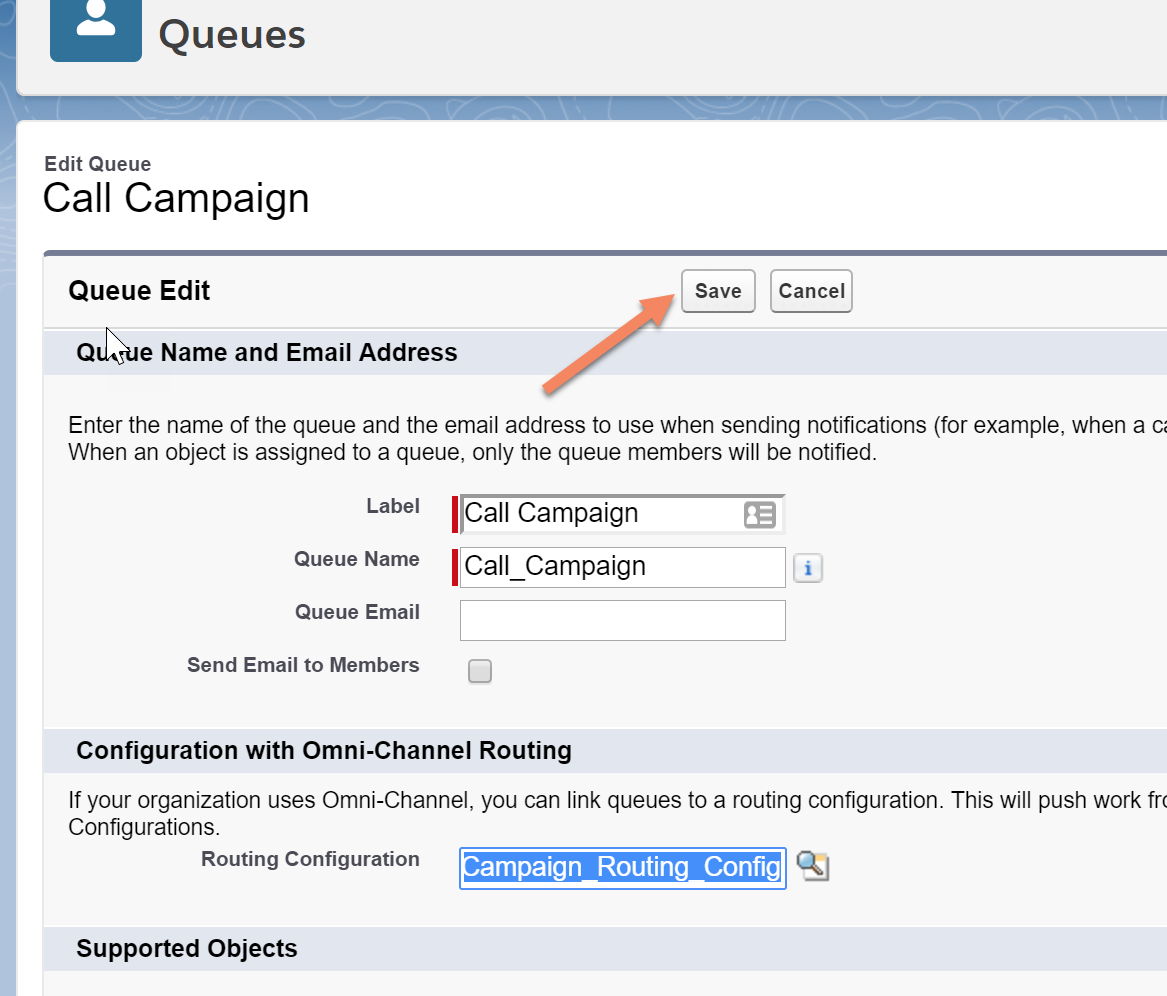
Click "Save" to store our changes.
The next steps are to create and configure the Presence Statuses.
Outbound Campaign Custom Object Using Salesforce Data Loader
The following is a description of the steps using the Salesforce Data Loader to insert outbound call campaign records. The Data Loader can be obtained from https://dataloader.io/
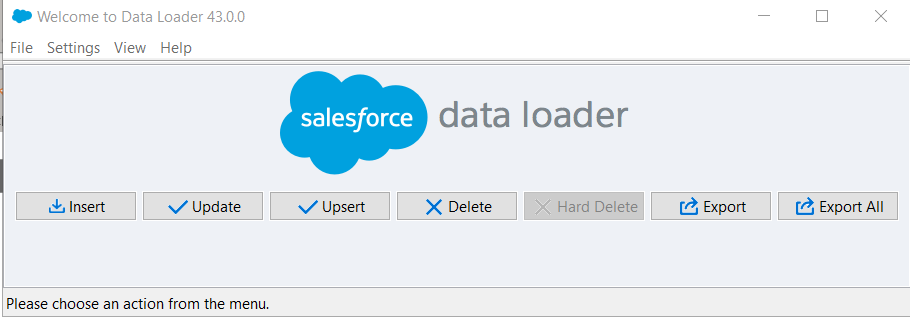
Start by exporting the call campaign custom object. From the Data Loader UI, click the "Export" button. You will be prompted to Login. Select OAuth as the method and then provide your Salesforce login credentials.
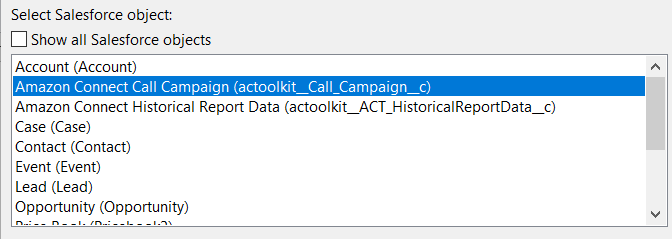
From the list of Salesforce objects select the Amazon Connect Call Campaign and export it to CSV file.
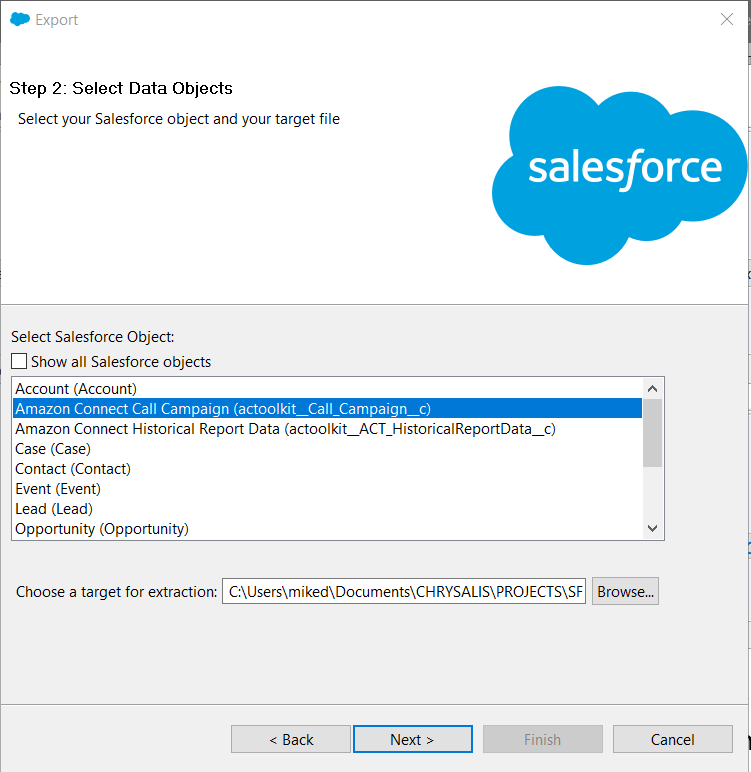
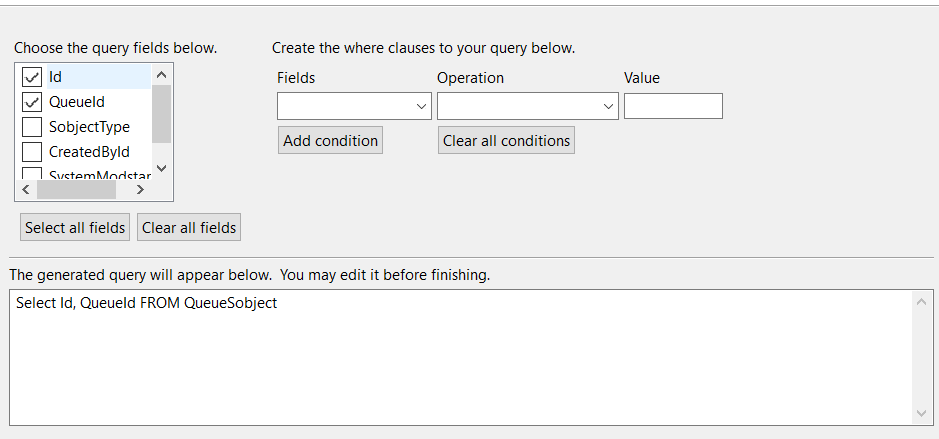
Next, we need the Object ID of the Queue that was created earlier. To obtain that, use the Data Loader to extract a listing of Queues. You will want to query for the QueueId.
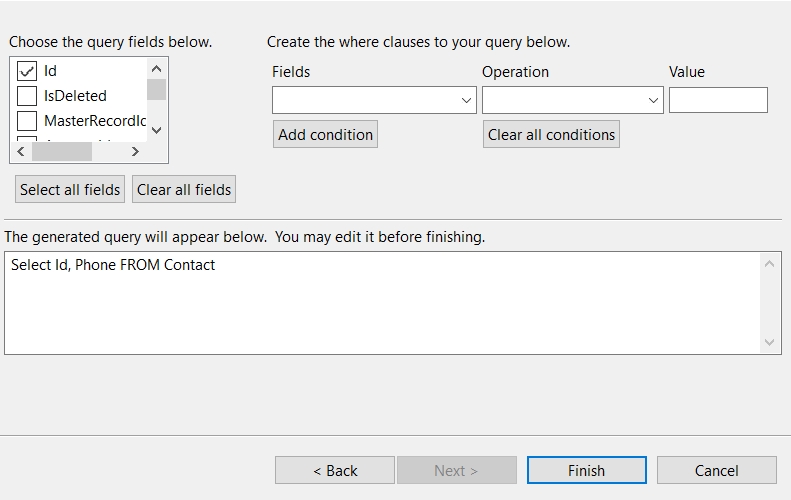
In this example, we want to pop Contact records when the outbound call is presented to the agent, so let's export a list of Contact to be called.
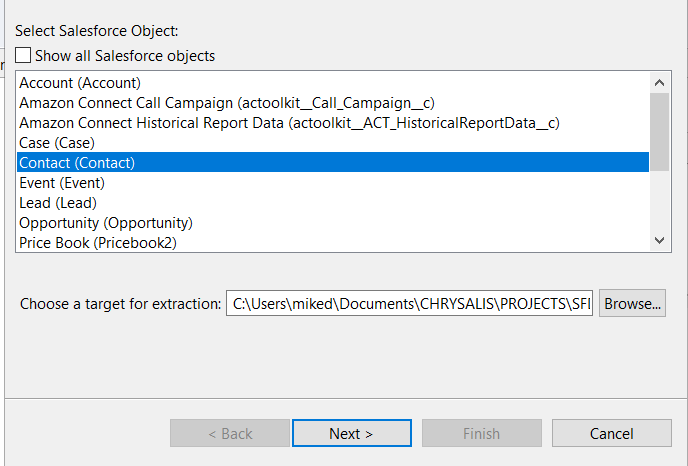
Query for all or specific Contacts, based on pre-defined criteria. At a minimum, you will need to extract a list of the Id and Phone number of the Contact.
Using the data extracted in the Queue listing and the Contact listing files, construct the outbound campaign, by using the first file what was exported as a template. Open the exported "Amazon Connect Call Campaign" in a spreadsheet application, such as Microsoft Excel, and build a list of Contacts to be called.
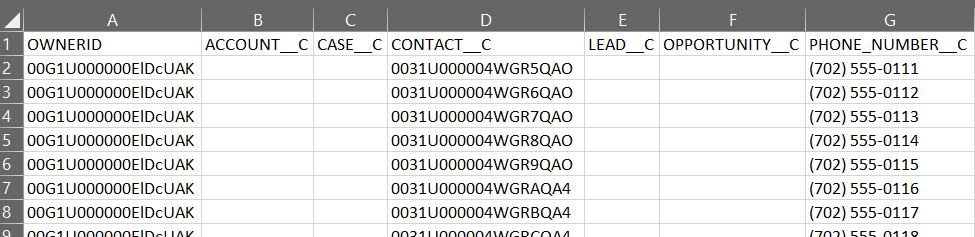
In the example above, the OWNERID column contains the QueueId obtained from the export of Queues. The CONTACT__C column contains the Id of the Contact we want presented to the agent, when the outbound call is initiated, and the PHONE_NUMBER__C field contains the phone number to be automatically dialed by Amazon Connect CCP.
Once you have built the campaign file, save it as a CSV file and then import it into Salesforce, using the Data Loader. Select "Amazon Connect Call Campaign" as the target of the upload.
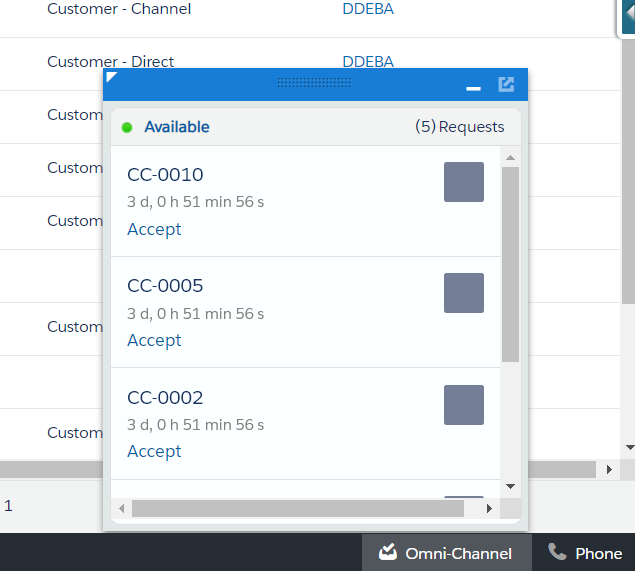
Once the campaign has been uploaded, the campaign records will be added to the queue and the agents who are assigned to that queue should start receiving the outbound requests in their Omni-Channel widget.