CTI Actions
Customers can now extend their Contact Control Panel (CCP) with customizable buttons called CTI Actions. These buttons can be configured in Salesforce and used to simplify common agent actions. For example, you can add a button that starts and stops recordings, automate case creation, or start a customer refund process. CTI Actions are configured in the CTI Adapter’s Actions Admin panel to execute CTI Flows which are process blocks that enable you to easily design agent workflows within our Salesforce integration.
You can configure a CTI Action in the CCP Element Editor page.
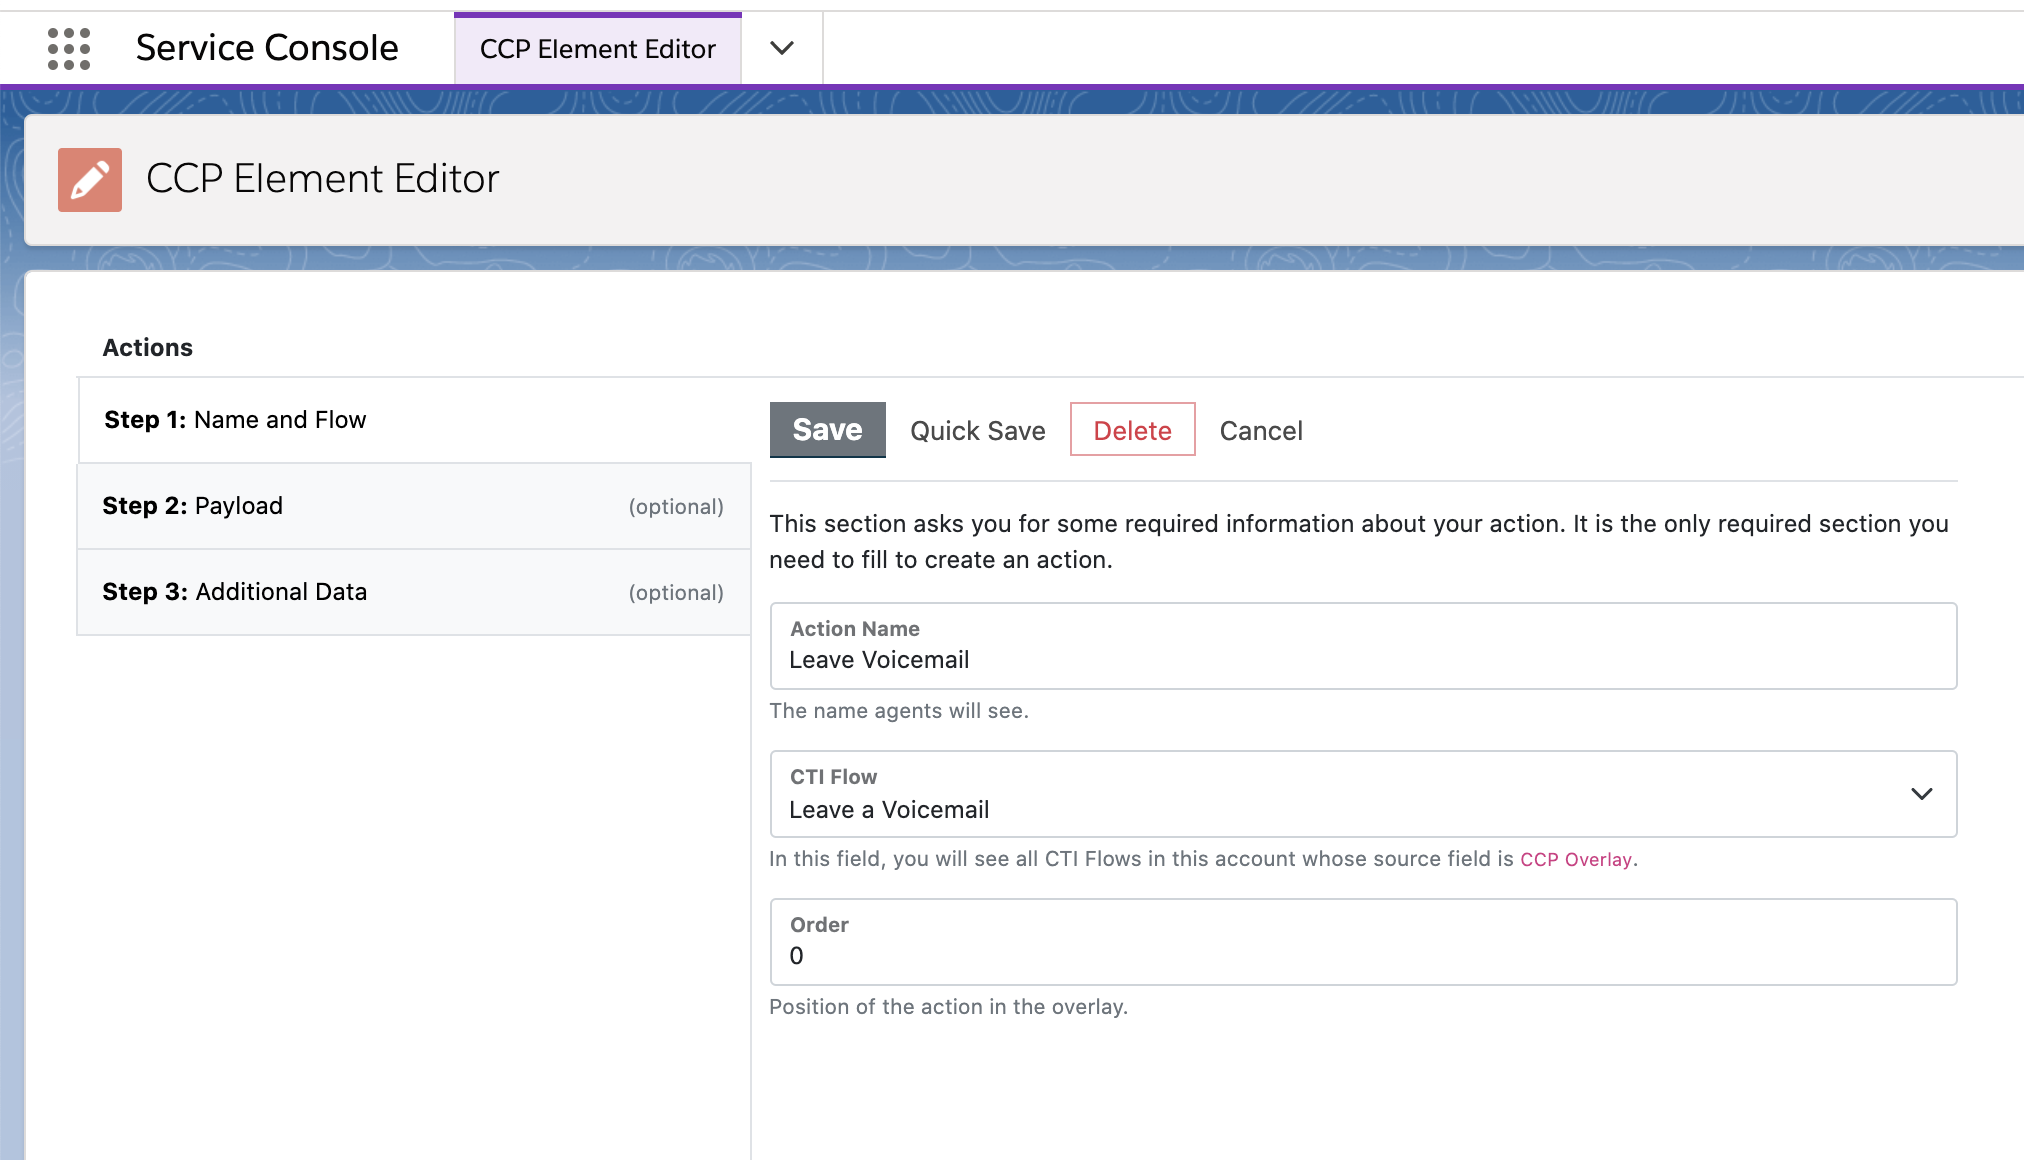
Make sure that you have created a CTI Flow and it uses the source "CTI Action." Only these CTI Flows will be displayed in the dropdown field.
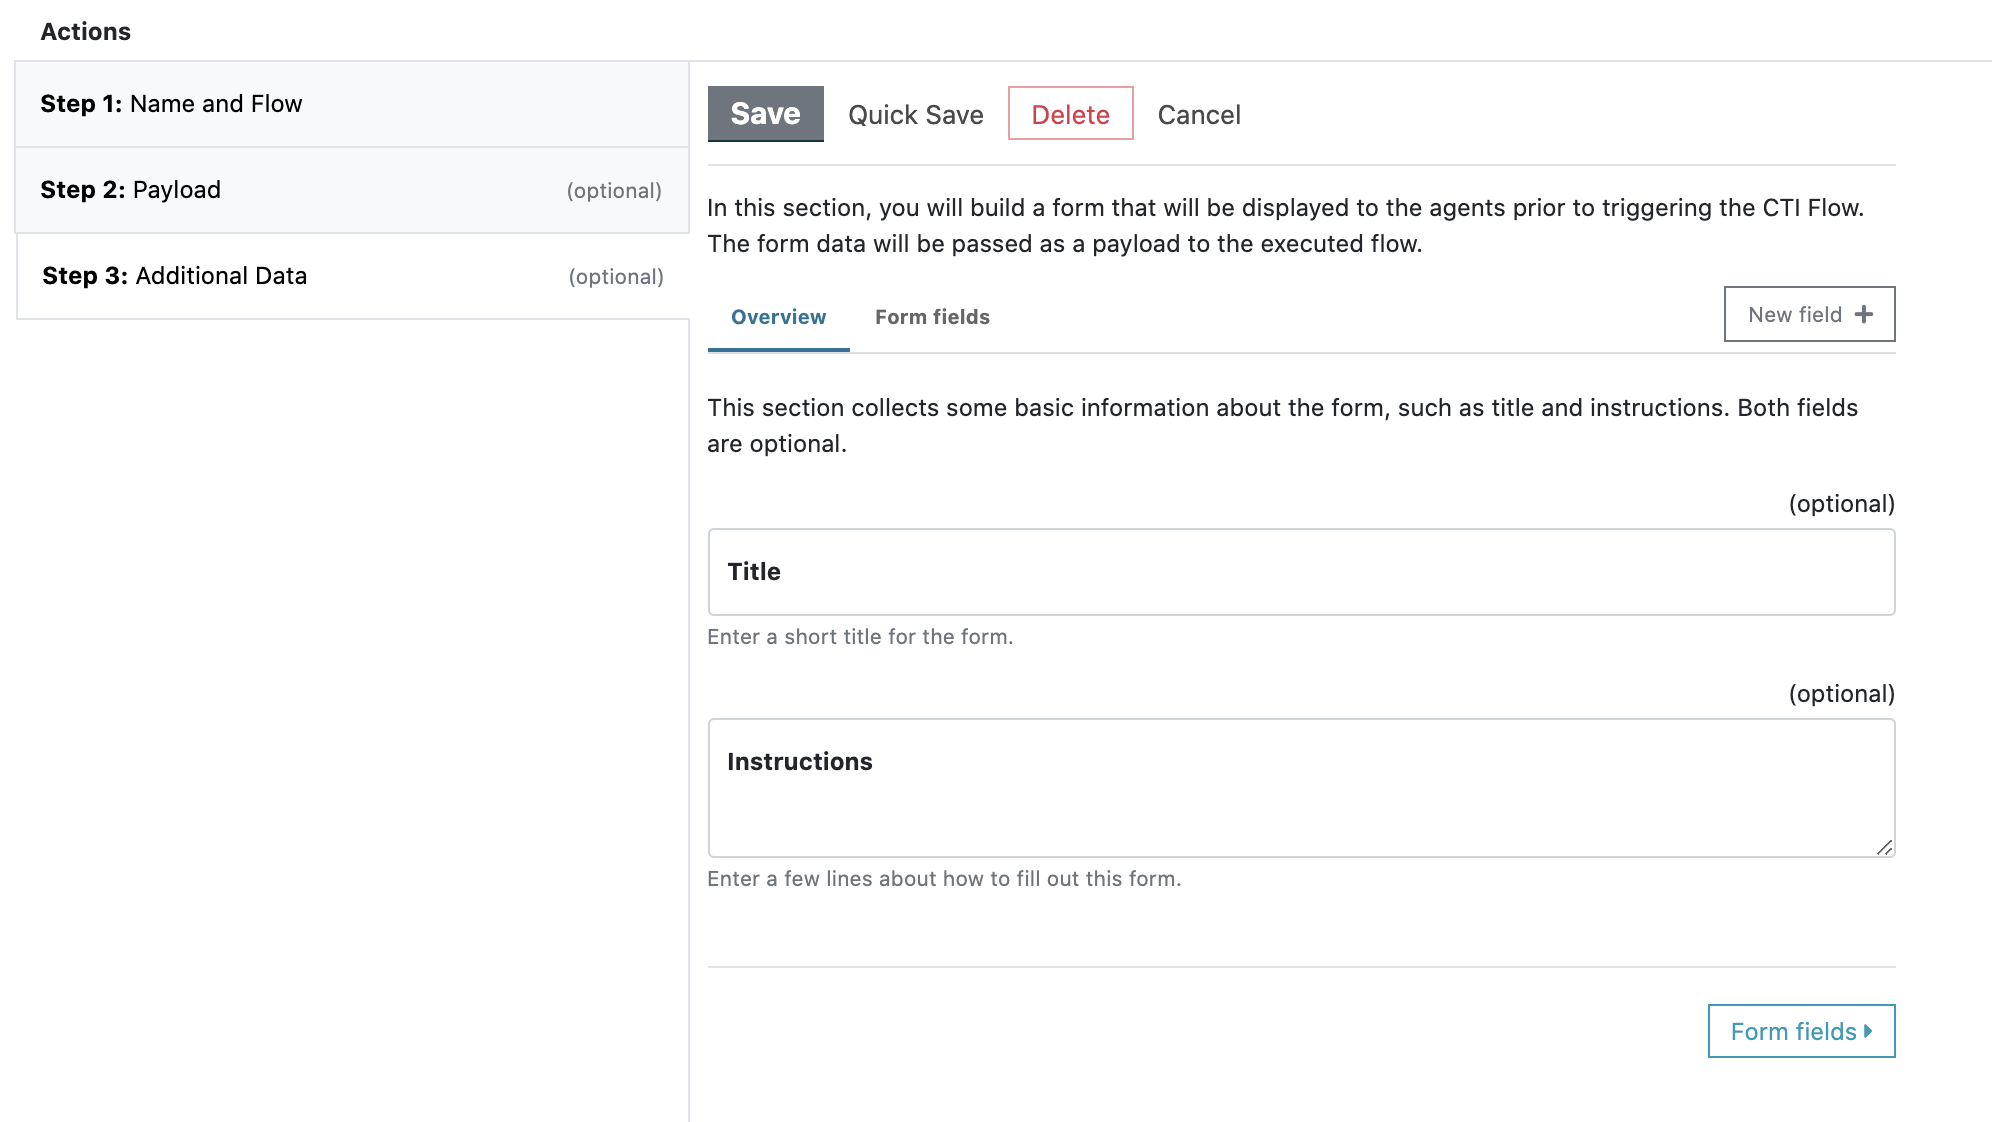
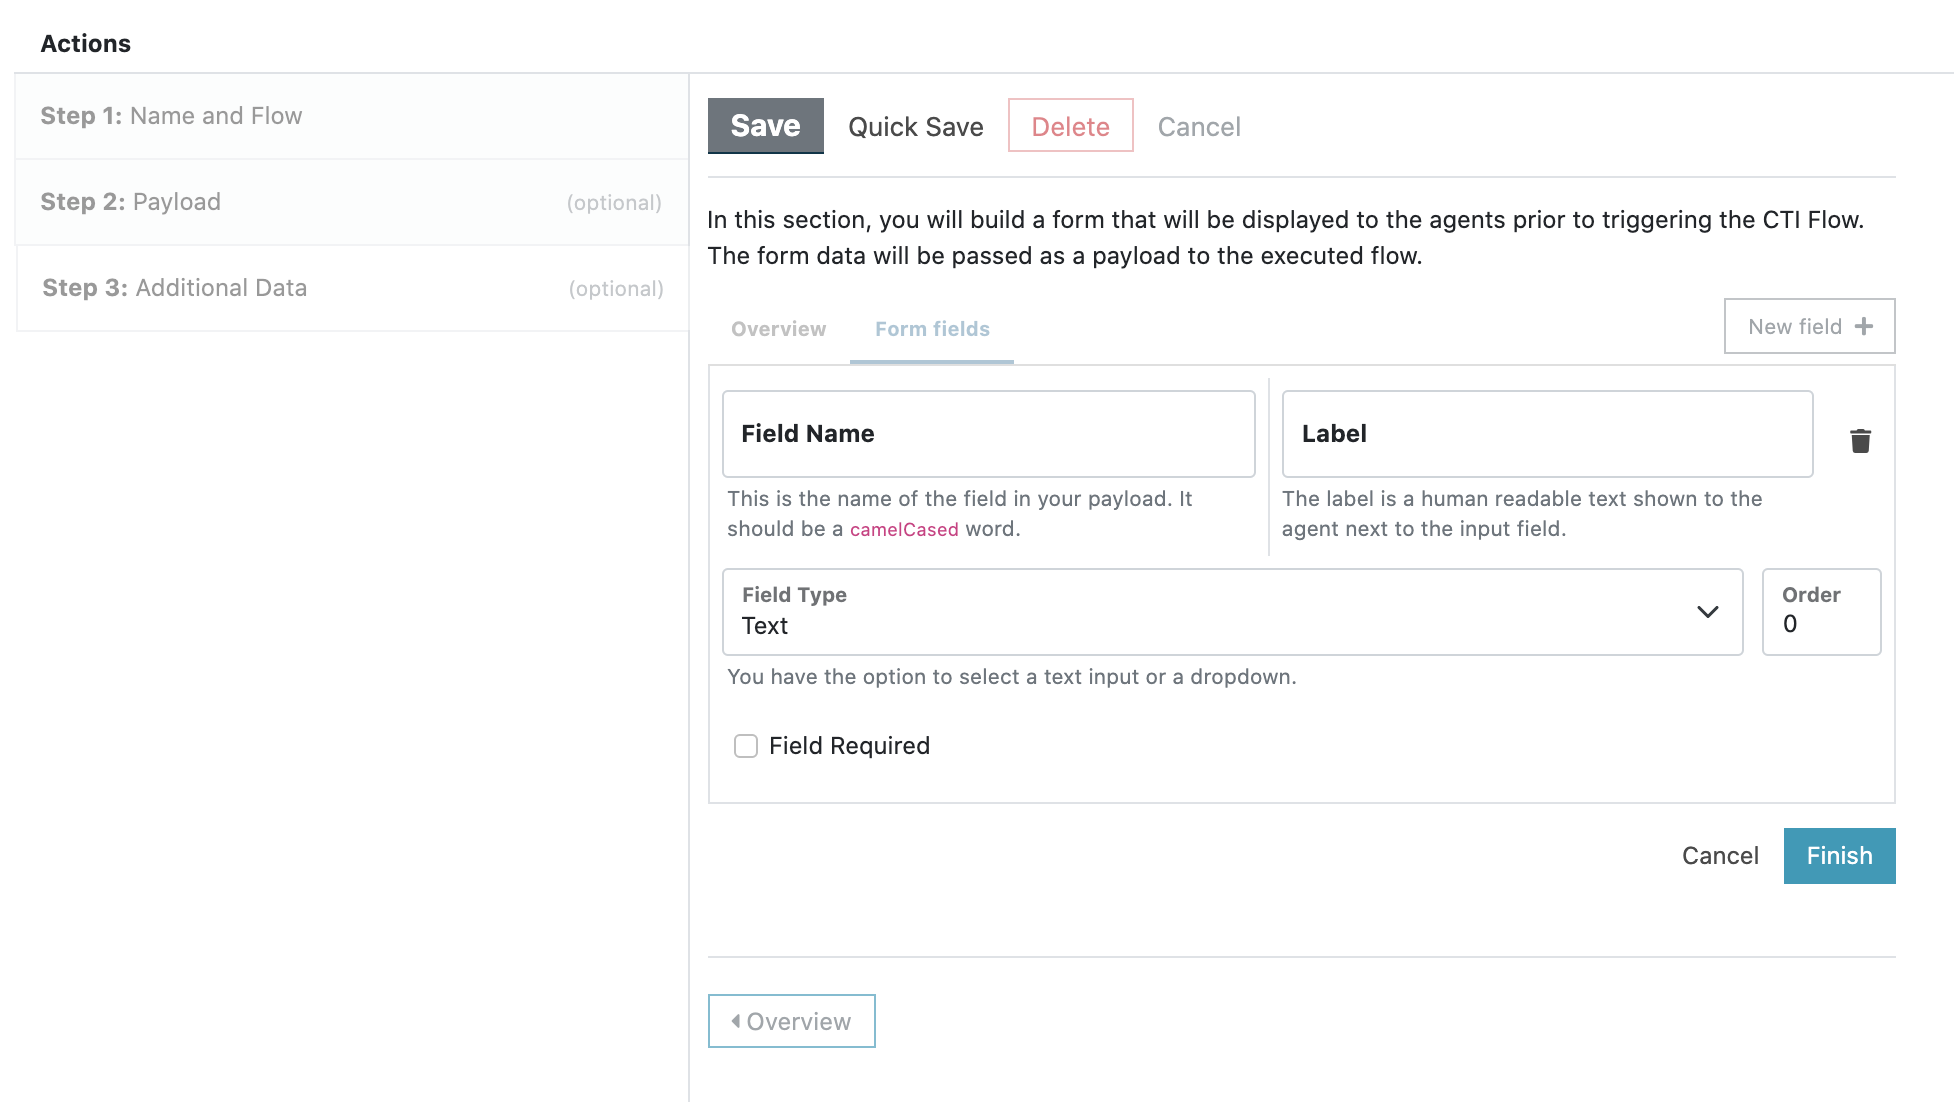
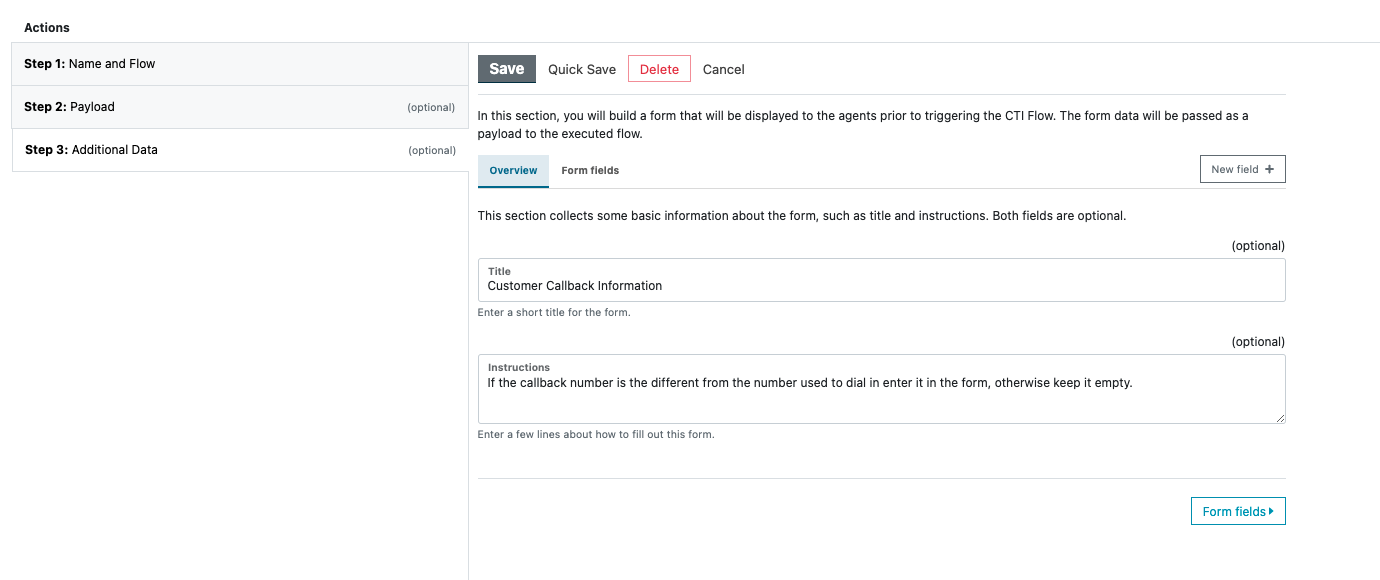
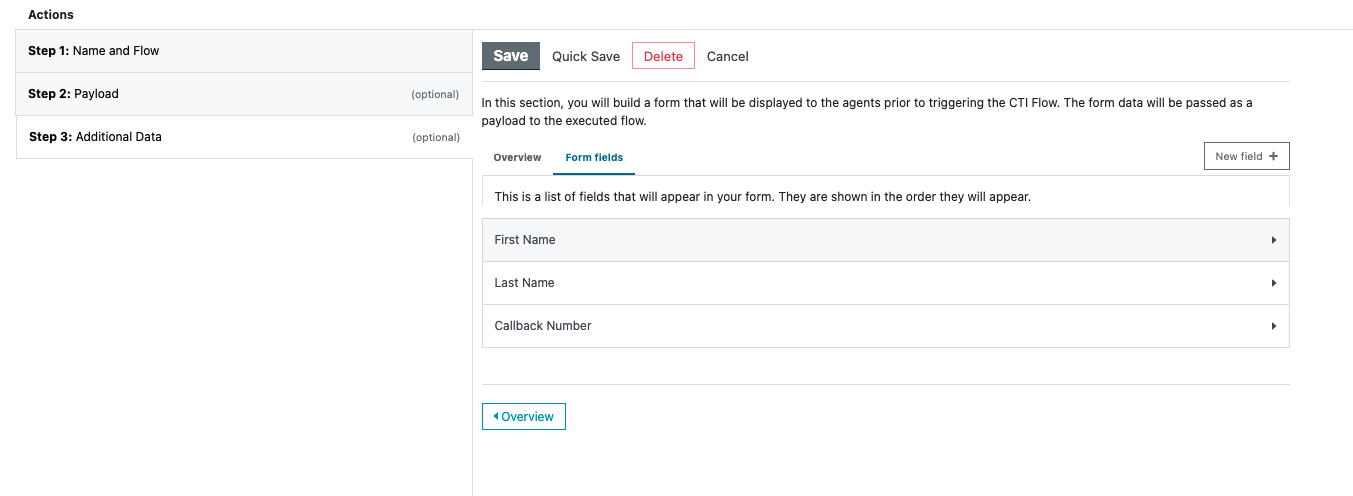
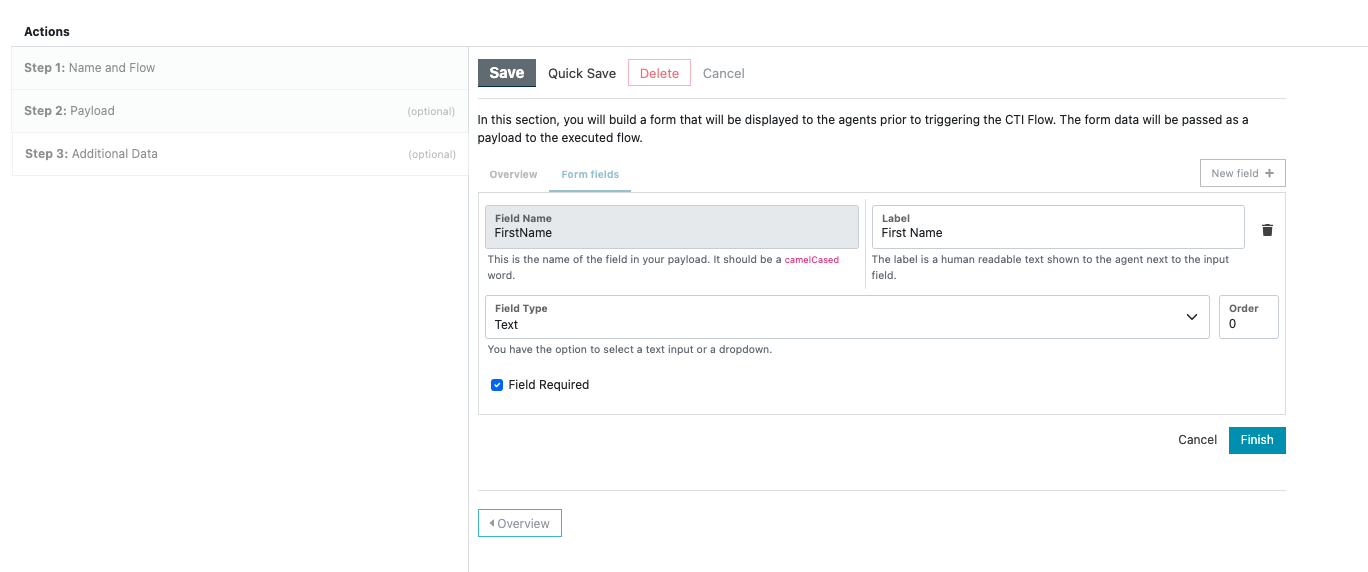
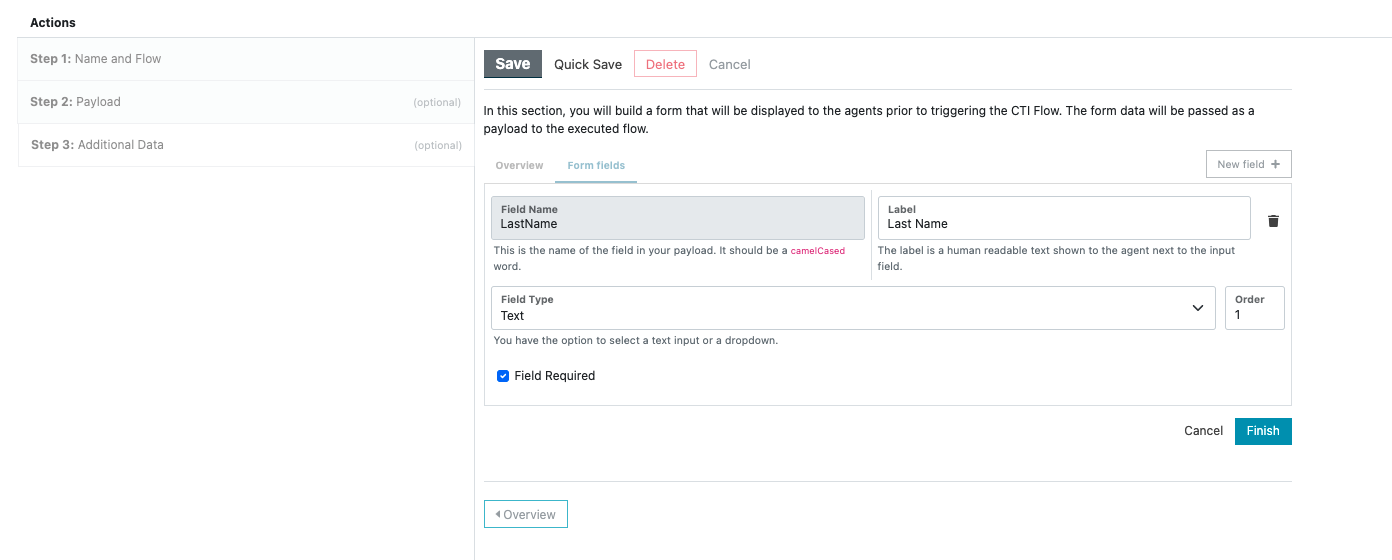
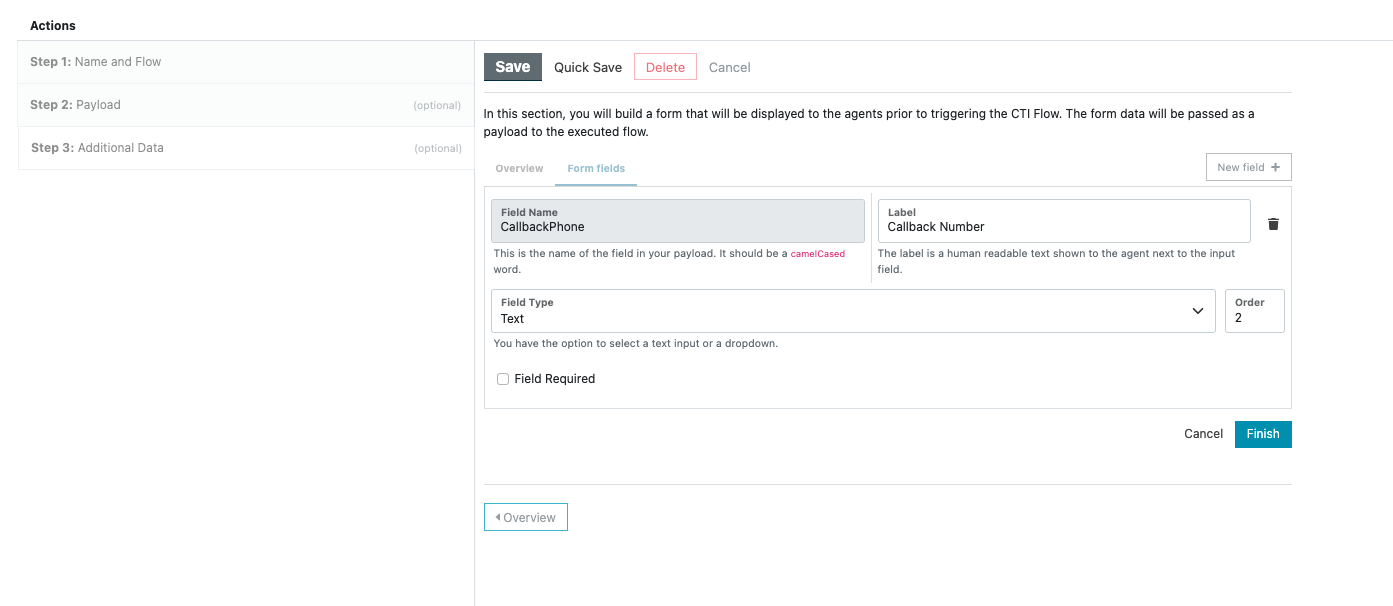
You can optionally specify a payload to pass to the CTI Flow. This allows your agents to enter additional data about the customer or information about the call to pass into the CTI Flow. The CCP Element Editor gives you the ability to add input fields into your form. These fields can be accessed in the CTI Flow through $.payload.fieldKey.
CCP Overlay
The Actions panel in the CCP overlay drawer displays the CTI Action buttons where your agents have easy access to them as they are interacting with customers.
The screenshots below are showcasing the CTI Actions and their behavior in the CCP Overlay panel, not the individual CTI Flows shown.
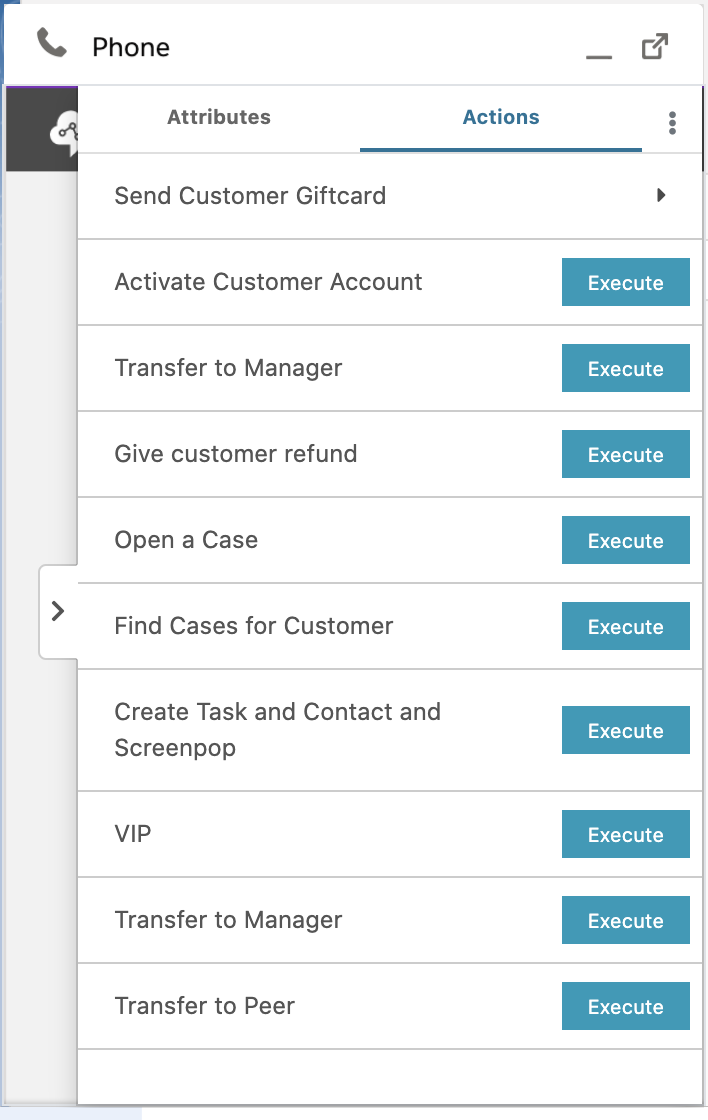
If a CTI Action requires additional input by the agent, its name will be followed by an arrow and when the agent clicks on this button, it will open the configured form. Otherwise, it will be shown with an "Execute" button next to its name.
Example
In this section we demonstrate how to use CTI Actions and how they interact with CTI Flows through an example.
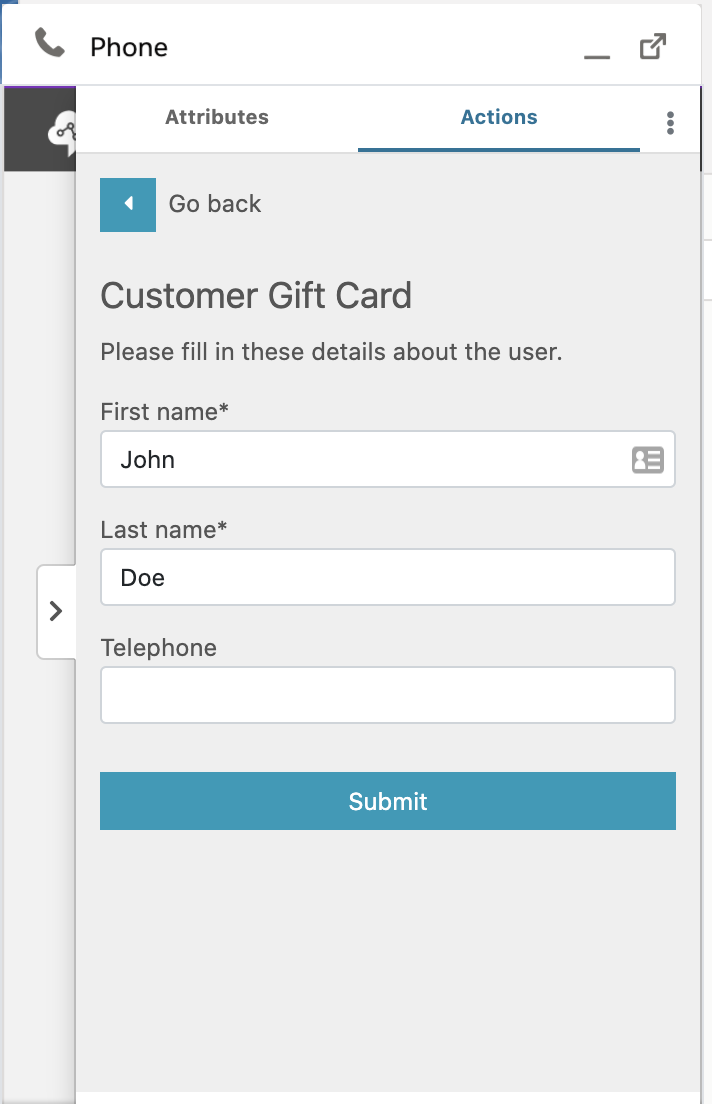
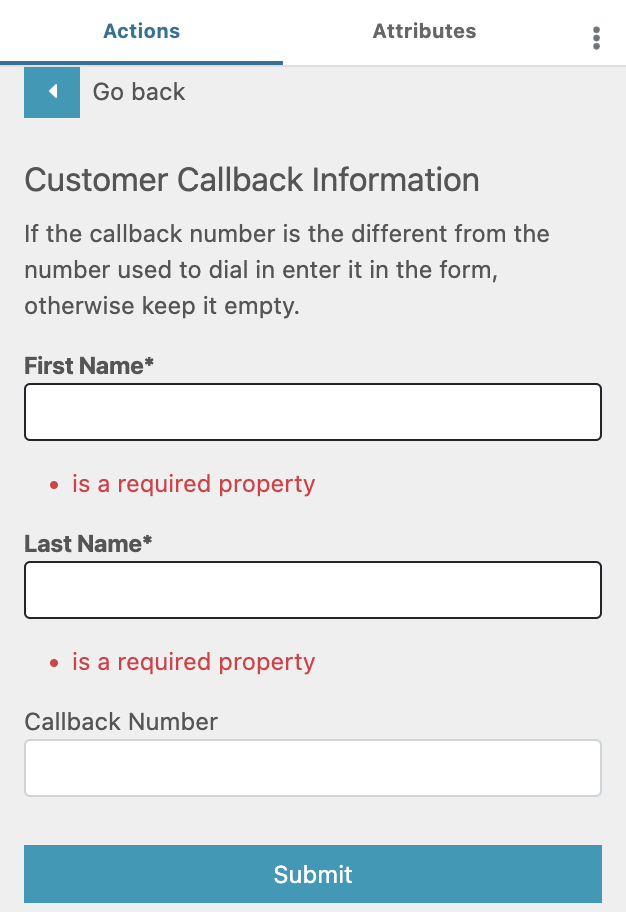
Here we setup a CTI Action and Flow to create a Salesforce Task to callback a customer and pop it. The end goal is to have a Task with the subject Callback - FirstName - LastName and the number to callback in the comments section of the Task. If a contact exists for that number, we will also link it in the Task. We use a CTI Action to do this to let the agent enter the customer's first and last name and callback number if it is different from the number used to call in. This action looks like this in the CCP Overlay.
To achieve this, we need to setup a CTI Action then a CTI Flow.
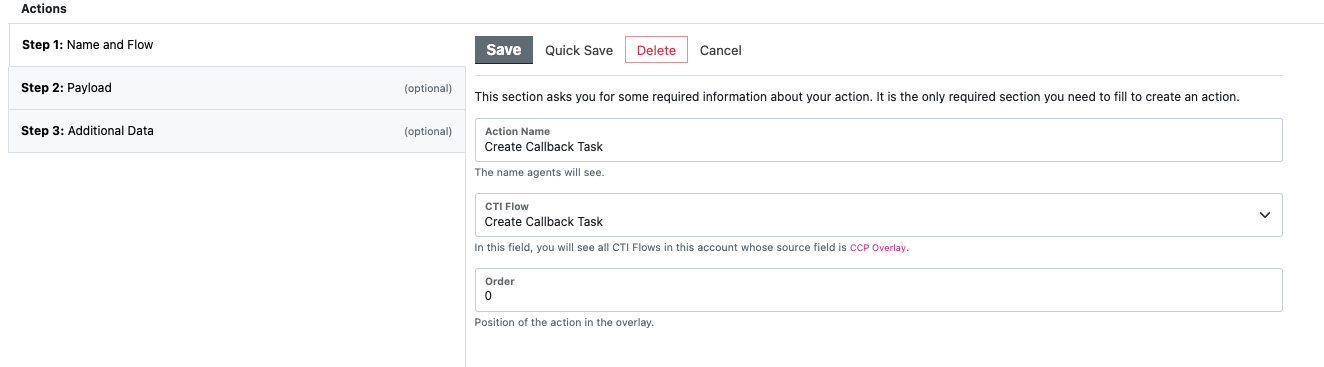
First, we setup the CTI Action. To do that we need to have created a CTI Flow with the CTI Actions as source. For now we create an empty Flow, which we will build later, just to reference it in the Action.
The first step is to name and link the Action to a Flow.
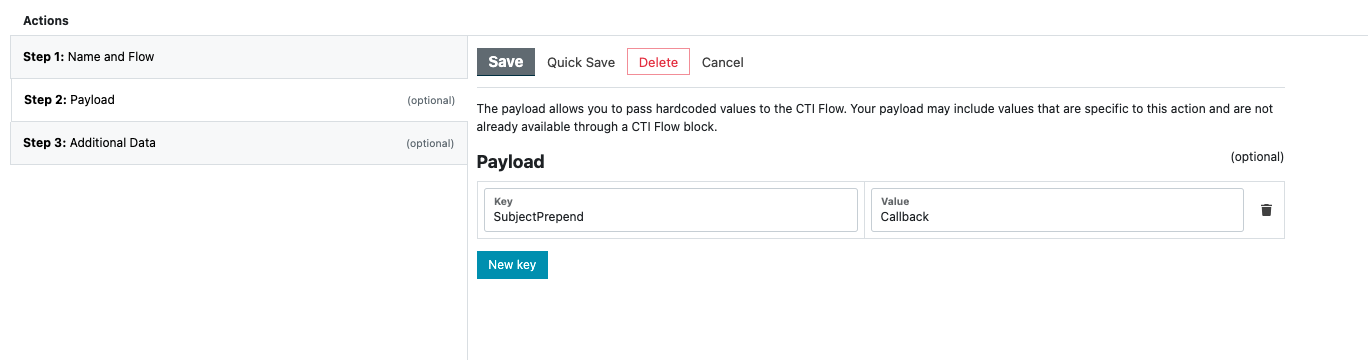
The second step is to add hardcoded fields to the payload, if desired. In this example we add part of the Task subject as hardcoded fields to demonstrate the functionality.
Finally, as shown previously, the action is a form, that means it has additional data that the agent can provide. Below are images showing how they are setup for this example.
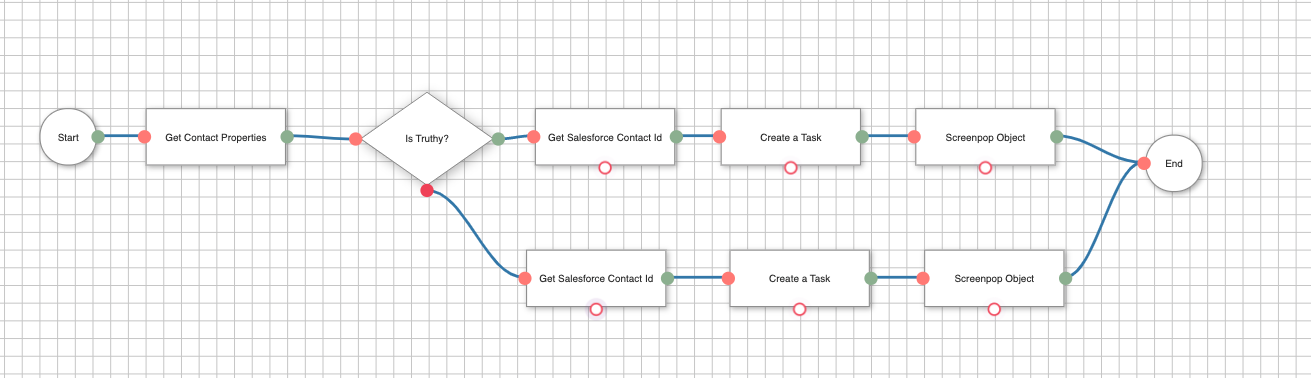
Then, we setup the CTI Flow. As mentioned above, it's possible to have the callback number different from the number used to call in, or it could be the same. If it's the same, we don't want the agent to enter the number again, in fact we can get that number in the CTI Flow. In the flow we use the Get Contact Properties block to get the phone number of the contact. Then using the Is Truthy? block, we check if the agent entered a callback number in the form or not. Depending on wether they did or not, we get the Salesforce Contact and create a Task using the correct callback number.
In the Flow we reference the CTI Action fields by using $.payload.fieldKey for both the hardcoded payload and the fields in the additional data form (Take a look at the Create a Task blocks in the flow below).
 Download Flow
To test this action, you can place or accept a call from the CCP, open the overlay, fill in the form then submit it. If everything is setup correctly, a Task should pop up with the desired information.
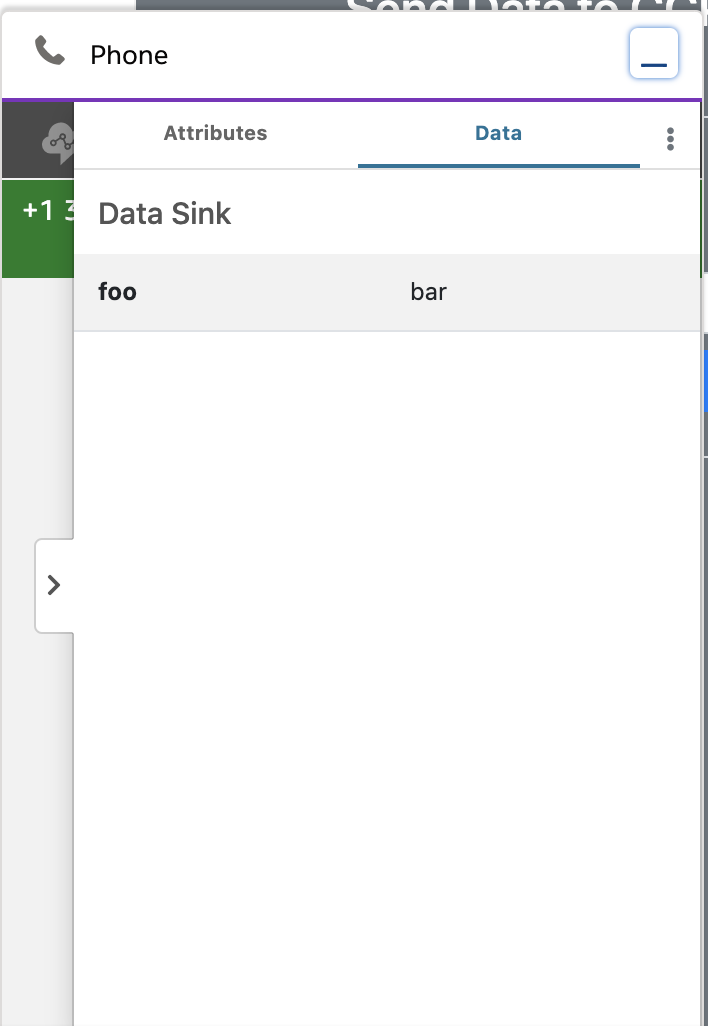
Receiving Data from CTI Flows
In addition to agents sending data to the CTI Flow, they can also receive data from a CTI Flow.. When a CTI Flow sends some information to the CCP overlay, it will be displayed in the Data panel.
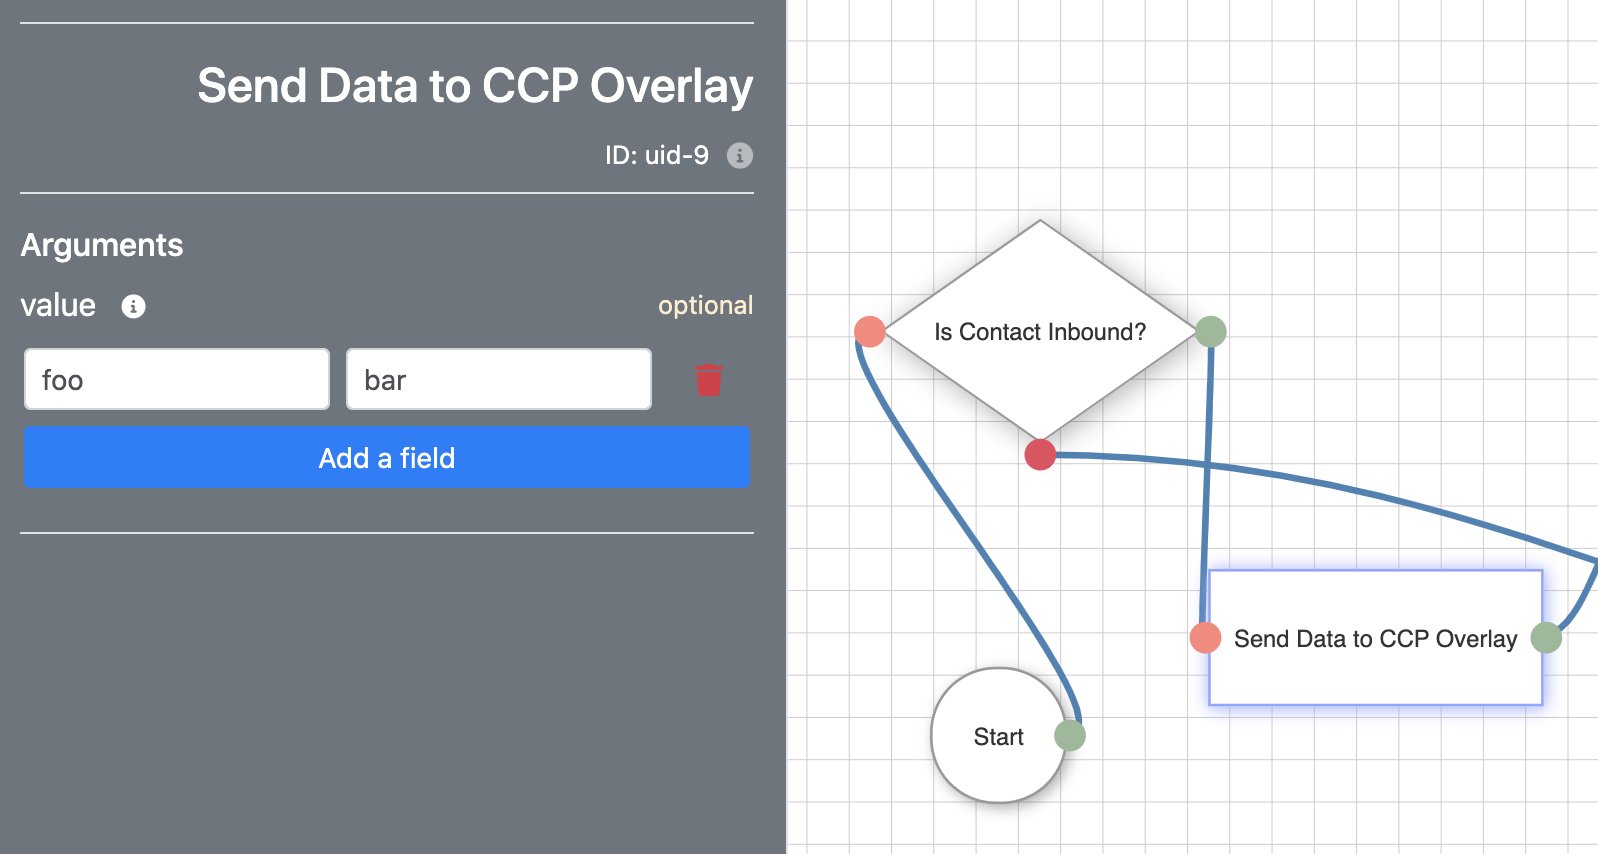
Here is how you would configure your CTI Flow to send data back to the CCP overlay.
Upgrading from an earlier version
If you are upgrading the Salesforce package from an earlier version of CTI Adapter, there are a few additional steps to follow:
- Go to Setup
- In "Quick Find," search for "Picklist Value Sets" and click on the result.
- Select "AC_CtiScriptSource" on "Picklist Value Sets" page.
- Scroll down to "Values" section
- Click "New" to add a new value.
- In the textarea, enter "ctiAction" and save
- Scroll down to the new field you added, "ctiAction," and click "Edit."
- Update the label to "CTI Action" and save.