Amazon Q Integration
The Amazon Connect CTI Adapter allows for integration with Amazon Connect Amazon Q. We still support reference to Amazon Q's old name "Wisdom" for now, but we will not support it in CTI Adapter version 5.23 and onwards.
The integration between Amazon Q and the CTI Adapter first requires that Amazon Q is set up in the Amazon Connect instance that the CTI Adapter is integrated with. See here for full instructions.
Before proceeding with the below, please ensure that Amazon Q articles are properly showing up in your Amazon Q instance for the specific user you are testing.
Amazon Q Permission Sets:
Salesforce users accessing Amazon Q in Salesforce must belong to either the AC_AmazonQ permission set, or the AC_Administrator permission set.
- In setup, search for and select permission sets.
- Select either the AC_AmazonQ or the AC_Administrator permission set
- Select Manage Assignments, and add all relevant users to the permission set of choice.
Setting up Amazon Connect Amazon Q in the CCP Overlay:
Navigate to your CTI Adapter
Scroll down to the Features section and create a new feature

Create a new feature with the following values:
- AC Feature Name - FEATURE_AMAZONQ_PANEL
- Value - Enabled: true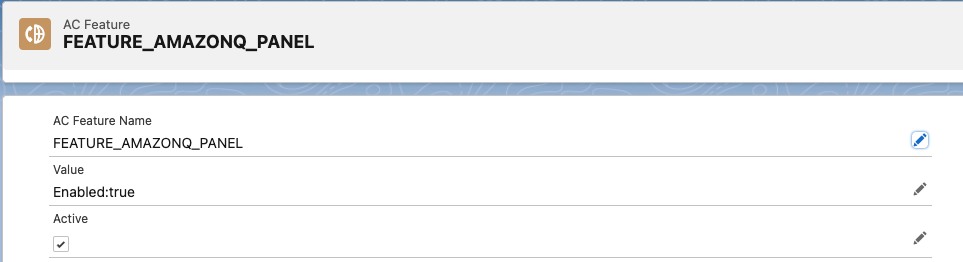
In addition, you can also include the
IgnorePermissionSetsetting to the value of the feature on a new line. This setting will show Amazon Q if it is enabled regardless of whether the logged in user belongs to the AC_AmazonQ or the AC_Administrator permission set. This setting is required if the logged in user has theView Setup and Configurationprofile setting set to false.- IgnorePermissionSet: true

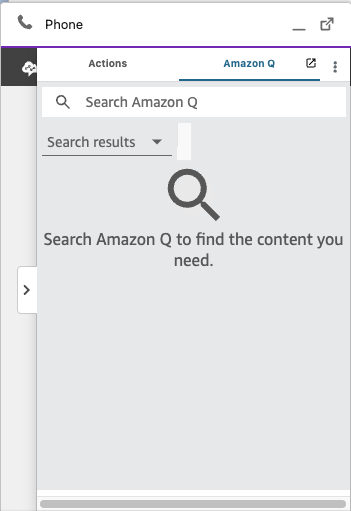
- Open the ccp, observe that there is a tab with Amazon Q in the CCP Overlay.
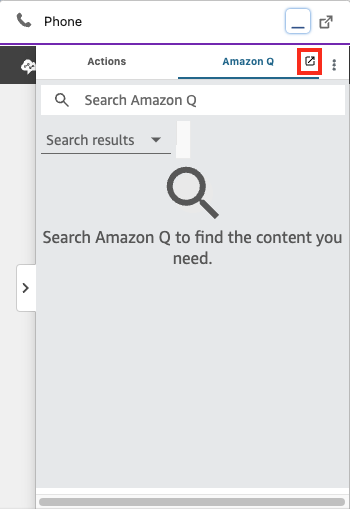
Amazon Q can be popped out into a new window by pressing pop out button.
Accessing the Tabbed Version of Amazon Q:
Amazon Q is also accessible in Tabbed form.
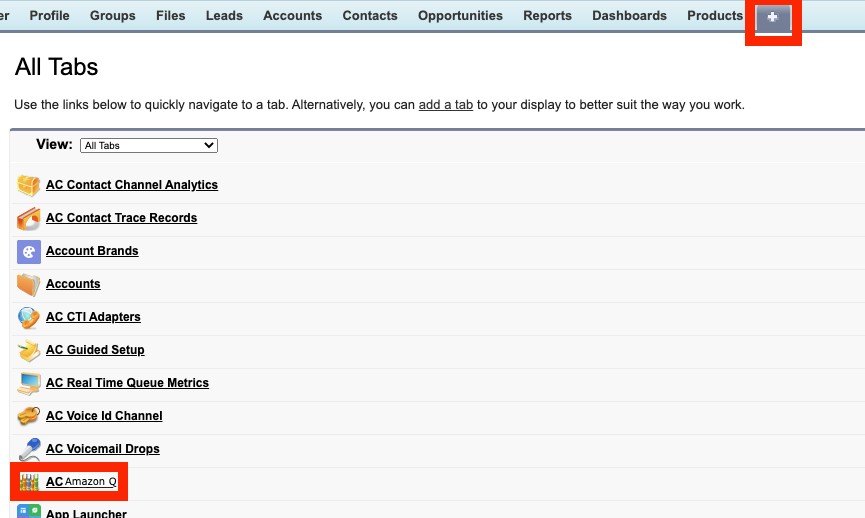
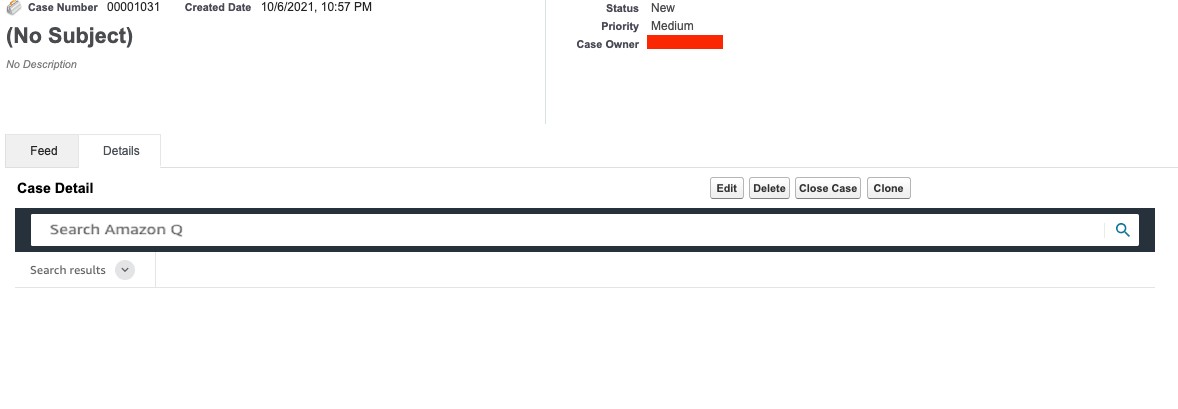
Accessing the Component Version of Amazon Q:
The final method of accessing Amazon Q in Salesforce is through the Amazon Q component.
- Navigate to Object Manager in Setup in Lightning
- Select either Task or Case (note: the Amazon Q component is embeddable in other pages as well, but you may need to write custom classes in order to do so.)
- Select Page Layouts
- Select the appropriate layout
- Select Visualforce Pages in the top component

- Click and drag the appropriate Amazon Q visualforce page into the desired location
- Save the layout
- Navigate to a task page