Amazon Connect Reports in Salesforce
Out of the box, within Amazon Connect, you can generate a number of real-time and historical metric reports to monitor efficiency and utilization, agent performance, and other information about your contact center.
Real-time metrics reports show real-time or near-real time metrics information about activity in your contact center. Historical metrics reports include data about past, completed activity and performance in your contact center. You can customize the default report settings to get the view of the data that is most meaningful to you and your organization. You can change the time frame for the report, which metrics are included in the report, and how the data is grouped within the report.
Amazon Connect provides you the ability to export reports to the S3 bucket of your choice, in comma separated value (CSV) format. This enables broad compatibility across many analytics and WFM tools. Encryption is enabled by default for all saved reports, using S3 server-side encryption with KMS. Disabling encryption is not recommended. You can schedule reports run hourly, daily, and monthly. The output will be stored in the S3 bucket. Each report can have different name and prefix.
For the particular integration, at 30-minute intervals, Amazon Connect generates CSV reports which contain statistics for the last (30 minute) period. Two different reports are available to transport Agent and Queue interval data from Amazon Connect to Salesforce.
Each time a new report is exported, S3 is going to trigger a Lambda function from Amazon Connect Salesforce Lambda package (AWS Serverless Application Repository), which is going to import the date into your Salesforce instance.
Amazon Connect scheduled, Agent and Queue reports, are not automatically configured by the Amazon Connect Salesforce Lambda package, therefore the first step would be to create and schedule these reports.
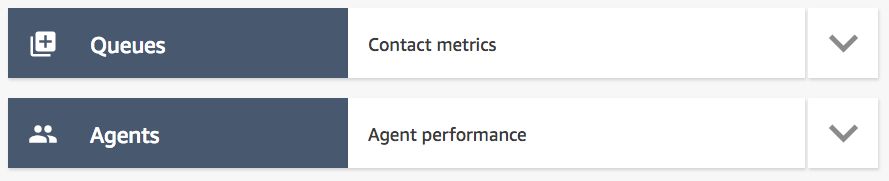
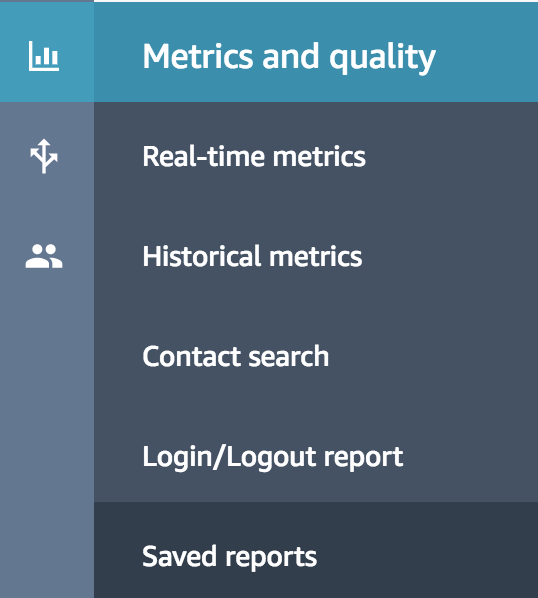
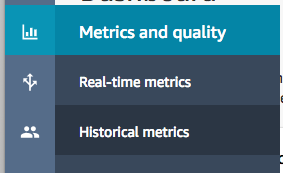
In your Amazon Connect instance, navigate to Metrics and Quality > Historical metrics. By default, you will be able to see the two reports needed for this integration: "Contact metrics" and "Agent Performance".

Click on the "Contact metrics" to open the report and then click on the grey gear icon on the right-hand side to configure it.

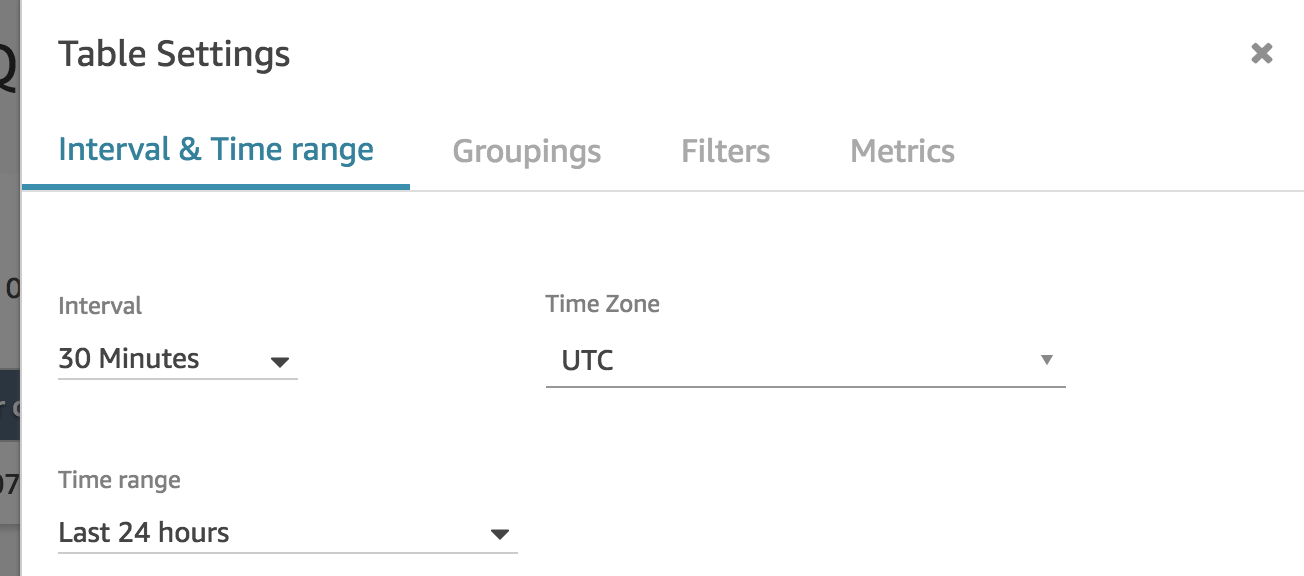
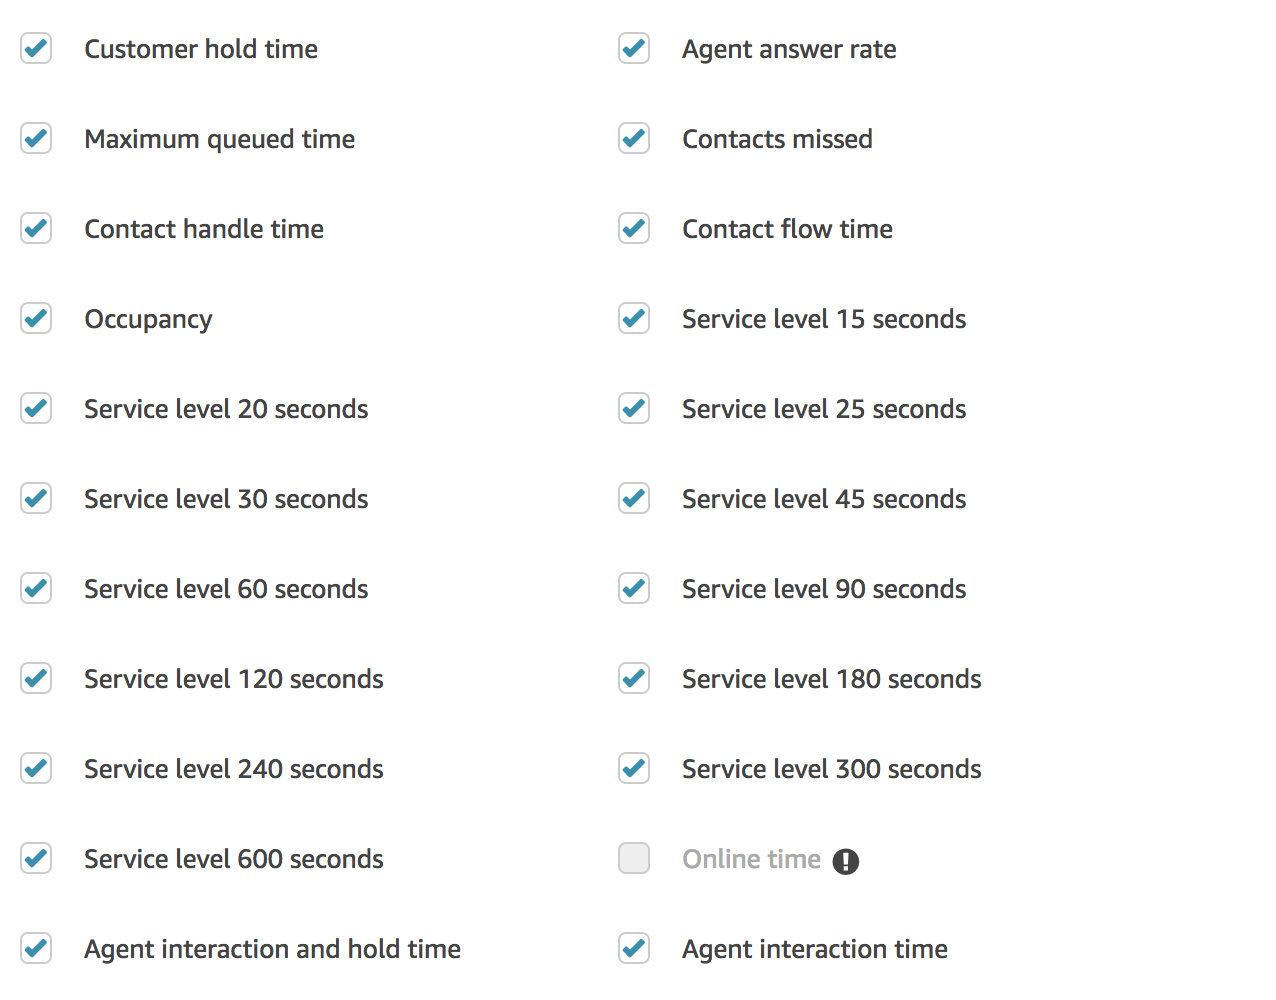
Set the report configuration by following the screenshots below:
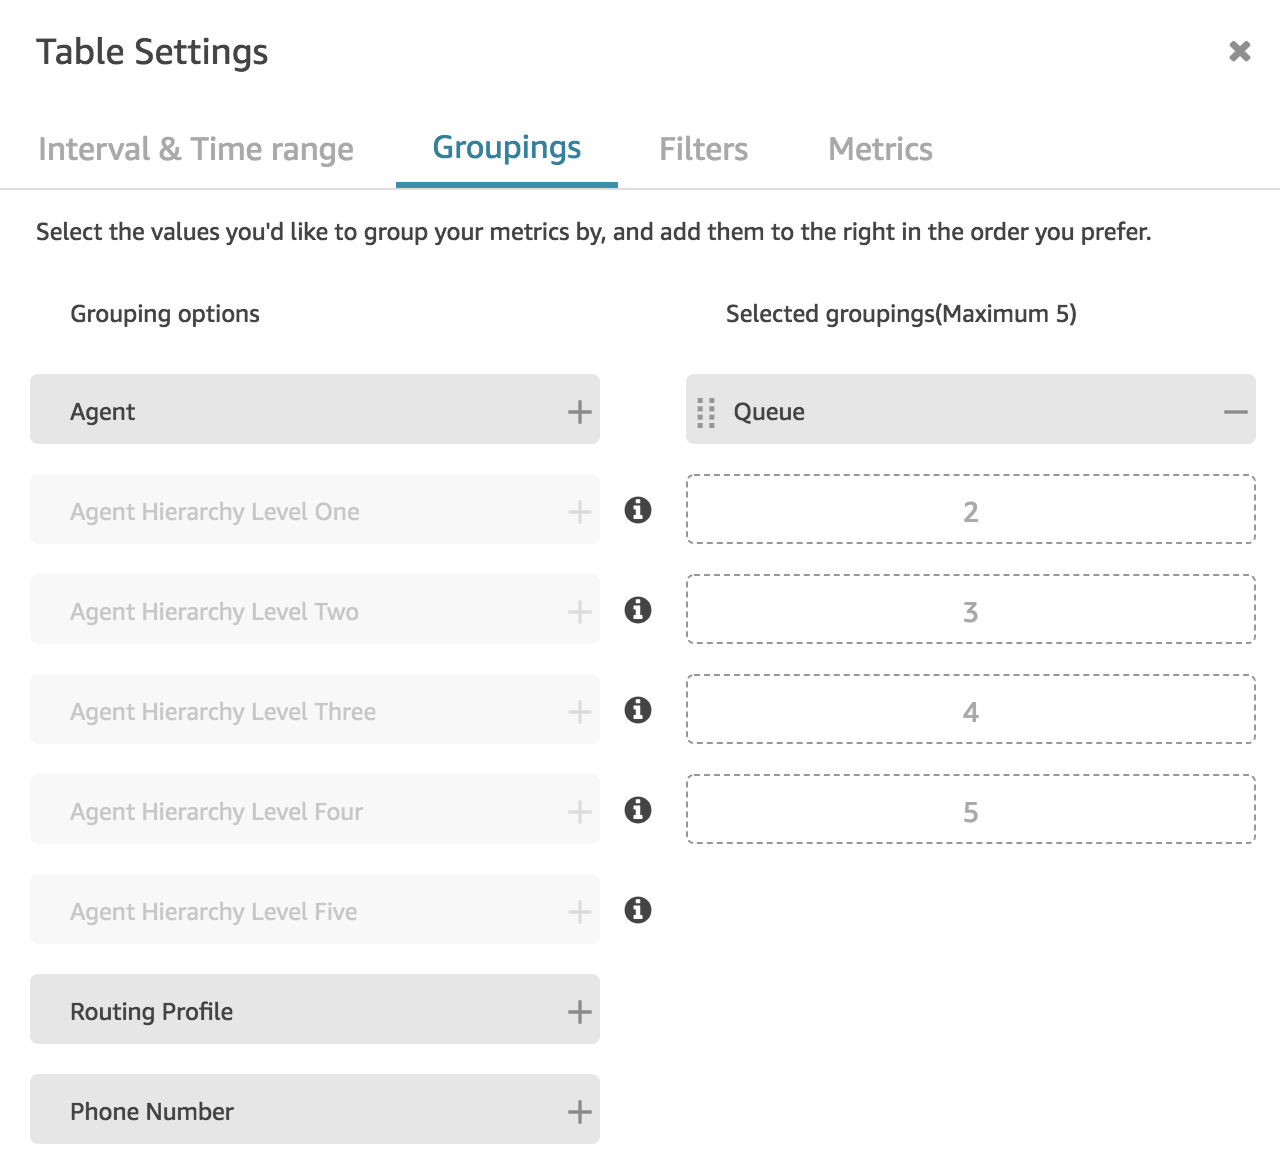
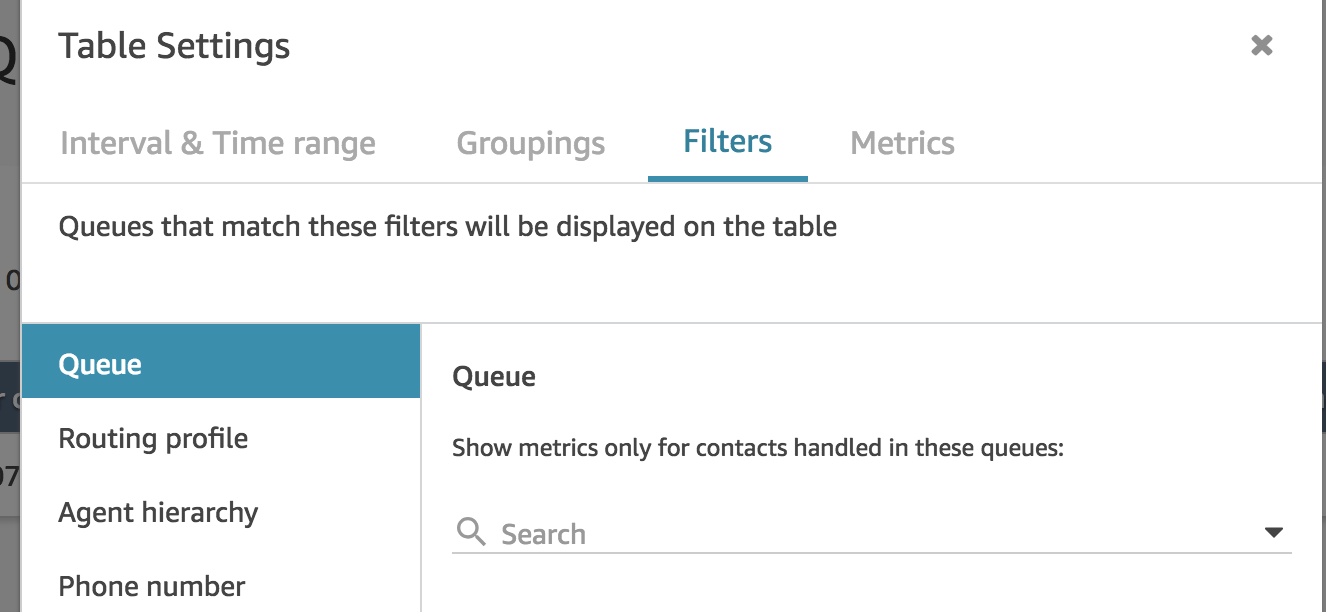
Optionally set the filters:
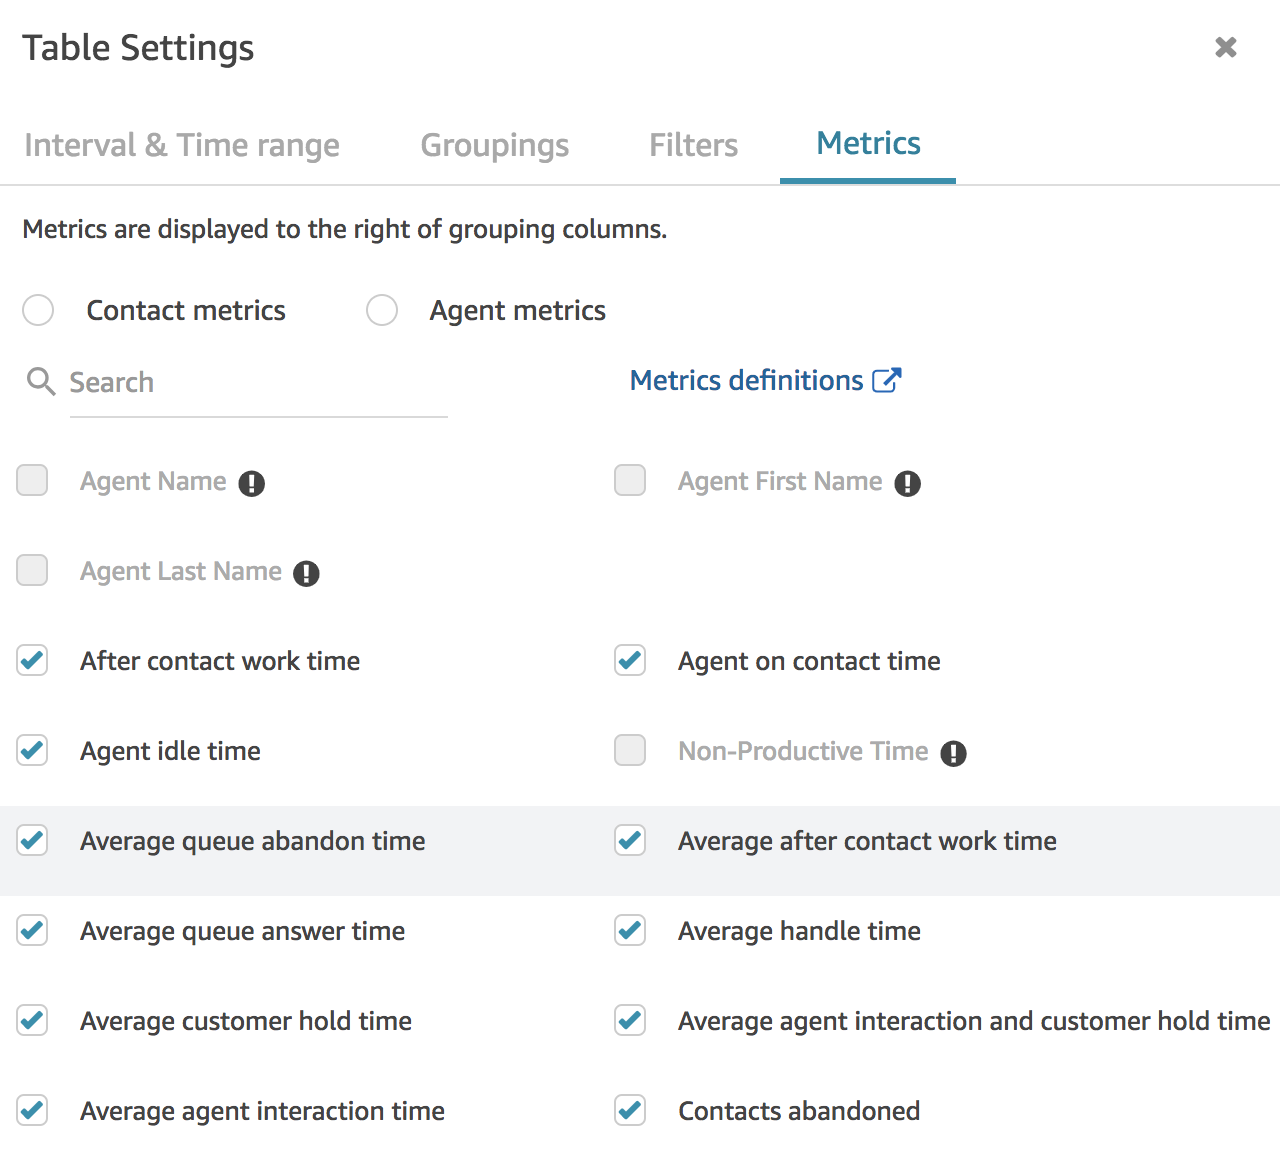
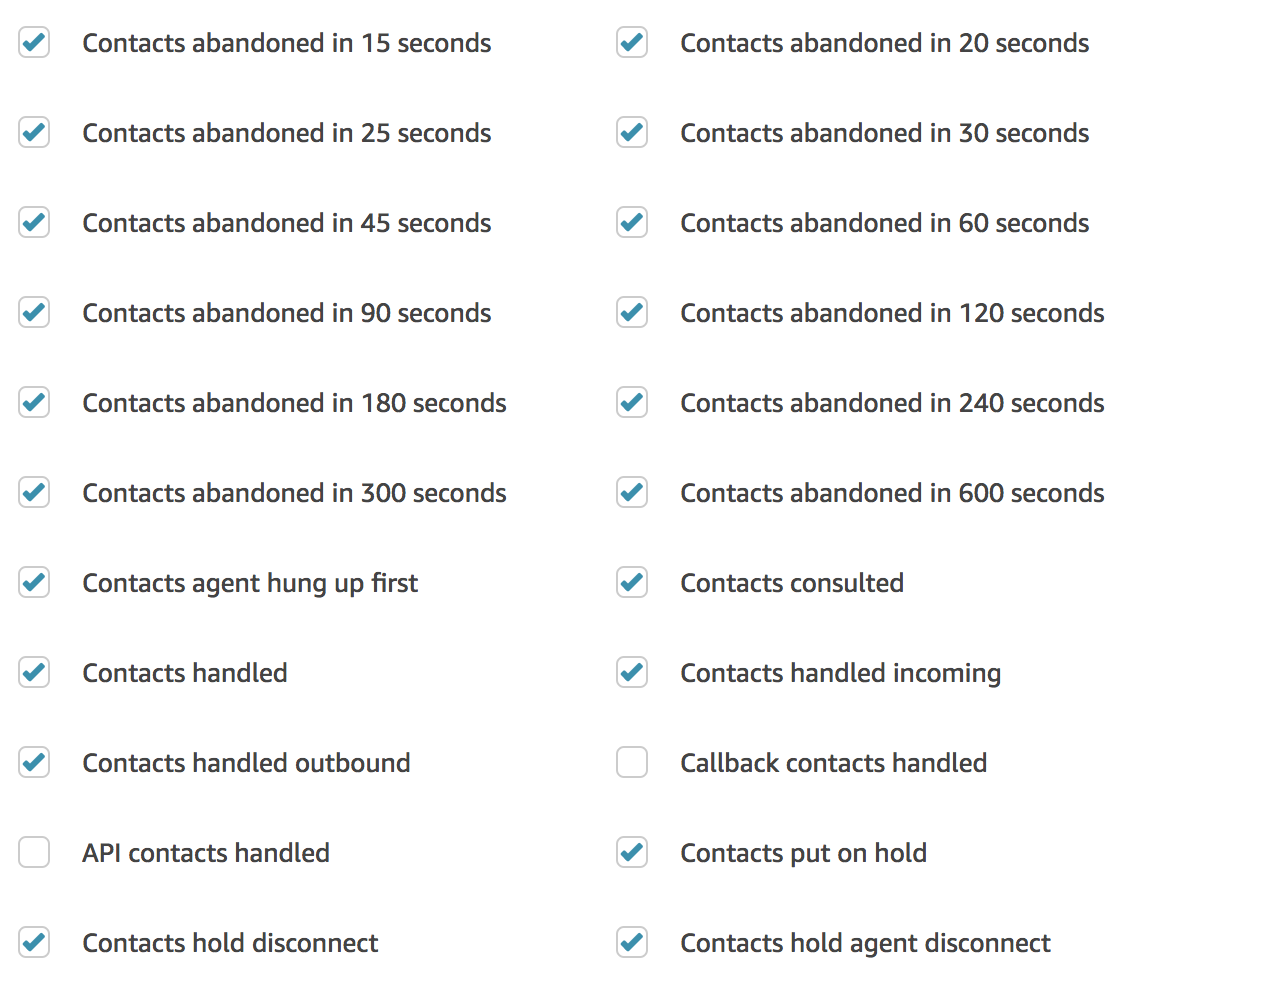
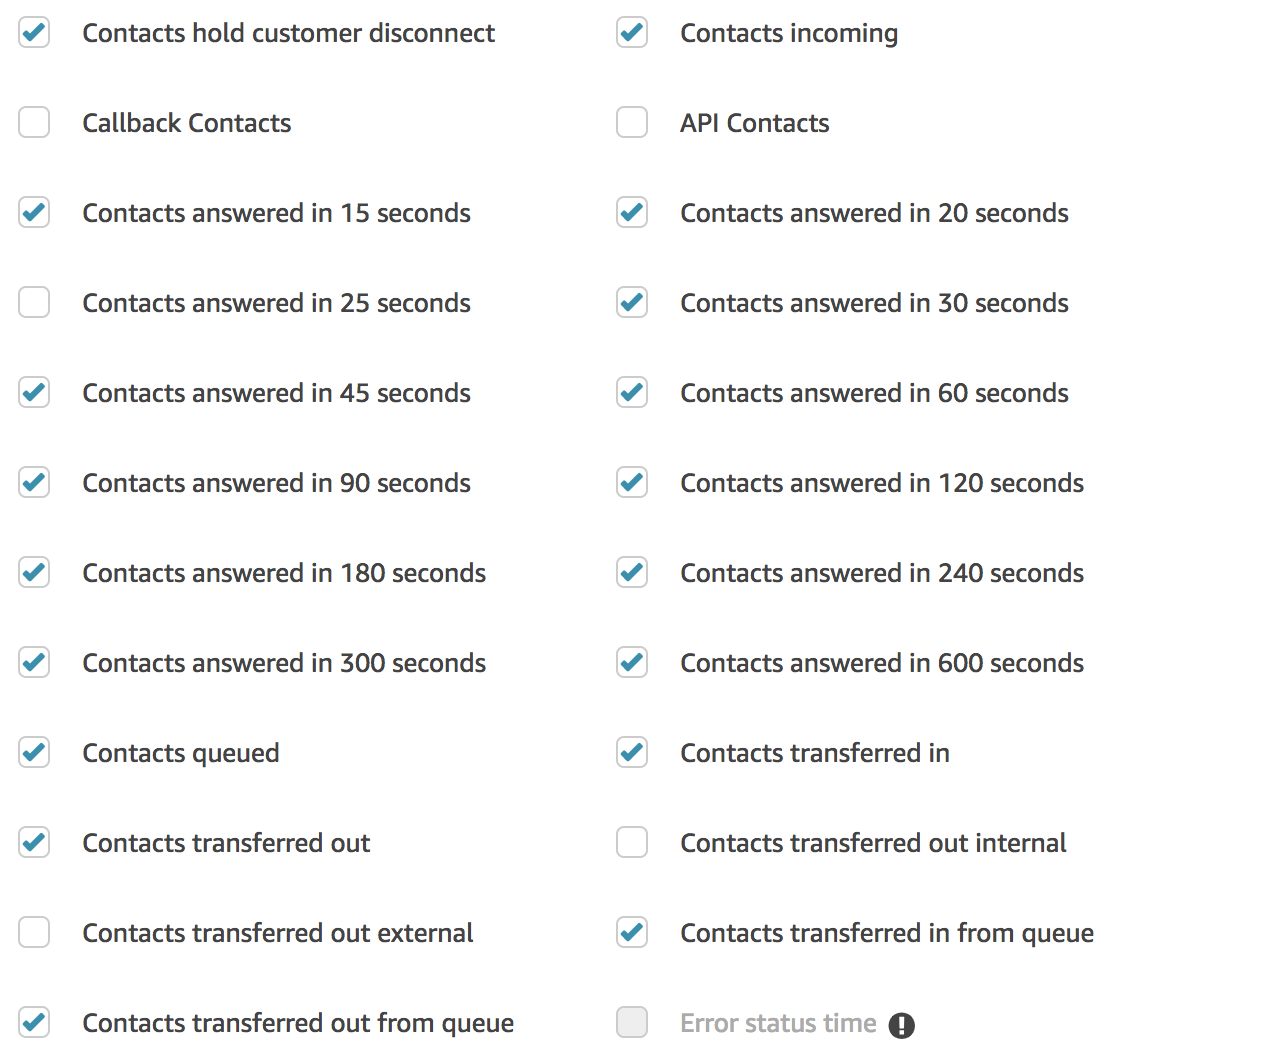
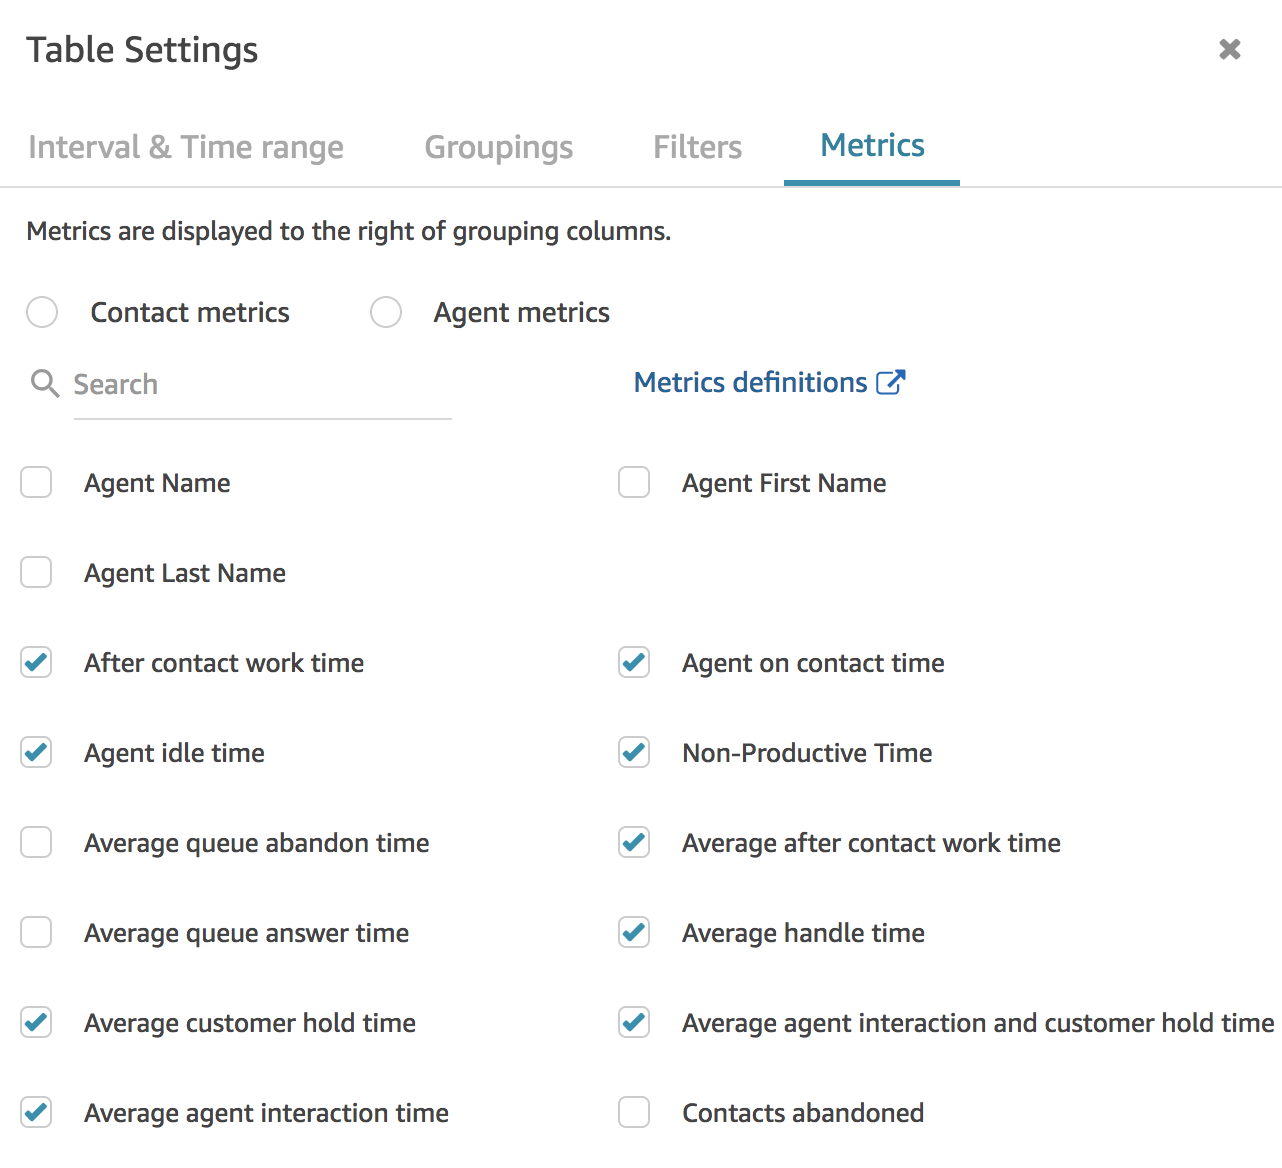
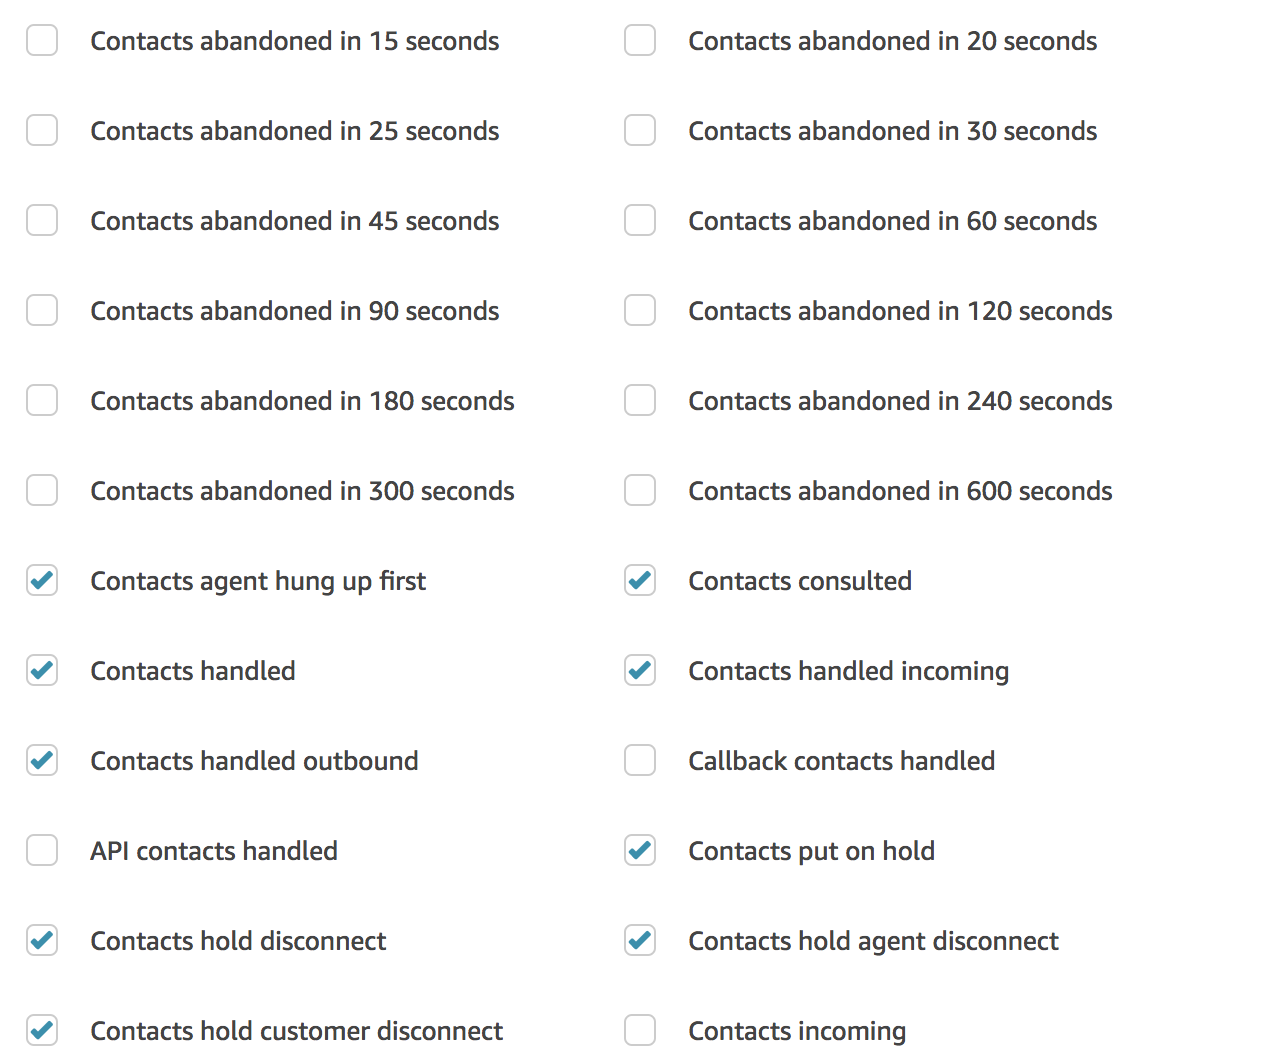
And most importantly, select the correct metrics in the last tab:
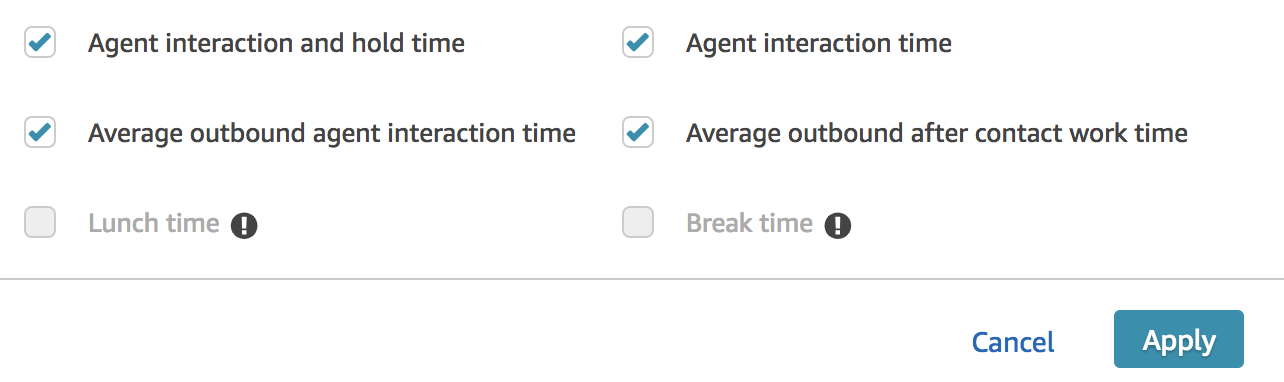
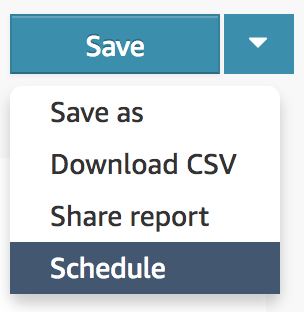
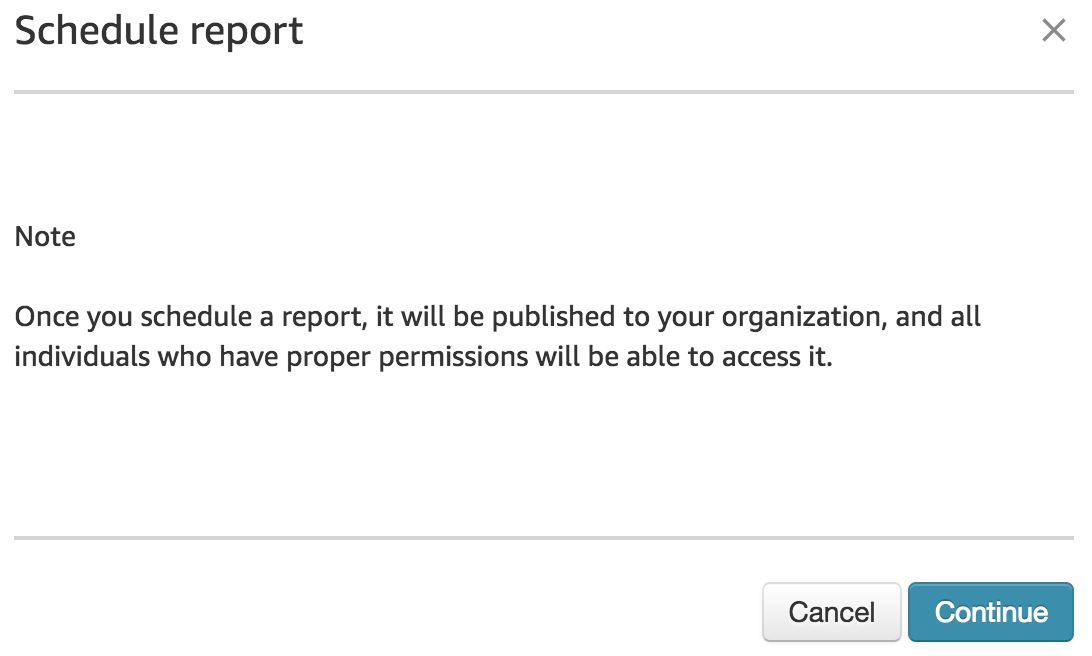
Once metrics are selected, click the Apply button. Next, click the drop-down arrow on the right-hand side and select Schedule.
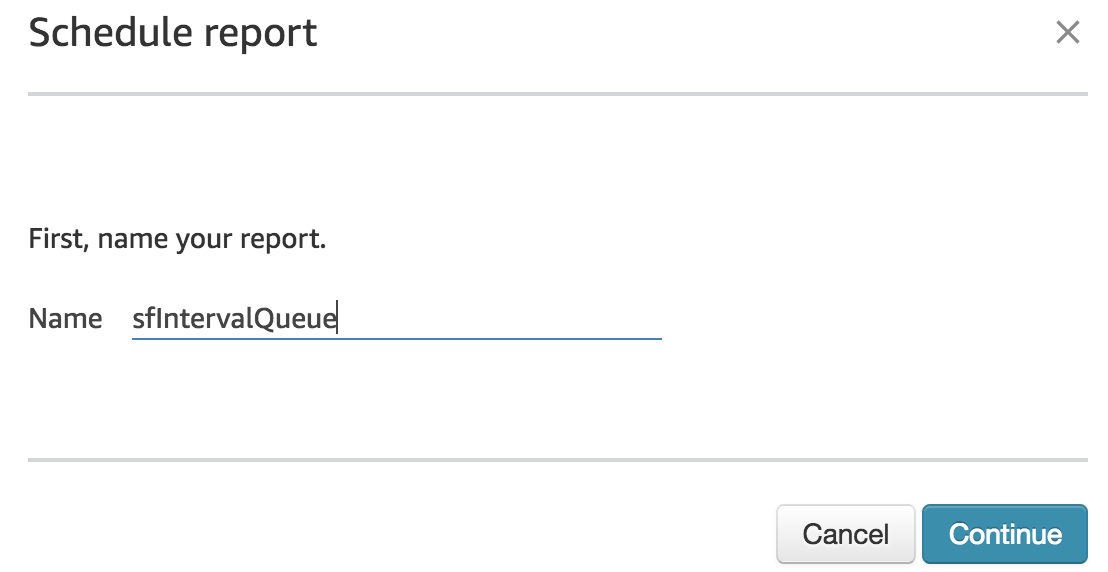
Set the report name, for instance sfIntervalQueue and click Continue
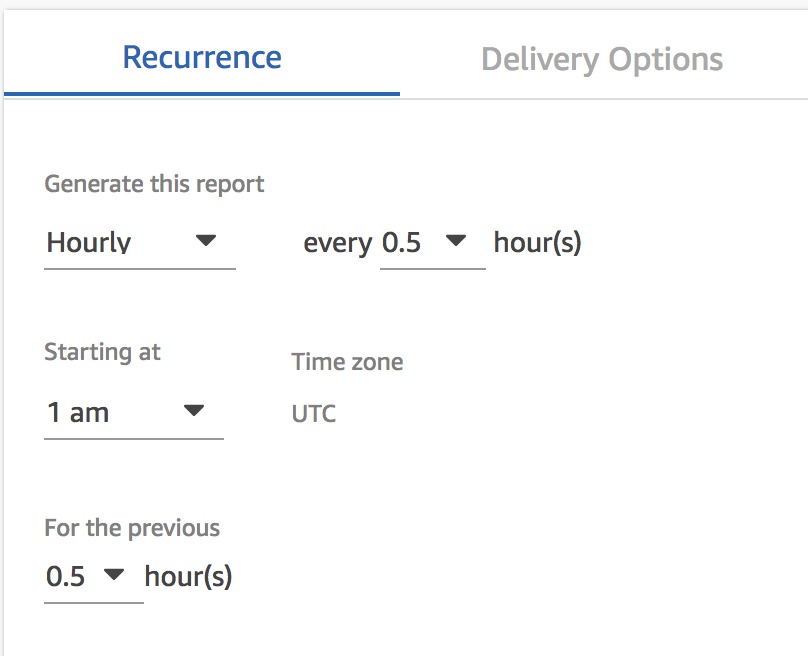
On the next screen, set Recurrence as:
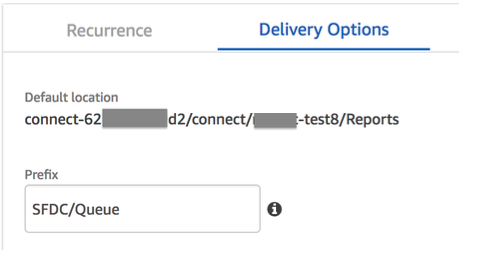
Switch to Delivery Options tab and set the Prefix as SFDC/Queue
\ Click the Create button to create the Schedule for the report. The report can be found in Metrics and quality > Saved Reports > Historical metrics
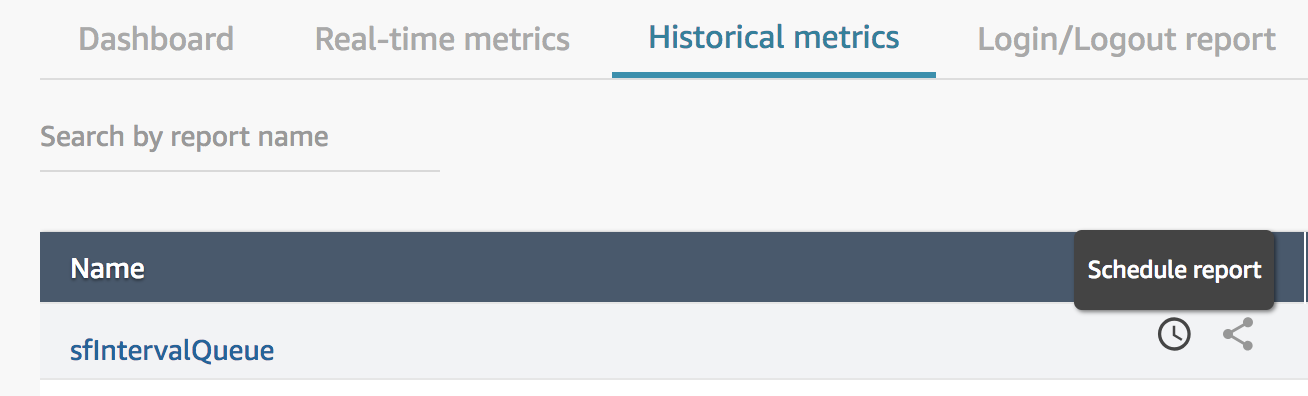
Click on the Clock (Schedule Report) icon to see the configuration. Please note the File name and the Path for the CSV file to be created.

The Queue Interval report has been created and scheduled to export the data. After a while, you will be able to see CSV files in the S3 bucket.

Repeat the steps for the Agent Interval report:
In your Amazon Connect instance, navigate to Metrics and Quality > Historical metrics.
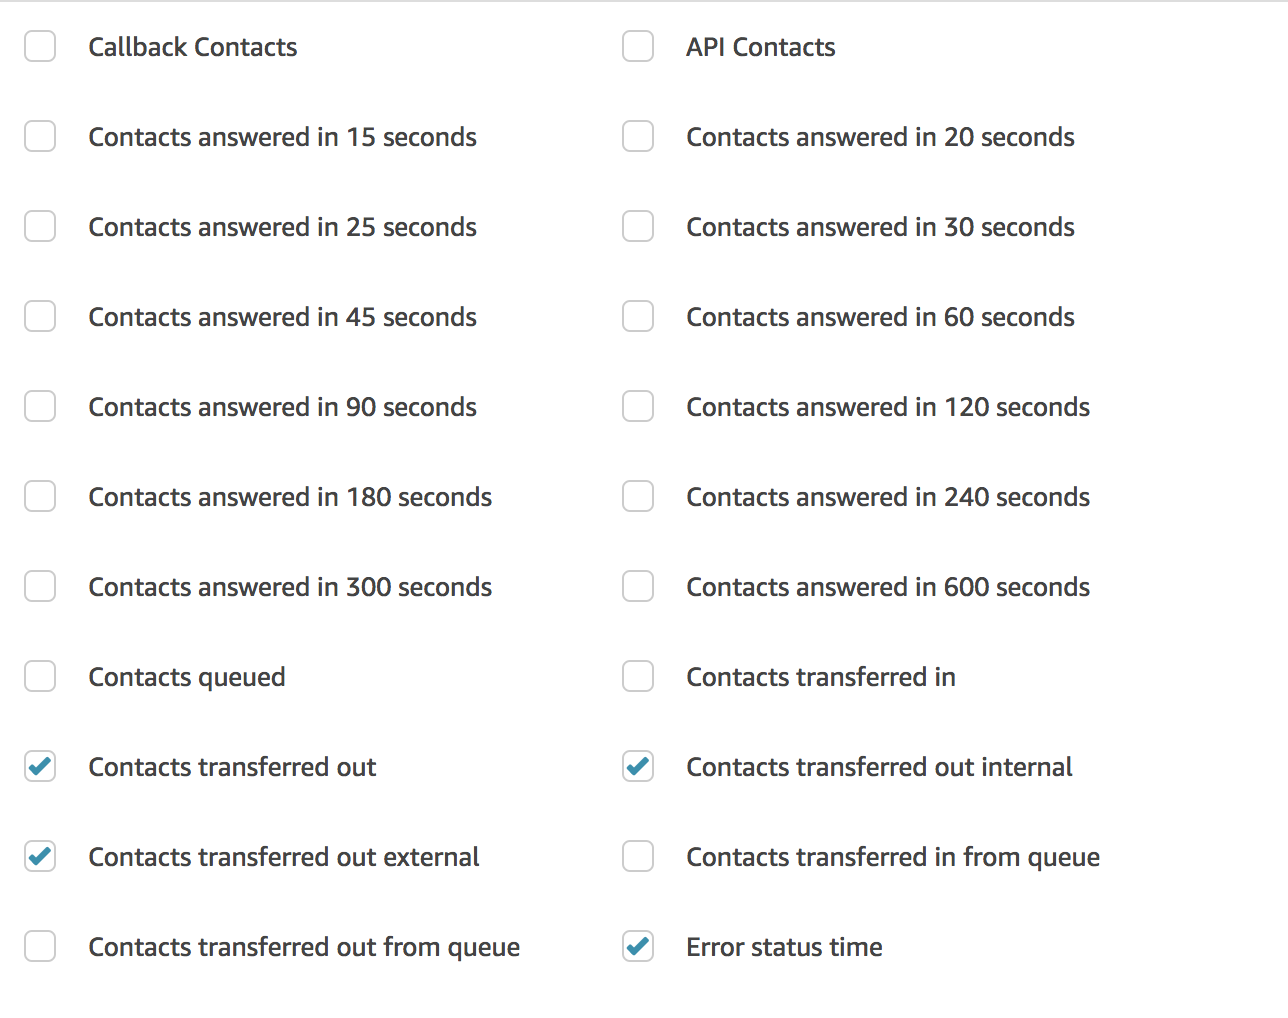
Choose the "Agent Performance" metrics to open the report and then click on the grey gear icon on the right-hand side to configure it.

Set the report configuration by following the screenshots below:

Optionally set the filters:
And most importantly, select the correct metrics in the last tab:

Once metrics are selected, click the Apply button. Next, click the drop-down arrow on the right-hand side and select Schedule.
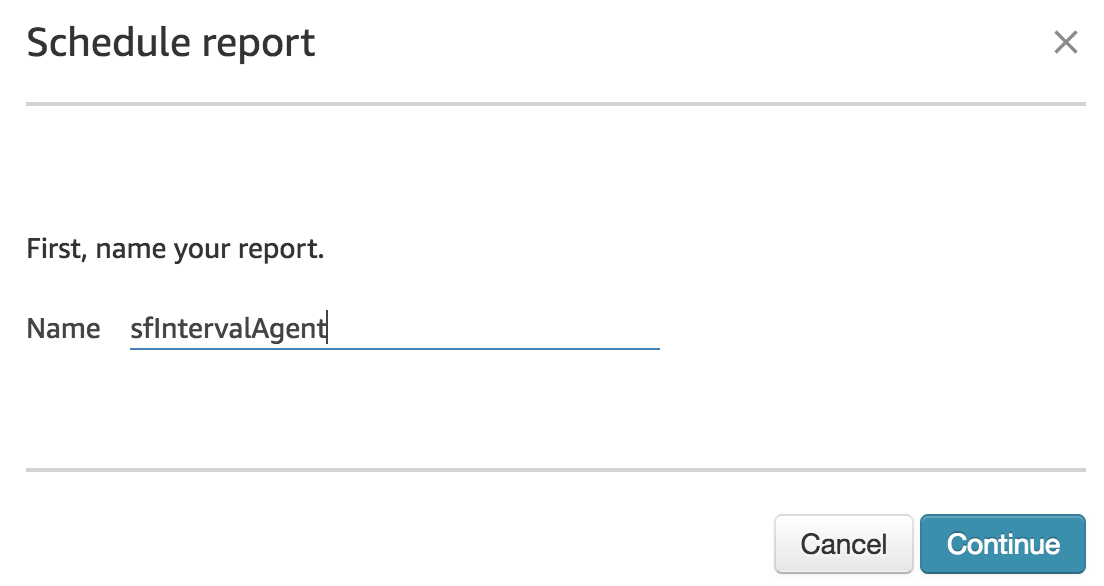
Set the report name, for instance sfIntervalAgent and click Continue
On the next screen, set Recurrence as:
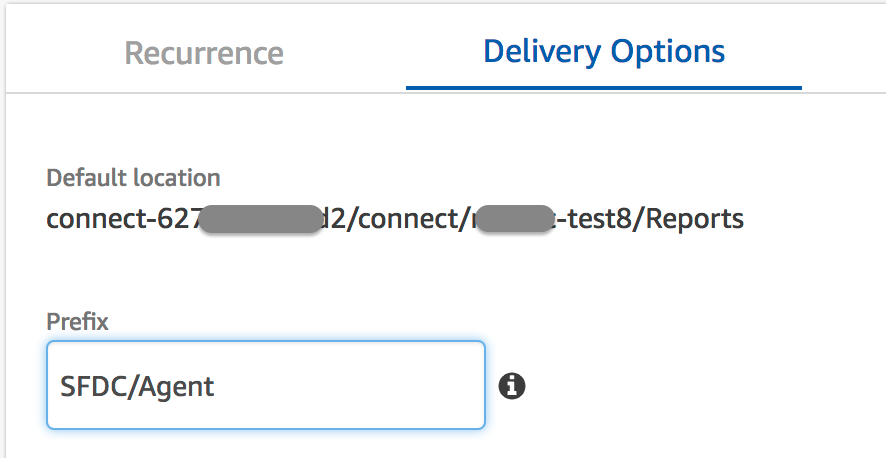
Switch to Delivery Options tab and set the Prefix as SFDC/Agent
Click the Create button to create the Schedule for the report. The report can be found in Metrics and quality > Saved Reports > Historical metrics
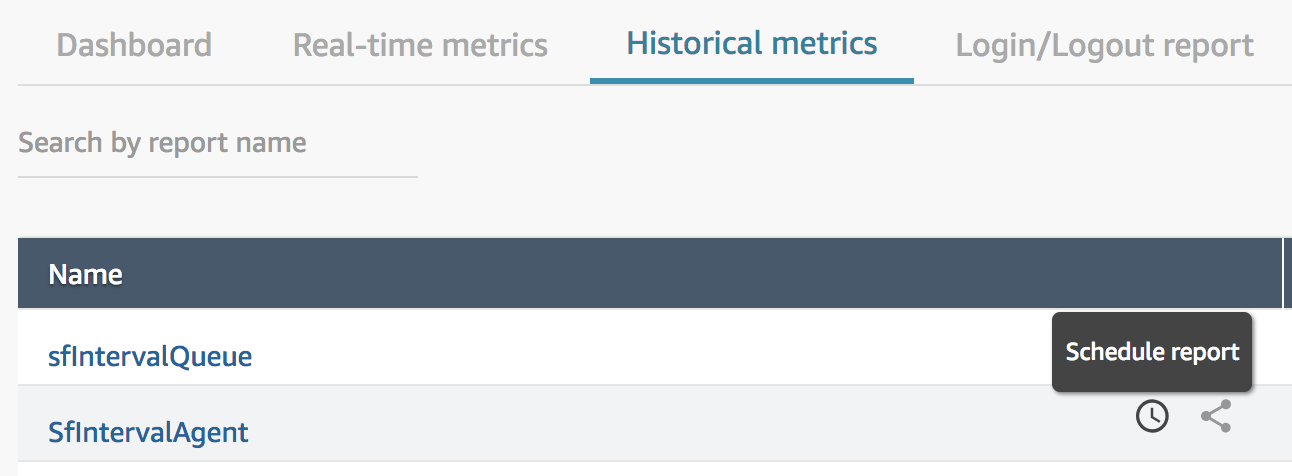
Click on the Clock (Schedule Report) icon to see the configuration. Please note the File name and the Path for the CSV file to be created.

The Agent Interval report has been created and scheduled to export the data. After a while, you will be able to see CSV files in the S3 bucket.

Amazon Connect Salesforce Lambda package (AWS Serverless Application Repository) deploys two Lambda functions to handle the reporting integration: sfIntervalQueue and sfIntervalAgent. In the next step, we are going to set Triggers for these functions.
From the AWS Console, select Lambda service and choose sfIntervalQueue Lambda function. On the left-hand side, select S3 as a trigger.

After the trigger is selected:

We need to set the trigger configuration. Select the Bucket where the CSV files are stored (from the Filename in previous steps). Set Event type to PUT and set Prefix to the Queue path (from the Filename in previous steps). Click the Add button and Save the function.
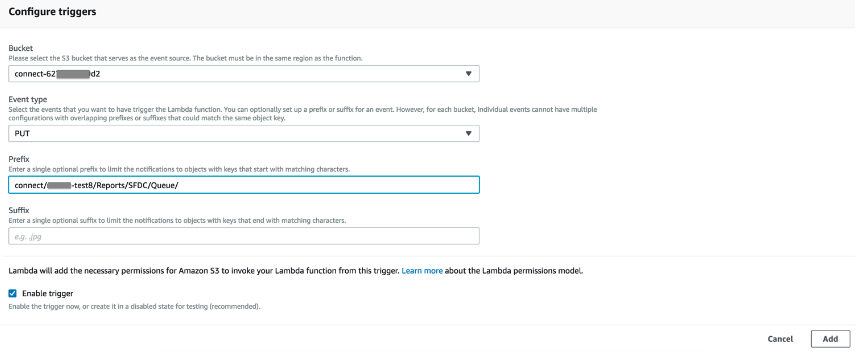
The final configuration should look like this:
This Lambda function transfers the Queue reporting data to your SFDC instance. Next, we have to repeat steps for Agent reporting Lambda function.
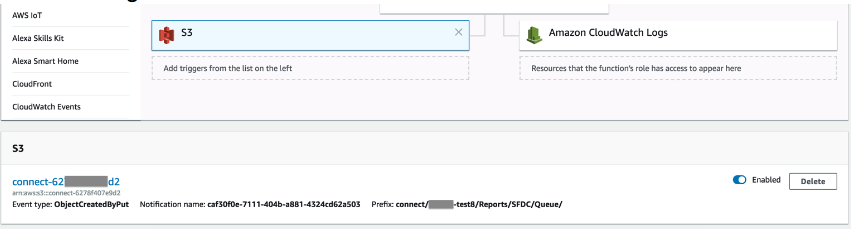
From the AWS Console, select Lambda service and choose sfIntervalAgent Lambda function. On the left-hand side, select S3 as a trigger.
After the trigger is selected:
We need to set the trigger configuration. Select the Bucket where the CSV files are stored (from the Filename in previous steps). Set Event type to PUT and set Prefix to the Agent path (from the Filename in previous steps). Click the Add button and Save the function.

The final configuration should look like this:
This Lambda function transfers the Agent reporting data to your SFDC instance.
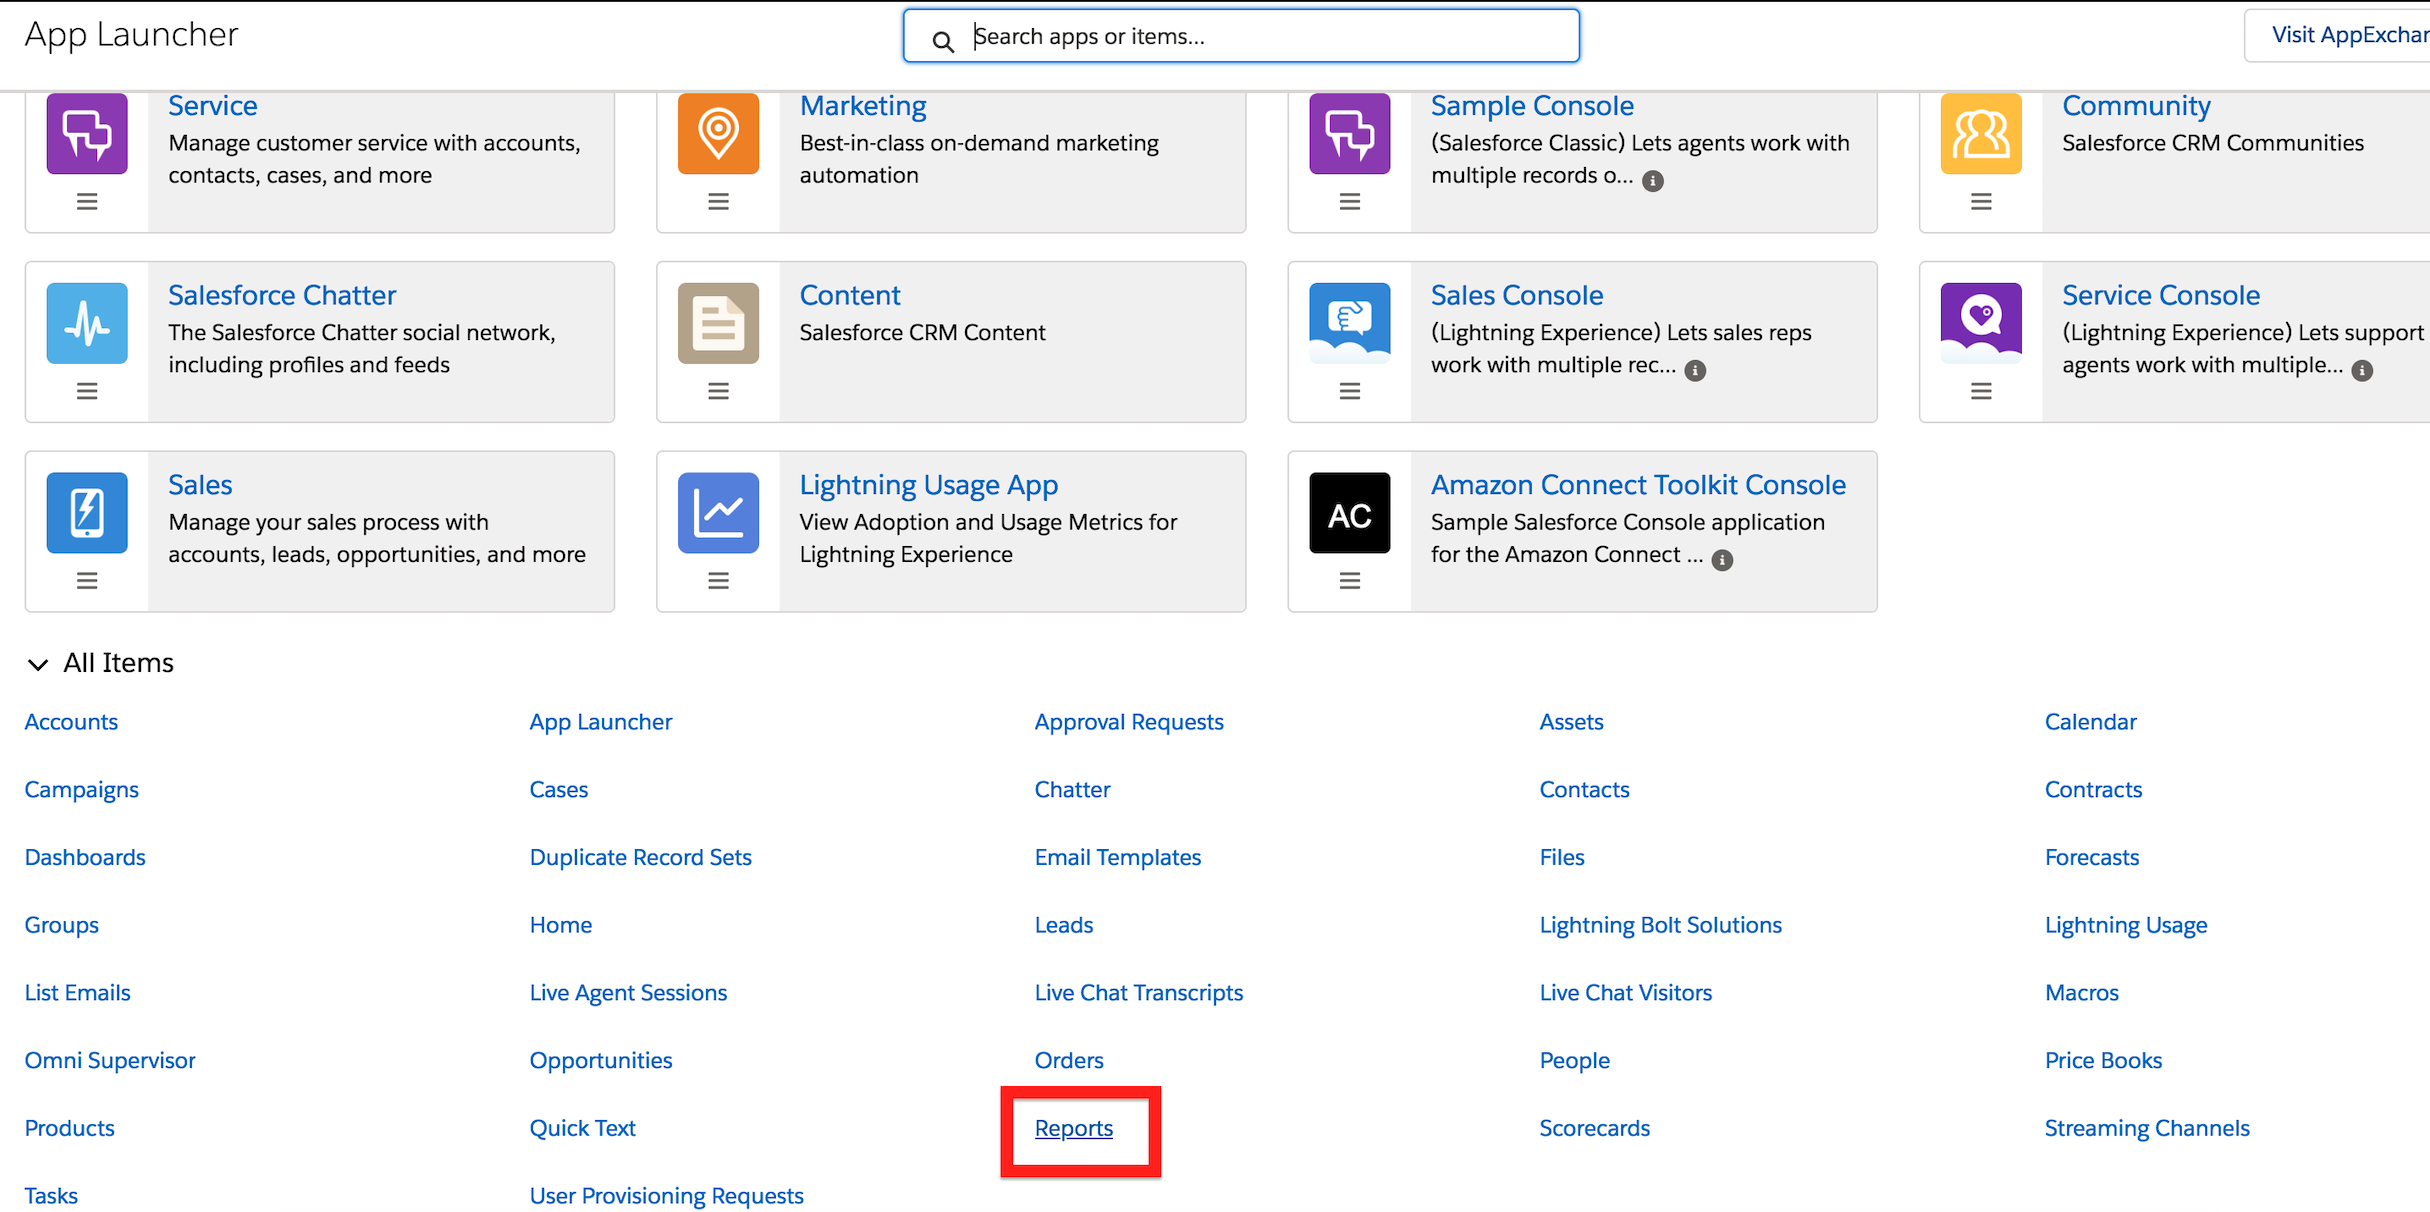
The Amazon Connect CTI Adapter comes with a predefined set of reports, which can be customized or additional reports can be created by leveraging the imported data. To see the list of built-in reports, login into your SFDC instance and open the App Launcher, then choose Reports.
All Amazon Connect built-in reports are deployed in Amazon Connect Reports folder:
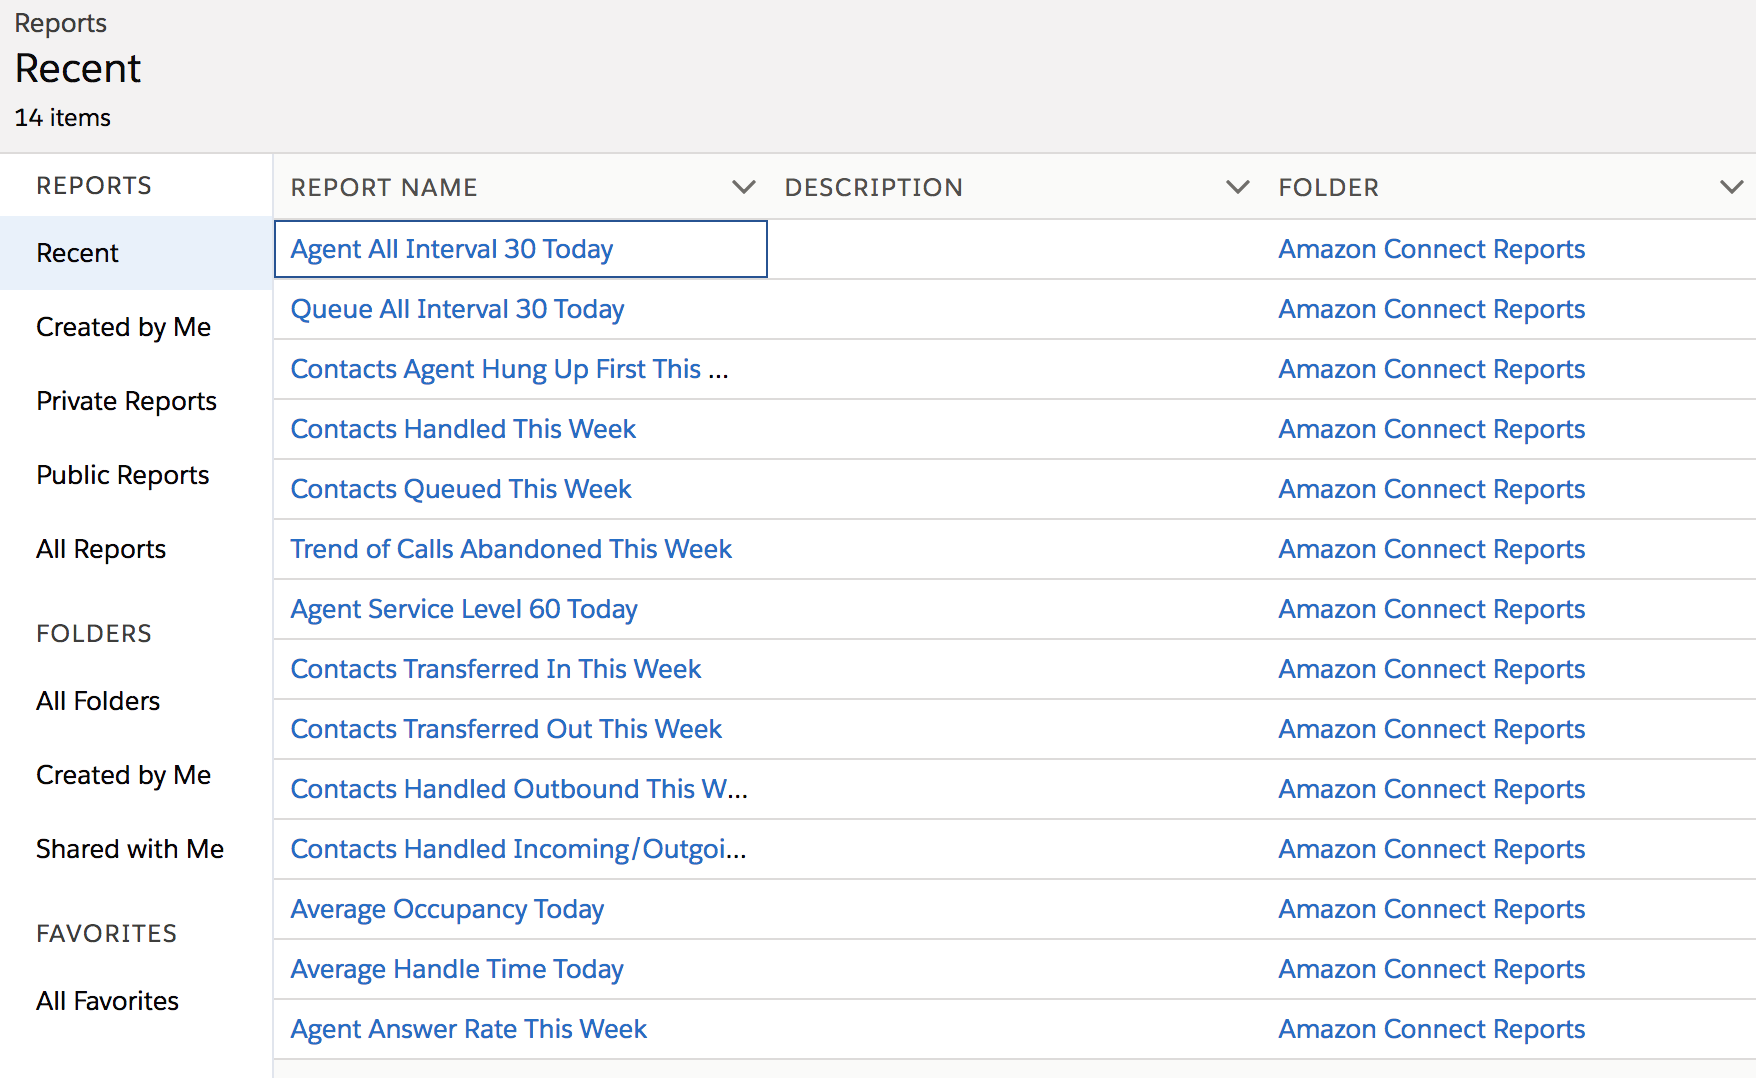
To see the exact layout of imported data for Queue, select the Queue All Interval 30 Today report:

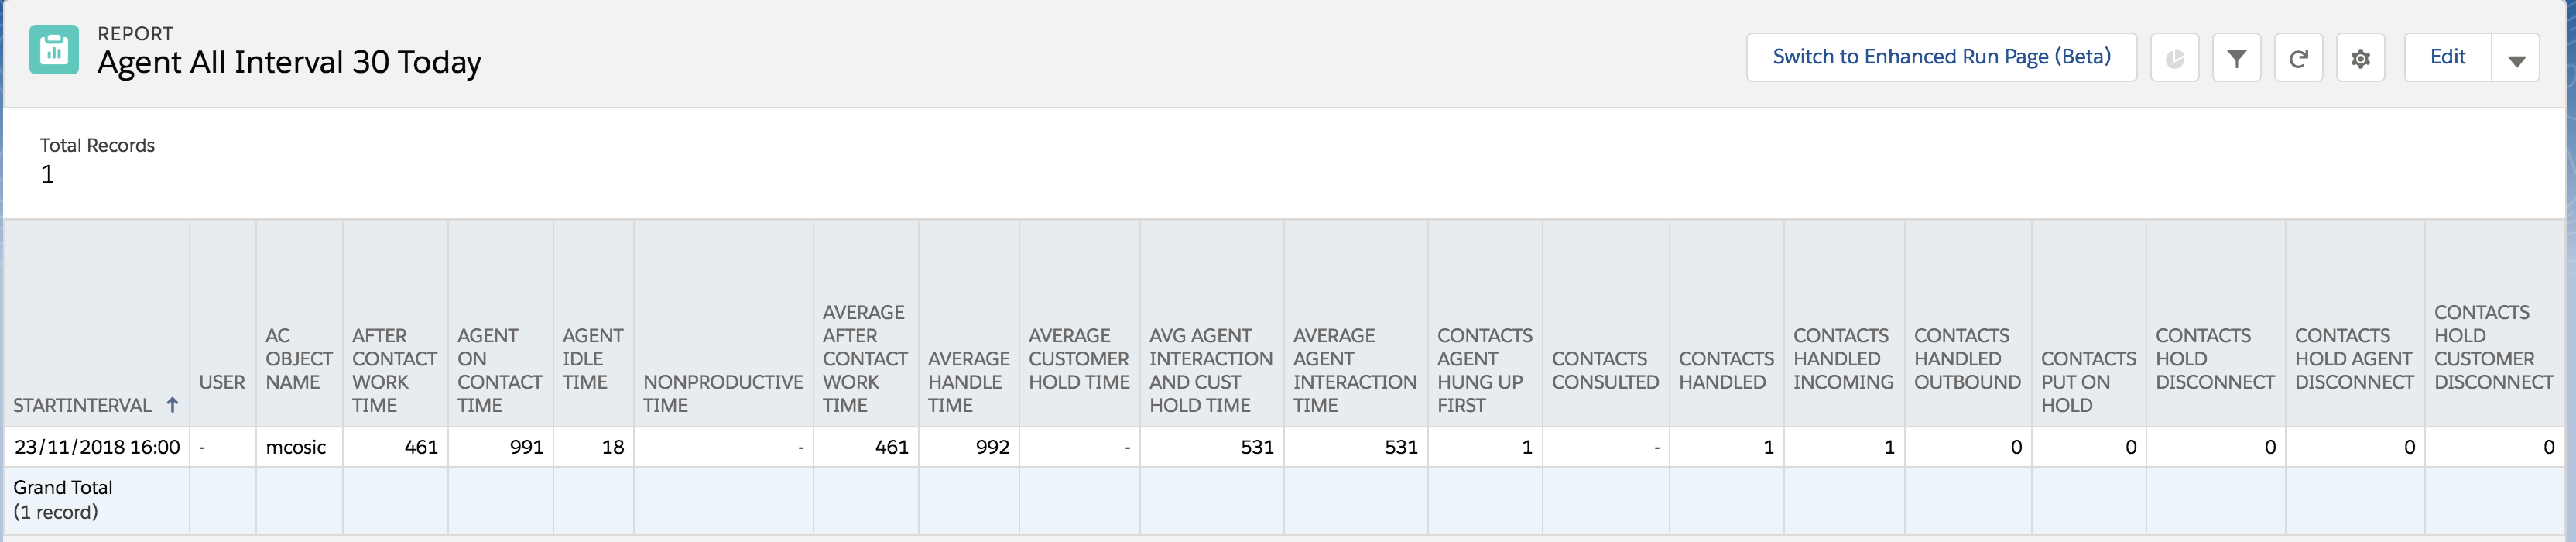
To see the exact layout of imported data for Agent, select the Agent All Interval 30 Today report: