Appendix E: Integration with Salesforce High Velocity Sales
What is High Velocity Sales?
Salesforce HVS (HVS) is a process for your inside sales team to follow a repeatable pre-defined sales cadence for your business. It enables sales managers and representatives to work on a prioritized list of prospects and follow best sequence of sales outreach activities as defined by your sales process.
Enabling the Integration with High Velocity Sales
In order to make HVS works for your connect users, you must enable High Velocity Sales in your Salesforce Org.
Enable High Velocity Sales
From Setup, enter High Velocity Sales in the Quick Find box, then select High Velocity Sales.
Toggle "Enable High Velocity Sales Features" from disable to enable state

Call Outcomes for Branching
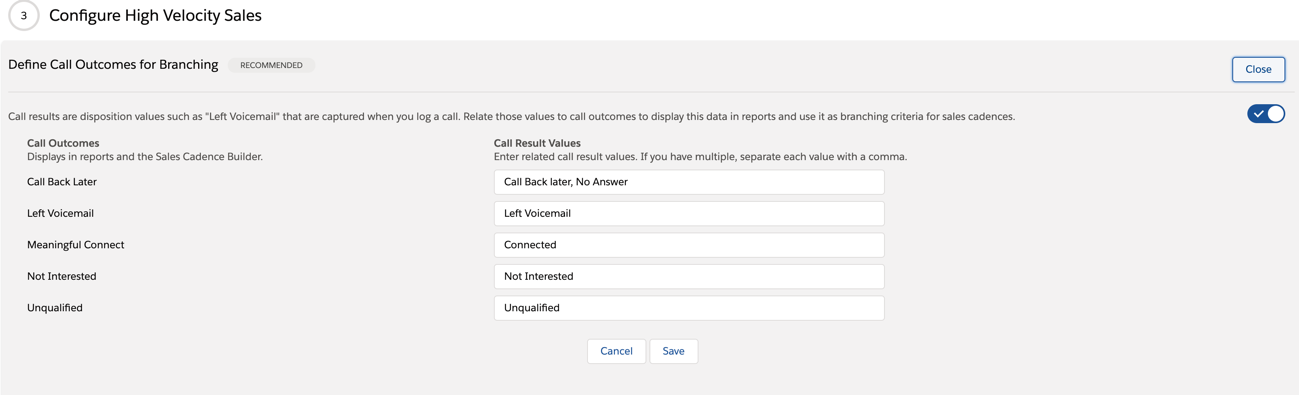
In this step, you can define call disposition values which can be used to branch sales cadence to define next best action for your sales process.
Define Call Outcomes for Branching
From Setup, enter High Velocity Sales in the Quick Find box, then select High Velocity Sales.
Edit the Define Call Outcomes for Branching.
Enter the call result values used by your org next to related call outcomes.
Assign HVS permission sets to Connect Users
For creating Sales Cadence, you need to have High Velocity Sales Cadence Creator permission set otherwise assign the High Velocity Sales User permission set to sales users.
Assign the permission set
From Setup, enter permission Sets in Quick Find box, and then select Permission Sets.
Select permission set, then click Manage Assignments to assign the permission set to users.
Create Sales Cadence
In HVS application, you will need to create a Sales Cadence based on Sales process
Create a Sales Cadence
Choose Sales Cadence from navigation menu.
Click the down arrow button then click New
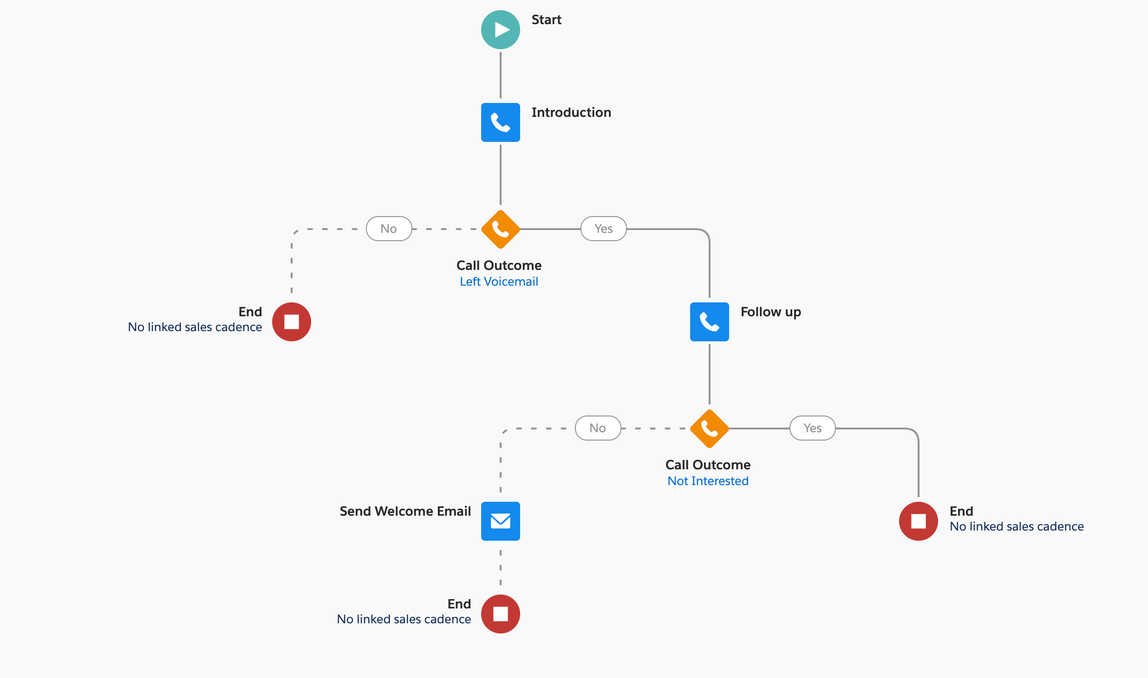
Enter name and description. Click Save button which opens Sales Cadence builder screen.

- Click + sign in the builder to add a step. Choose a type of step you want to add for your sales cadence. Once you finish adding steps, click the Activate button. Once a sales cadence is active, you can add leads, contact, and personal accounts to Sales Cadence.
Assigning Prospects
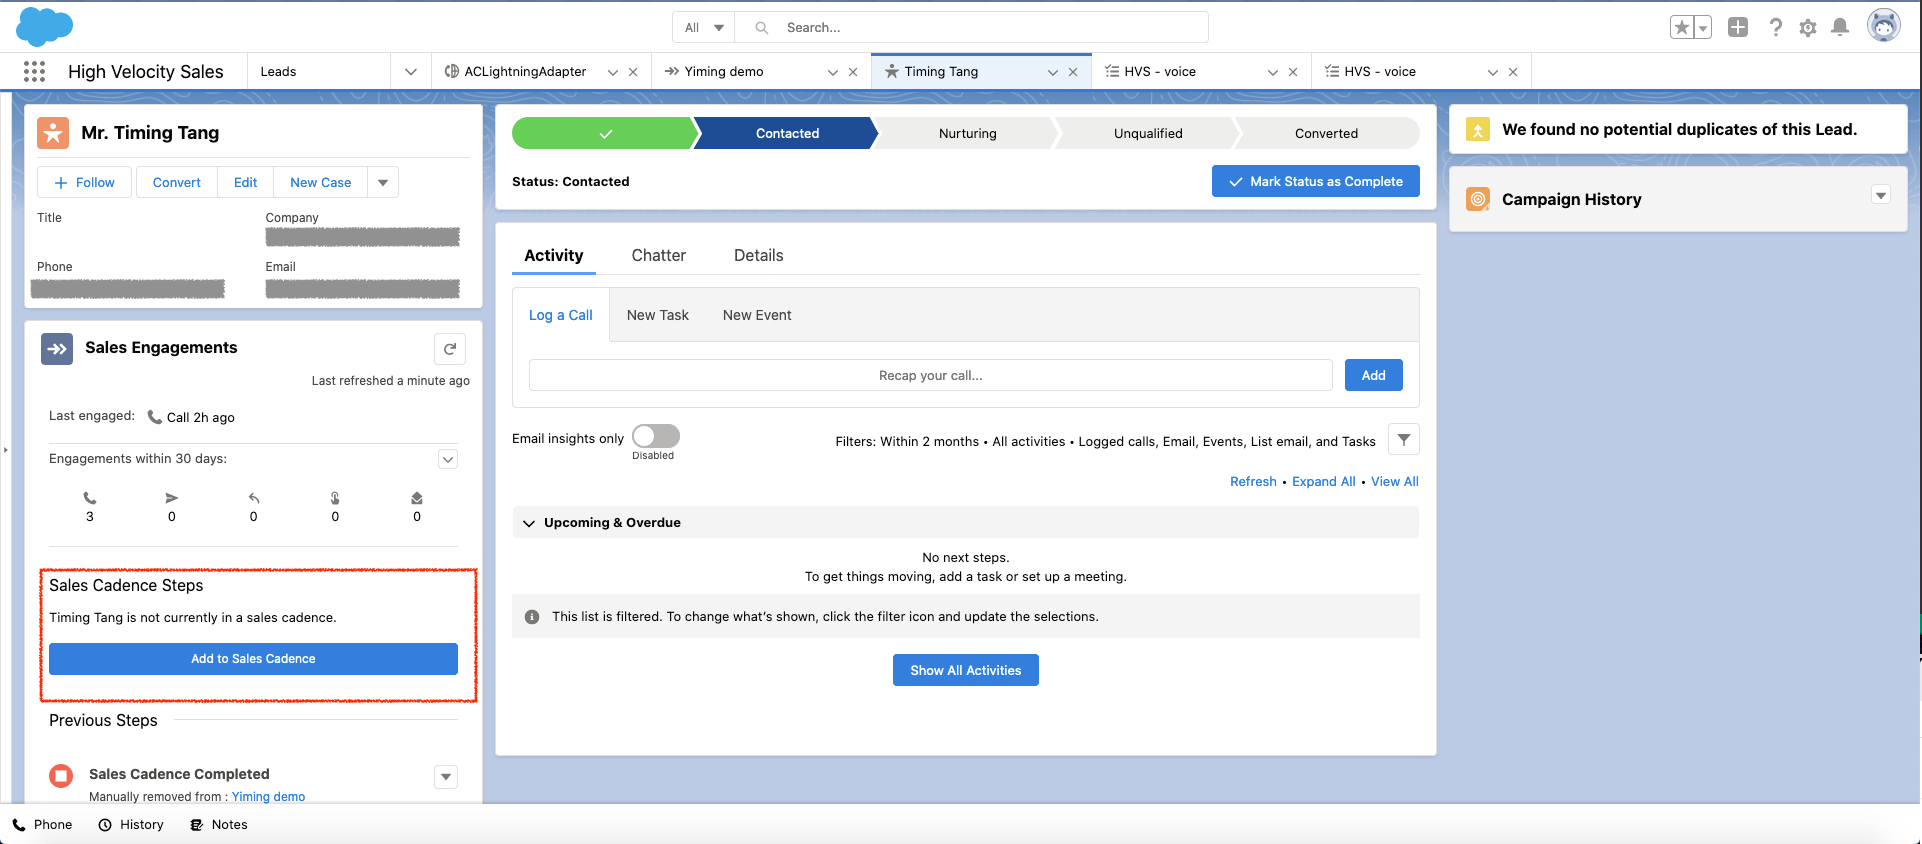
You can assign a prospect to a Sales Cadence either on a prospect detail page or through an automated flow. In this example, using prospect detail page to assign a sales cadence.
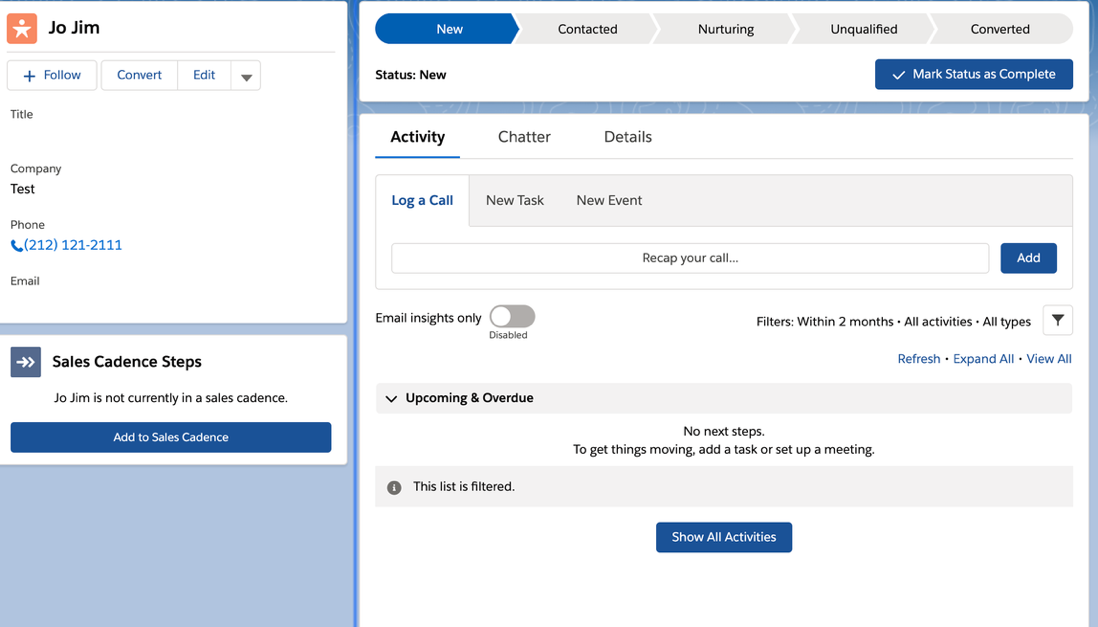
Click Add to Sales Cadence button to add this prospect to a Sales Cadence.
Create and Map Dispositions
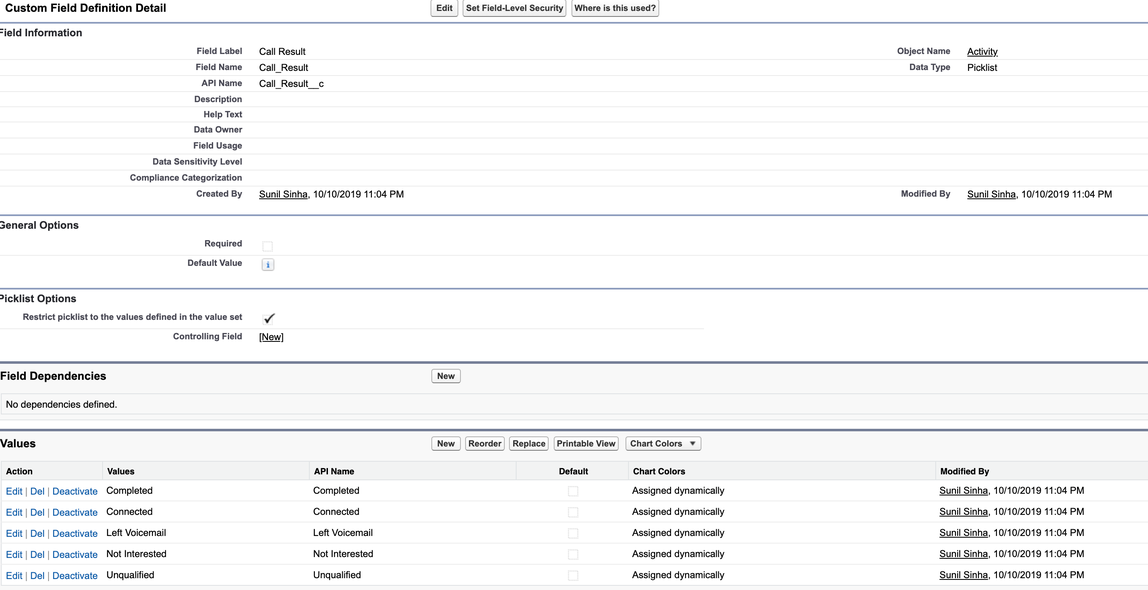
In this step you need to add a disposition field on Activity object and map disposition options to what is defined in HVS call outcomes. In this example, I am going to create a picklist field and add it to default task page layout to track disposition value for each call.
Create and map disposition fields
Go to the Setup screen then click Object Manager
Click Activity Object
In Fields and Relationships section select New
Select a picklist field and choose Next
Enter require information and add HVS call outcomes as picklist options.
Select all default options and add this filed on Task page layout. (If there is already a field called Call Result on Task Page layout then remove it from the page layout.)
Choose Save
Setup CTI Flows for High Volume Sales
Next you will need to create a new set of CTI Flows for High Volume Sales.
Configuring the CTI Flow
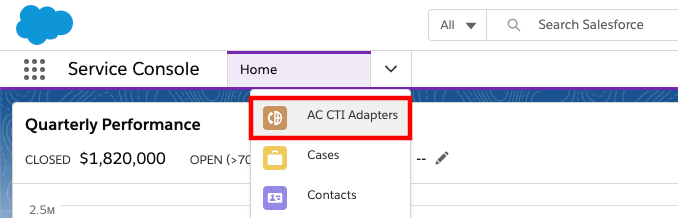
Log in into your Salesforce org and go to the Service Console
Expand the navigation menu by selecting the down arrow and choose AC CTI Adapters.
Select ACLightningAdapter
Scroll down to the Scripts section
Select New to create a new CTI Flow

In the CTI Flow Name field, enter Voice onHvsWorkStart
Make sure the checkbox for Active is selected
For the Source, select Salesforce UI
For the Event, select onHvsWorkStart
Provide a Description
Click Save.
Scroll down and click on the link Voice onHvsWorkStart.
- Download this file
Click Upload and find the file you just downloaded. You should now see this:**
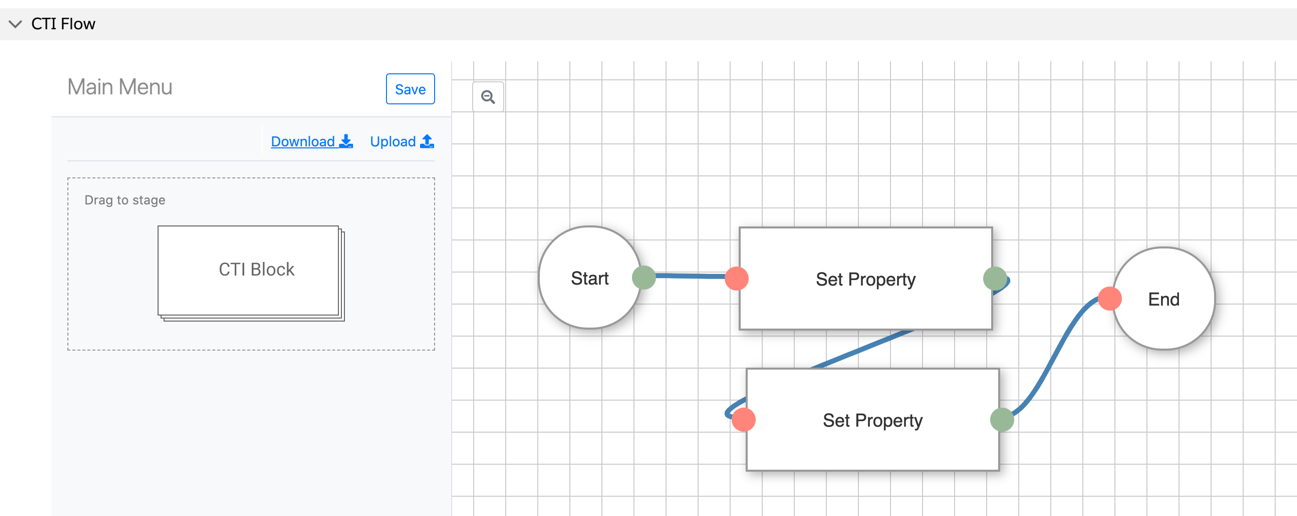
Click Save. This creates a CTI Flow that is invoked when you start a HVS work and capture the workId for the third CTI Flow below.
Go back to the CTI Adapter page and select New in CTI Flows section to create another CTI Flow.
In the CTI Flow Name field, enter HVS Voice onConnecting
Make sure the checkbox for Active is selected
For the Source, select Amazon Connect Voice Contact
For the Event, select onConnecting
Provide a Description and Save
Scroll down and click on the link HVS Voice onConnecting.
- Download this file
Click Upload and find the file you just downloaded. You should now see this:
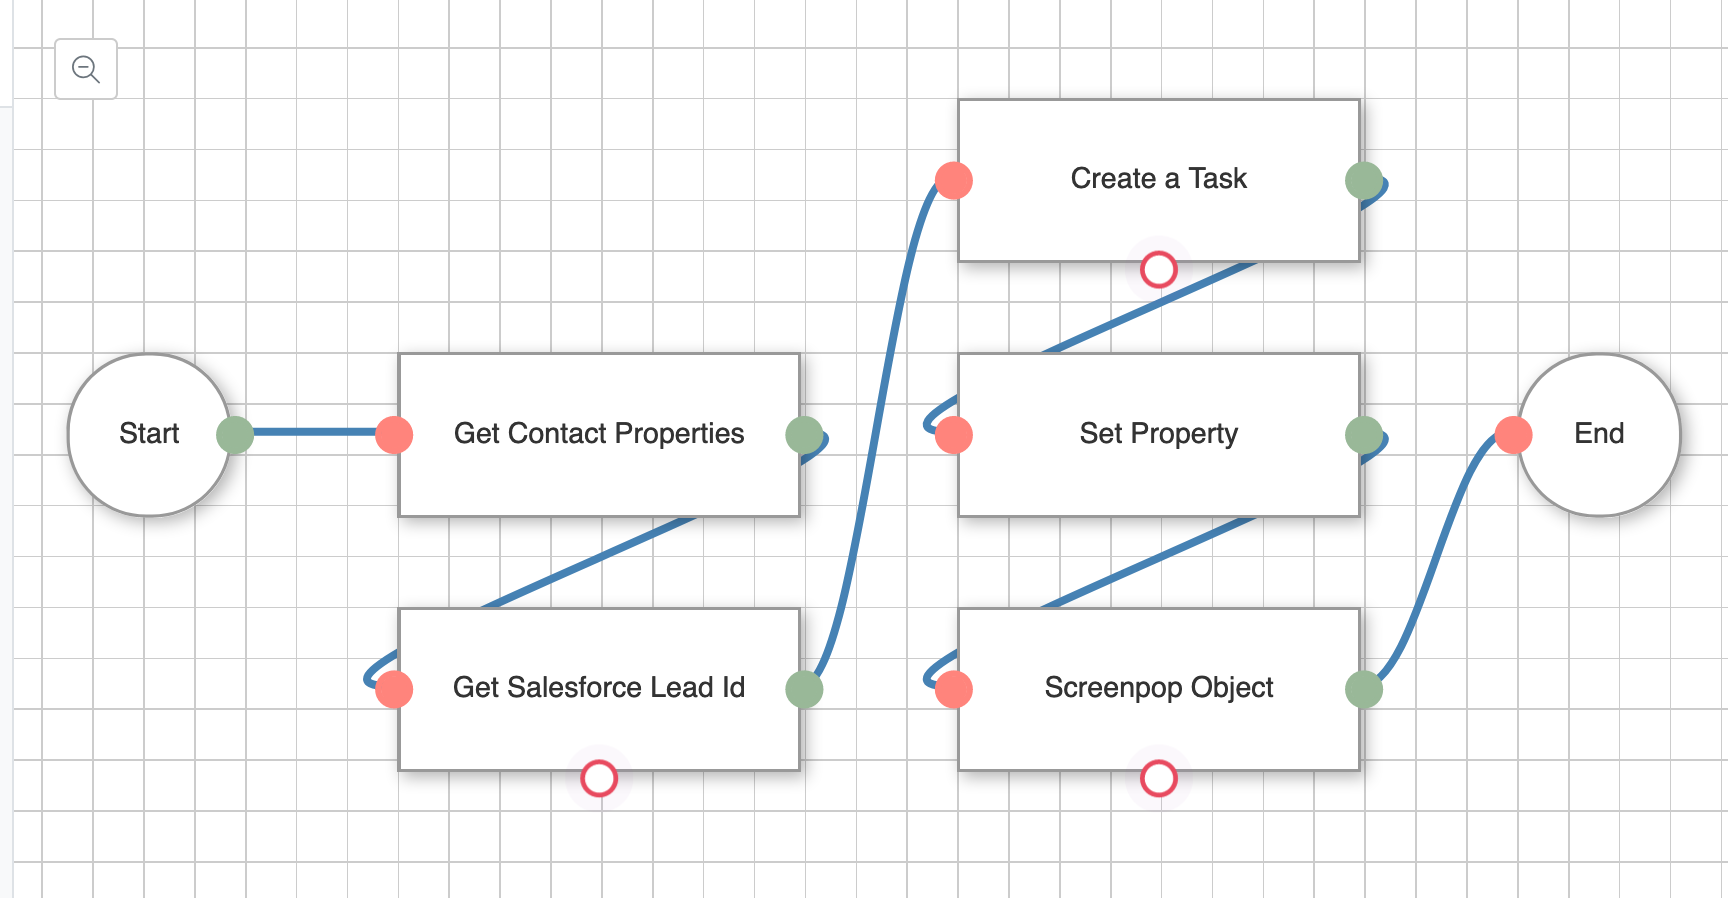
Click Save. This creates a CTI Flow creates task for the voice contact and save the taskId for the third CTI Flow below. If you already have a CTI Flow that creates task for voice contact, you do not need to add this one but just need to add a
Set PropertyCTI Block to save the taskIdGo back to the CTI Adapter page and select New in CTI Flows section to create another CTI Flow.
In the CTI Flow Name field, enter HVS Voice onRoutable.
Make sure the checkbox for Active is selected
For the Source, select Amazon Connect Agent
For the Event, select onRoutable
Provide a Description and Save
Scroll down and click on the link HVS Voice onRoutable
- Download this file
Click Upload and find the file you just downloaded. You should now see this:
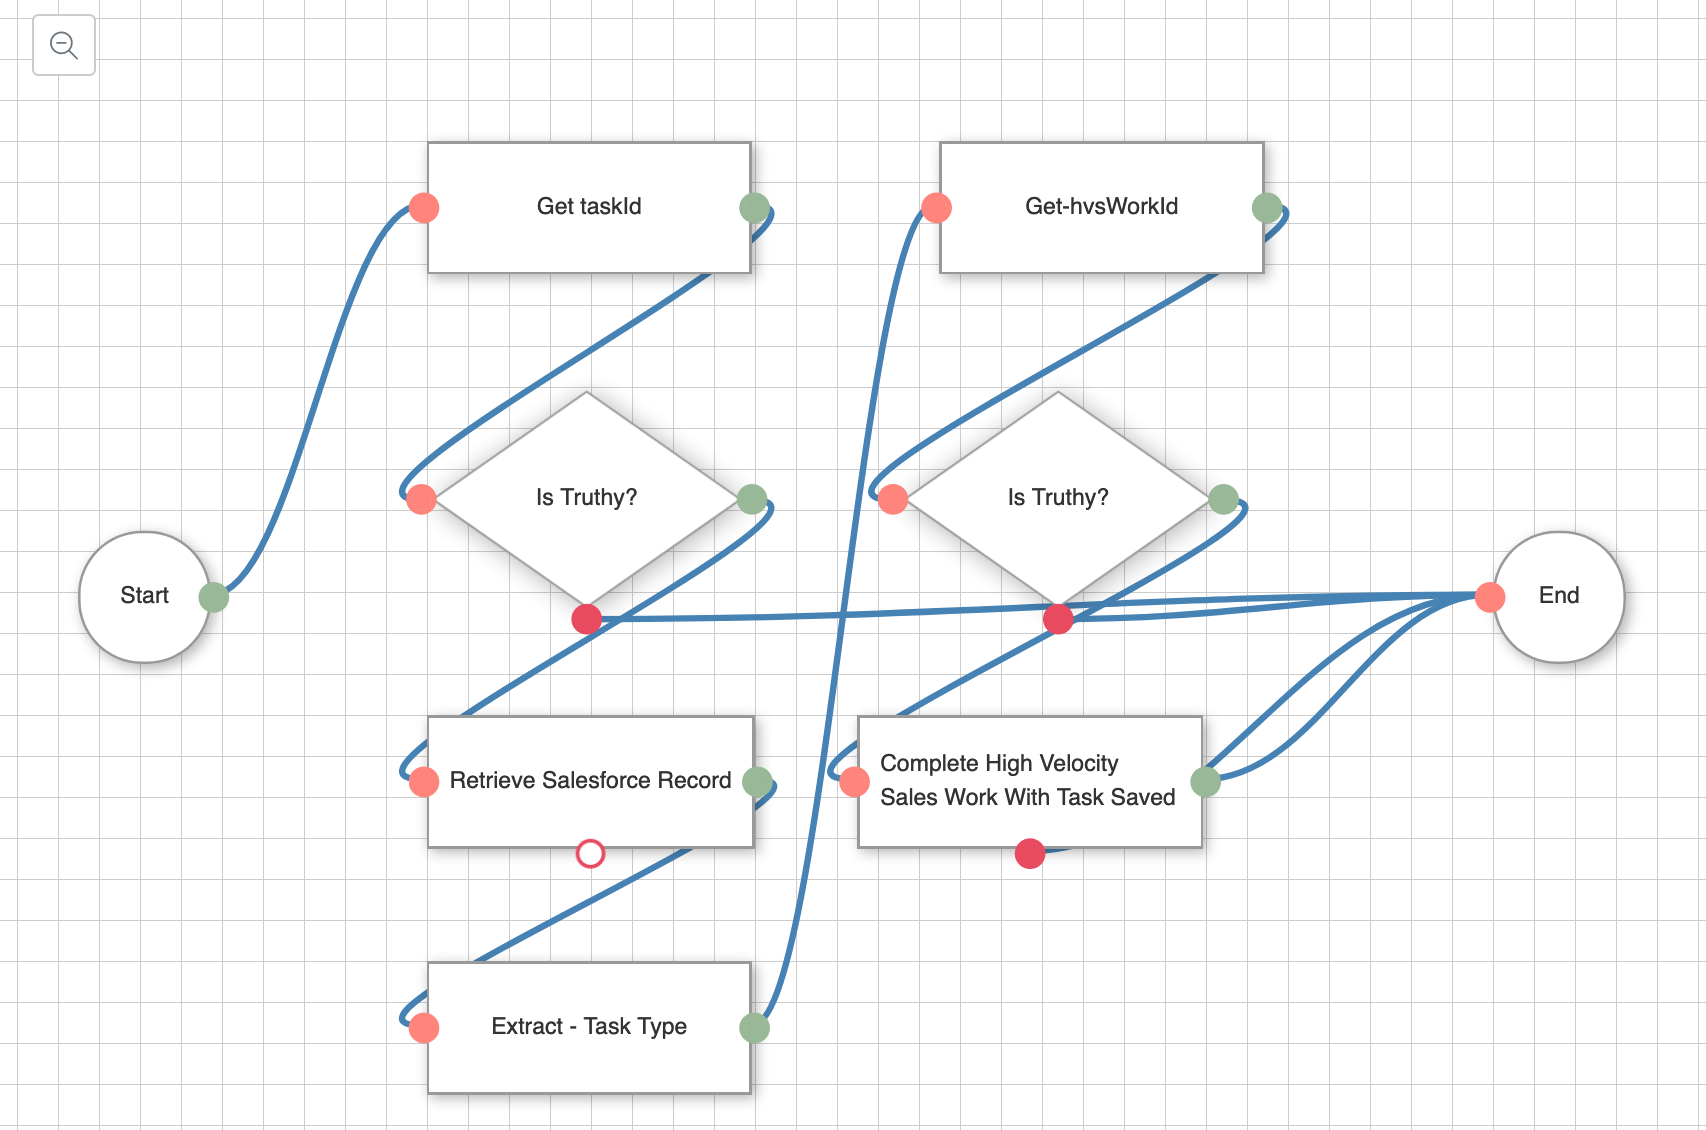
Click Save. This CTI Flow is executed before your agent is back to routable and retrieves the call result based on the task Id you set in the second CTI Flow, and use it to complete the HVS work
Once you've created the flows refresh your browser and the new scripts will take effect.
Expected Behavior
- Adding Lead to the Sales Cadence you created
- Make a call to the lead using the call button
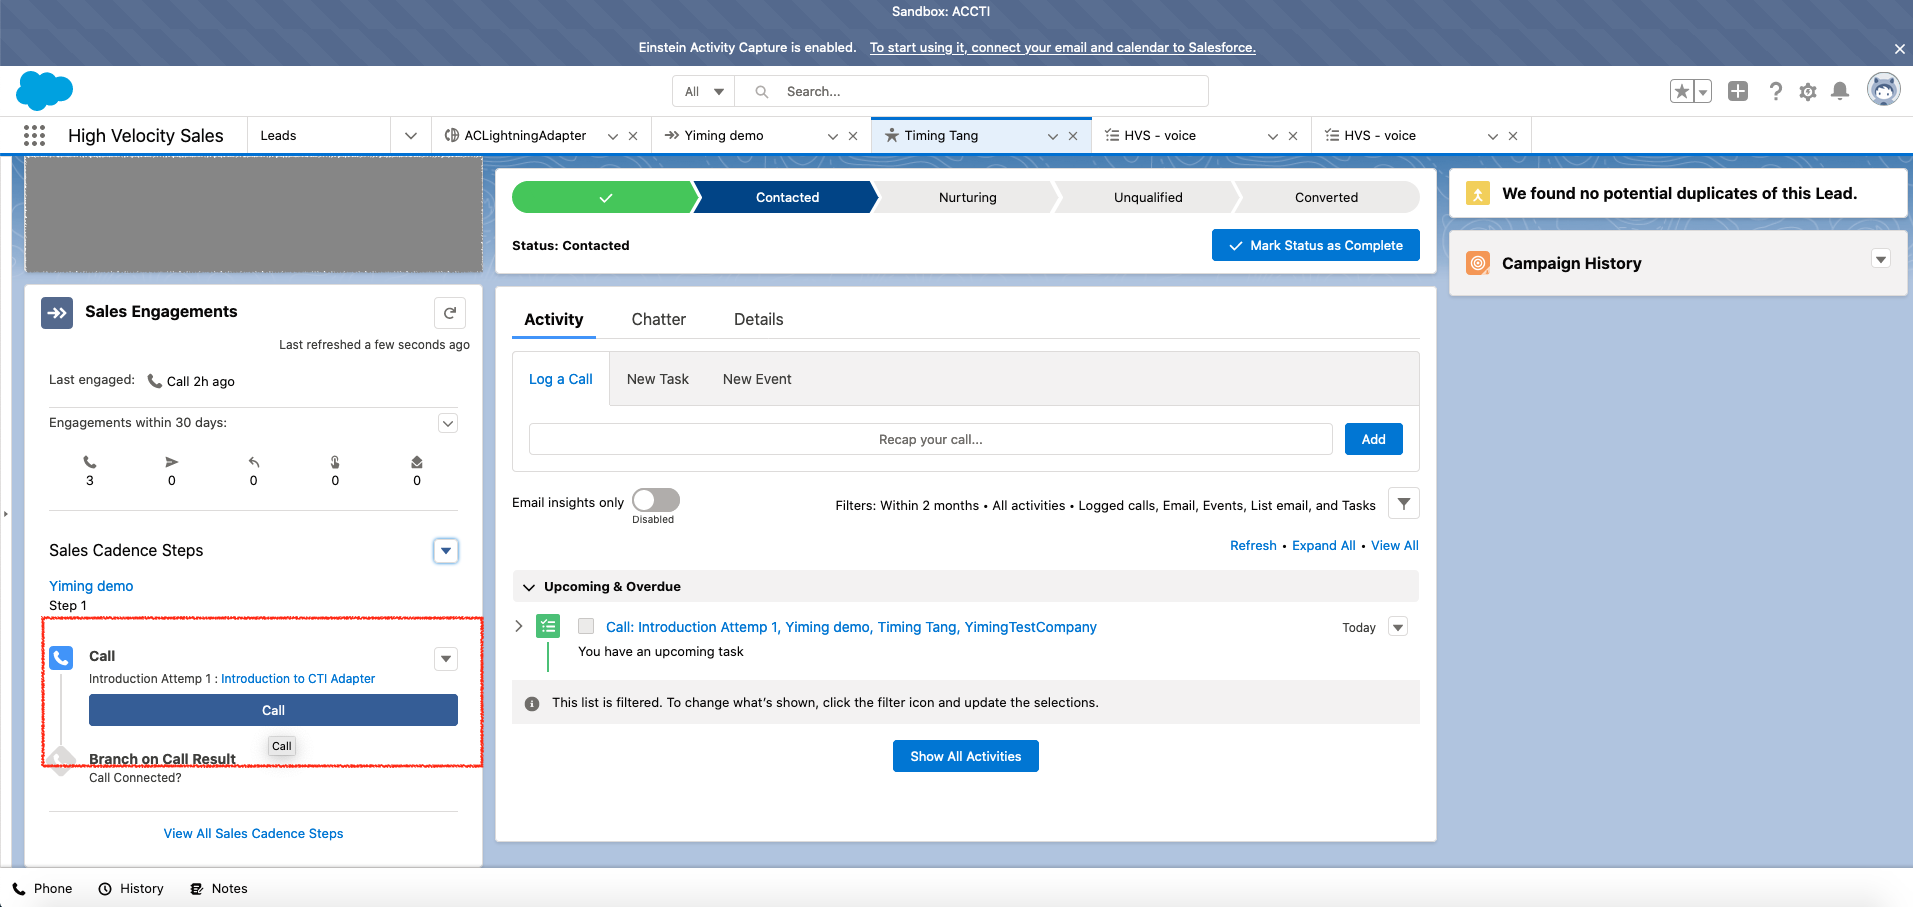
- A outbound call is made and a task is created and popup
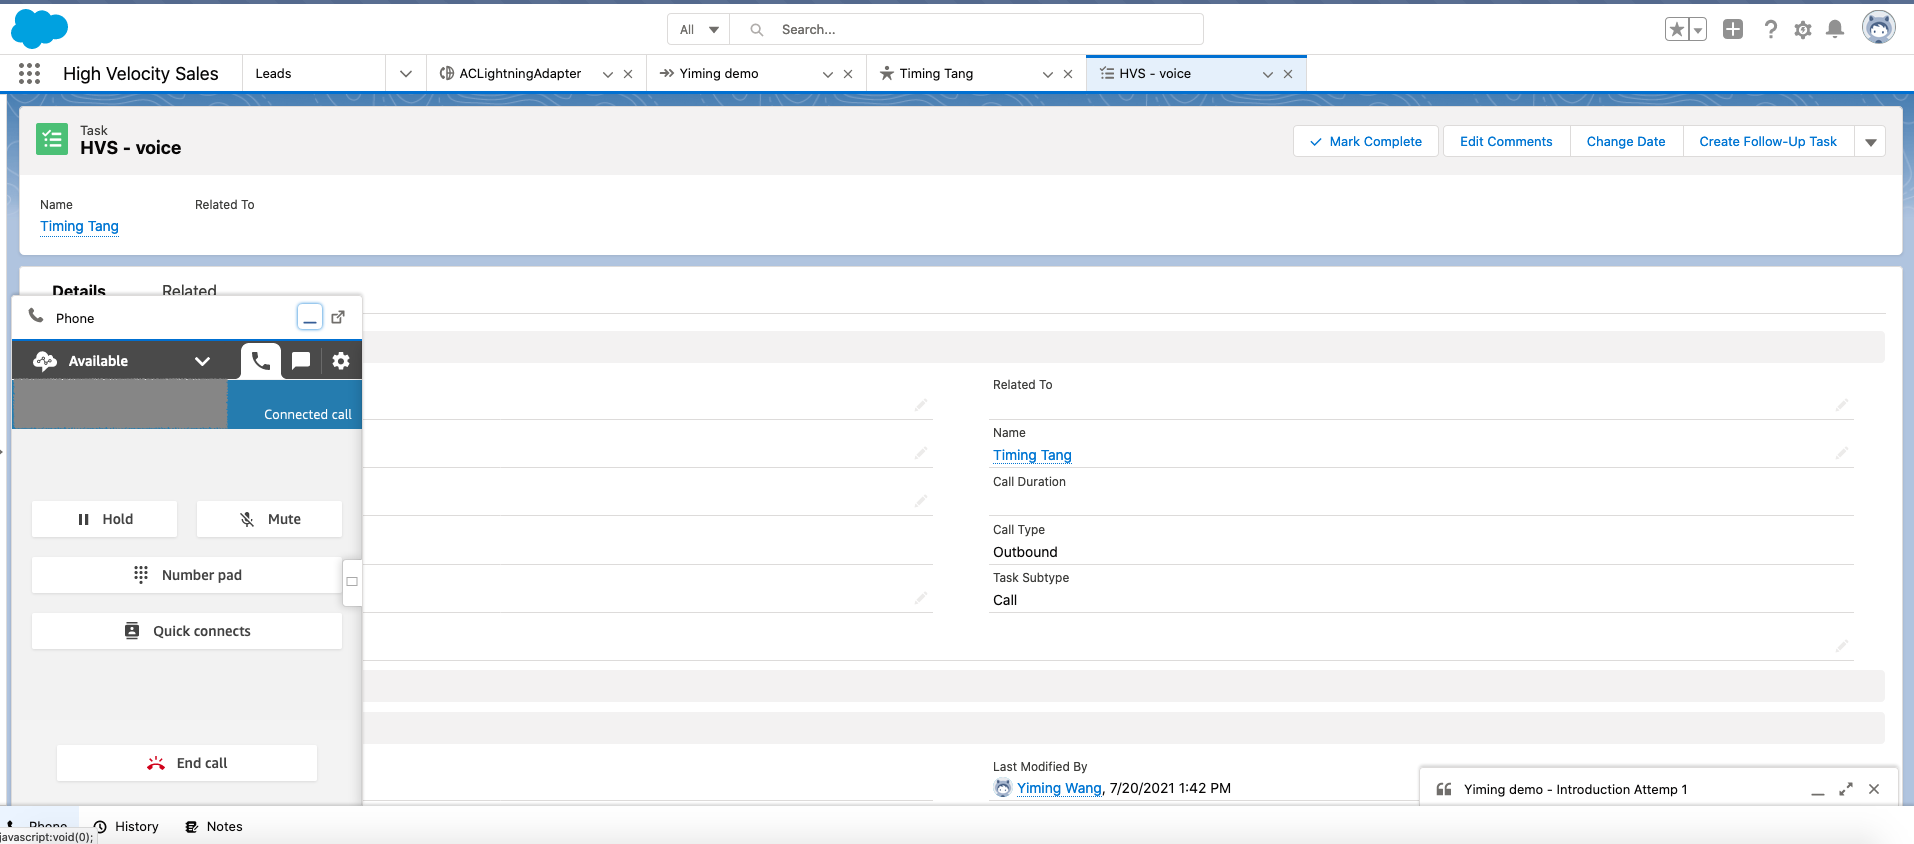
- While agent is in After Call Work status, Agent update the Call Result of the popup task and click Save.
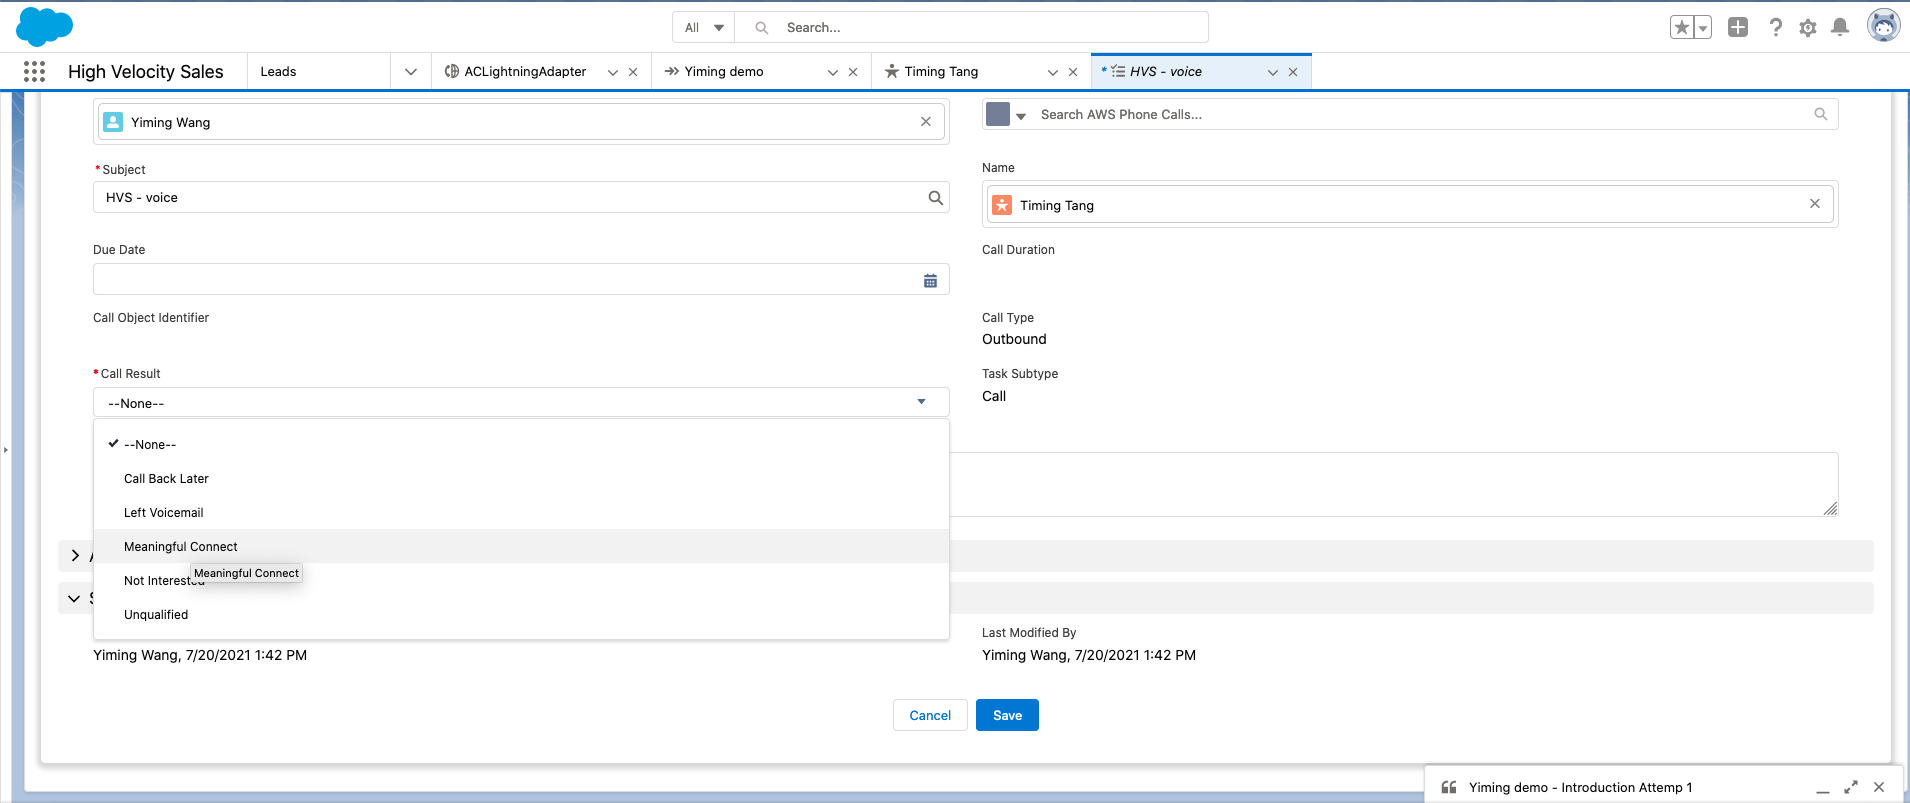
- Agent click Close Contact to be available for the next call. The third CTI Flow will be invoked to retrieve the call result and the Sales Cadence Steps for this lead will be updated (highlighted in red below). The popup task should be linked to the lead as well (highlighted in orange below).
