Presence Sync Rules
The CTI Adapter supports bidirectional synchronization of agent state between Amazon Connect and Salesforce Omnichannel. This allows you to tightly control agent availability for different contact/media types dependent on current agent state. This section of the guide assumes that you have Omnichannel configured appropriately. If you do not and wish to test this function, please refer to the section Configure Salesforce Omnichannel for Testing.
NOTE: In order for Presence Sync to work, the CTI Adapter must be configured to allow it. See CTI Adapter Details for more information. This feature is not turned on by default.
NOTE: After Salesforce Winter ’22 Release, users need to have View Setup and Configuration OR View DeveloperName permission via a profile or permission set to use this feature. See New Permission Requirements for DeveloperName Field for more information.
Presence Sync Rules are evaluated based on specific events. The available events are:
Connect Agent State Change: The Connect agent's state has changed.
Salesforce Agent State Change: The Salesforce agent's state has changed.
- If a rule is set up with this event and the new state is set to "Offline", this will not trigger Salesforce Agent Logout
Salesforce Agent Logout: The Salesforce agent has logged out
- Logging out of Omnichannel does not automatically log you out of Connect or set CCP to offline. If you want this functionality, you will need to set up a Presence Sync rule.
- Rules triggered by Salesforce Agent Logout will only work if the rule is set to trigger when Salesforce New Agent Status is equal to the exact value "Offline" (case sensitive without quotes)
Salesforce Work Accepted: The Salesforce agent has accepted work.
Salesforce Workload Changed: The Salesforce agent's workload has changed.
Once the event is triggered, the CTI adapter will evaluate the provided criteria. The criteria is established by comparing Operand A, using standard comparator options, against Operand B. Possible options for Operand A and B are:
Connect Agent New State: The Connect agent's new state value
Connect Agent Old State: The Connect agent's old (previous) state value
Salesforce Agent New State: The Salesforce agent's new state value
Salesforce Service Channel: The service channel upon which the Salesforce agent has accepted work
Salesforce Previous Workload: The Salesforce agent's previous workload
Salesforce Previous Workload Pct: The Salesforce agent's pervious workload expressed as a percent of configured capacity
Salesforce New Workload: The Salesforce agent's new workload
Salesforce New Workload Pct: The Salesforce agent's new workload expressed as a percent of configured capacity
Salesforce Configured Capacity: The Salesforce agent's configured capacity
Static Value: The user may provide a value. For example, a custom agent state name or other alphanumeric value. When Static Value is selected a "Value" field becomes visible to accept the users static value input.
Available comparators are:
Equal to: Are Operand A and Operand B equal
Not equal to: Are Operand A and Operand B not equal
Greater than: Is Operand A greater than Operand B
Greater than or equal to: Is Operand A greater than or equal to Operand B
Less than: Is Operand A less than Operand B
Less than or equal to: Is Operand A less than or equal to Operand B
Configuring Statuses
Presence Sync Rules require statuses in both Amazon Connect and Salesforce. In this example, we will add two additional statuses to each side of the configuration and prepare rules that sync both clients to the same state regardless of which agent sets the status. Essentially, you will configure the status sync similar to the following example:
| When a sets status to b | Set x to y |
|---|---|
| Amazon Connect sets status to Available | Omnichannel to Available |
| Omnichannel sets status to Available | Amazon Connect to Available |
| Amazon Connect sets status to Working -- Phone | Omnichannel to Working -- Phone |
| Omnichannel sets status to Working -- Media | Amazon Connect to Working - Media |
Amazon Connect System Statuses
The following Amazon Connect CCP statuses are system statuses that can be used in presence sync. Please note however that these statuses are restricted and you cannot set the Amazon Connect status to the below.
- Busy - agent is in a call
- Pending - agent is receiving a request for a queue callback
- PendingBusy - agent is receiving call
- CallingCustomer - agent is calling customer
- AfterCallWork - agent is in the after call work screen
Create Presence Statuses in Amazon Connect
Agents are responsible for setting their status in the Contact Control Panel (CCP). Typically, the only time an agent\'s status changes is when they manually change it in the CCP however Presence Sync Rules can automate the process when conditions are met.
Amazon Connect provides two default status values:
Available
Offline
You can change the name of these values, and you can add new ones. For example, you might add a status for Lunch, and another for Training. These and the default status values will be used for reporting, metrics, and resource management.
Note: When you add a new status, it will always be Custom, not routable.
Create an Amazon Connect status
Login to your Amazon Connect instance as an Administrator
From the left navigation, choose Users, then select Agent status
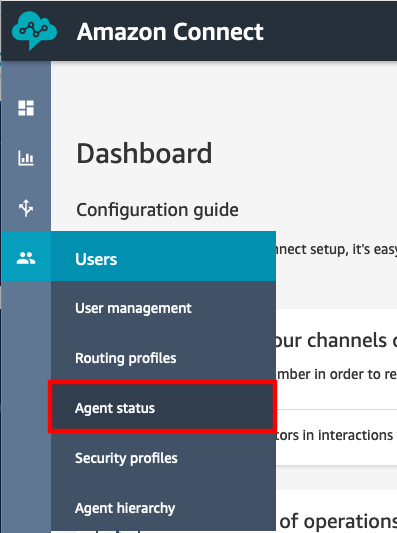
Select Add new agent status
Provide a Status name and Description. Leave the Enabled checkbox selected.

- Select Save. Repeat as desired for the remaining statuses that you wish to add.
Create Presence Statuses in Salesforce
You will need to configure presence statuses to reflect the different presence states that you wish your Omni-Channel agents to enter. These do not need to match agent statuses in Amazon Connect exactly, but it does make it easier to track what you are doing.
Create a Salesforce presence status
Log in into your Salesforce org and go to Setup
In the Quick Find field, enter presence and choose Presence Statuses from the results
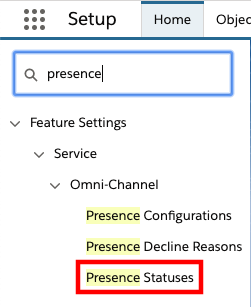
In the Presence Statuses page, choose New
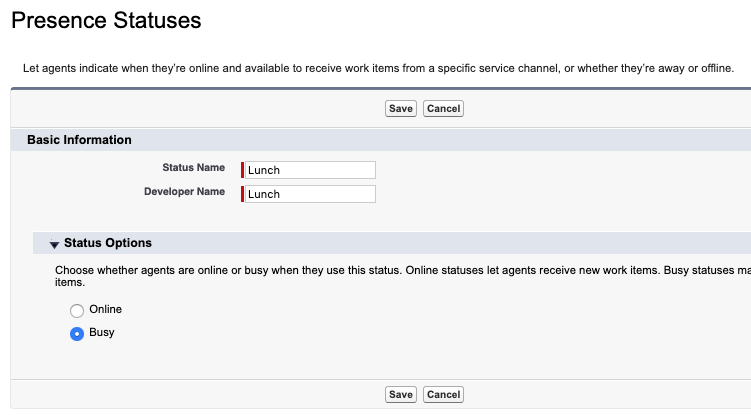
Provide a status name, for example Lunch
Set the Status options appropriately, for example, Busy
a. For Online statuses, you will need to provide a channel. Please reference the Omni-Channel documentation for details
Choose Save
- Repeat as necessary for all desired statuses
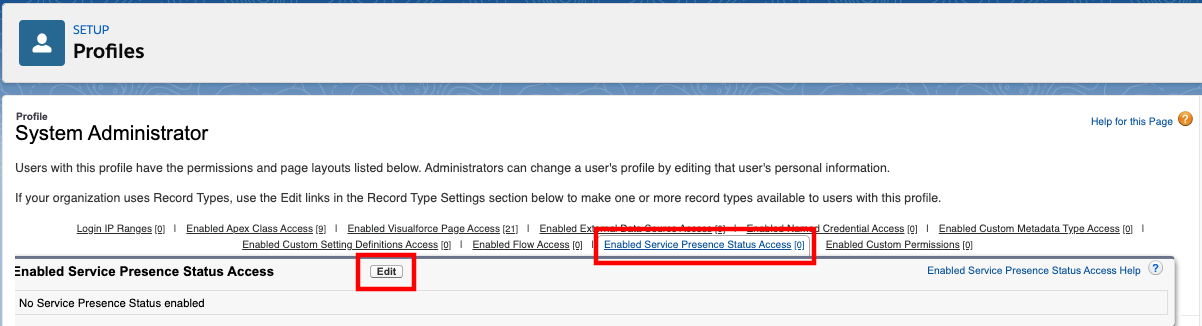
Configure Enabled Service Presences Status Access in Salesforce
Log in into your Salesforce org and go to Setup
In the Quick Find field, enter profiles and choose Profiles from the results
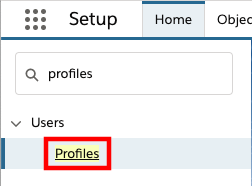
Select the profile assigned to your users
Hover over the Enabled Service Presence Status link and choose Edit
- Select the available status from the left, then choose the Add button to add it the Enabled Service Presence Statuses field
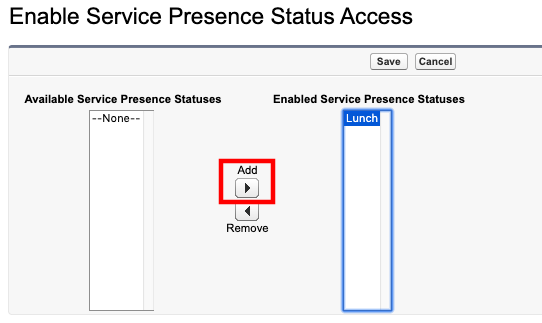
Select Save
Repeat as necessary for other statuses or profiles.
Configure Presence Sync Rules
The CTI Adapter provides a rules-based presence status synchronization system allowing for flexibility in mapping agent states between Amazon Connect and Salesforce Omni-Channel.
Presence synchronization actions may be configured based upon manual agent state changes (agent goes on break), system agent state changes (answering a call), omnichannel agent work (agent accepts an email), and omnichannel workload changes (agent completes an email) as examples.
As the scope of presence sync rules can vary wildly, this example will show you how to change state based on Amazon Connect agent state change and Salesforce agent state change.
Create a Presence Sync Rule
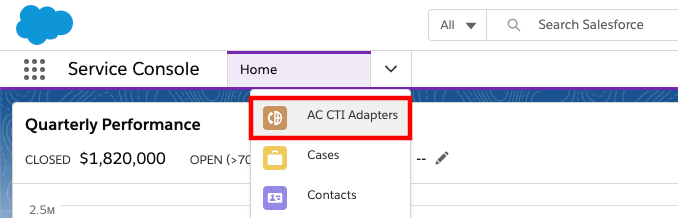
Log in into your Salesforce org and go to the Service Console
Expand the navigation menu by selecting the down arrow and choose AC CTI Adapters.
Select ACLightningAdapter
Scroll down to the Presence Sync Rules section
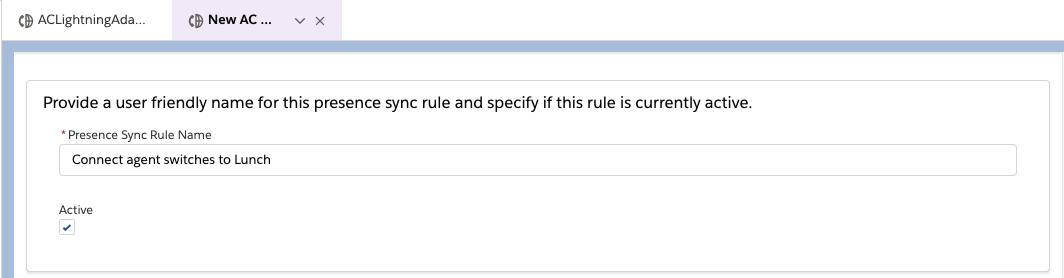
Select New to create a new presence sync rule
Provide a Presence Sync Rule Name to identify the use case of this rule. For example: Connect agent switches to Lunch
Select Next
For Source, select Connect Agent State Change, and select Next
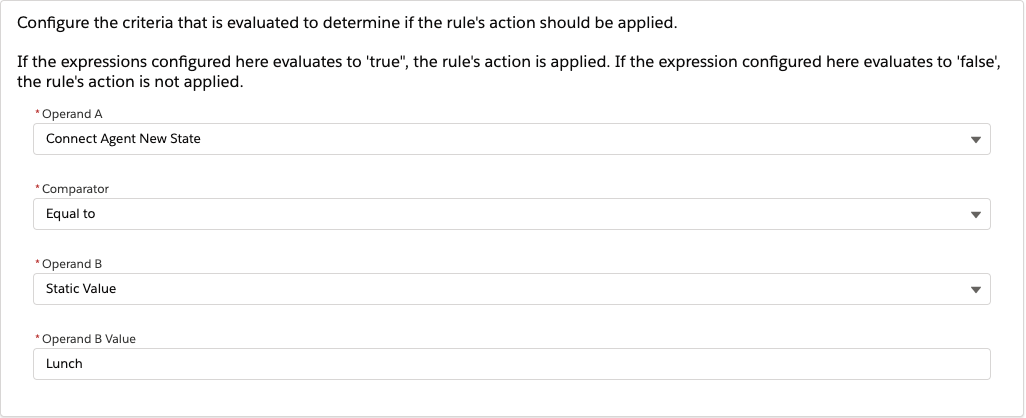
For Operand A, choose Connect Agent New State
Set the Comparator to Equal to
Set Operand B to Static Value
For Operand B Value, enter Lunch (Or whatever state you have created in Amazon Connect)**
Select Next
For Destination, choose Salesforce Agent State
Set the Value to Lunch (Or whatever state you have configured in Salesforce) NOTE: the static value for Salesforce Omni-Channel status is the Developer Name, not the Status Name
Select Save.
Refresh your browser
In the bottom left corner of the Service Console, select the CTI Softphone icon

- Set your Amazon Connect agent status to Lunch
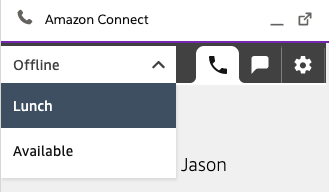
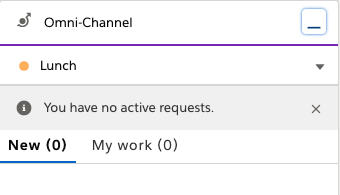
- Observe that the Omni-Channel status switches to Lunch
- Repeat this process as desired to configure your presence sync rules.