Installing the CTI Adapter and Salesforce Lambdas
Amazon Connect Salesforce CTI Adapter Managed Package
The Amazon Connect CTI Adapter for Salesforce provides the core integration between the two platforms. It embeds the Amazon Connect Contact Control Panel into Salesforce which provides telephony control as well as access to event data coming from Amazon Connect. Using this adapter, you can configure screen pops based on customer data, automate contact center telephony functions like click-to-dial, and establish presence syncing rules for integration with Salesforce Omni-Channel. This is the base of the integration.
The first step in the deployment of the integration is to install the Amazon Connect CTI Adapter managed package from the AppExchange Marketplace.
Log in into your Salesforce org and go to Setup
In the Quick Find, type AppExchange (the results will populate without hitting enter)
Select AppExchange Marketplace from the links provided
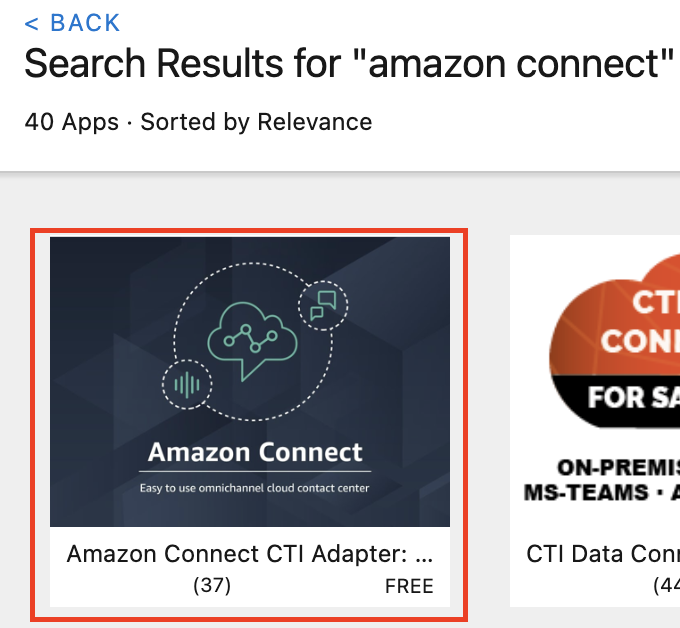
In the AppExchange window, enter Amazon Connect into the Search AppExchange field and press enter
In the Search Results, select Amazon Connect CTI Adapter
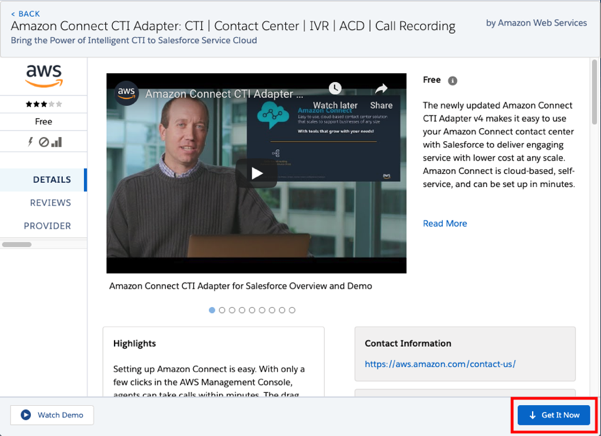
- On the Amazon Connect CTI Adapter detail page, select Get It Now
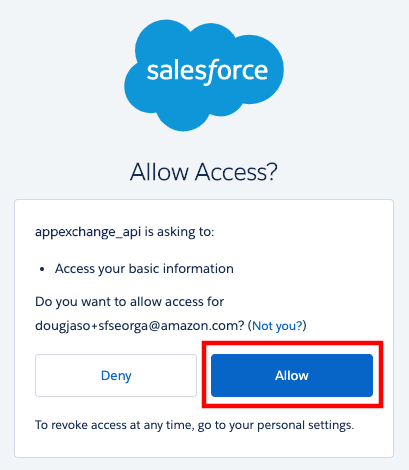
- If you are presented with the Log In to AppExchange screen, select Open Login Screen. You should then be presented with an Allow Access Screen. Choose Allow
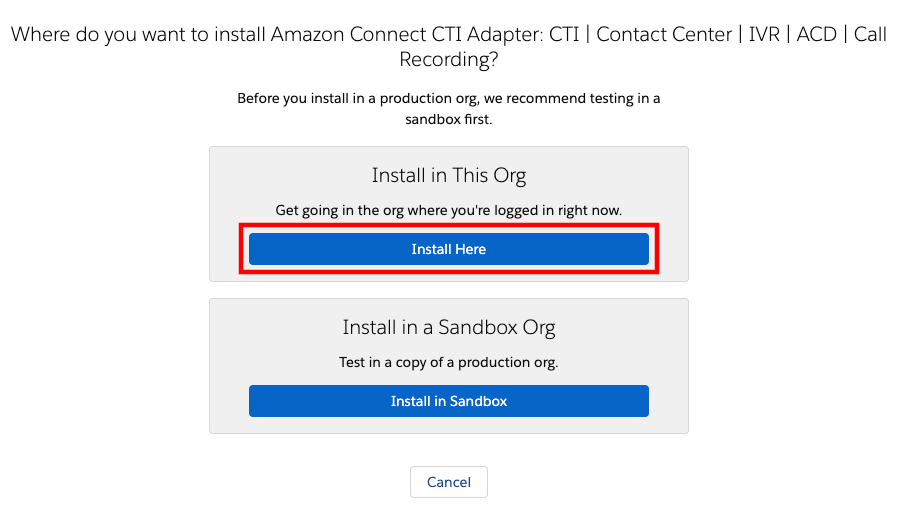
- On the Where do you want to install Amazon Connect CTI Adapter page, choose the Install Here button in the Install in This Org section
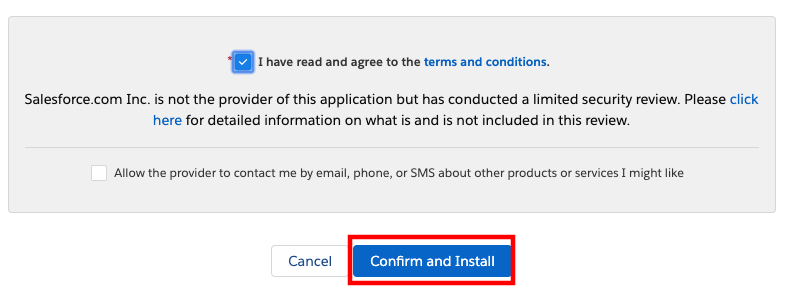
- On the Confirm installation details screen, fill out the Tell us about yourself form, check the box to agree with the terms and conditions, and optionally select the box to allow the provider to contact you. Then select Confirm and Install
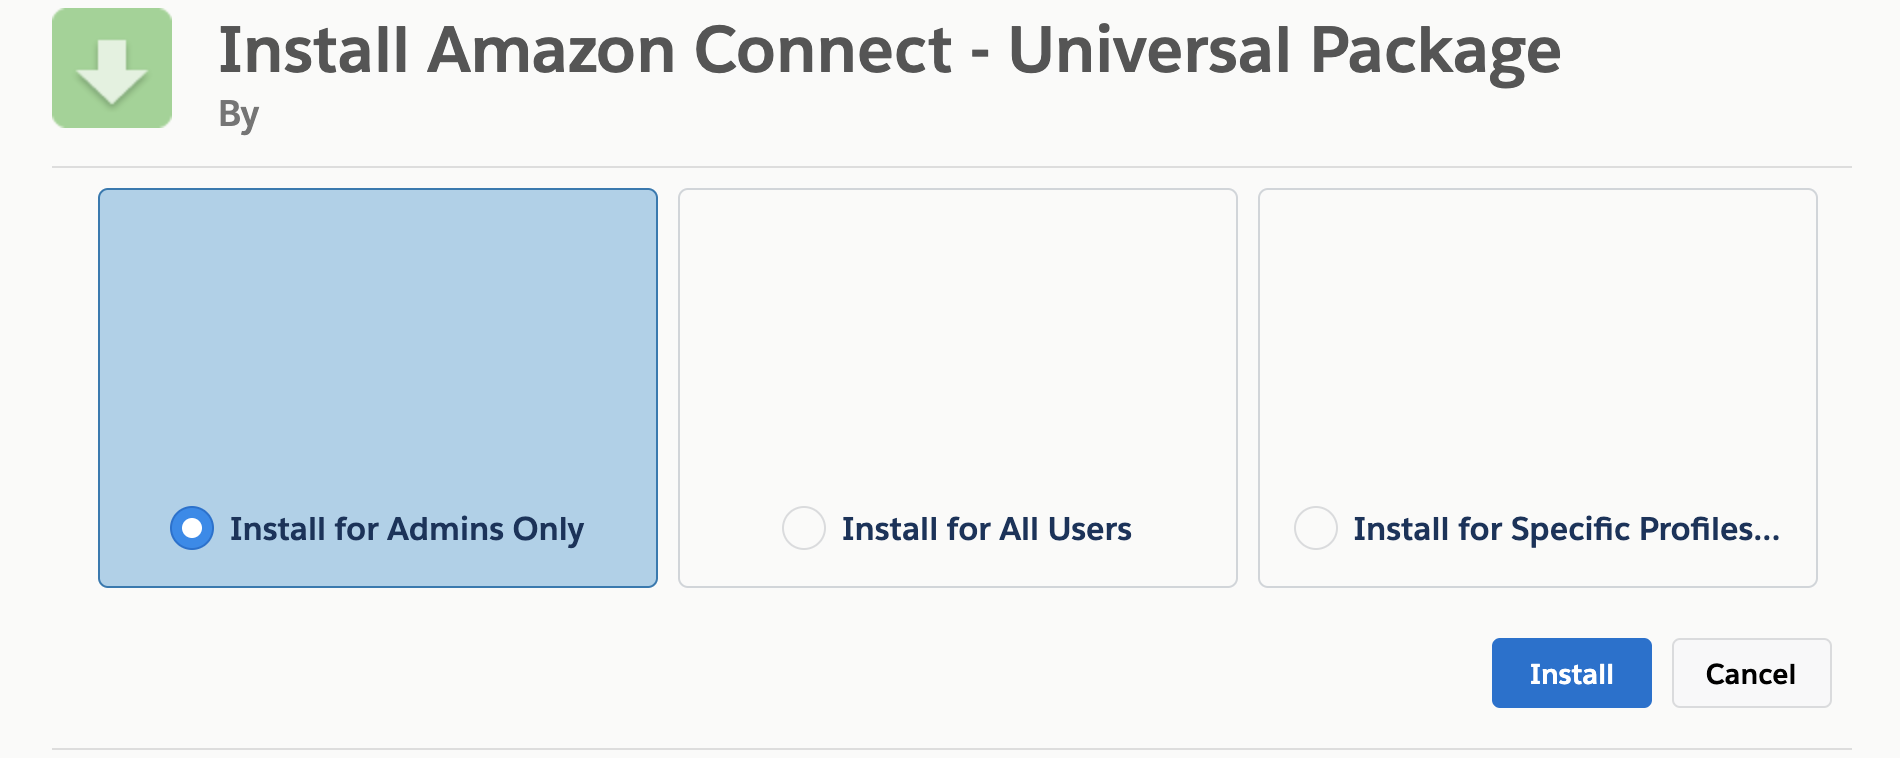
- Select Install for Admins Only, then choose Install. THIS SELECTION IS VERY IMPORTANT - if you select the wrong option, then standard users may have access to objects and pages that they shouldn't have access to.
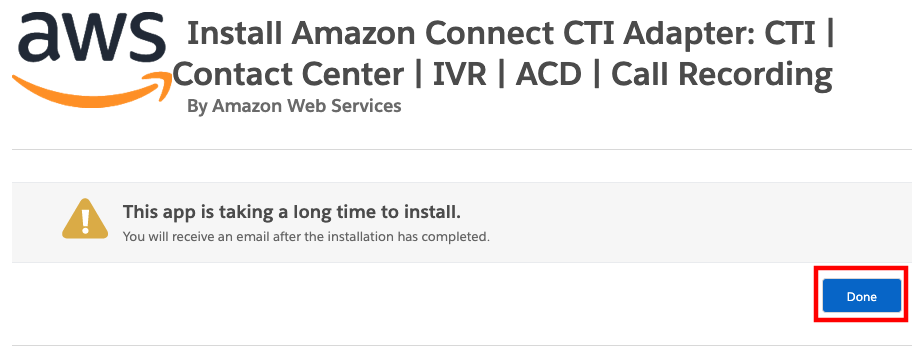
The CTI Adapter will take some time to install. While it installs, you will be presented with the This app is taking a long time to install screen.
Choose Done.
Once you receive confirmation that the installation has completed via email, return to the browser
Close the Amazon Connect CTI Adapter detail page (if still open)
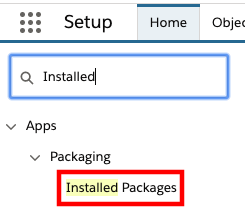
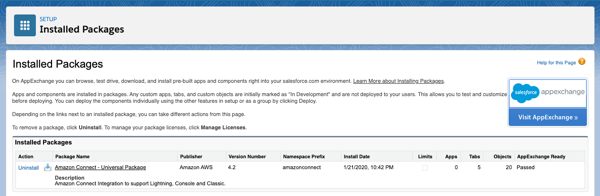
In Quick Find, enter Installed, then select Installed Packages from the result
- Once the Installed Packages page opens, validate that the Amazon Connect -- Universal Package is installed
Amazon Connect Salesforce Lambda package
The Amazon Connect Salesforce Lambda package adds considerable capability to the integration. It includes data connectivity between Amazon Connect and Salesforce for typical tasks like lookups, case creation, and updates. Additionally, it adds new features like real-time and historical data imports, contact trace record imports, recording import, transcription, and contact analytics functions. These capabilities are configurable and can be activated or deactivated on a call-by-call basis.
The Amazon Connect Salesforce Lambda package is delivered via the AWS Serverless Application Repository. The AWS Serverless Application Repository enables you to quickly deploy code samples, components, and complete applications. Each application is packaged with an AWS Serverless Application Model (SAM) template that defines the AWS resources used. There is no additional charge to use the Serverless Application Repository - you only pay for the AWS resources used in the applications you deploy.
In a new browser tab, login to the AWS console
Make sure you are in the same region as your Amazon Connect instance
Once you have selected the region, navigate to the Amazon Connect Console
Verify that the Amazon Connect instance that you wish to configure is listed
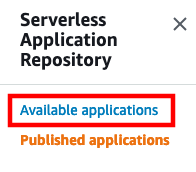
Once you have verified your Amazon Connect instance, Open the Serverless Application Repository Console
In the left navigation, select Available Applications
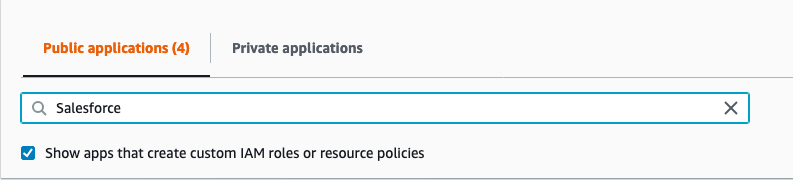
- In the search area, make sure that Public applications is selected, check the box for Show apps that create custom IAM roles or resource policies, and enter Salesforce in the search field, this will automatically filter the available packages
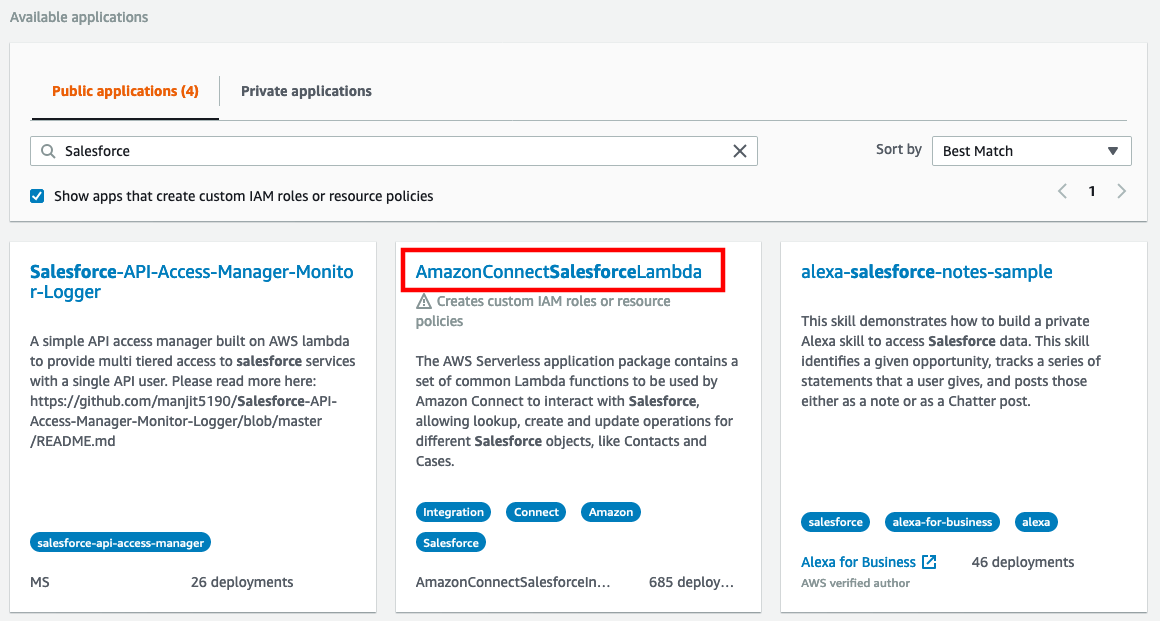
- Select AmazonConnectSalesForceLambda
When the Application loads, scroll down to the Application settings section
If you would like to use the Guided Setup feature, don't change any parameters in the template and select Deploy, and wait for the stack to finish deployment. Then, follow the section below on setting up the ExecuteAwsService named credential. If you are not using the Guided Setup feature, navigate to here for manual setup instructions (skipping the rest of the instructions on the page).

Setting up the ExecuteAwsService Named Credential
The ExecuteAwsService Named Credential is the entrypoint for the CTI Adapter to communicate with your AWS account.
The Apex code uses the Named Credential to call the sfExecuteAwsService.py lambda, which uses boto3 to make changes
in and retrieve data from your AWS account. Setting up this Named Credential is not required if you do not wish
to use the features that rely on it (Guided Setup and Contact Lens). In addition, you can alter the permissions given
to the sfExecuteAwsService lambda to match your security requirements (NOTE: if you choose to do so, do so after you
configure up the lambdas as some permissions are added/removed based on how the lambdas are configured).
Before you create the ExecuteAwsService Named Credential, confirm that the application was installed for admins only. If not, then standard users may be able to invoke methods that call named credentials. If you did this by accident, then you will have to manually edit the profiles to remove the permissions to the objects and pages created by the app.
- Navigate to the IAM console in your AWS account, select the Users tab, and select Add Users to create a new user.
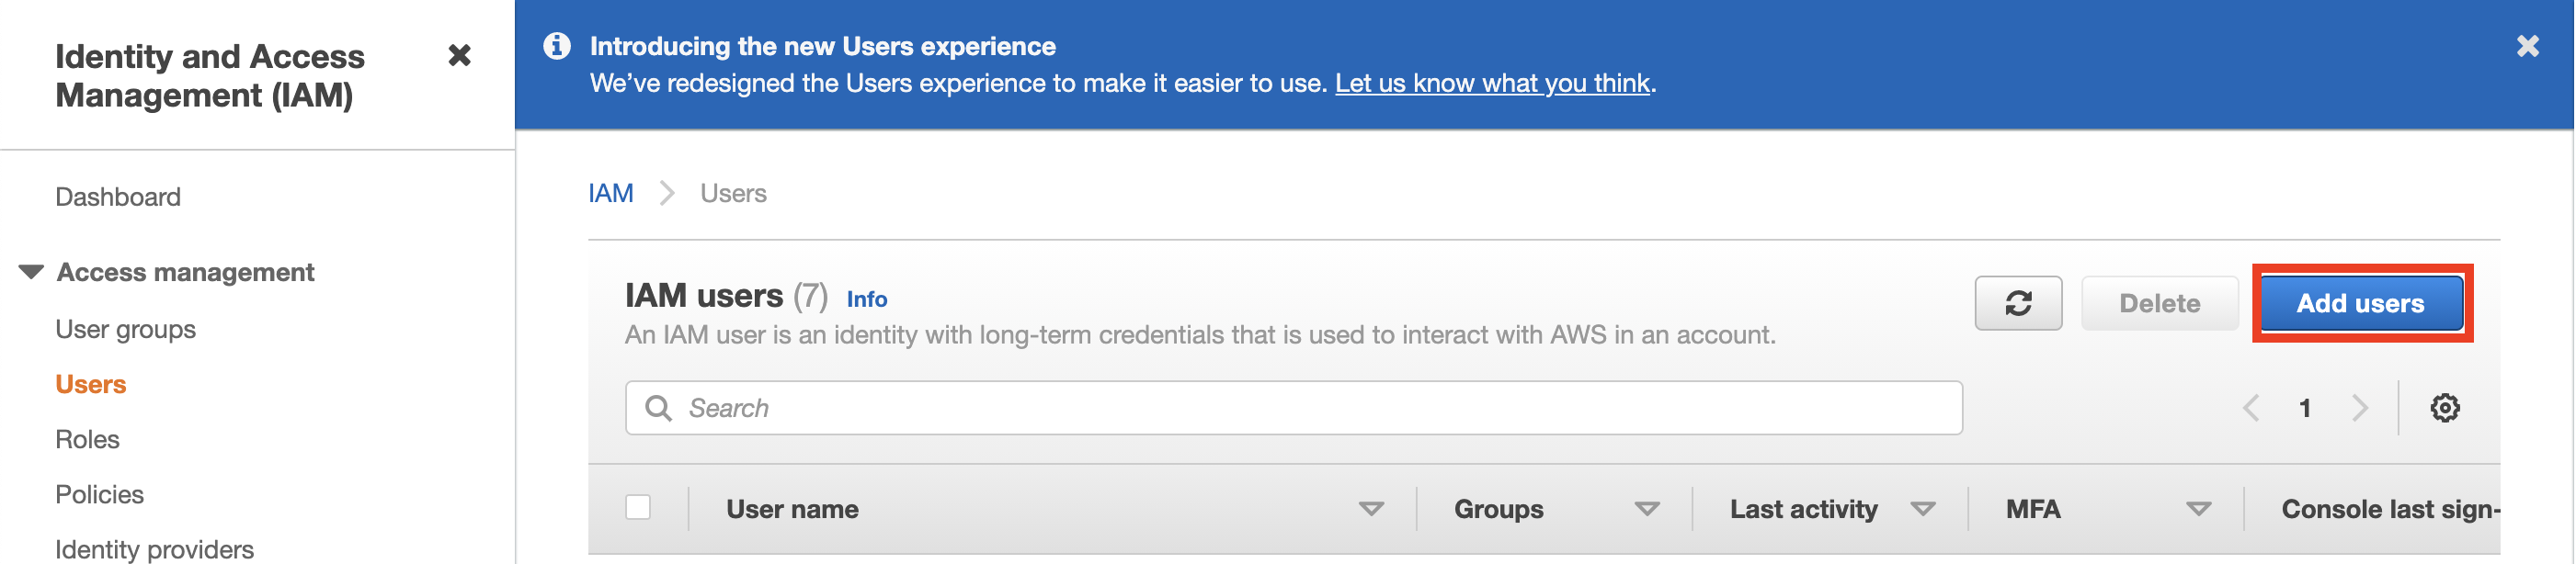
Give your IAM user a name (like sfExecuteAwsServiceIamUser). For the Access type, select Programmatic access. Click Next.
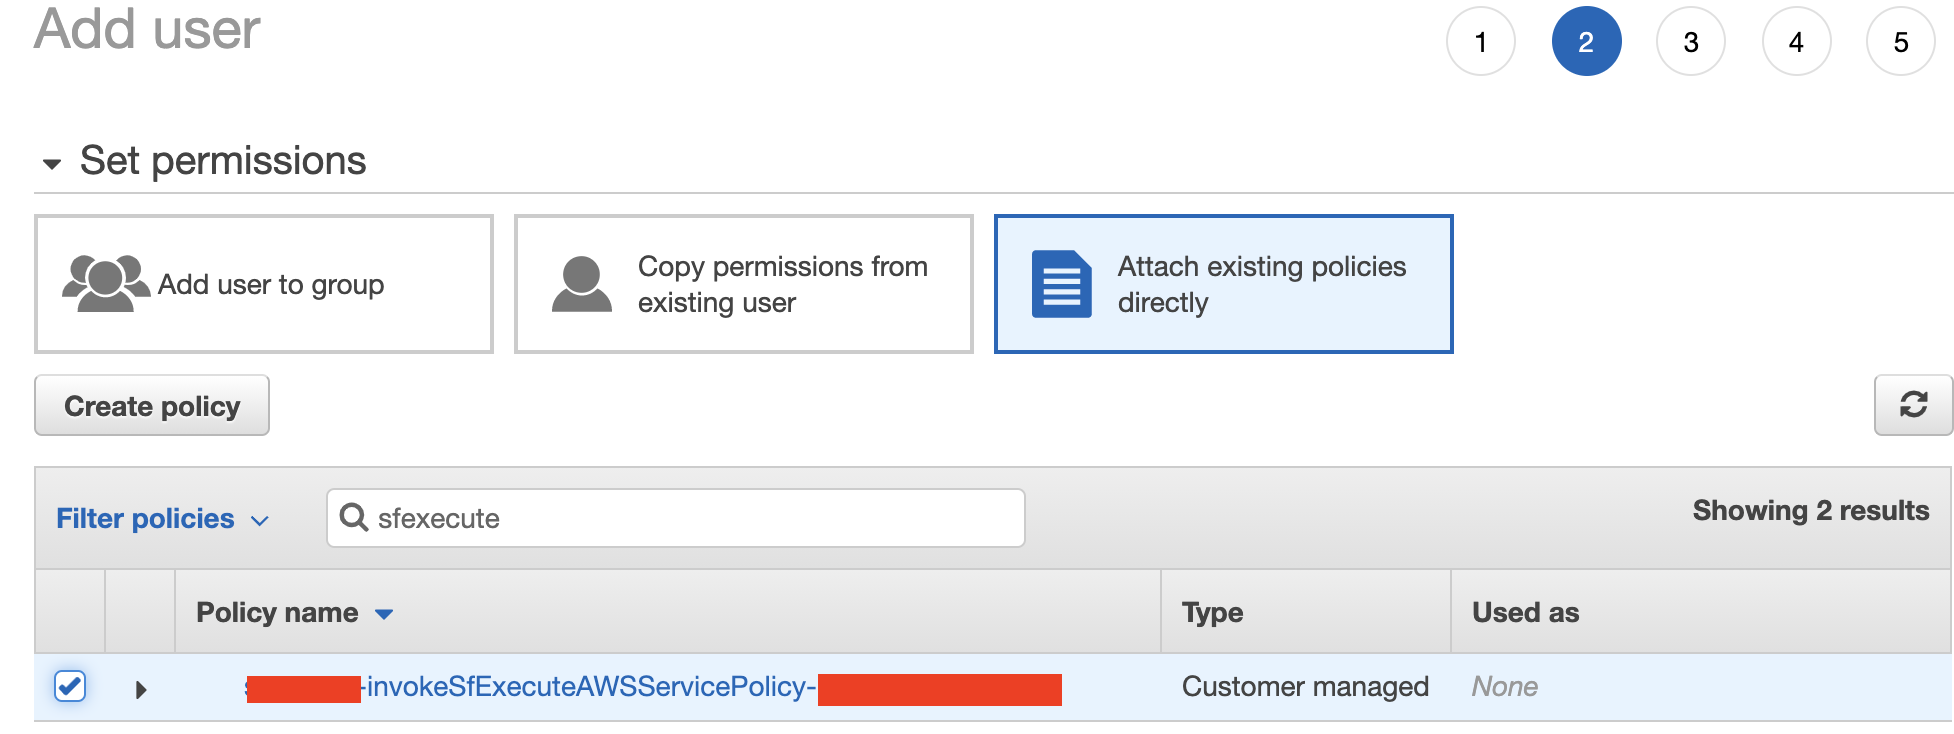
Select Attach existing policies directly, then search for and select invokeSfExecuteAWSServicePolicy.
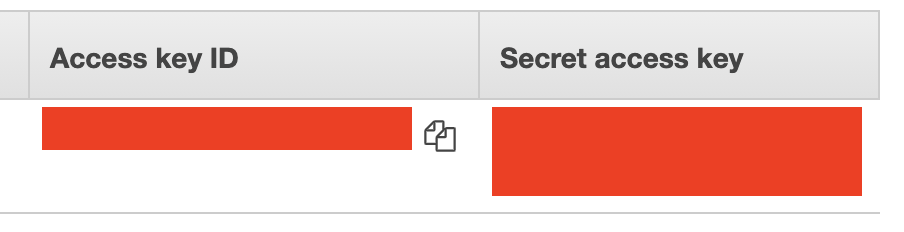
- Click next until the user is created. In the final screen, copy down the Access Key ID and the Secret Access Key.
- Next, navigate to the Lambda Console. In the functions tab, search for sfExecuteAwsService.
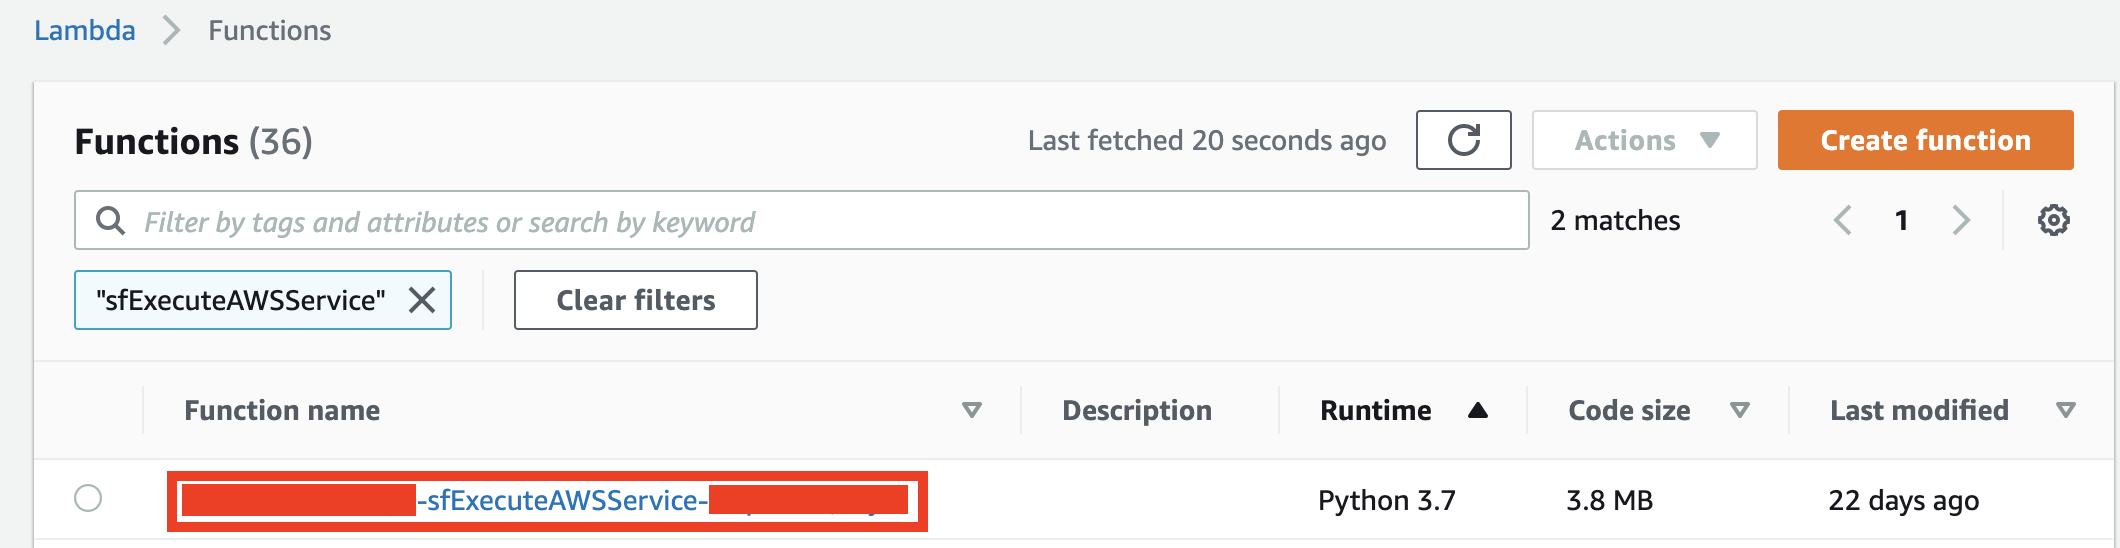
Copy down the name of the function. Make sure you are not copying any extra characters.
Navigate to your setup section of your Salesforce instance, and search for Named Credentials.
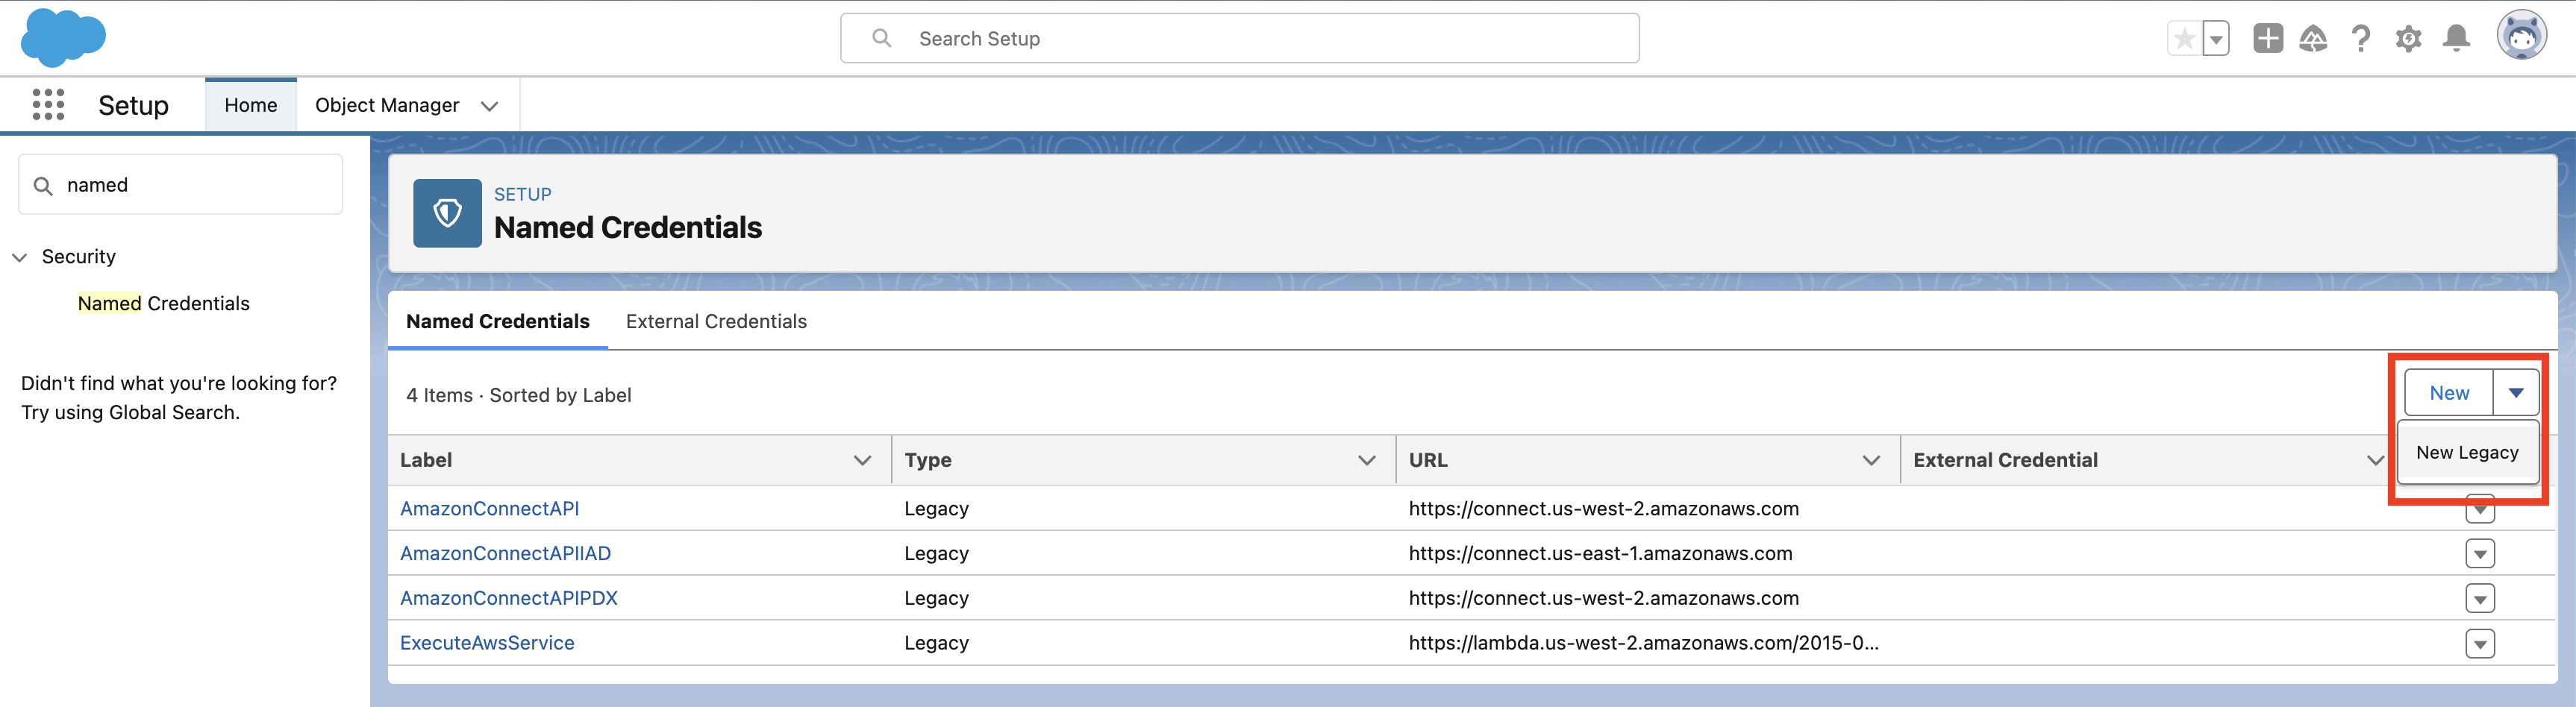
- Select New Legacy. For the values in the next screen, enter the following:
- Label: ExecuteAwsService
- URL:
https://lambda.{insert AWS region}.amazonaws.com/2015-03-31/functions/{insert lambda function name (copied above)}/invocations - Identity Type: Named Principle
- Authentication Protocol: AWS Signature Version 4
- AWS Access Key ID: Access Key ID copied above
- AWS Secret Access Key: Secret Access Key
- AWS Region: {insert AWS region}
- AWS Service: lambda
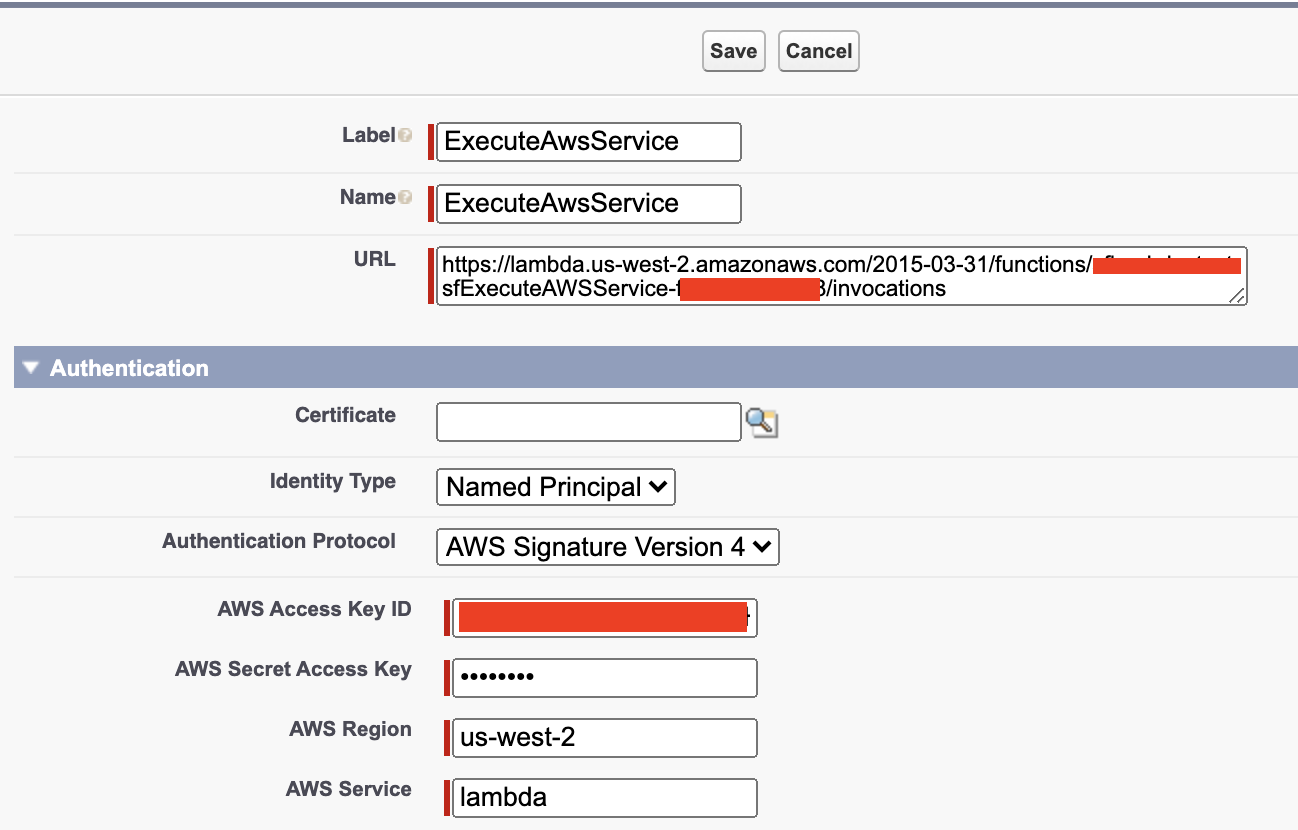
- Click Save.
Post-Setup Cleanup (Recommended)
The sfExecuteAWSService Lambda function is used only during initial setup to configure your Amazon Connect instance and related AWS resources. Once your CTI Adapter configuration is complete, this function is no longer needed for day-to-day operations.
As a best practice, we recommend disabling or deleting the sfExecuteAWSService Lambda function and its associated IAM user (e.g., sfExecuteAwsServiceIamUser) to keep your environment clean and minimize unused resources.
Note: If you need to re-run the Guided Setup wizard in the future, you can re-deploy the Lambda package from the AWS Serverless Application Repository.
After following the above instructions, follow these instructions to navigate to the Guided Setup feature.