Voice Id
The Amazon Connect CTI Adapter allows for integration with Amazon Connect Voice Id.
The integration between Voice Id and the CTI Adapter first requires that Voice Id is set up in the Amazon Connect instance that the CTI Adapter is integrated with. See here for full instructions.
Before proceeding with the below, please ensure that Voice Id works as expected in a standalone CCP.
Enabling the Voice Id Trigger:
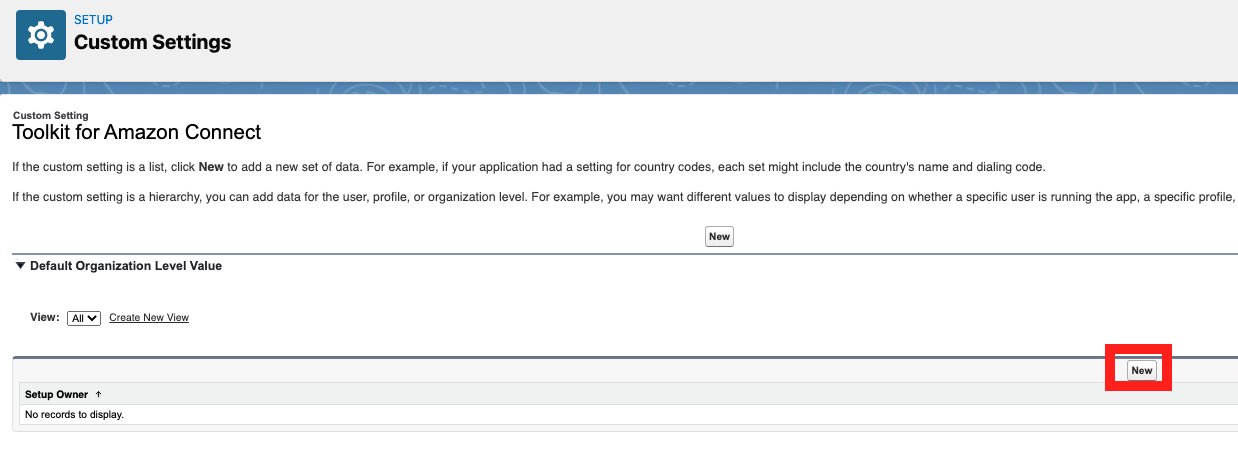
- In Setup, search for Custom Settings.
- Click on Custom Settings, and click Manage on the row with the
Toolkit for Amazon Connectsetting - Click into your setting (or create one if it doesn't exist)
- Search and assign the toolkit for either your profile or user, and then uncheck Disable the Voice Id Channel Trigger
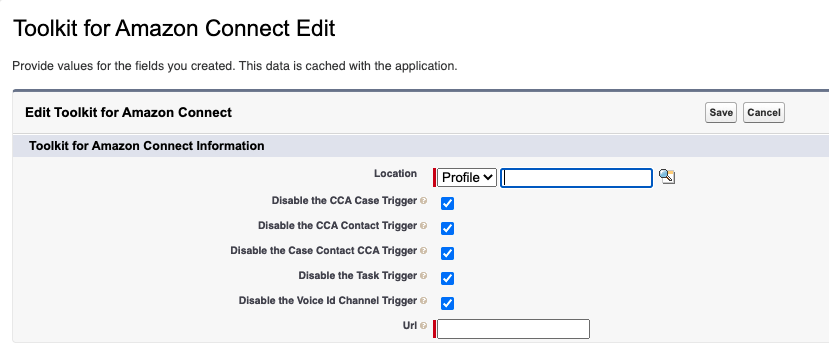
- Enter the domain of Amazon Connect instance in the Url field (if it doesn't exist already).
- Click save.
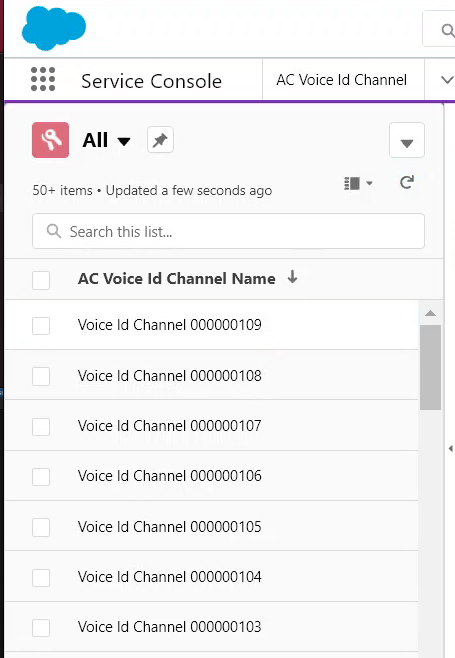
After following the above steps, AC_VoiceIdChannel__c records will start to be created on calls where Voice Id is active. These records can be viewed in the AC Voice Id Channel tab:
Adding Voice Id Components: Add the Voice Id component to the contacts page:
- Navigate to Contacts list, and create a contact with the phone number you’ll use for testing.
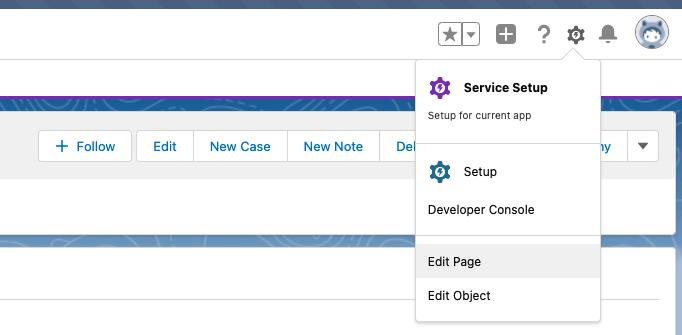
- Click into the created Contact page, on the right-top corner, click the Setup icon and then click Edit Page.
- Find
ac_VoiceIdChannelListViewin the custom components list, drag and drop it into the page.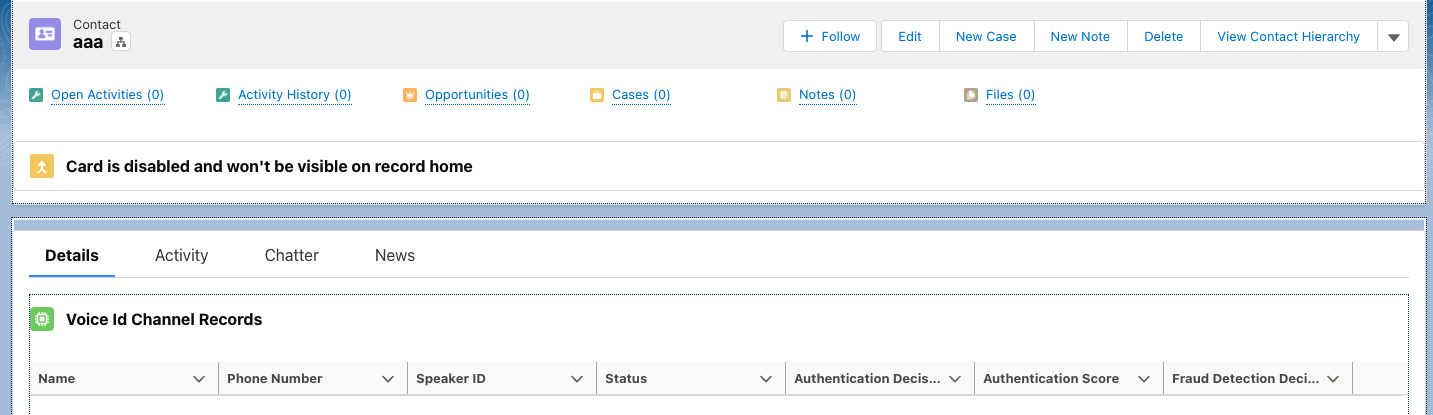
- Save and return to the record page. Click activate and assign as Org Default if prompted.
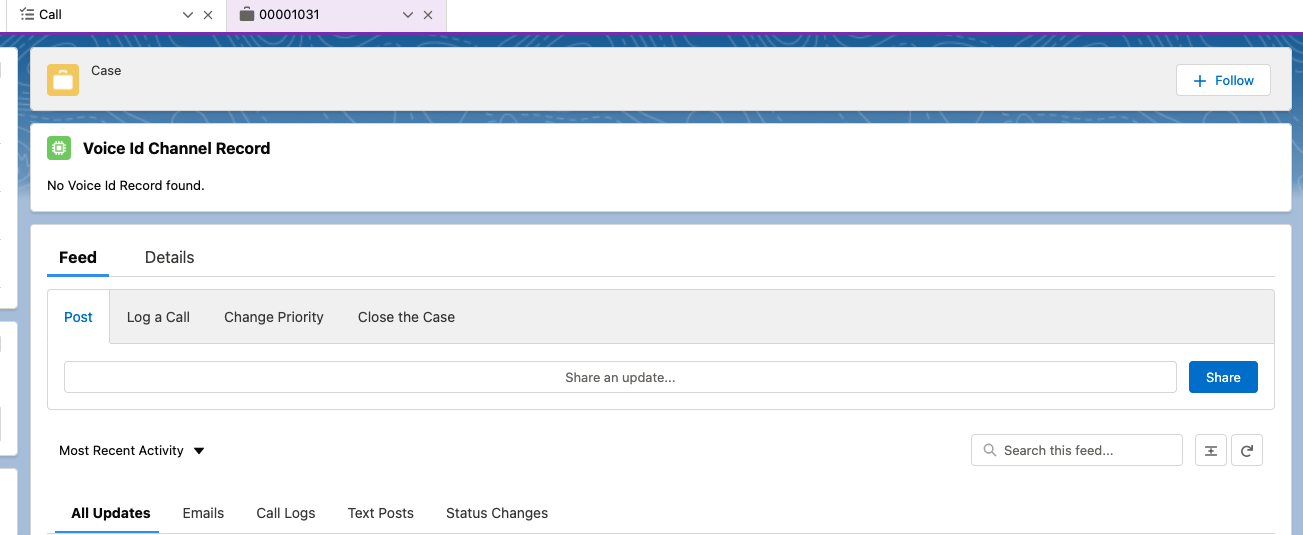
Add the Voice Id component to the Task/Cases page:
- Open the task record page, and Edit Page (same steps as Contacts).
- Find
ac_VoiceIdChannelDetailViewin the custom components list, drag and drop it into the page. - Save and return to the record page. Click activate and assign as Org Default if prompted.