Setting Up The CTI Adapter Using Guided Setup
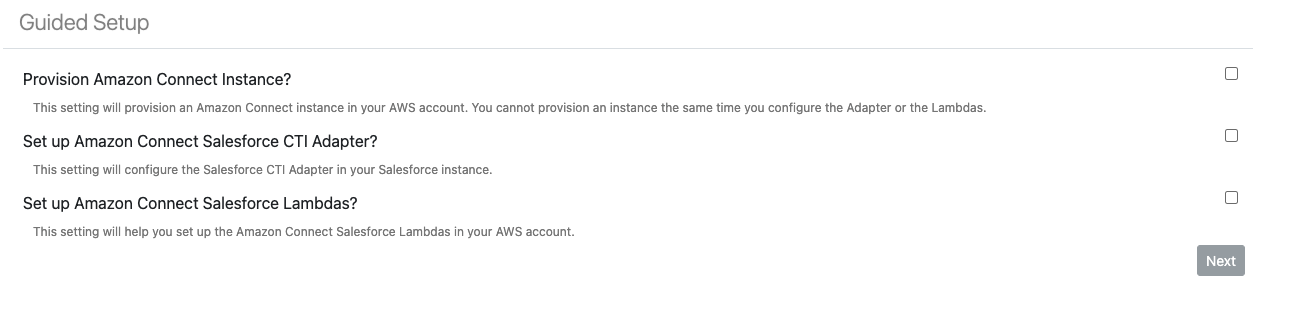
In order to navigate to the Guided Setup feature, perform the following steps (NOTE: If you are not an admin user then you must first add yourself to the AC_Administrator permission set, see here for more details):
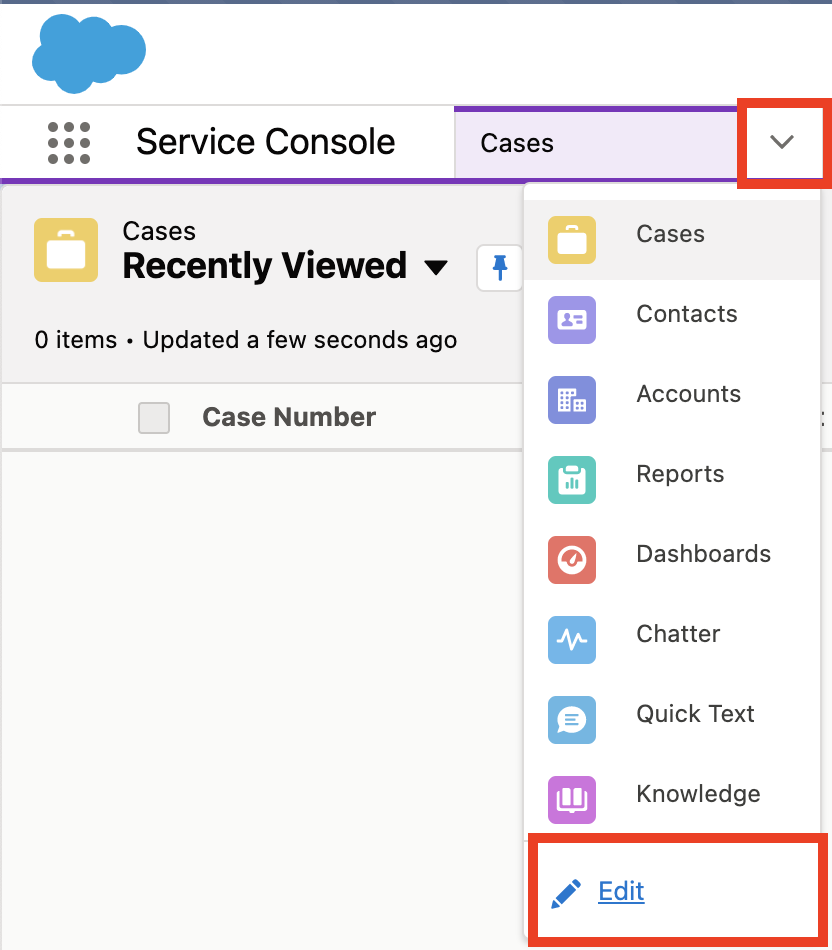
Navigate to the Service Console in your Salesforce instance.
Click the drawdown button in the Service Console navigation bar, and select Edit.
- In the proceeding popup, select Add More Items.

Click the + button next to AC Guided Setup, then add the item and save.
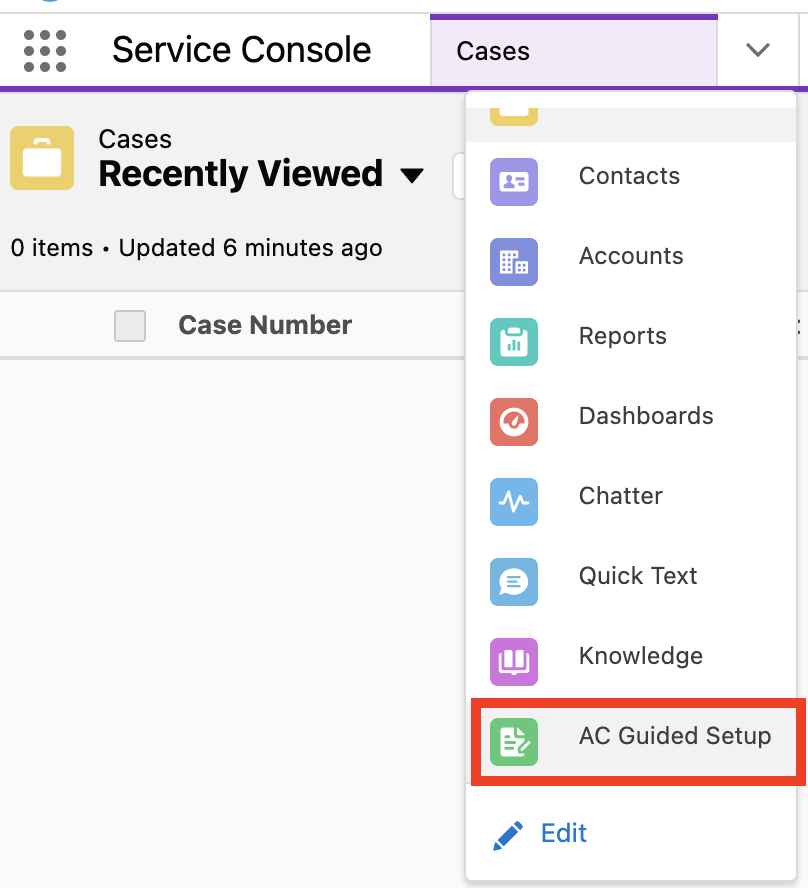
Select the newly added AC Guided Setup button in the drawdown menu.
Guided Setup Prerequisites
The below sections are linked to from the Guided Setup feature. Only perform the below steps when the Guided Setup feature links to them.
Create Named Credential
See here for instructions on setting up the Named Credential.
Create Connected App
To get access to the environment, a Connected App must be configured with OAuth settings enabled.
Log in into your Salesforce org and go to Setup
In the Quick Find field, type External Client Apps, then select Settings from the results
In the Connected Apps section, toggle on Allow creation of connected apps and select Enable on the pop-up that appears. Then, select the enabled New Connected App button.
*Note: If you're not able to enable creation of Connected Apps in Salesforce, contact Salesforce Customer Support to have this re-enabled. This can be done by creating a Salesforce Support case.
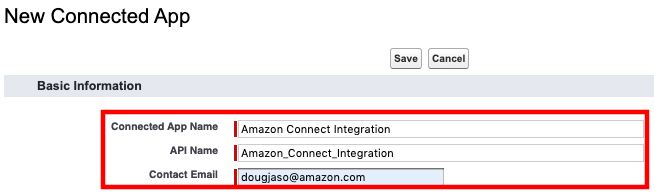
- On the New Connected App form, enter a name for the Connected App, such as Amazon Connect Integration and press tab. This will populate the API Name automatically. Then provide a contact email address
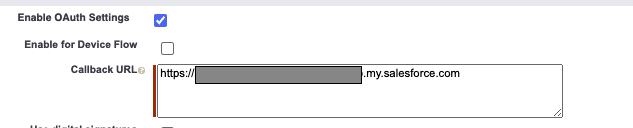
- Select the checkbox to Enable OAuth Settings

- Set the Callback URL to your domain url. Find the domain at Setup -> My Domain.
In the Selected OAuth Scopes section, select the following and add them to the Selected OAuth Scopes:
Access the identity URL service (id, profile, email, address, phone)
Manage user data via APIs (api)
Select the checkbox for Require Secret for Web Server Flow, and the checkbox for Require Secret For Refresh Token Flow
The API (Enable OAuth Settings) section should now look like this
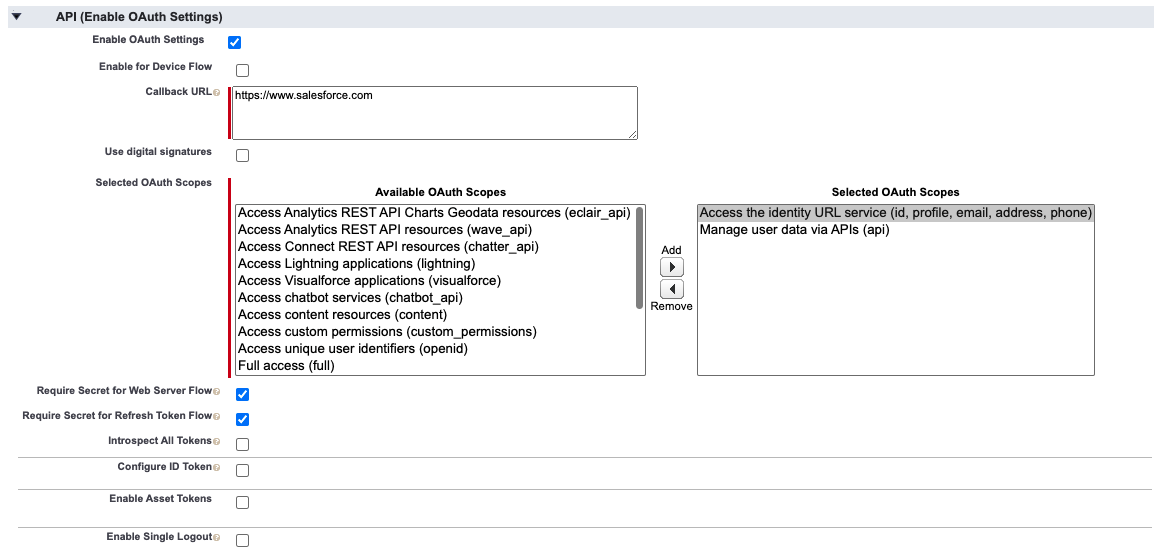
Select Save at the bottom of the screen.
Select Continue on the New Connected App page
You should now be at the new app's page
Copy the value for Consumer Key to your notepad
Select Click to reveal next to Consumer Secret and copy the value to your notepad
At the top of the detail page, select Manage
On the Connected App Detail page, select the Edit Policies button
Set Permitted Users to Admin approved users are pre-authorized and choose OK on the pop-up dialog
Set IP Relaxation to Relax IP restrictions
The OAuth Policies section should now look like the following

- Select Save
Guided Setup Additional Instructions
The below sections are linked to from the Guided Setup feature. Only perform the below steps when the Guided Setup feature links to them.
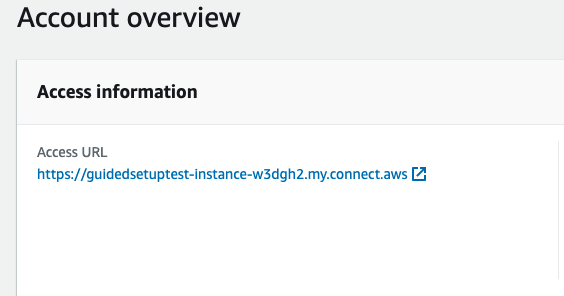
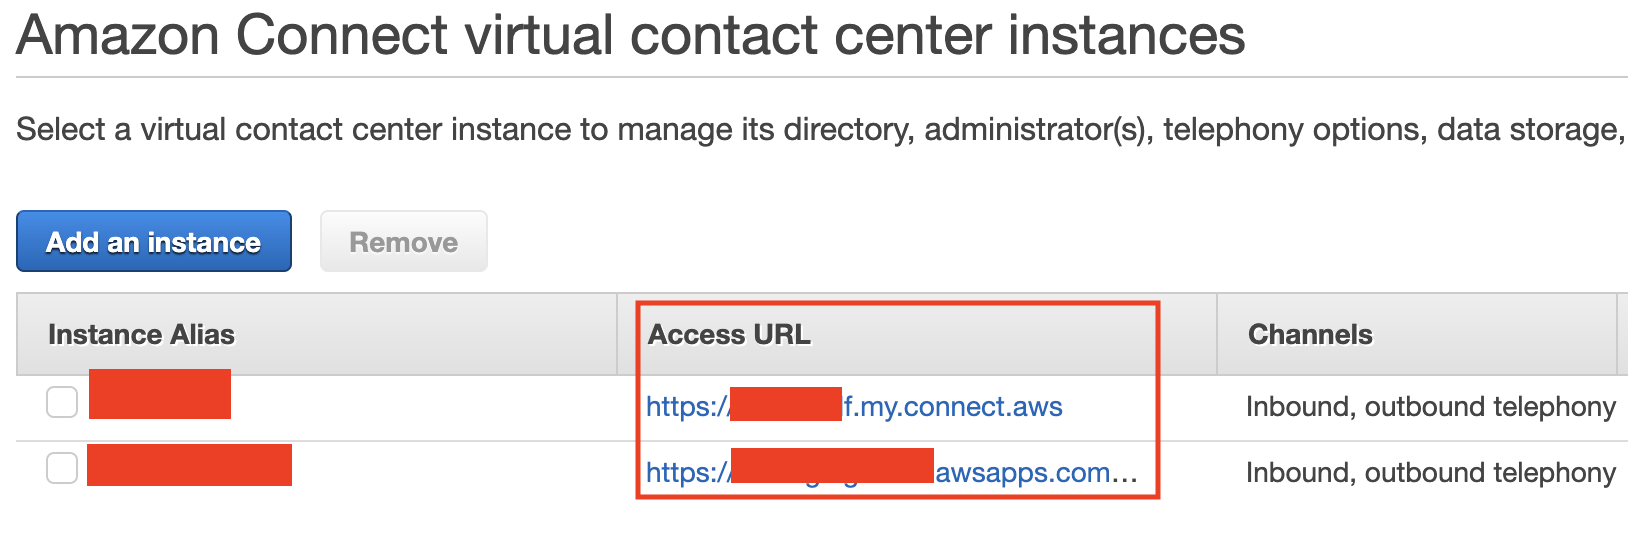
Retrieve Amazon Connect Instance Url
Navigate to the Amazon Connect Console
Select your Instance Alias
On the Overview page for your instance, copy the Login URL (if your Amazon Connect instance uses the
https://(instancename).awsapps.com/connect/logindomain, then remove everything after ".com"):
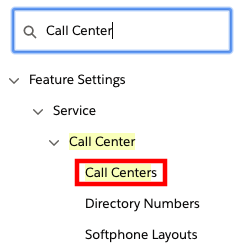
Add users to the Call Center
Log in into your Salesforce org and go to Setup
In the Quick Find field, enter Call Center, then select Call Centers from the result list
If you see the Say Hello to Salesforce Call Center page, select Continue
Select AC Lightning Adapter
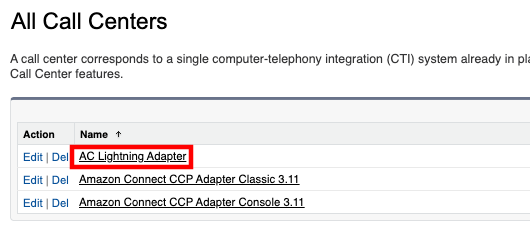
On the AC Lightning Adapter detail page, select Edit
On the AC Lightning Adapter: Manage Users page, select Add More Users.
Set filters (if desired) and then choose Find.
Select the checkbox next to the user to add, then choose Add to Call Center.

- Repeat the steps to add more users.
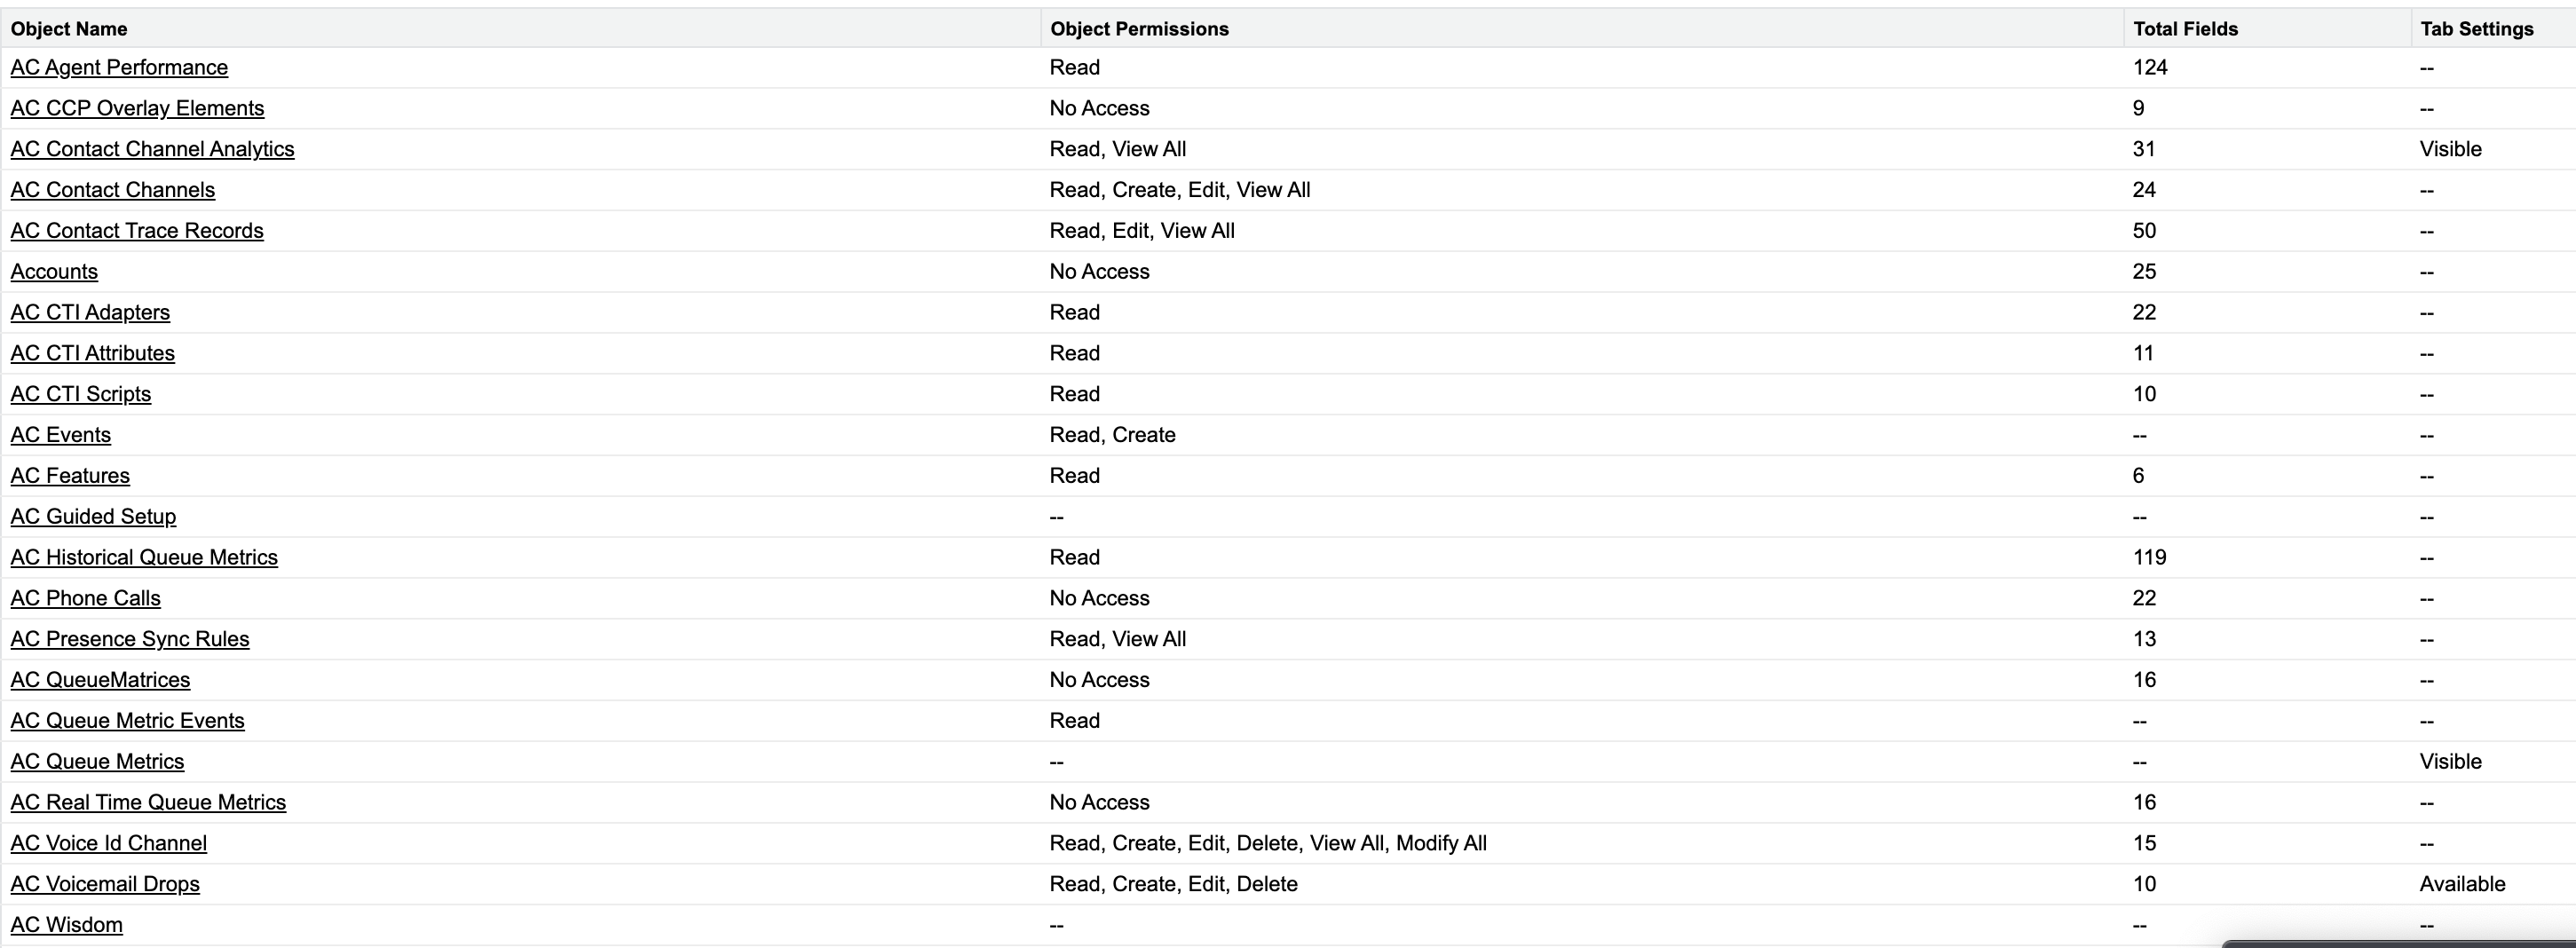
Add users to a Permission Set
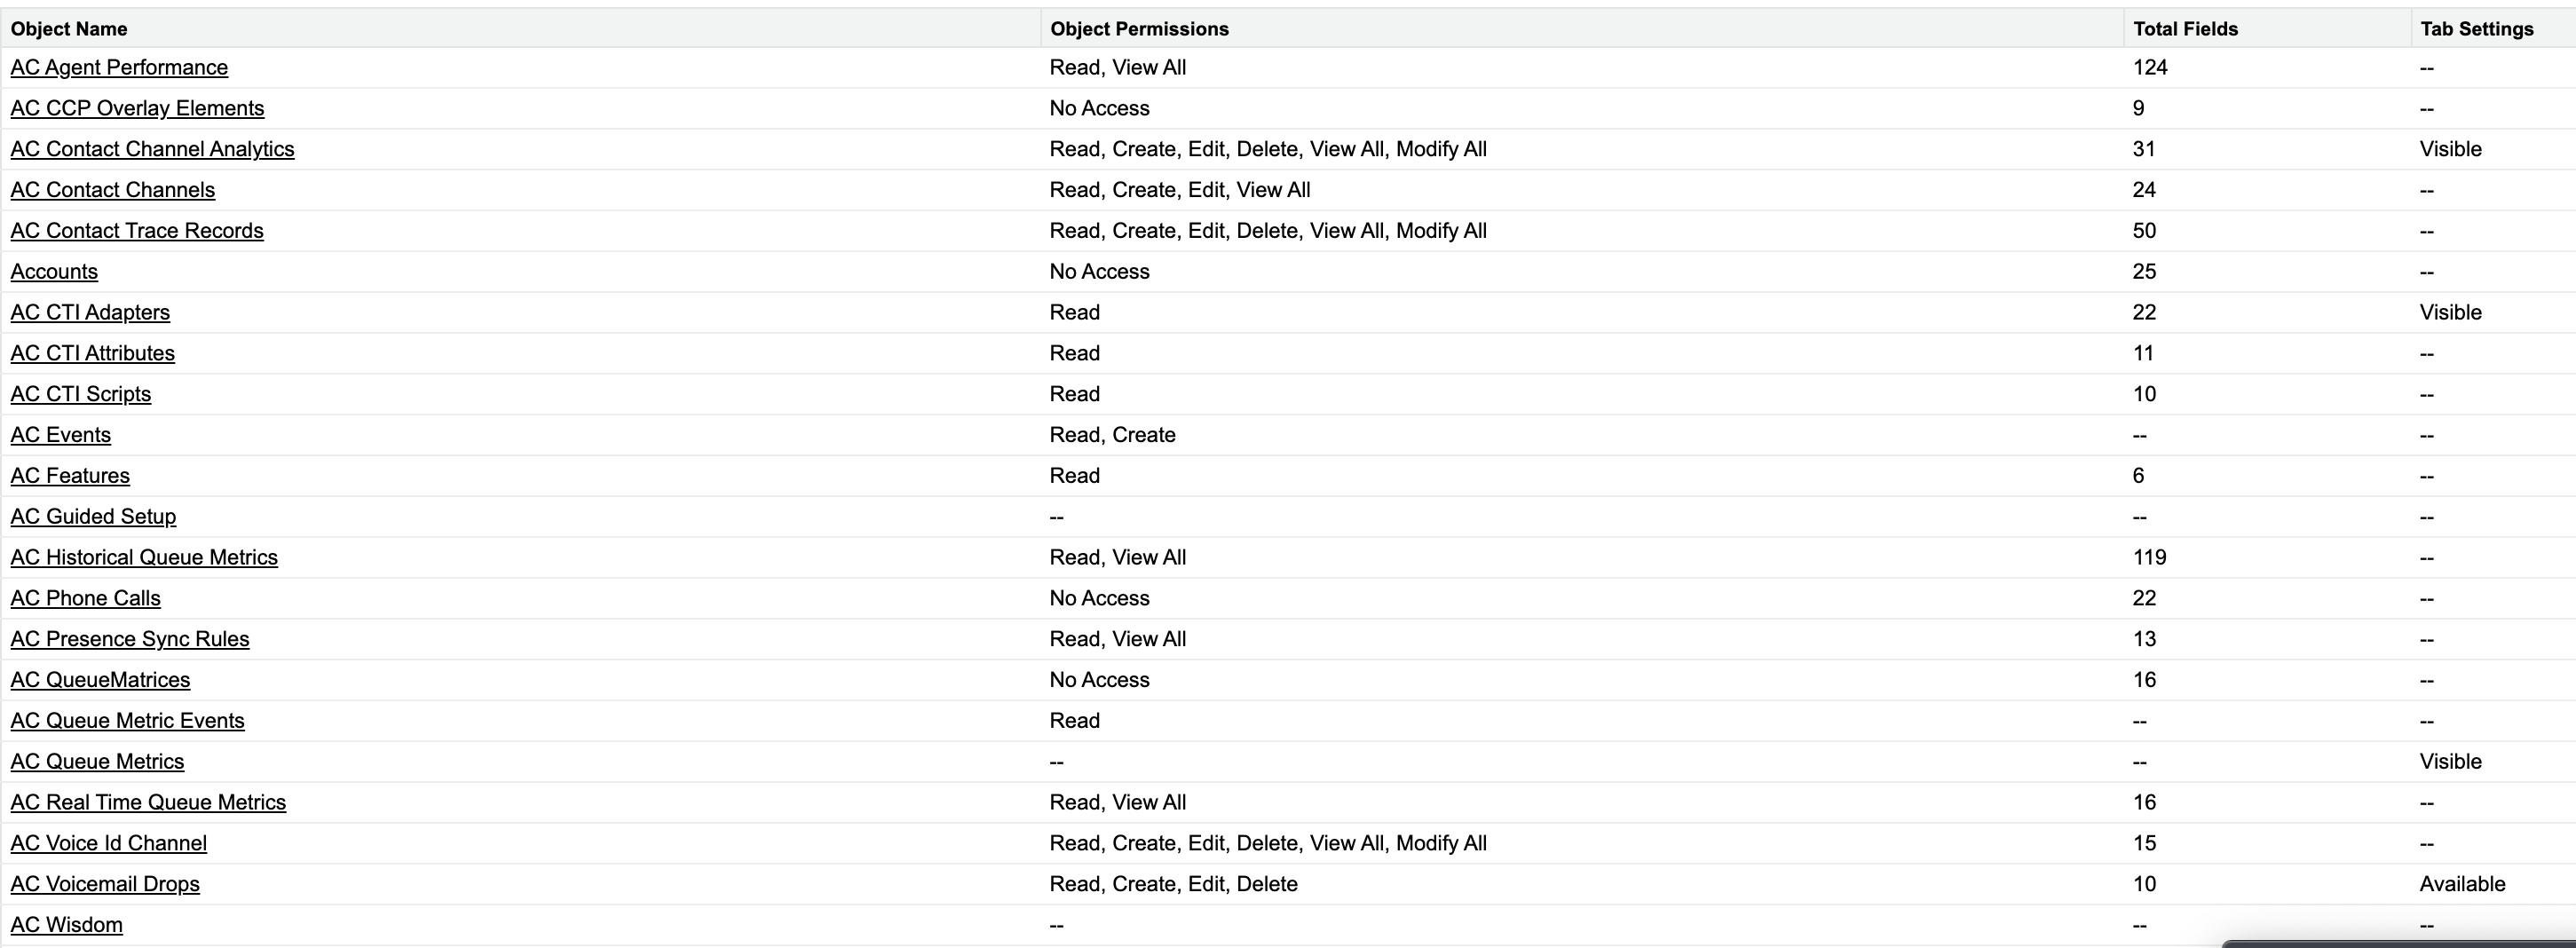
All users must be assigned the required permission set to access Salesforce metadata. The Amazon Connect CTI Adapter includes Permission Sets-- one for agents, one for managers, one for administrators, and a few for specific features, that grant users the appropriate access for their role. More information on assigning user permissions can be found in the Salesforce help documentation.
Log in into your Salesforce org and go to Setup
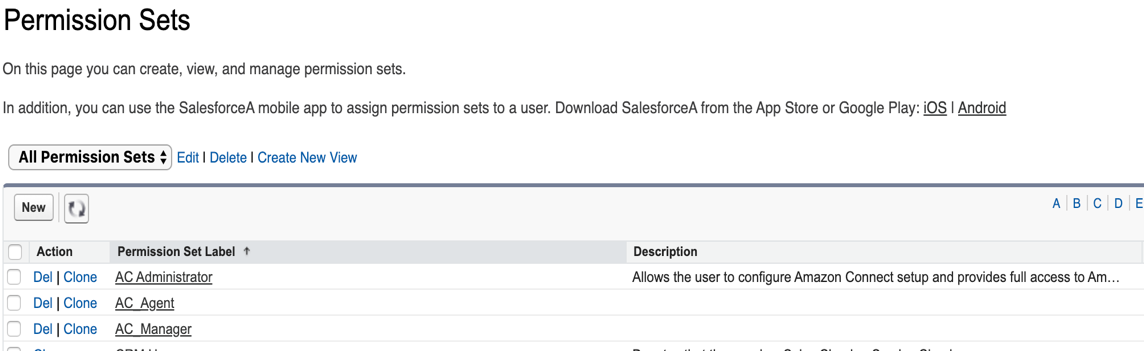
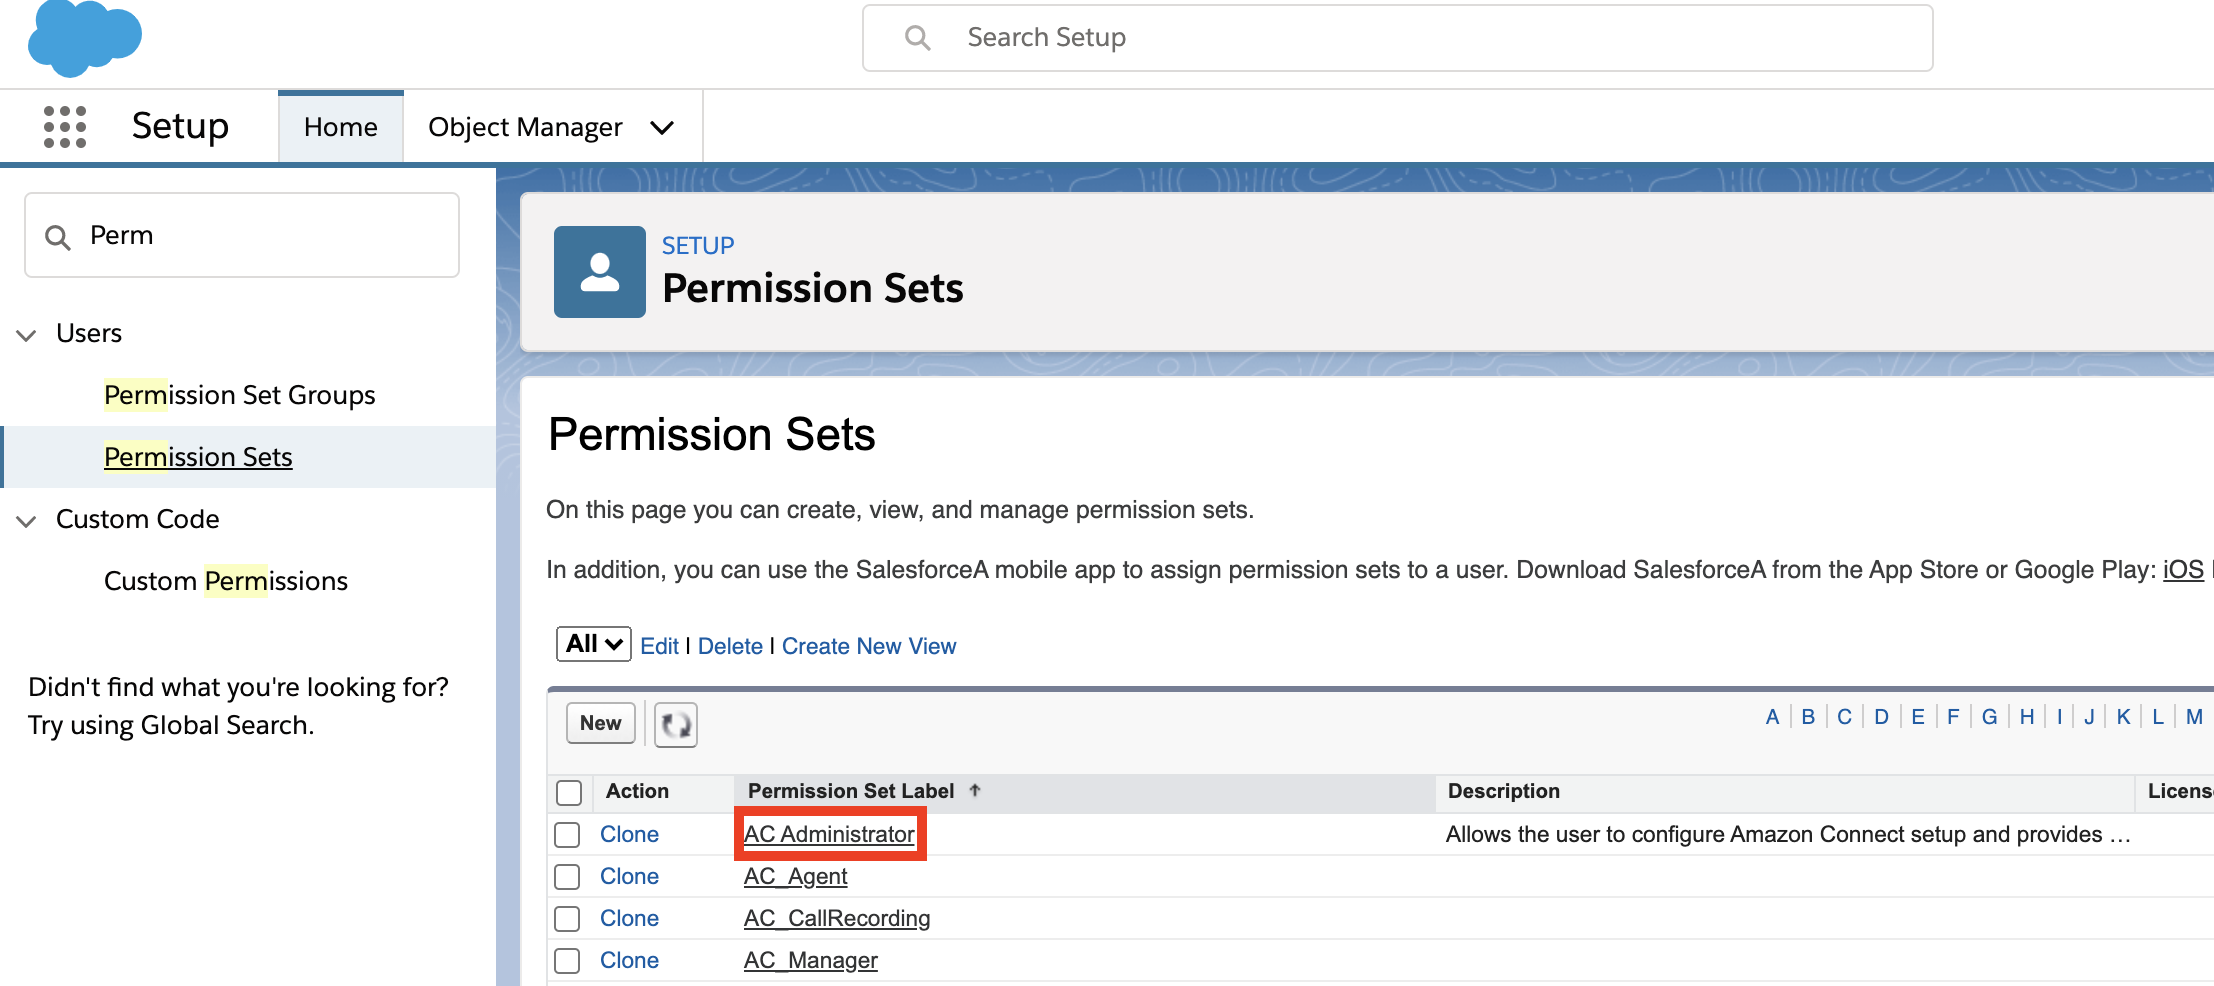
In Quick Find, enter Permission and select Permission Sets from the results
Choose AC_Administrator, AC_Agent or AC_Manager as appropriate for the user(s)
Choose Manage Assignments.
Choose Add Assignments.
Select the users to assign the permissions, then choose Assign.
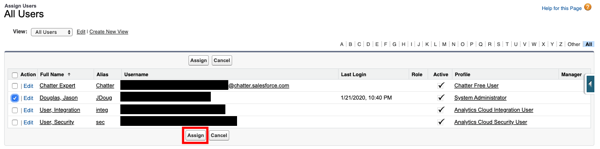
- Repeat these steps as needed for all users
AC_Administrator

AC_Manager
AC_Agent
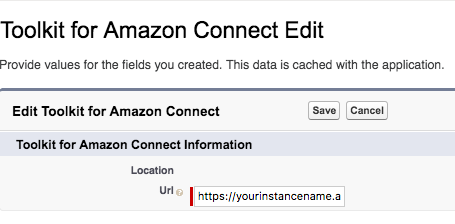
Configure the Toolkit settings
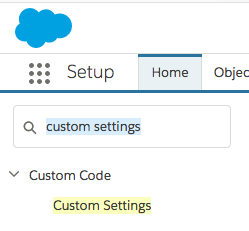
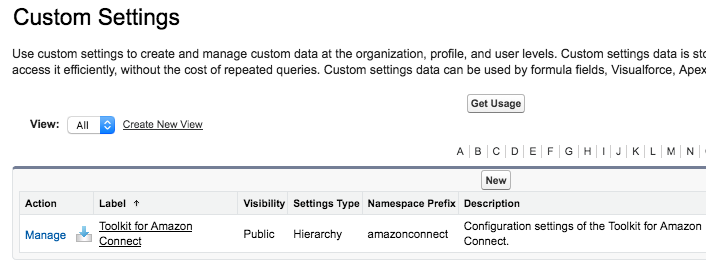
- Navigate to Setup then in type Custom Settings in Quick Find
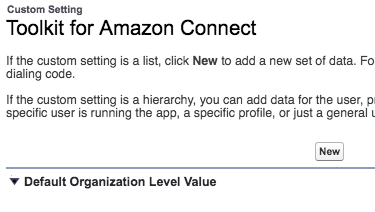
- Next to the Toolkit for Amazon Connect custom setting, choose Manage
- Select New
- On the following page, provide the URL to your Amazon Connect instance. This value can be found in your Amazon Connect console.
- You will also see the option to enable and disable certain triggers in the package, which you can configure to meet your needs. You can change these whenever you would like to. For more details, see below
These are options we provide that allow you to toggle certain functionality in the adapter.
- CCA Case Trigger - This trigger looks for any ContactChannelAnalytics records that could be related to a updated/inserted Case, and creates a relationsihp between the two records. This trigger uses batching to process the update requests.
- CCA Contact Trigger - This trigger looks for any ContactChannelAnalytics records that could be related to a updated/inserted Contact, and creates a relationsihp between the two records. This trigger uses batching to process the update requests.
- Case Contact CCA Trigger - This trigger looks for any Case/Contact records that could be related to an updated/inserted ContactChannelAnalytics record, and creates a relationsihp between the records.
- Task Trigger - This trigger creates a ContactChannel record for any inserted/updated task that with a
CallObjectfield that does not currently have a ContactChannel record created before.
- Select Save
Configure the Scheduler for Batch processing for triggers
The execution time for triggers that run in batches (refer the list above) can be managed using a cron-job scheduler in CTI Adapter. The scheduler allows you to configure the frequency at which triggers will execute in batches. By default, this job will run every hour. It's important to note that Salesforce's Lightning Platform has existing limits on lightning platforms, which you should consider when scheduling your apex batch jobs to avoid exceeding these constraints. For instance, there is a maximum limit of 100 concurrent Apex classes that can be scheduled (please refer to the Salesforce documentation for the latest limits). Therefore, if you anticipate more than 100 batch Apex executions per hour to fulfill all the associations from the triggers, you may need to increase the batch execution frequency accordingly. In order to setup the processing of these jobs, follow the below steps:
From the Setup, go to Object Manager, and click on AC CTI Adapter.
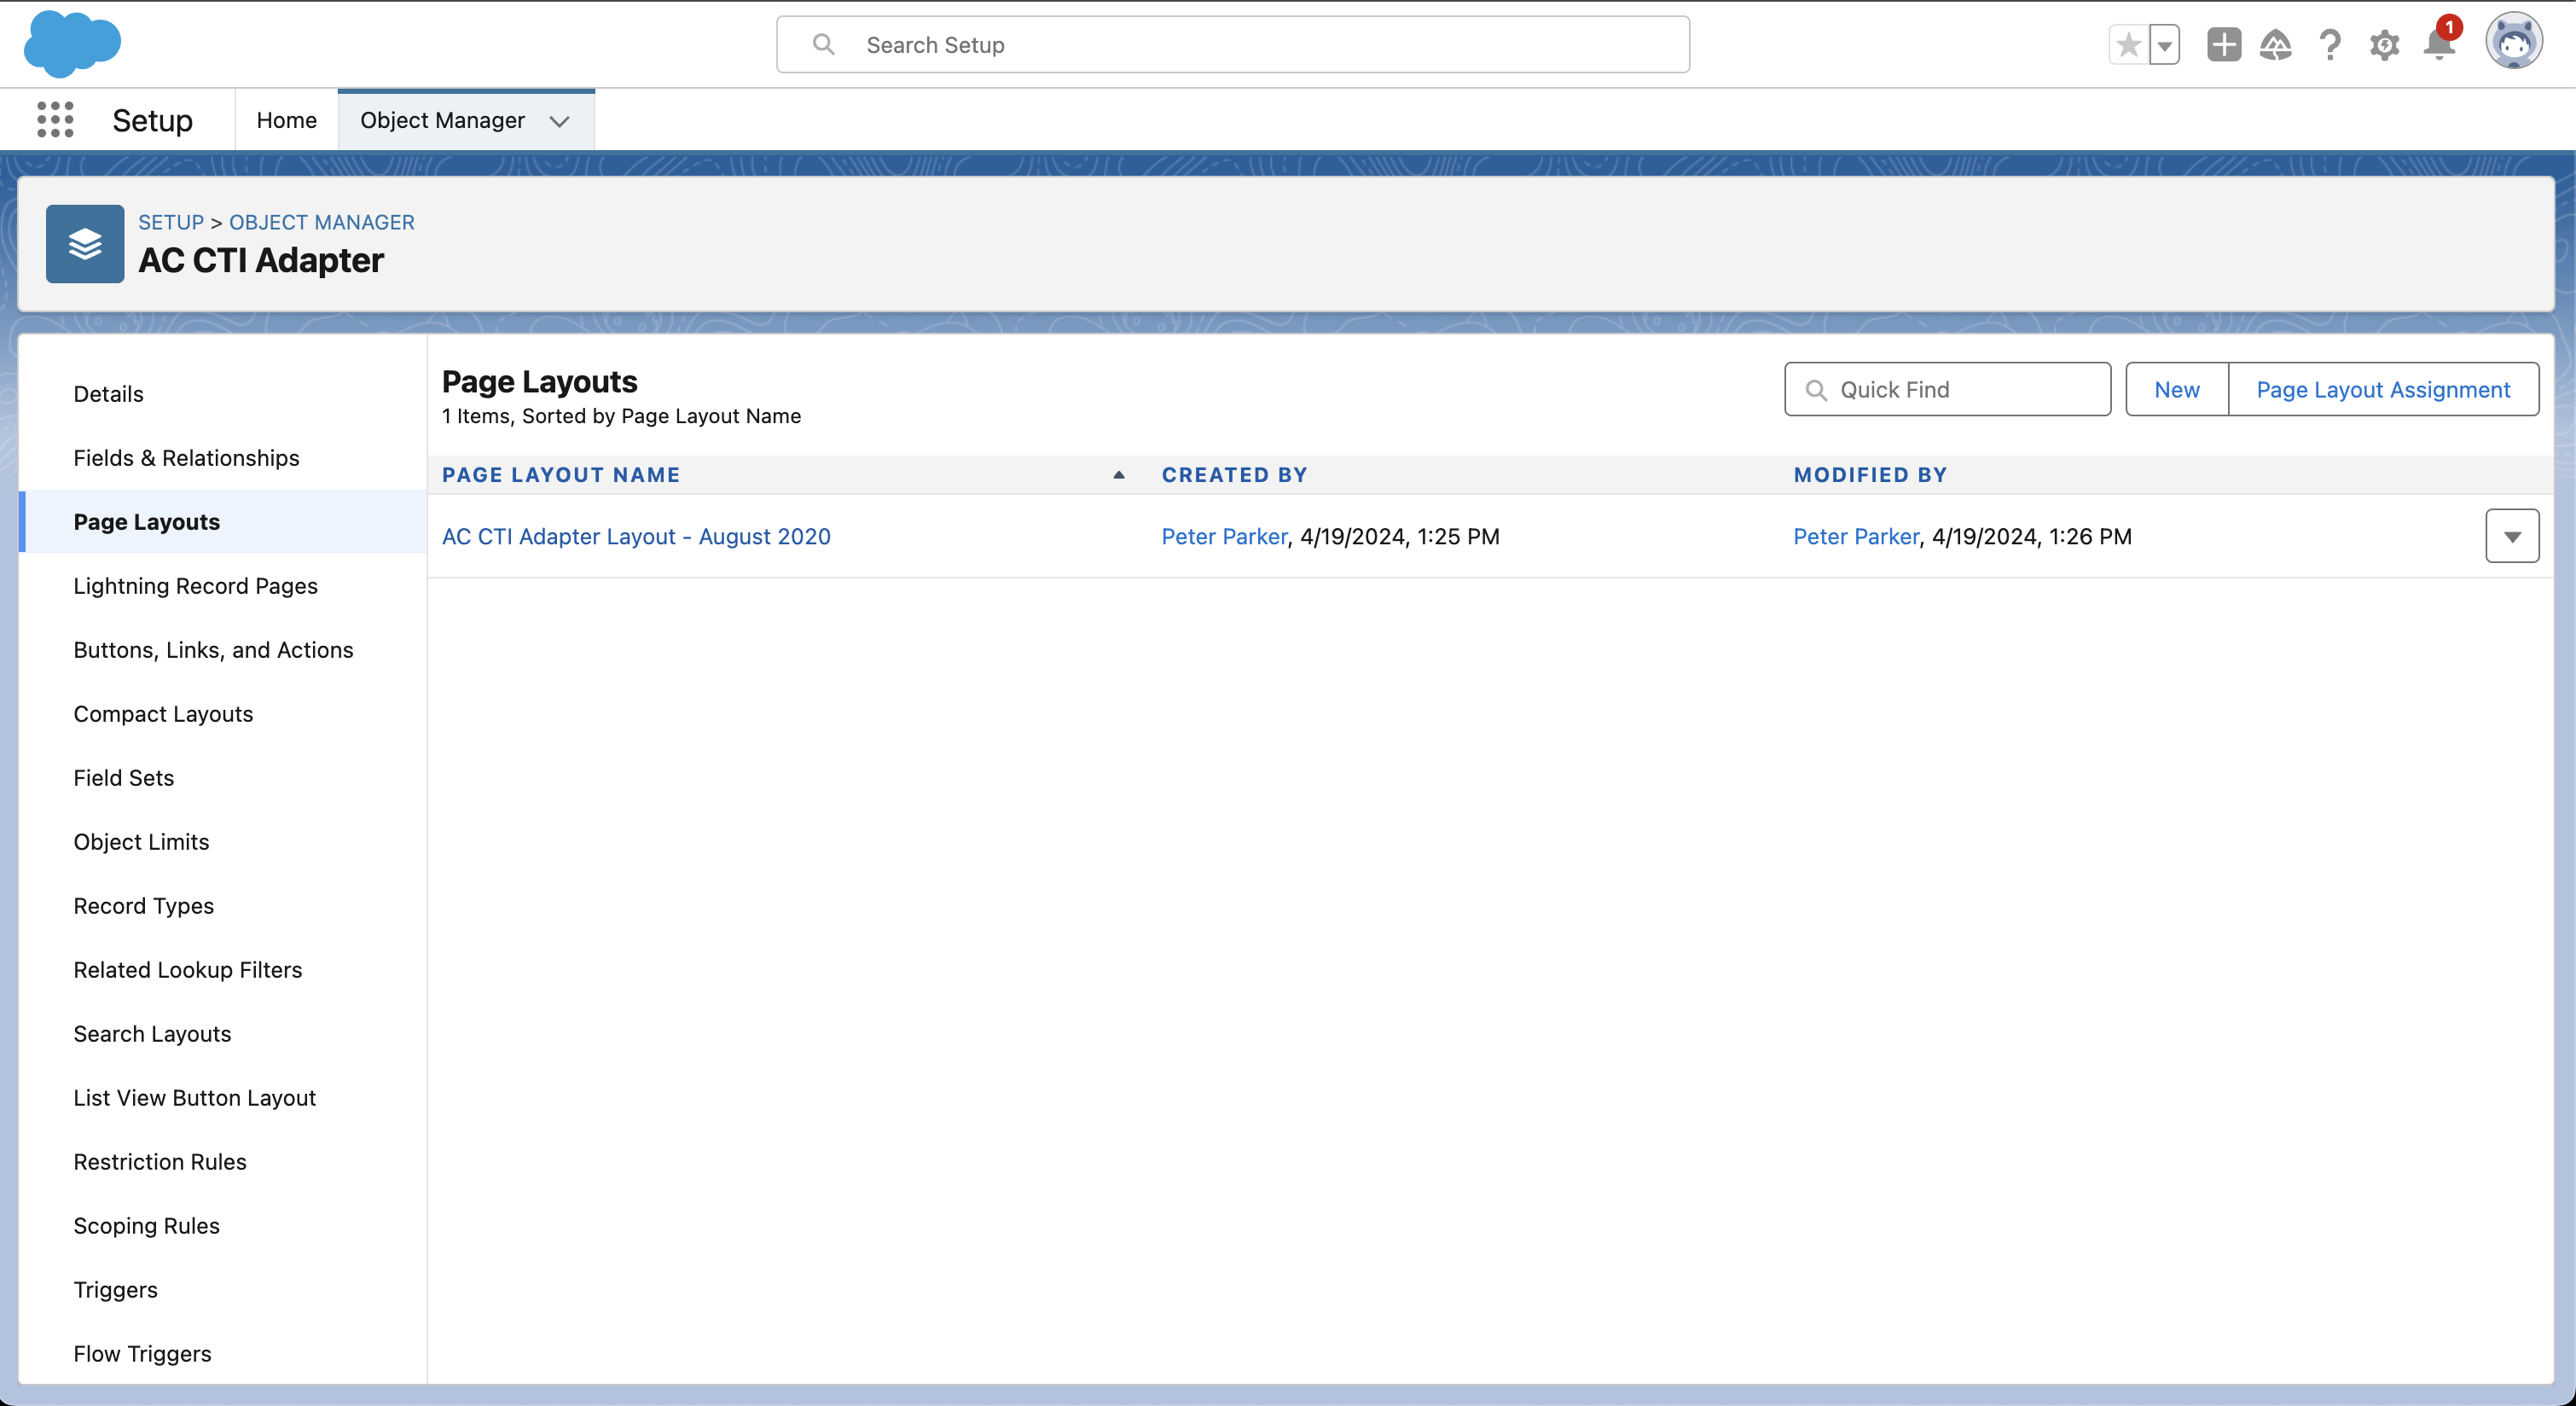
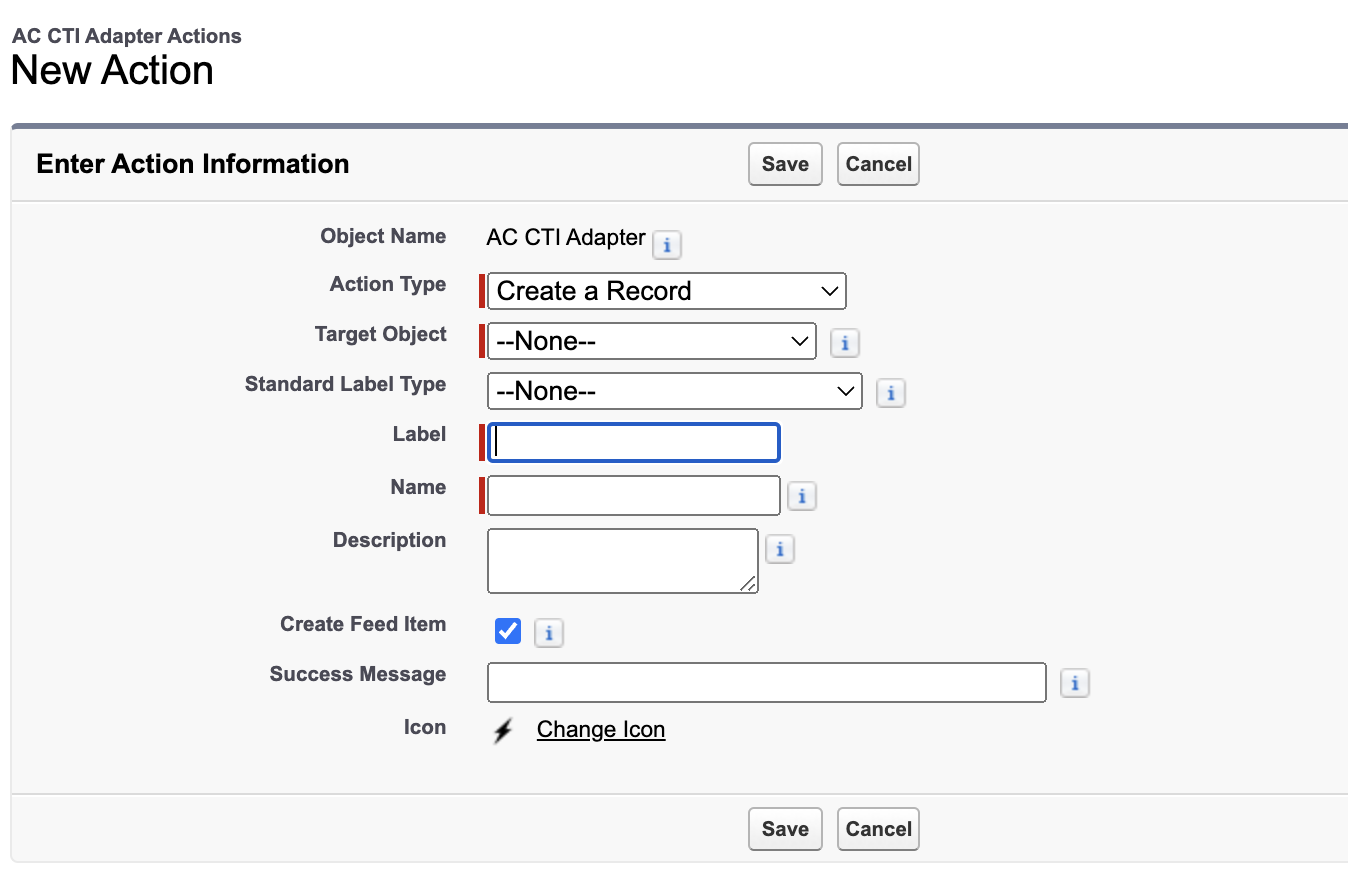
From the left navigation menu, select Buttons, Links, and Actions and click on New Action.
In the Action Type, select Lightning Component. A drop down for lightning component will appear from which, select
amazonconnect:AC_ToggleScheduleBatchJob.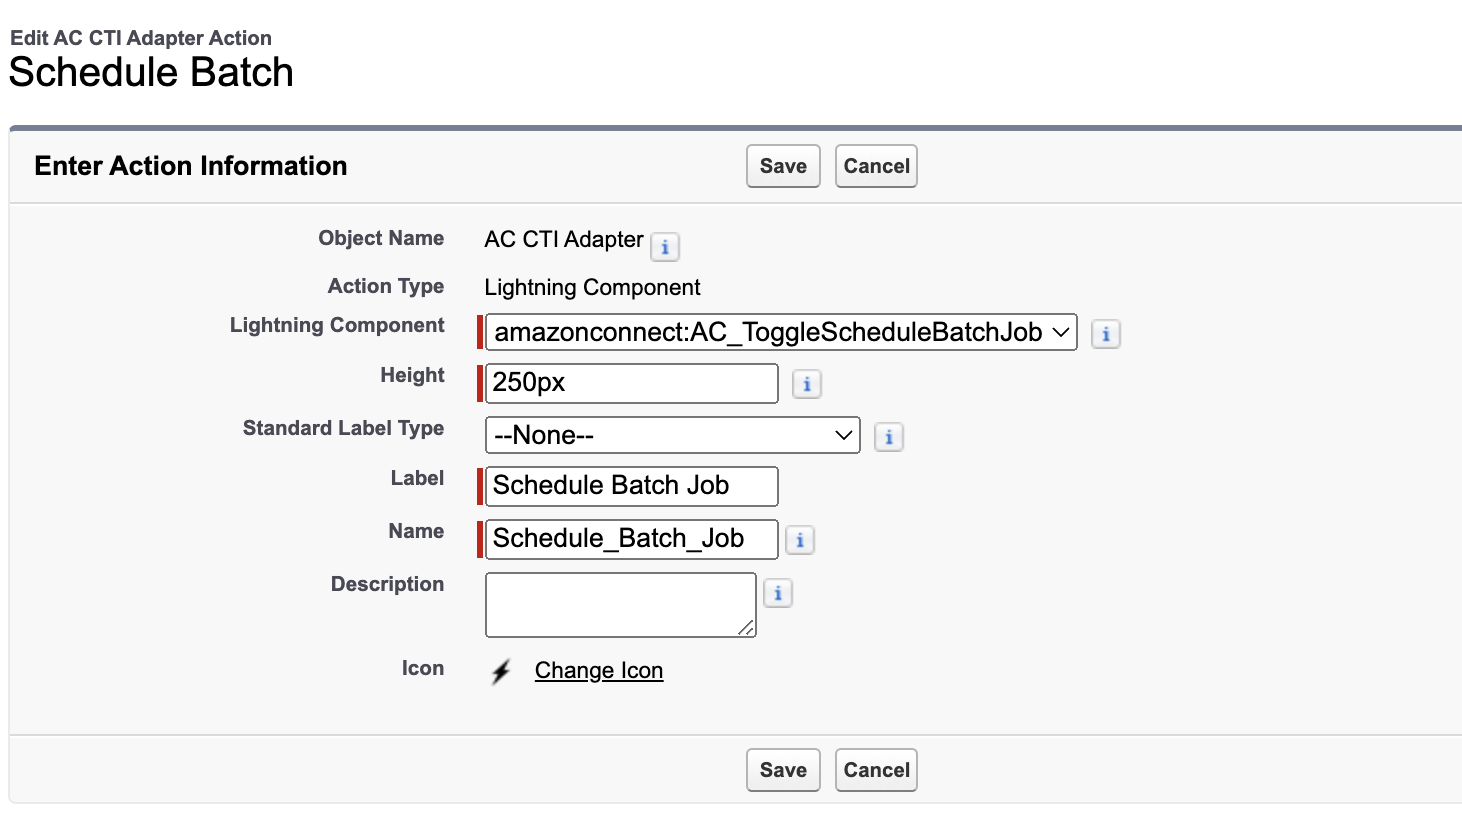
Provide the Label to the action as
Schedule Batch Joband click on Save.Click the Page Layouts and select the current layout used for displaying CTI Adapter. The default layout provided currently is AC CTI Adapter Layout - August 2020.
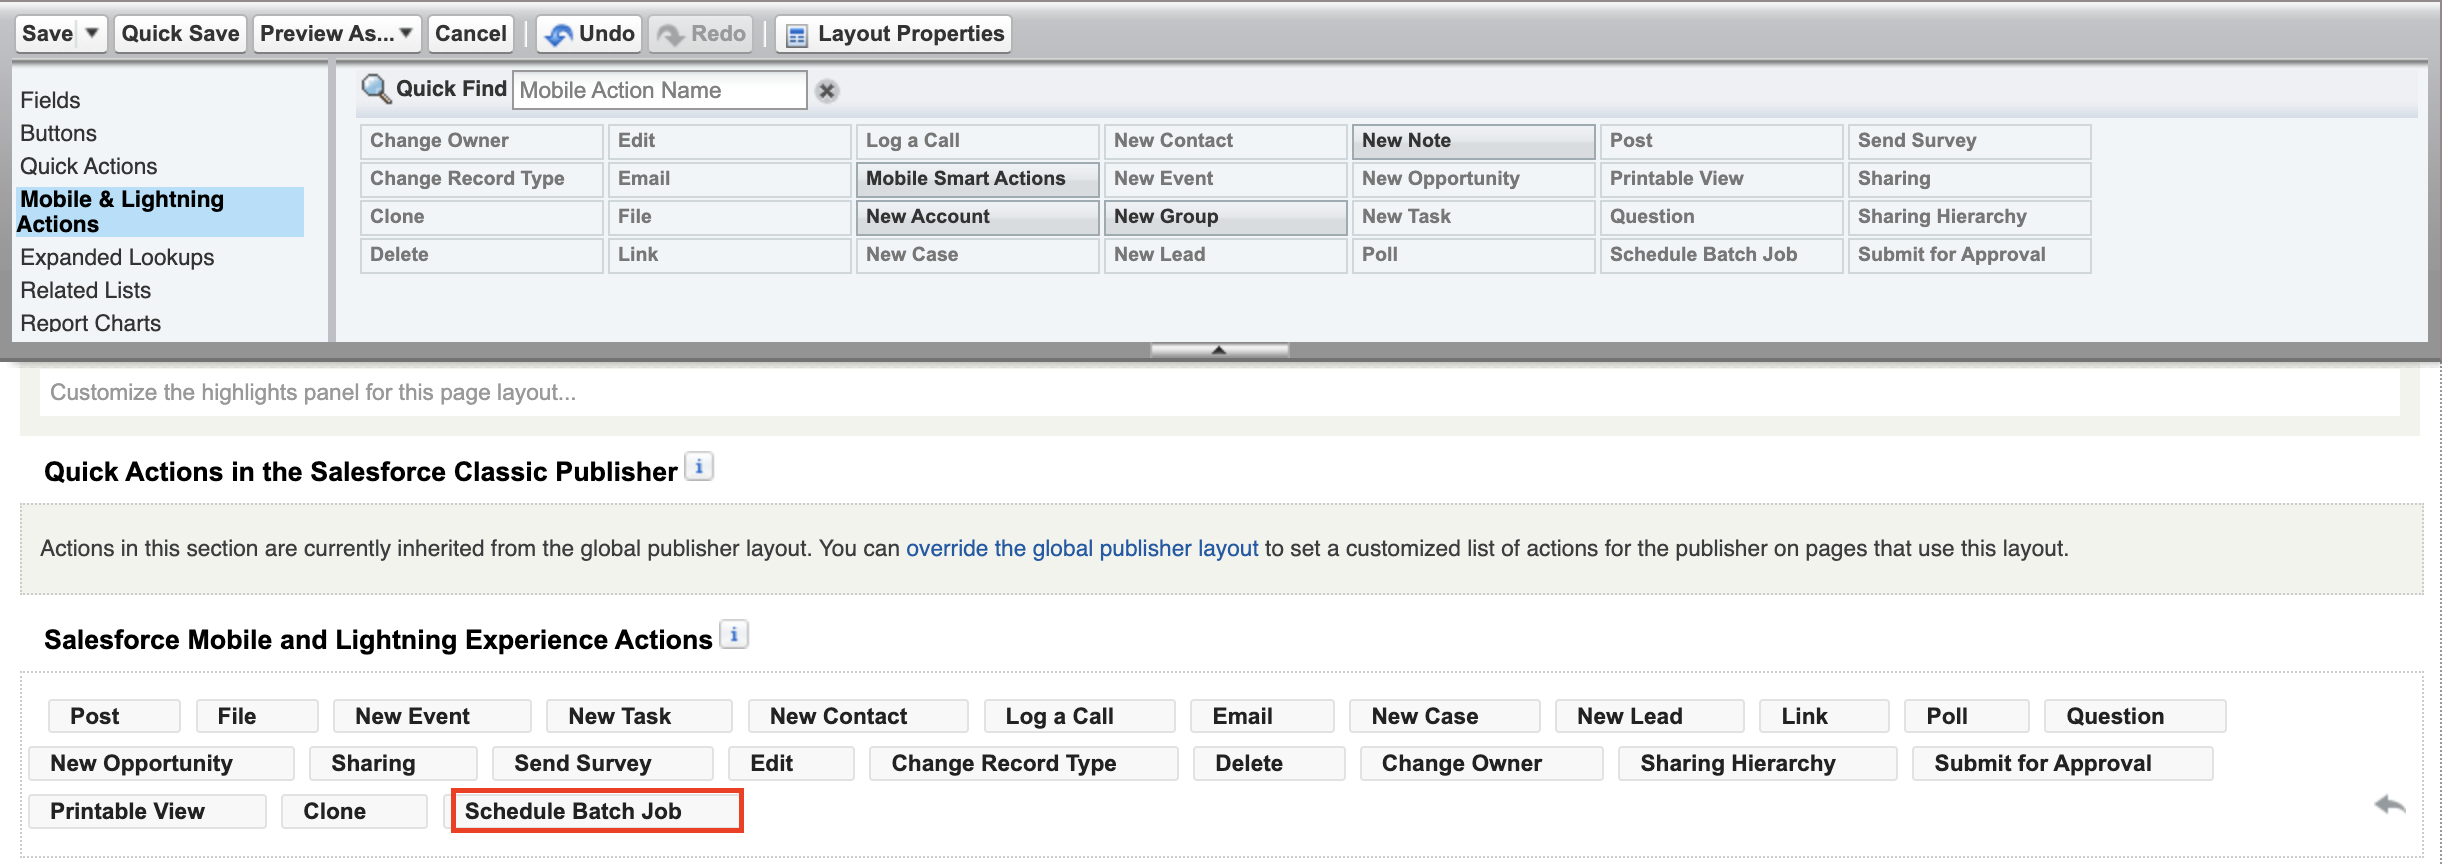
In the page layout edit view, under Salesforce Mobile and Lightning Experience Actions, enable the option to override the predefined actions.
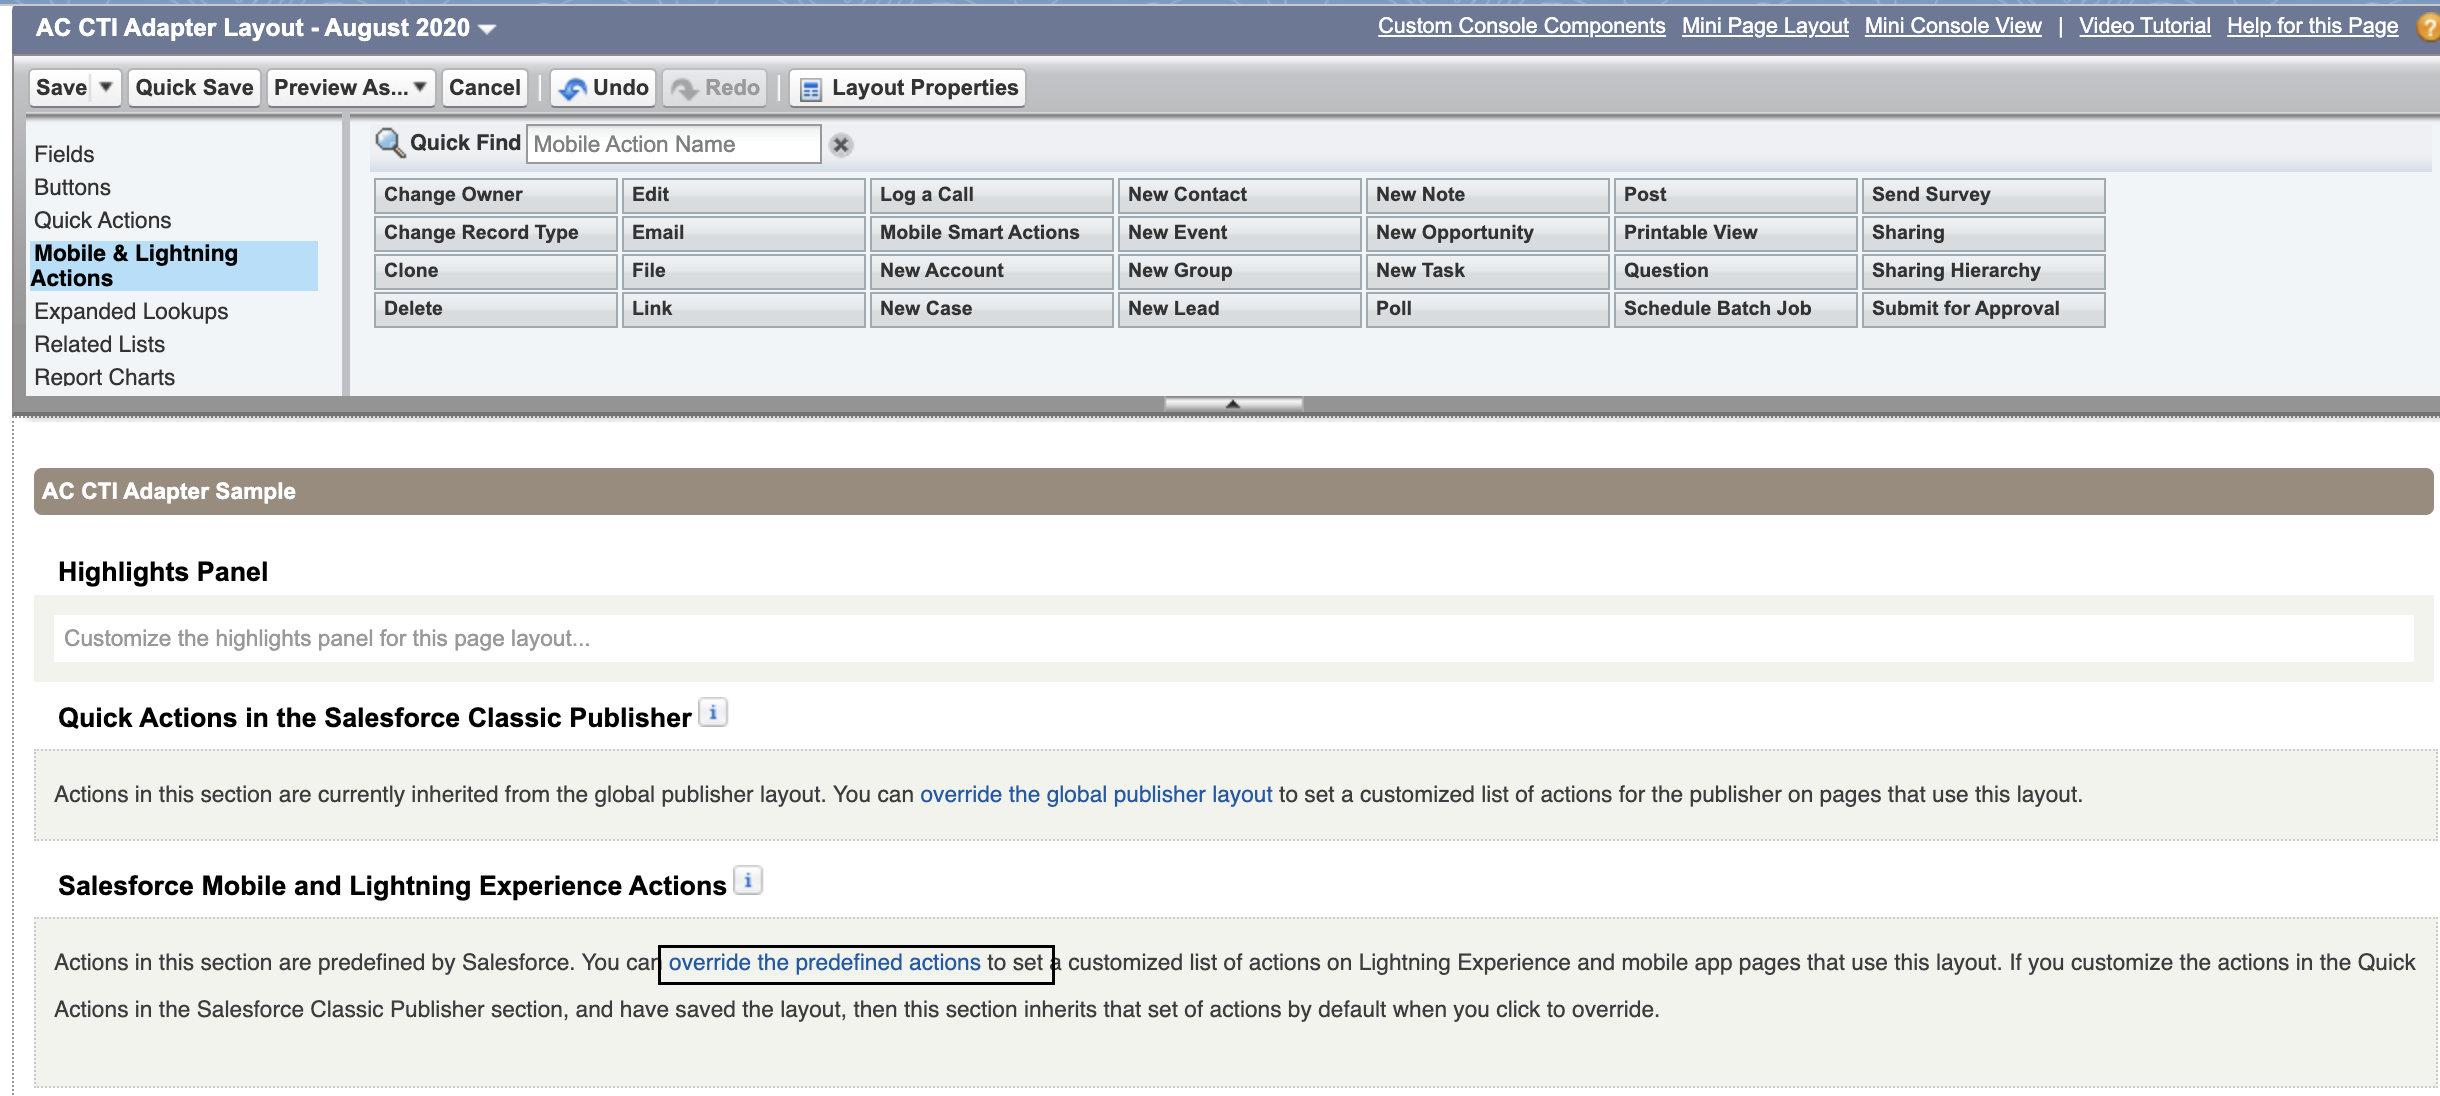
From the Mobile and Lightning Actions, drag the newly created action to the lightning experience actions section, and save the layout.
In the Service Console, under the AC CTI Adapters from the menu, choose the
ACLightningAdaptervalue been used in your Salesforce environment.From the drop down on the top right of the Cti Adapter, click on the newly created action Schedule Batch Job.
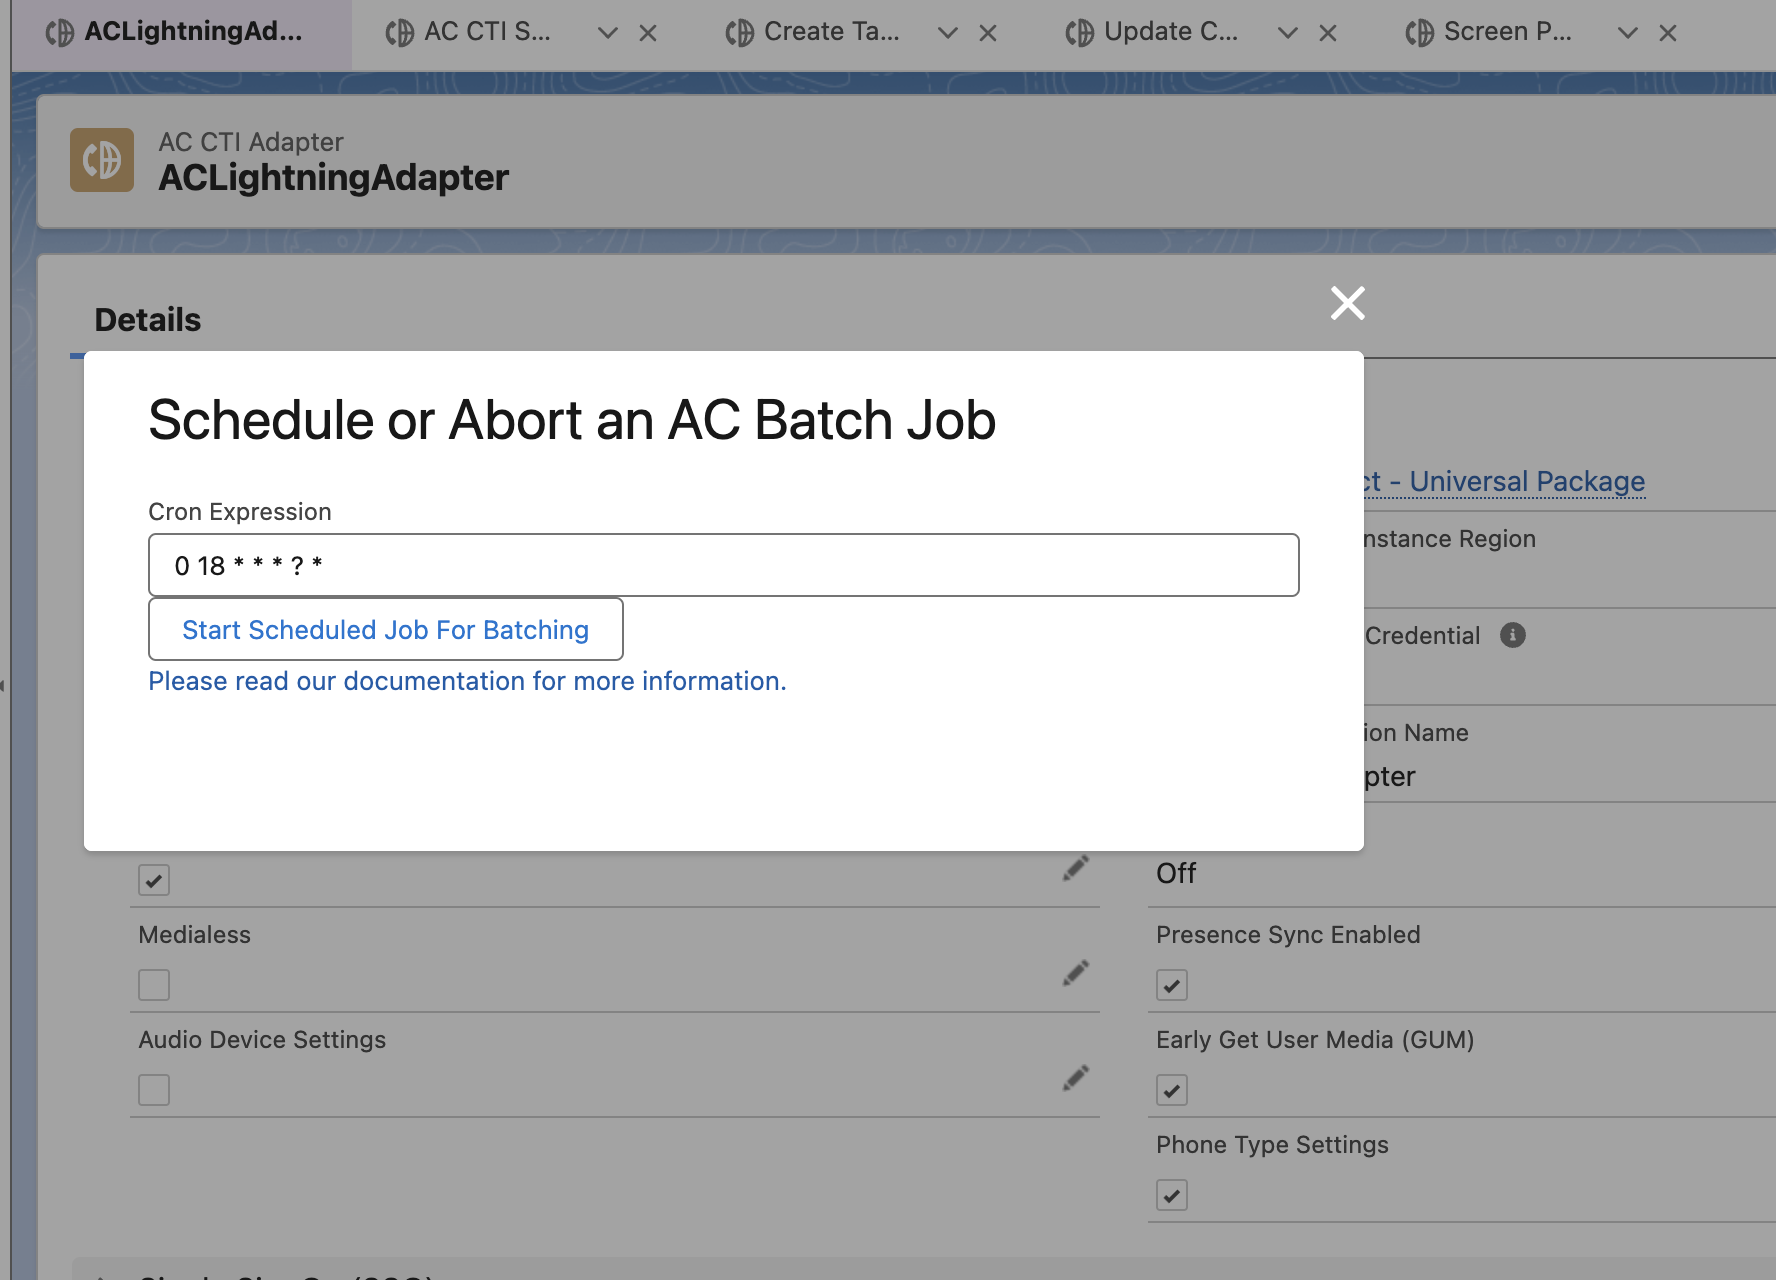
A pop up will open that allows you to set the schedule for the batch jobs to run. If required, you can use any available cron generator (such as this) to create a cron job schedule.
Finally, click on Start Scheduled Job For Batching to save the schedule and start the batch jobs.
Create the Softphone Layout
The softphone layout settings will tell the console what resources are available for screenpop by default and what to do under different match conditions.
Log in into your Salesforce org and go to Setup
In the Quick Find box, type Softphone, then choose Softphone Layouts from the results
If you are presented with the Get Started message, choose Continue
On the Softphone Layouts page, choose New

- Enter a name for the layout, such as AmazonConnectDefault, then select the Is Default Layout checkbox.

- Expand Display these salesforce.com objects and select objects that CTI Connector should be able to search, for a screen-pop query. In this example, Case has been added to the default selection, allowing search and screen-pop by CaseID.

- If desired, configure the search behavior to your requirements

- Additionally, validate the Screen Pop settings. Please note that the default behavior is to not pop a screen if there is more than one result
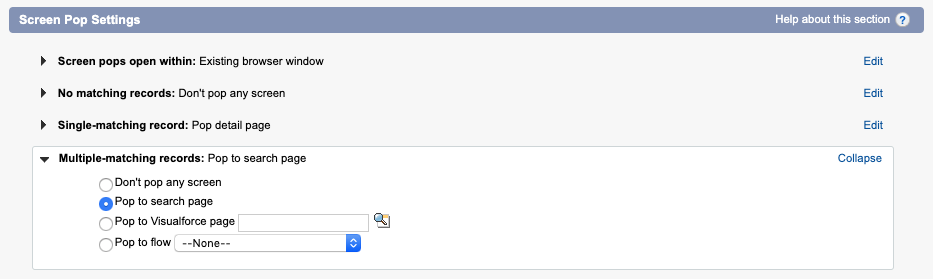
- Once you have configured the search behavior, choose Save
Retrieve the Salesforce API Version
Log in into your Salesforce org and go to Setup
In the Quick Find field, type apex, then select Apex Classes from the results
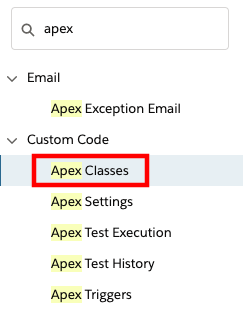
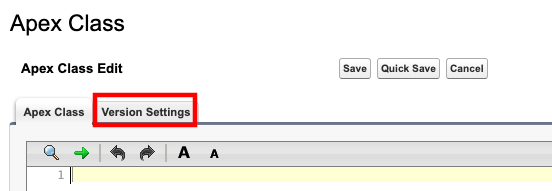
- Select New

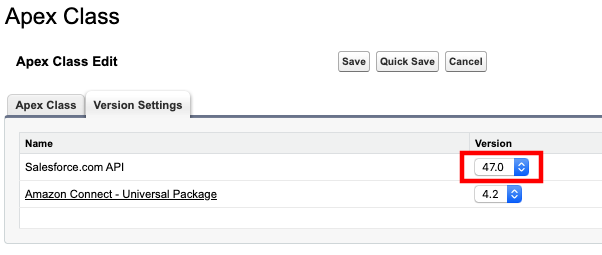
- Select the Version Settings tab
- Note the Salesforce.com API version in your notepad. The pattern of this value is
vXX.X.
Setting up the Salesforce API User
The Lambda functions authenticate with Salesforce via user credentials. It is a common practice to create an API user account for this purpose.
Log in into your Salesforce org and go to Setup
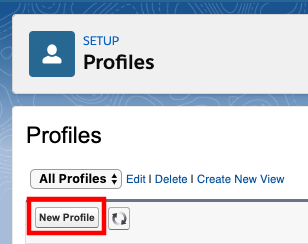
In the Quick Find field, type profiles, then select Profiles from the results
Select New Profile
Provide a Profile Name, such as API_ONLY
From the Existing Profile dropdown, select System Administrator NOTE: You\'re advised to use a full Salesforce License for the user to be able to set the below permissions and have full access to avoid any other errors.
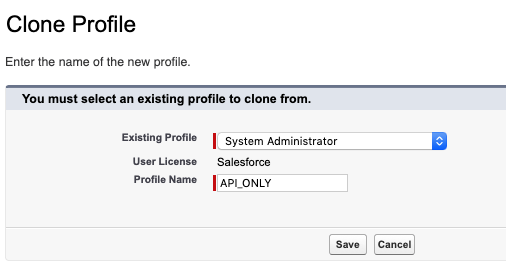
Select Save to create the new profile
Once the new profile page opens, scroll down to and select the System Permissions section

When the next page opens, select edit
Make sure the Lightning Experience User option is unselected

Select Save, and confirm the changes
Go back to the Profile Overview, scroll down, and select Password Policies

Select Edit.
Set User passwords expire in to Never expires NOTE: Failure to this may lead to production outages.
Select Save.
In the Quick Find field, type connect, then select Manage Connected Apps from the results

Select the app you have created earlier, Amazon Connect Integration
In the profiles section, select Manage Profiles
Select the new API_Only profile that you just created
Select Save at the bottom of the page
In the Quick Find field, type users then select Users from the results
Select New User
Set the required fields as:
a. Last Name: apiuser
b. Alias: apiuser
c. Email: provide a valid email address
d. Username: apiuser@<yoursalesforcedomain>.com
e. Nickname: apiuser
On the right-hand side, set User License to Salesforce
Set Profile to API_ONLY
Choose Save
In Quick Find, search for "Permission Sets". Select the AC_Administrator permission set.
Select Manage Assignments. Add the apiuser you just created to the permission set.
A confirmation email with an activation link will be sent to the email address provided. Choose the link to activate your user and set their password
Fill out the form to set a password for the API user
Select Change Password. The API user will log into the Salesforce Classic view
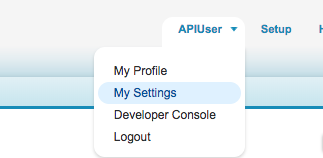
Access the API user's personal settings by selecting the username in the top right corner, then choose My Settings
- In the Quick Find field, type security then select Reset My Security Token from the results
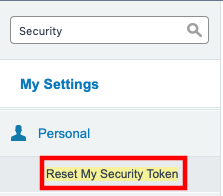
Select Reset Security Token. Your security token will be emailed to you
Copy the security token from the email to your notepad
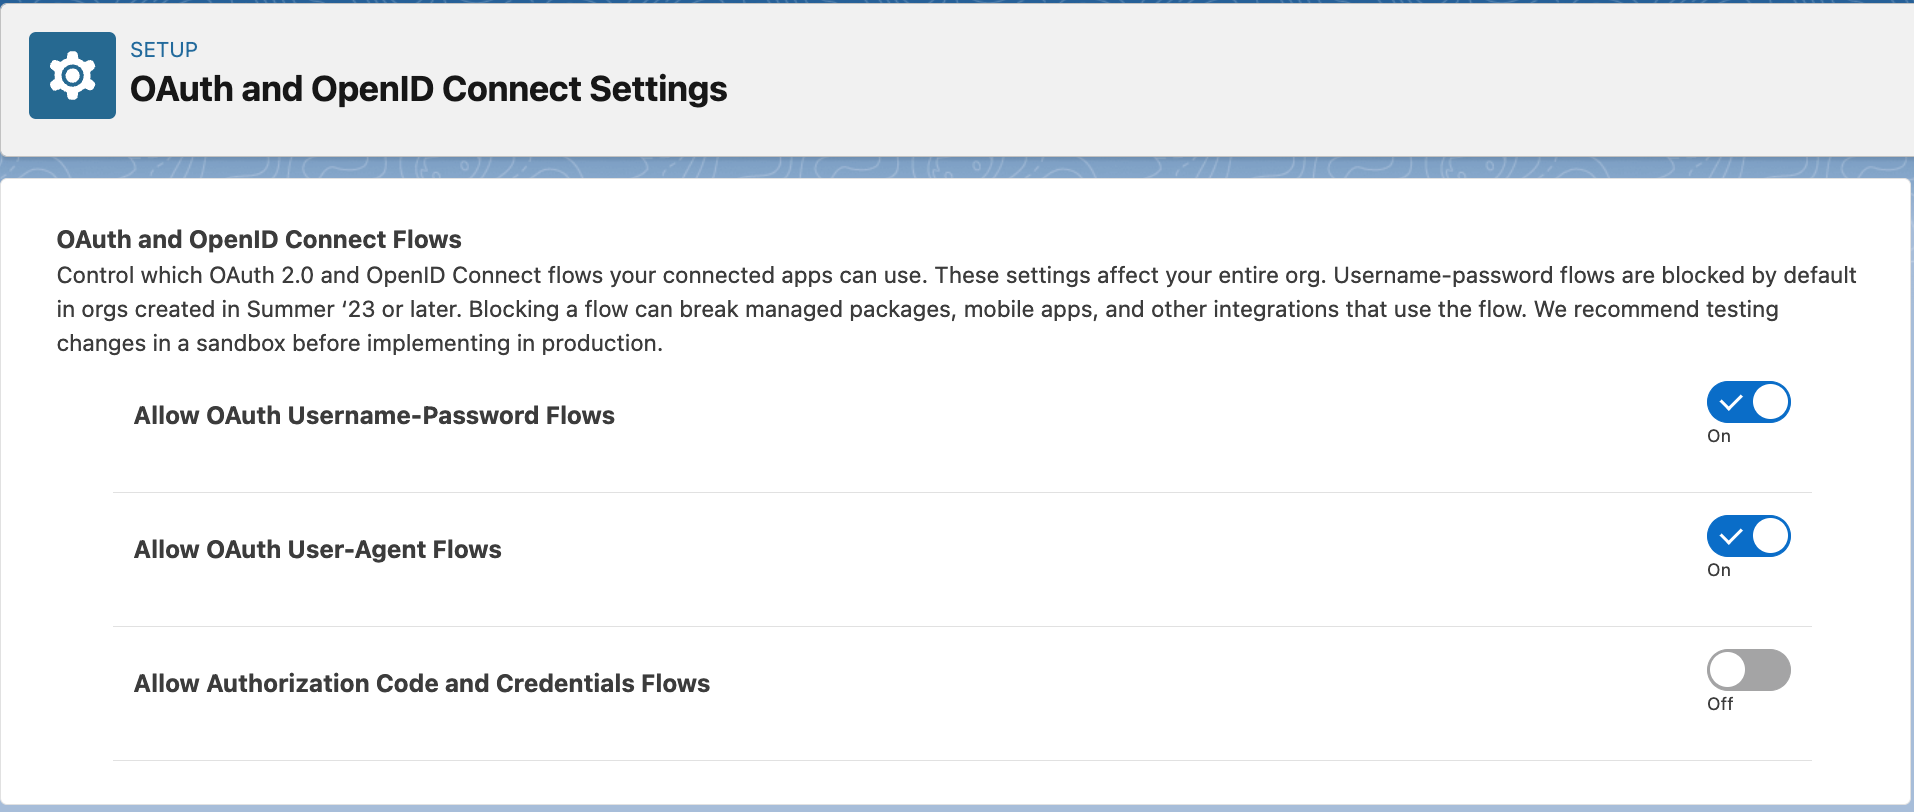
Allowing the API user to authenticate using password
The api user created above authenticates using username-password flow in Salesforce. This flow needs to be unblocked and to do that, go to Setup and in the Quick Find box, search for OAuth and OpenID Connect Settings. After that, make sure that the toggles for Allow OAuth Username-Password Flows and Allow OAuth User-Agent Flows are turned ON, as shown in below image.
Setting up the SecretsManager Secret
To ensure that your Salesforce credentials are secure, the Lambdas require that the credentials are stored in AWS Secrets Manager. AWS Secrets Manager is a highly secure service that helps you store and retrieve secrets.
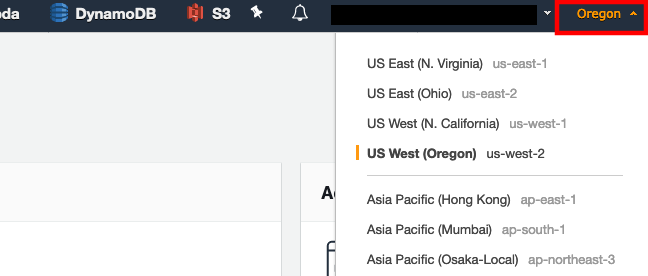
In a new browser tab, login to the AWS console
Make sure you are in the same region as your Amazon Connect instance. You can set the region by expanding the region selector in the upper right and choosing the region
Navigate to the Secrets Manager console
Select Secrets
Select Store a new secret
Select Other types of secrets
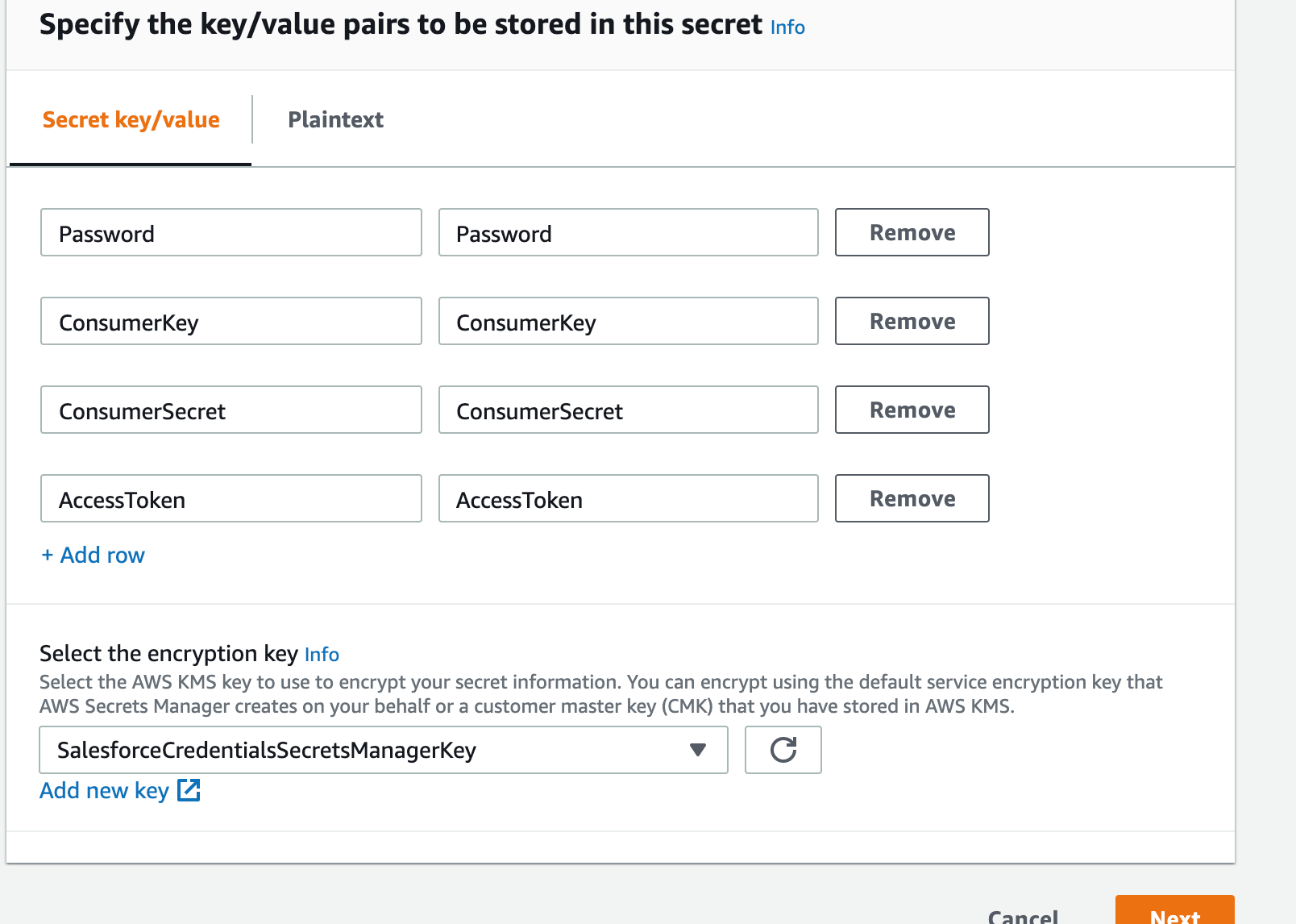
Make sure Secret key/value is selected
Enter key value pairs that match the following:
a. Key: Password, Value: the password for the API user that you configured in the previous section
b. Key: ConsumerKey, Value: the Consumer Key for the Connected App you created in the previous section
c. Key: ConsumerSecret, Value: the Consumer Secret for the Connected App you created in the previous section
d. Key: AccessToken, Value: this is the access token for the API user that you configured in the previous section
For the encryption key, click Add new key
Select Create Key
Make sure key type is set to symmetric
Give your key an alias, like SalesforceCredentialsSecretsManagerKey
Click Next
Select administrators you want to have access permission to change the key policy. Make sure you are being as restrictive as possible
Click Next
Select the users and roles you want to have access to the Salesforce credentials in Secrets Manager. Make sure you are being as restrictive as possible
Click Next
Click Finish
Click on the managed key that you just created (which is SalesforceCredentialsSecretsManagerKey in this case).
Note down the ARN. This is SalesforceCredentialsKMSKeyARN that will be used later when installing the Amazon Connect Salesforce Lambda package.
Navigate back to the Secrets Manager setup tab
Select the key you just created
Click Next
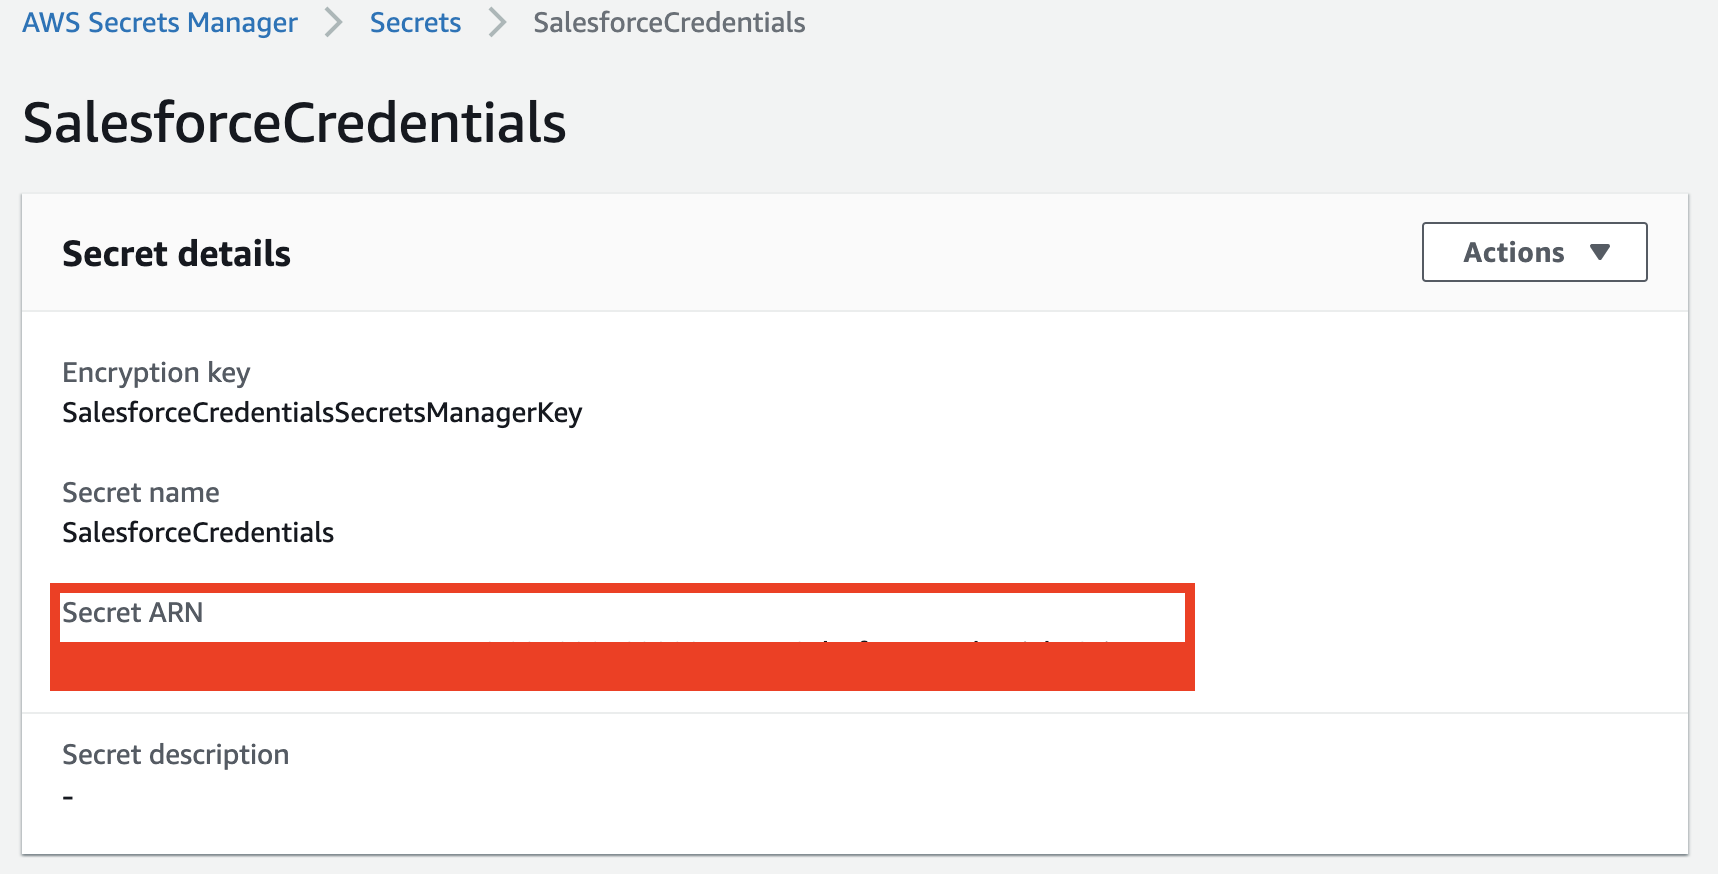
Give your secret a name, like SalesforceCredentials
Click Next
Make sure automatic rotation is disabled.
Click Next
Click Store
Select the secret you just created, and copy the Secret ARN
Test the Salesforce Lambda Core Functionality
The package provides a core Lambda function (sfInvokeAPI) that supports multiple operations, like lookup, create and update. For the initial validation, sample events are provided within the function. Validating this function provides a good check that the installation and configuration is correct.
Validating the lambda functions requires the use of test events to simulate data coming into the function as it would in a typical deployment. Each function has a set of test event samples included to make validation easier.
Validate the core functionality
In a new browser tab, login to the AWS console
Open the AWS Lambda Console
In the Filter field, enter sfInvokeAPI and press enter, this will filter your list out to the core function that we just installed
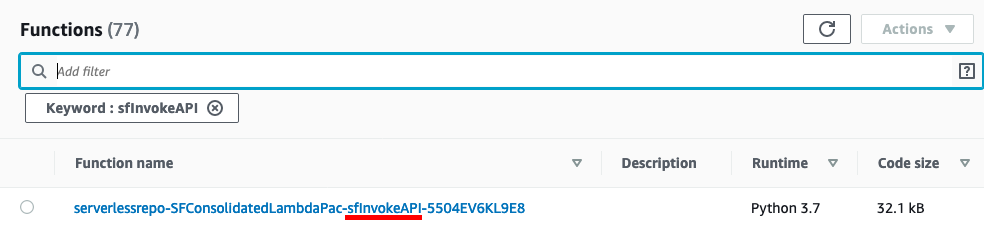
Select the function name. First, we will validate a phone number lookup.
In the Environment pane, double-click the event-phoneLookup.json file
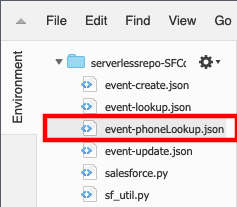
The test even JSON will open in the Lambda editor
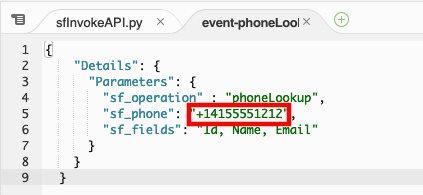
Modify the value for sf_phone to match the phone number of the test contact you created when you setup the CTI adapter or for any valid contact in your Salesforce org\ NOTE: The phone number must be in E.164 format
Select the entire JSON event and copy it, then close the event-phoneLookup.json tab.
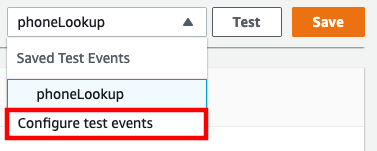
In the top-right corner, select drop-down arrow next to Test and choose Configure test events
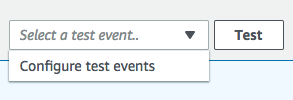
Select the radio button for Create new test event and provide an event name, for example: phoneLookup
Select the existing event JSON and delete it. Paste the modified JSON payload you copied from the event-phoneLookup.json file
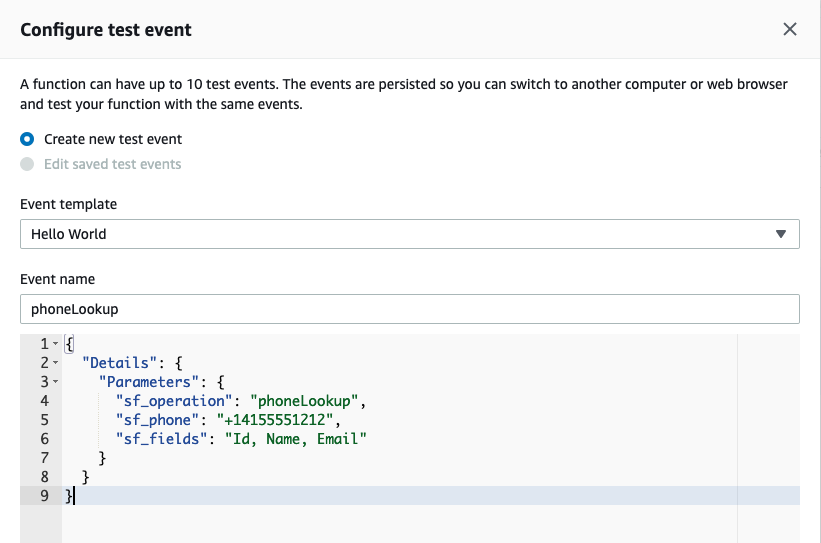
Select Create to save your test event
By default, your new test event should be selected in the drop-down list to the left of the Test button.

Select Test
If successful, the result will contain fields defined in "sf_fields" parameter in the invocation event
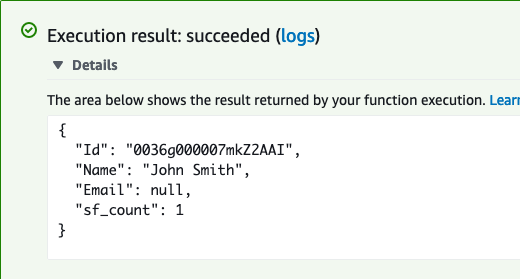
Copy the value for the Id key in the response. Next, we are going to use that Id to create a Case in Salesforce.
In the Environment pane, double-click the event-create.json file. Replace the existing ContactId value with the ID value you copied previously.
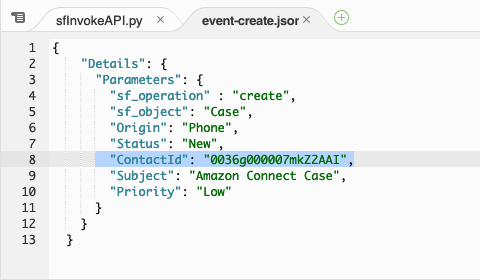
Select the entire JSON event and copy it, then close the event-create.json tab.
In the top-right corner, select drop-down arrow next to Test and choose Configure test events
Select the radio button for Create new test event and provide an event name, for example: createCase
Select the existing event JSON and delete it. Paste the modified JSON payload you copied from the event-create.json file
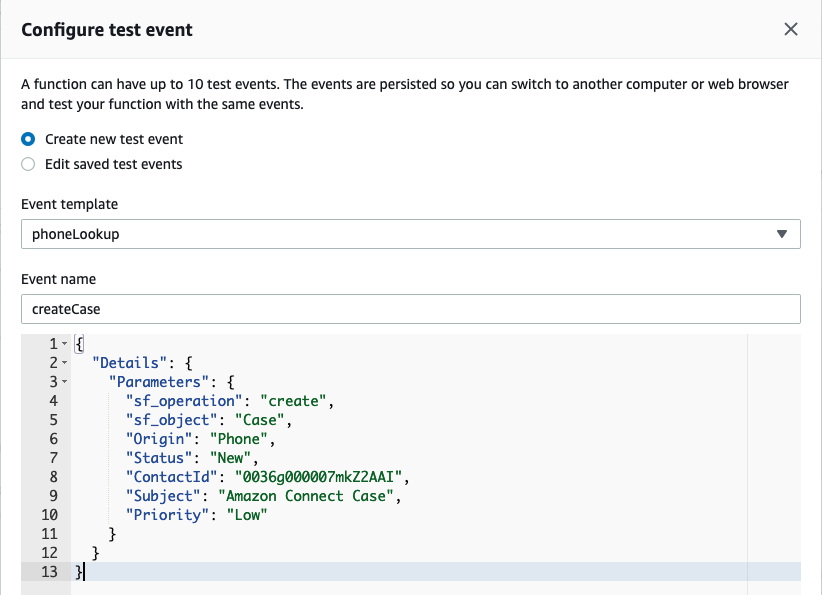
Select Create to save your test event
By default, your new test event should be selected in the drop-down list to the left of the Test button.

Select Test
If successful, the result will contain the Case Id
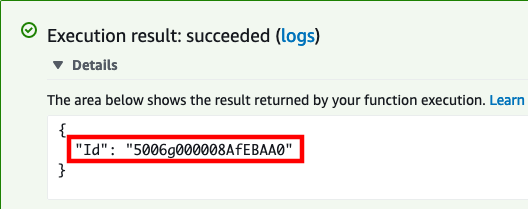
Copy the value for the Id key in the response.
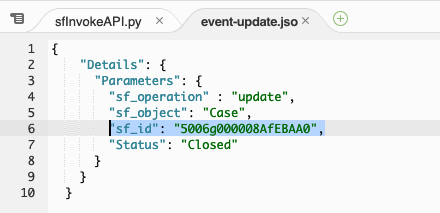
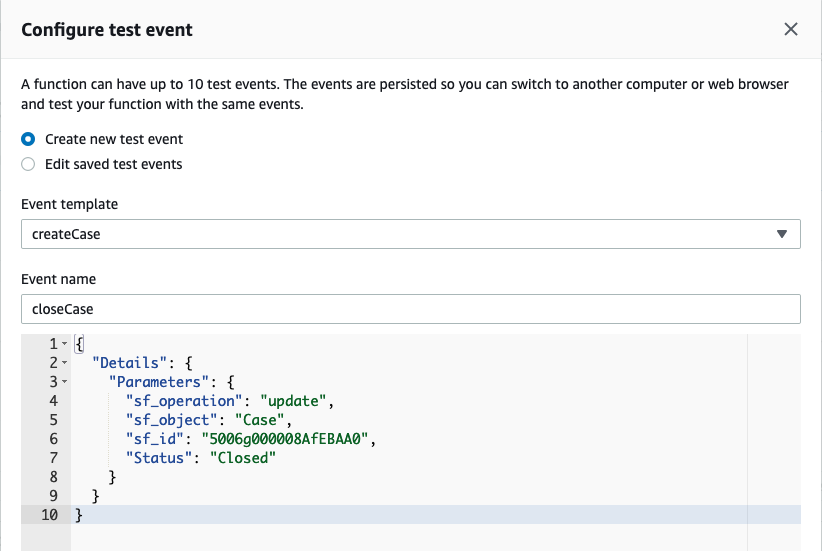
When we created the case, the Status was set to New and the Priority to Low. We are going to use the update operation to close the case.
In the Environment pane, double-click the event-update.json file and replace the existing Case Id in "sf_id" parameter with the new one you copied from the last test result
Select the entire JSON event and copy it, then close the event-update.json tab.
In the top-right corner, select drop-down arrow next to Test and choose **Configure test events
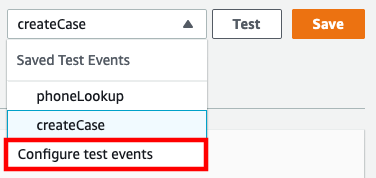
Select the radio button for Create new test event and provide an event name, for example: updateCase
Select the existing event JSON and delete it. Paste the modified JSON payload you copied from the event-update.json file
Select Create to save your test event
By default, your new test event should be selected in the drop-down list to the left of the Test button.

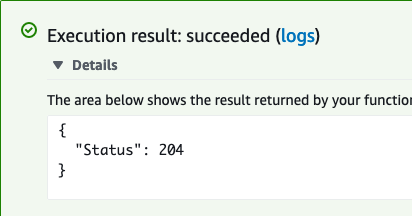
Select Test
If successful, the result will be the HTTP 204 No Content success status response code
Log in into your Salesforce org and go to the Service Console
In the search box, change the object type to Cases and type Amazon Connect Case, then press enter

- You should find 1 case opened by the API user, and the status should be closed

- You have completed core function validation
Allow Amazon Connect to Access the sfInvokeAPI Lambda Function
Once you have validated function, you can use the Amazon Connect console to add the sfInvokeAPI Lambda function to your Amazon Connect instance. This automatically adds resource permissions that allow Amazon Connect to invoke the function.
Add the Lambda function to your Amazon Connect instance
In a new browser tab, login to the AWS console
Navigate to the Amazon Connect Console
Select your Instance Alias
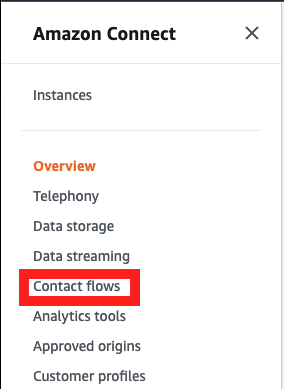
In the navigation pane, choose Contact flows.
- Scroll down to the AWS Lambda section, and select the function that includes sfInvokeAPI in the name
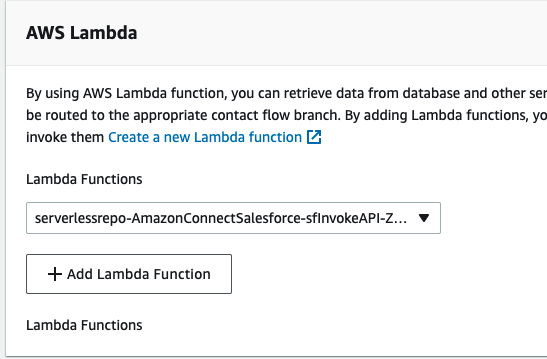
- Choose Add Lambda Function. Confirm that the ARN of the function is added under Lambda Functions.

- The AWS Lambda function has been added to your Amazon Connect instance.
Post-Setup Cleanup (Recommended)
The sfExecuteAWSService Lambda function is used only during initial setup to configure your Amazon Connect instance and related AWS resources. Once your CTI Adapter configuration is complete, this function is no longer needed for day-to-day operations.
As a best practice, we recommend disabling or deleting the sfExecuteAWSService Lambda function and its associated IAM user (e.g., sfExecuteAwsServiceIamUser) to keep your environment clean and minimize unused resources.
Note: If you need to re-run the Guided Setup wizard in the future, you can re-deploy the Lambda package from the AWS Serverless Application Repository.