Setting Up The CTI Adapter Managed Package Manually
Below are manual setup instructions for the Salesforce CTI Adapter Managed Package. After following the below steps, be sure to follow the instructions for setting up the Salesforce Lambdas here.
When installing v5.15, please confirm that the application was installed for admins only (see installation for more details). If you did this by accident, then you will have to manually edit the profiles to remove the permissions to the objects and pages created by the app.
Set Access Permissions
All users must be assigned the required permission set to access Salesforce metadata. The Amazon Connect CTI Adapter includes two Permission Sets, one for agents and one for managers, that grant users the appropriate access for their role. More information on assigning user permissions can be found in the Salesforce help documentation.
Log in into your Salesforce org and go to Setup
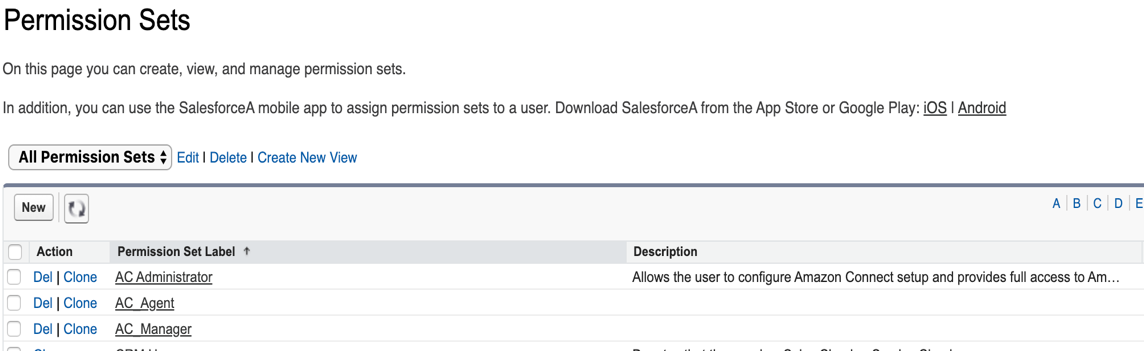
In Quick Find, enter Permission and select Permission Sets from the results
Choose AC_Administrator, AC_Agent or AC_Manager as appropriate for the user(s)
Choose Manage Assignments.
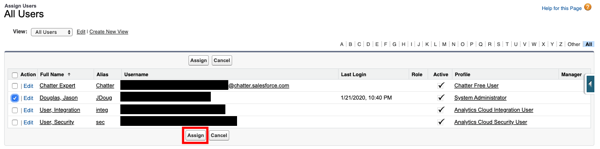
Choose Add Assignments.
Select the users to assign the permissions, then choose Assign.
- Repeat these steps as needed for all users
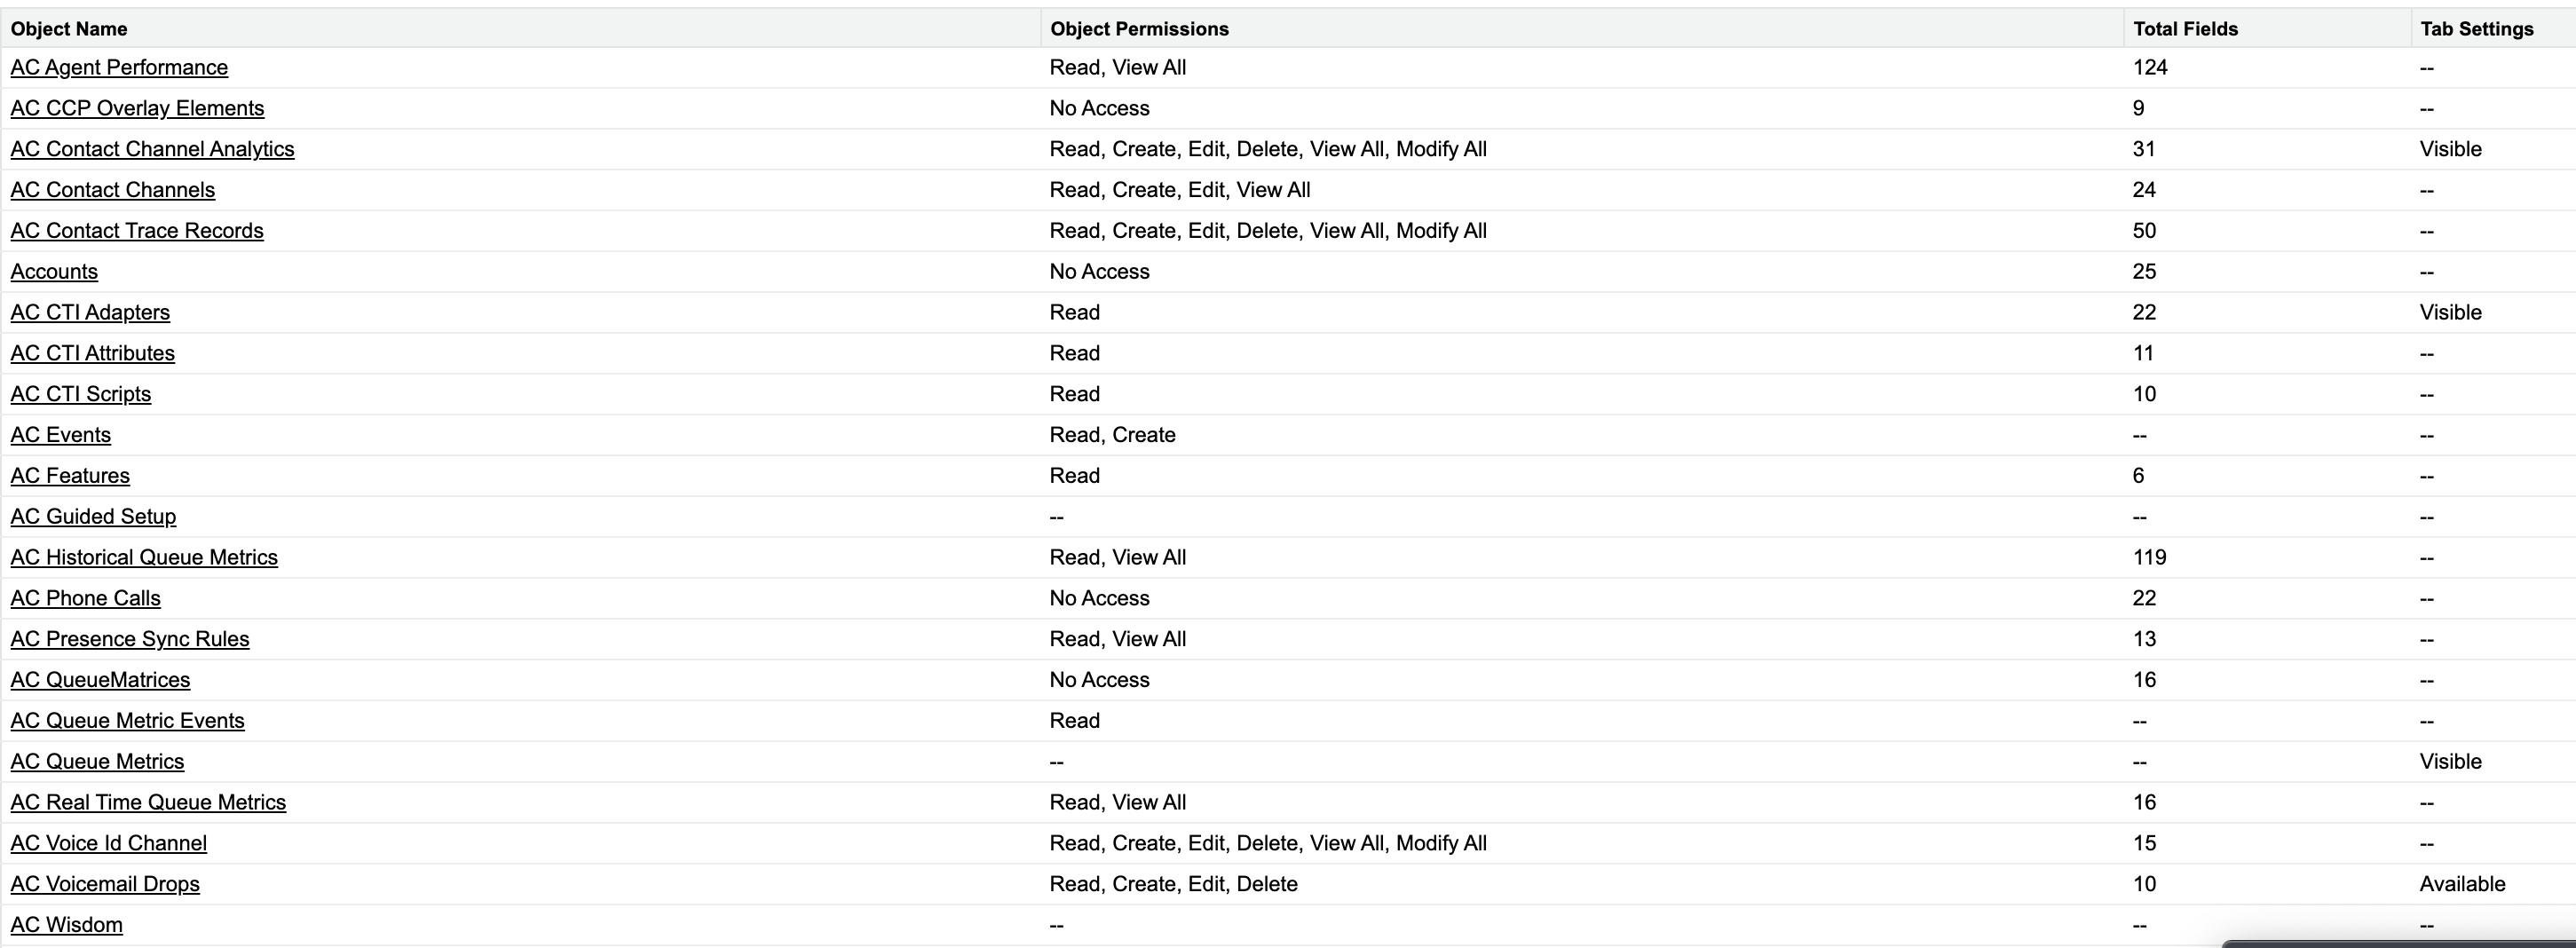
AC_Administrator

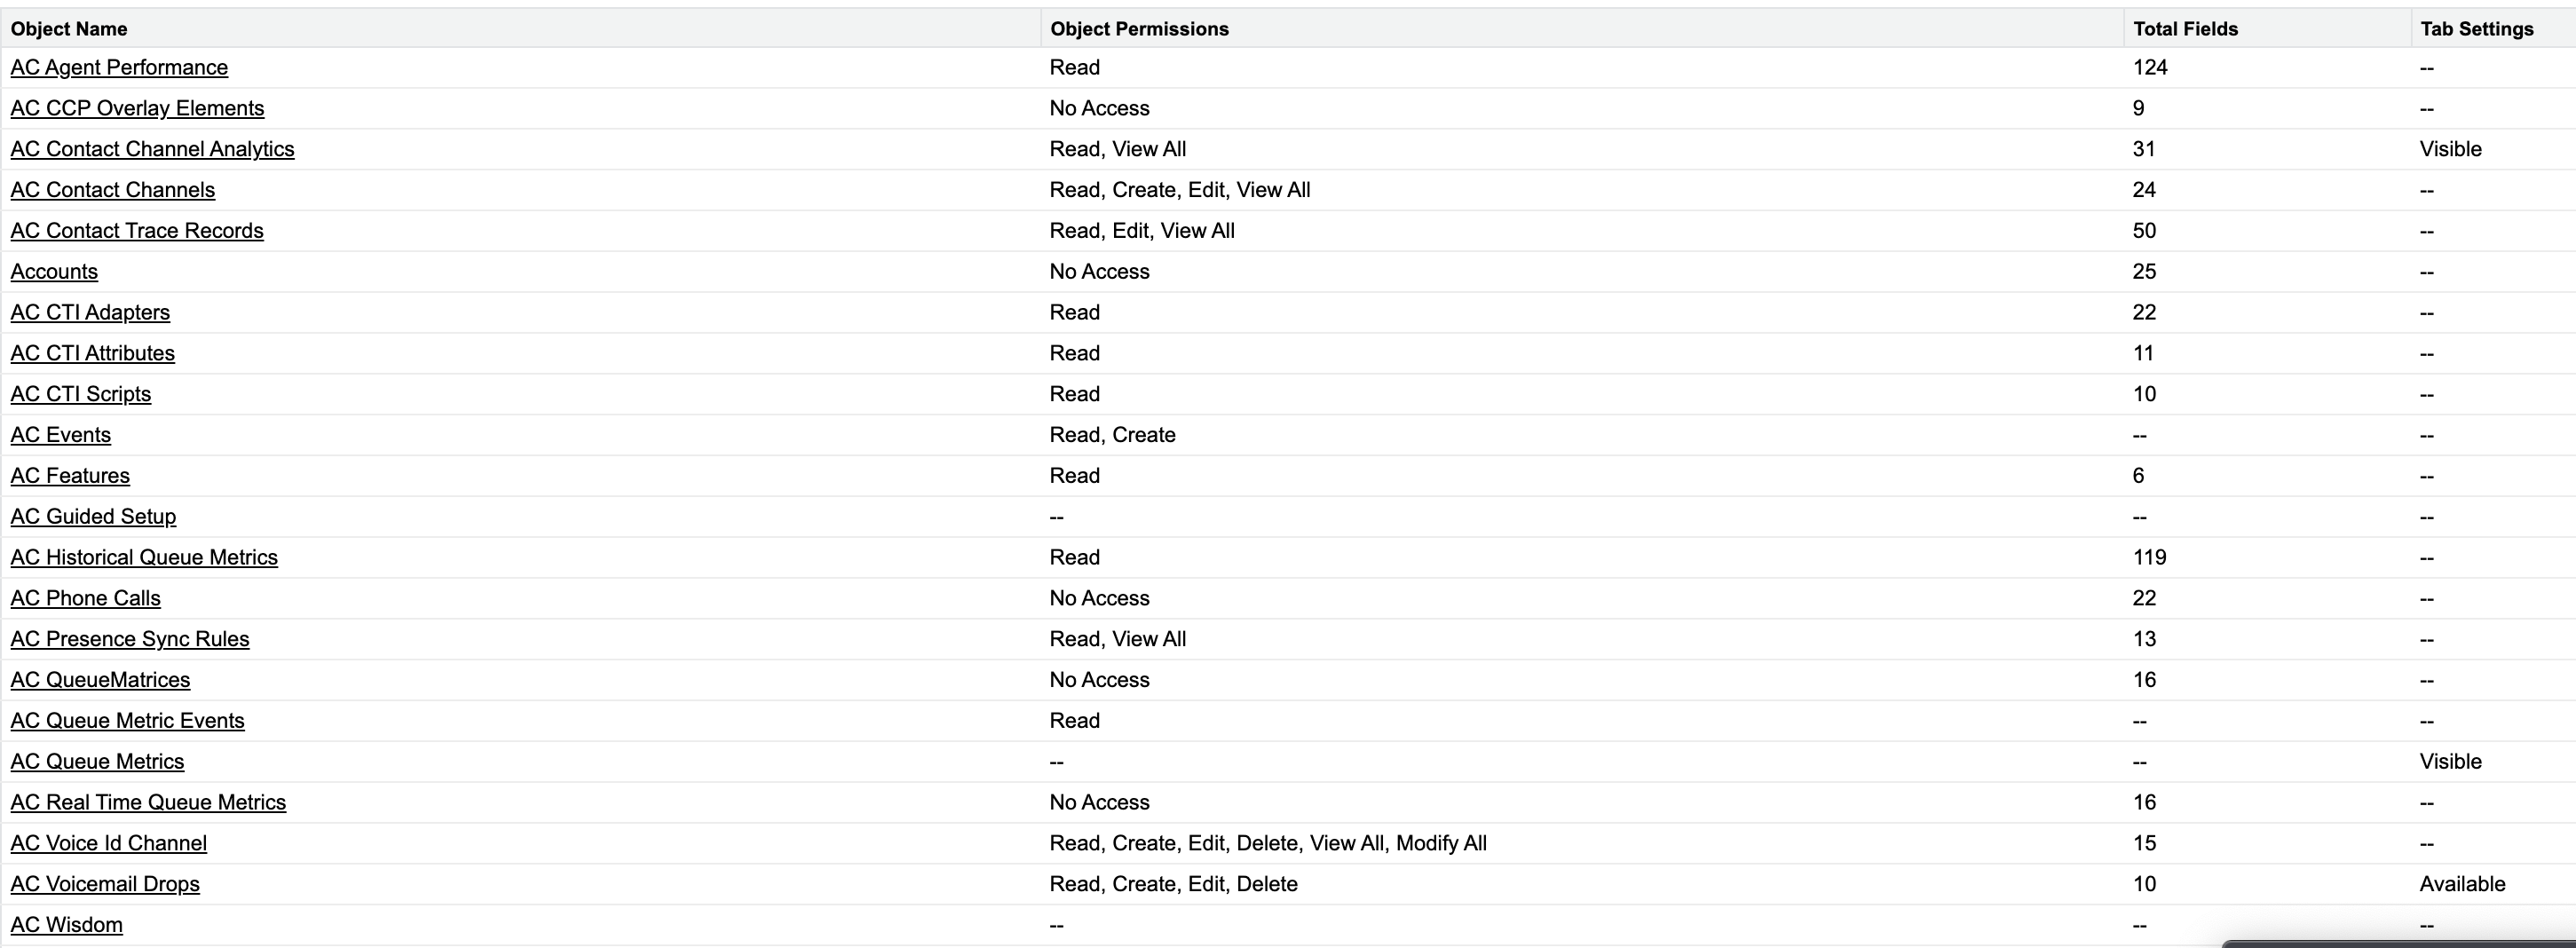
AC_Manager
AC_Agent
Configure the Lightning Experience
In this guide, we will configure the CTI Adapter for Service Console (Lightning Experience). You may use the same procedure described in this section for other applications.
Configure Service Console
First, you need to add the CTI softphone to your Service Console.
Log in into your Salesforce org and go to Setup
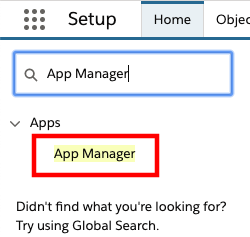
In the Quick Find box, type App Manager, then choose App Manager from the result list.
- Expand the drop-down menu associated to Service Console and select Edit.

- Once the Lightning App Builder opens, select Utility Items (Desktop Only) from the left Navigation
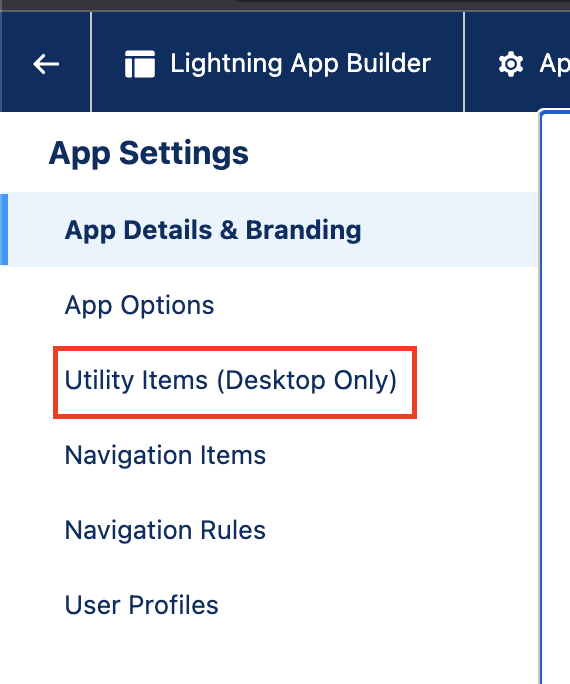
- Choose Add Utility Item, then select Open CTI Softphone.

- Change the Label, if desired, then choose Save.
Allowlist Your Salesforce Org with Amazon Connect
In order to embed the Amazon Connect Contact Control Panel (CCP) into your Service Console, you need to allowlist two (2) domains for your org with Amazon Connect. This allows for cross domain access to the underlying resources required for the CCP to function.
Log in into your Salesforce org and go to Setup -> My Domain
Copy the entire URL of this page and past it to a text document.

- In the Quick Find field, type visual, then select Visual Force Pages from the results

- Choose the AC_LightningAdapter Visualforce page
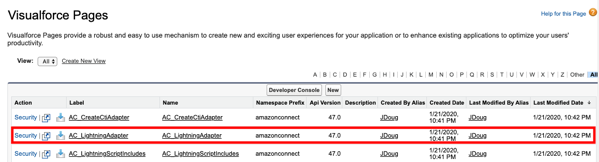
- On the Visualforce detail page, select the Preview button. This will open a new browser tab showing the page content, which should only be a button labelled Sign in to CCP. Copy the entire URL of this page and past it to a text document.

In a new browser tab, login to the AWS console
Navigate to the Amazon Connect Console
Validate that you are in the correct AWS region for your instance, then select your instance alias from the list of instances

Choose Approved Origins from the left navigation
Select + Add origin
In the Enter origin URL field, enter the URL of the page that you copied in step 2. The URL can vary depending on the instance due to a setting named "enhanced domain". You should copy and paste the domain name URL into the field.
Select Add. You should see your org domain listed in the Approved origins section.

Select + Add origin
In the Enter origin URL field, enter the URL of the visualforce page that you copied in step 5. Only enter the url through the .com. The URL can vary depending on the instance due to a setting named "enhanced domain". You should copy and paste the visual force page domain URL into the field.
Select Add. You should see your org domain listed in the Approved origins section

Modify the Call Center
Now that you have allowlisted the org in the Amazon Connect Console, you will need to modify the Call Center that was configured in Salesforce when the AppExchange package was installed. Once you complete the configuration, you add users to the Call Center to provide access to it.
Log in into your Salesforce org and go to Setup
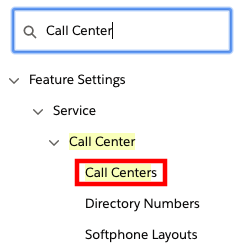
In the Quick Find field, enter Call Center, then select Call Centers from the result list
If you see the Say Hello to Salesforce Call Center page, select Continue
Select AC Lightning Adapter
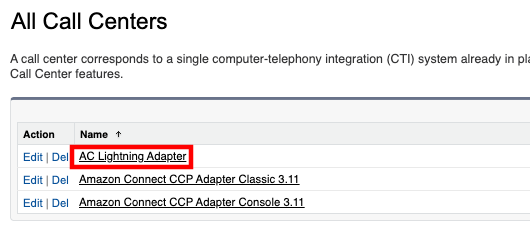
On the AC Lightning Adapter detail page, select Edit
Replace the CTI Adapter URL with the AC Lightning Adapter visualforce page url you copied in the previous section.
Next, change the values for Softphone Height to 570 and the Softphone Width to 330, and choose Save.
Once you return to the AC Lightning Adapter detail page, choose Manage Call Center Users in the Call Center Users section
On the AC Lightning Adapter: Manage Users page, select Add More Users.
Set filters (if desired) and then choose Find.
Select the checkbox next to the user to add, then choose Add to Call Center.

- Repeat the steps to add more users.
Configure the Toolkit settings
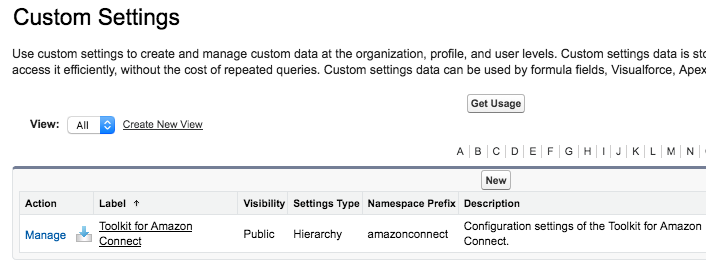
- Navigate to Setup then in type Custom Settings in Quick Find
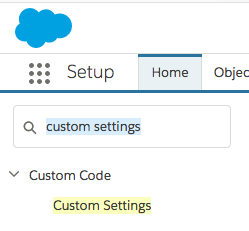
- Next to the Toolkit for Amazon Connect custom setting, choose Manage
- Select New
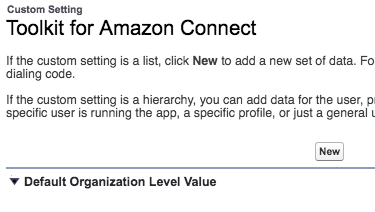
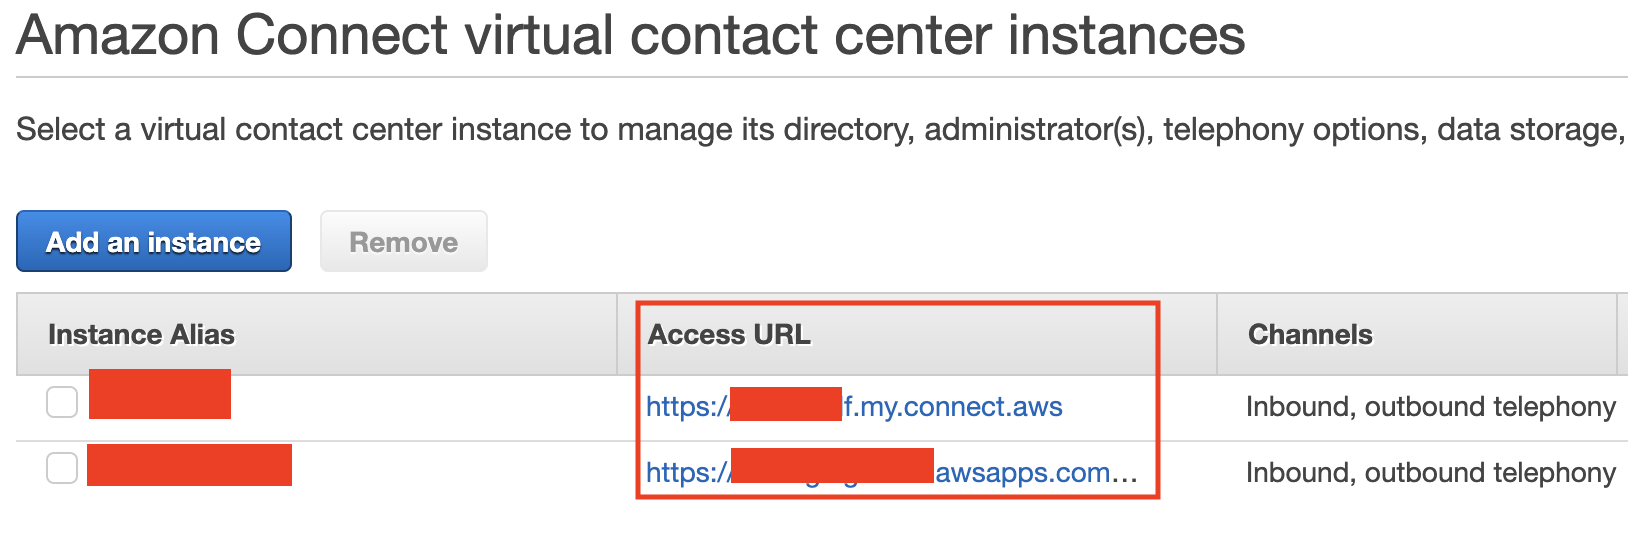
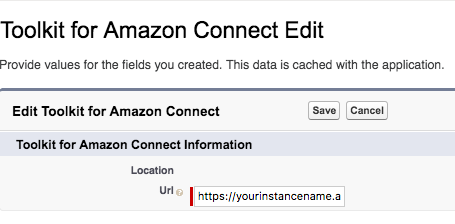
- On the following page, provide the URL to your Amazon Connect instance. This value can be found in your Amazon Connect console.
- You will also see the option to enable and disable certain triggers in the package, which you can configure to meet your needs. You can change these whenever you would like to. For more details, see below
These are options we provide that allow you to toggle certain functionality in the adapter.
- CCA Case Trigger - This trigger looks for any ContactChannelAnalytics records that could be related to a updated/inserted Case, and creates a relationsihp between the two records. This trigger uses batching to process the update requests.
- CCA Contact Trigger - This trigger looks for any ContactChannelAnalytics records that could be related to a updated/inserted Contact, and creates a relationsihp between the two records. This trigger uses batching to process the update requests.
- Case Contact CCA Trigger - This trigger looks for any Case/Contact records that could be related to an updated/inserted ContactChannelAnalytics record, and creates a relationsihp between the records.
- Task Trigger - This trigger creates a ContactChannel record for any inserted/updated task that with a
CallObjectfield that does not currently have a ContactChannel record created before.
- Select Save
Configure the Scheduler for Batch processing for triggers
The execution time for triggers that run in batches (refer the list above) can be managed using a cron-job scheduler in CTI Adapter. The scheduler allows you to configure the frequency at which triggers will execute in batches. By default, this job will run every hour. It's important to note that Salesforce's Lightning Platform has existing limits on lightning platforms, which you should consider when scheduling your apex batch jobs to avoid exceeding these constraints. For instance, there is a maximum limit of 100 concurrent Apex classes that can be scheduled (please refer to the Salesforce documentation for the latest limits). Therefore, if you anticipate more than 100 batch Apex executions per hour to fulfill all the associations from the triggers, you may need to increase the batch execution frequency accordingly. In order to setup the processing of these jobs, follow the below steps:
From the Setup, go to Object Manager, and click on AC CTI Adapter.
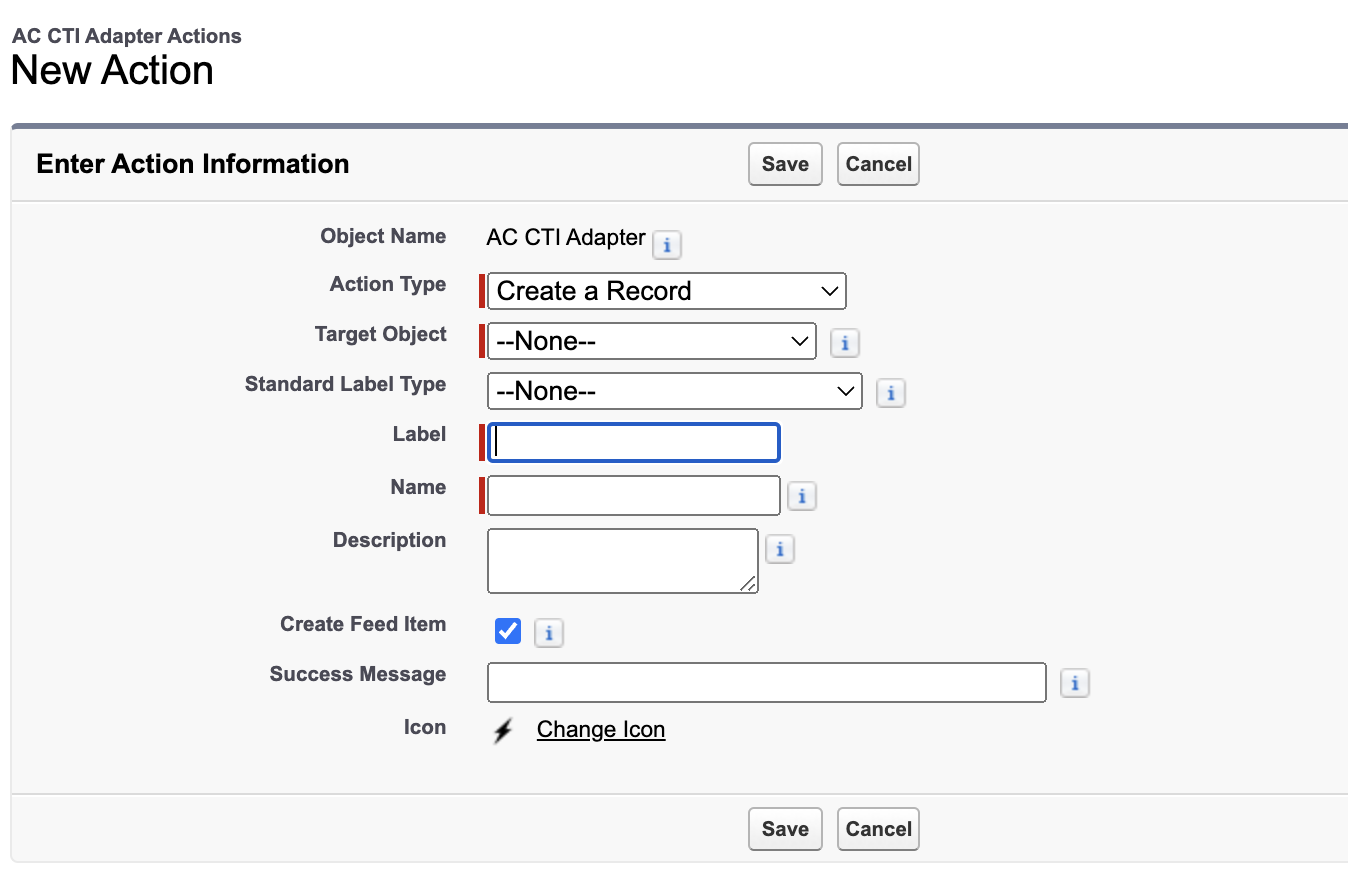
From the left navigation menu, select Buttons, Links, and Actions and click on New Action.
In the Action Type, select Lightning Component. A drop down for lightning component will appear from which, select
amazonconnect:AC_ToggleScheduleBatchJob.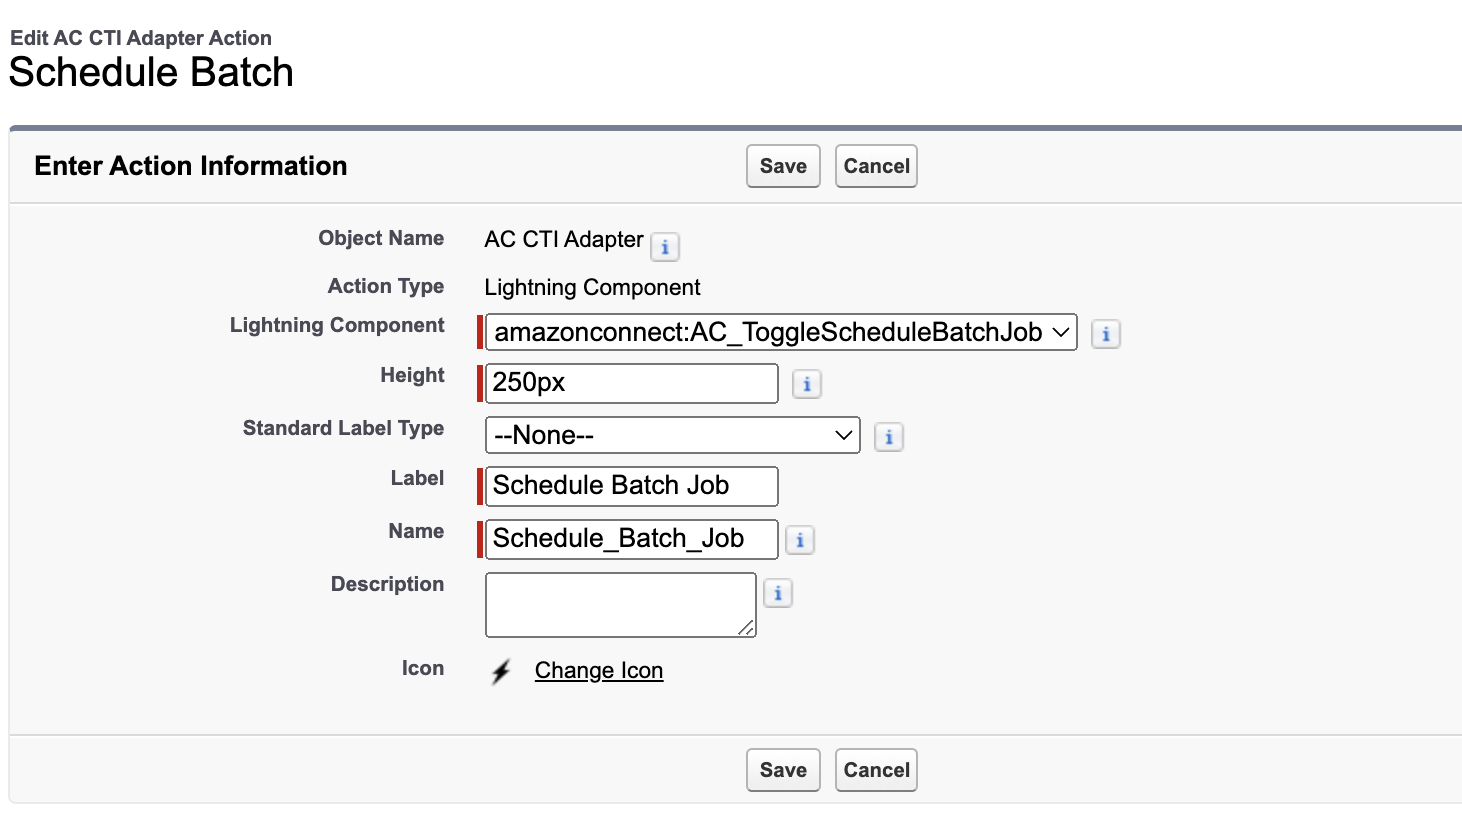
Provide the Label to the action as
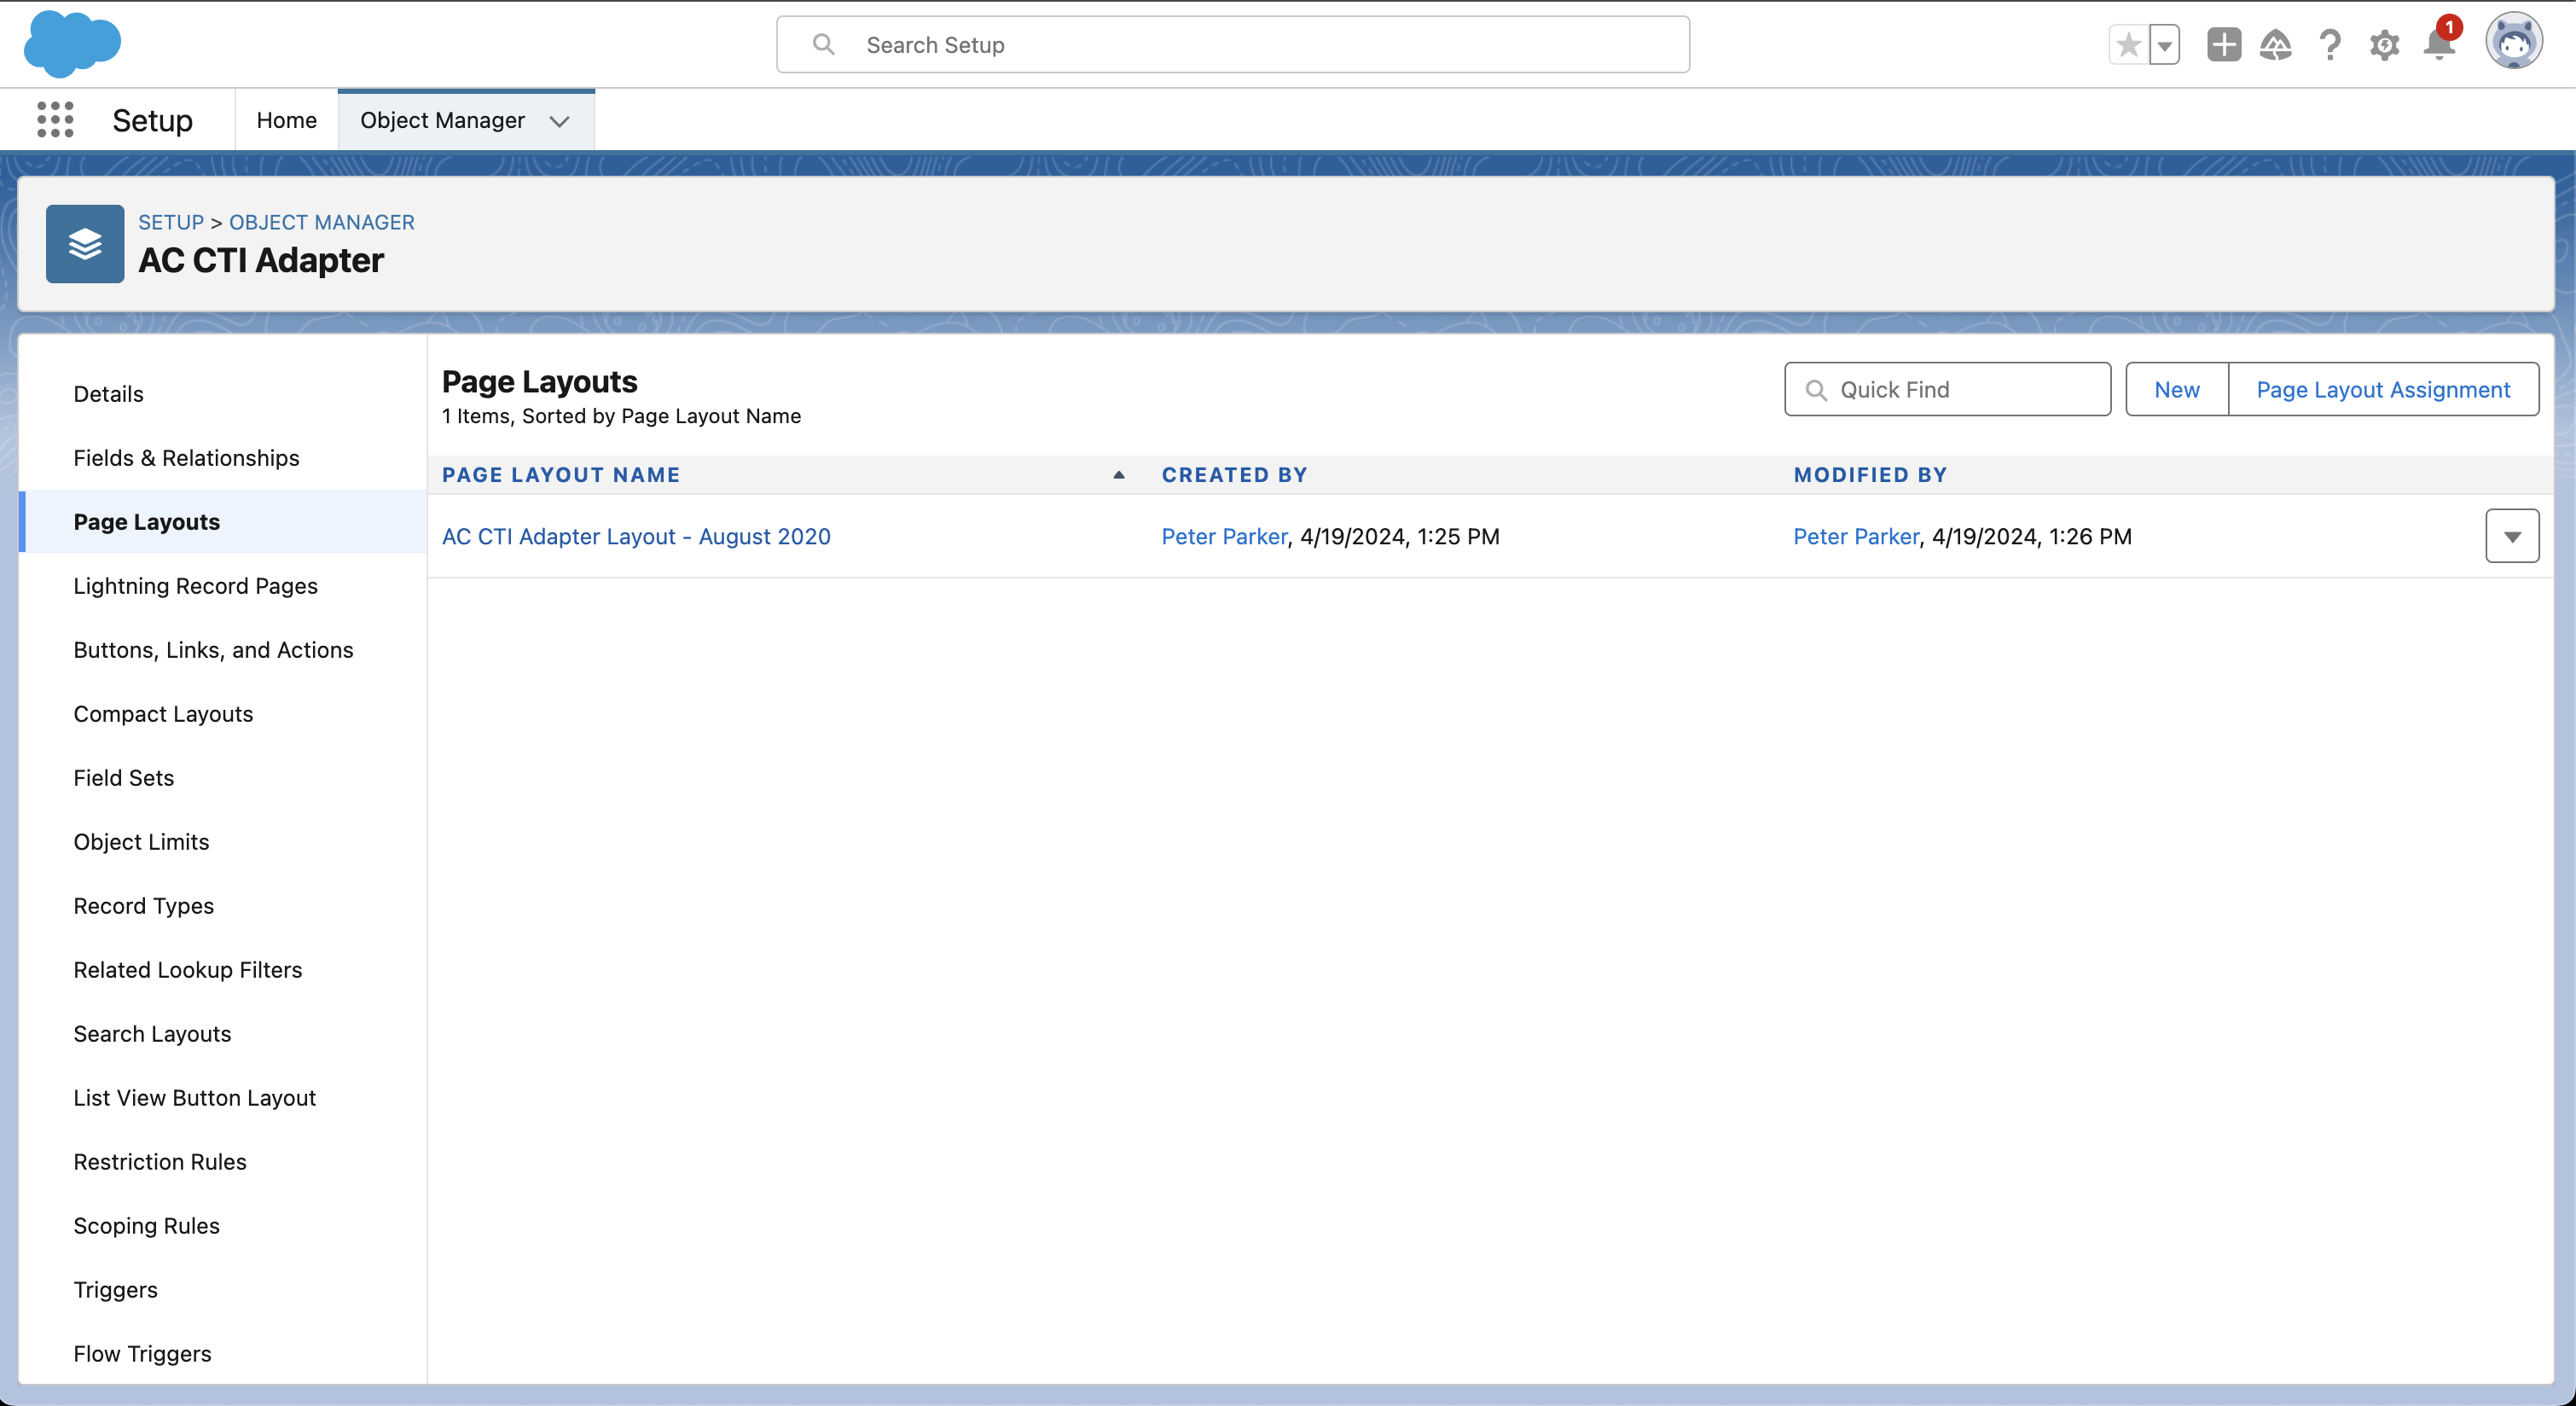
Schedule Batch Joband click on Save.Click the Page Layouts and select the current layout used for displaying CTI Adapter. The default layout provided currently is AC CTI Adapter Layout - August 2020.
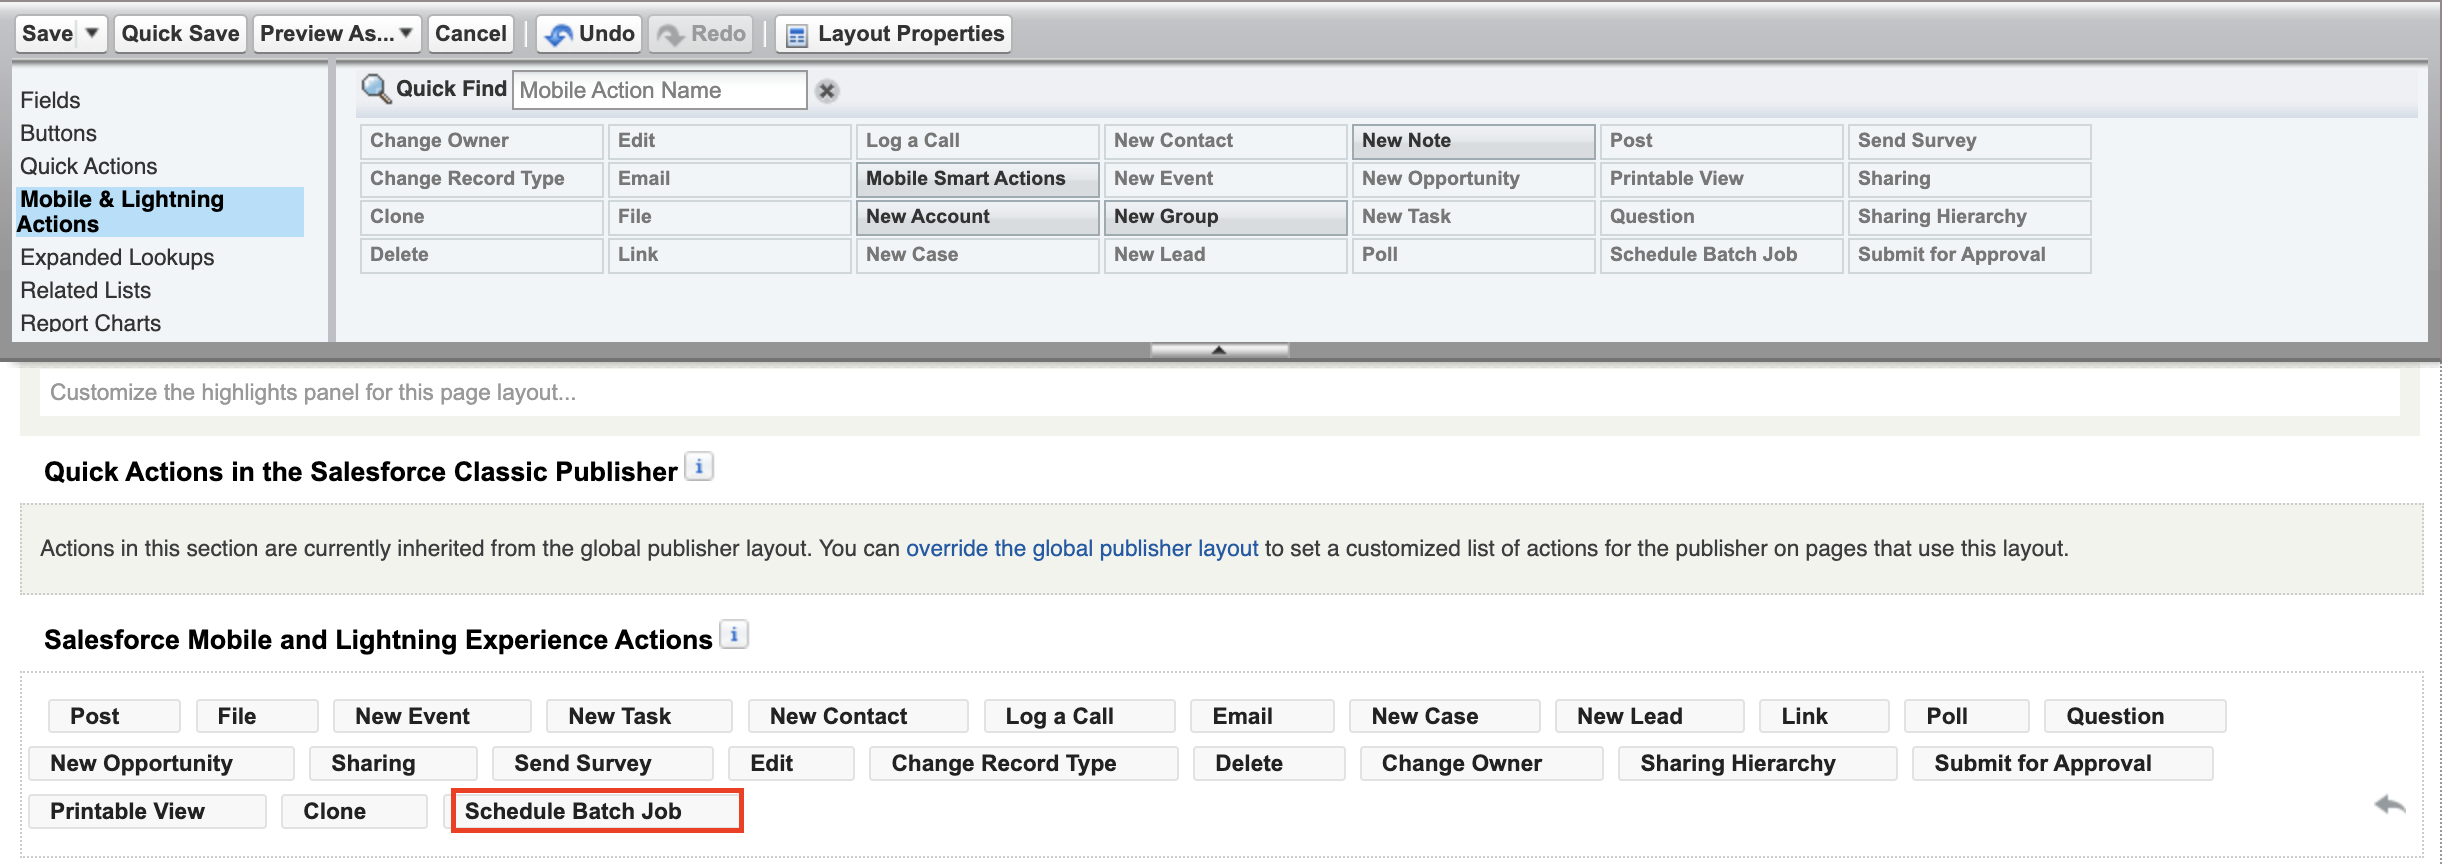
In the page layout edit view, under Salesforce Mobile and Lightning Experience Actions, enable the option to override the predefined actions.
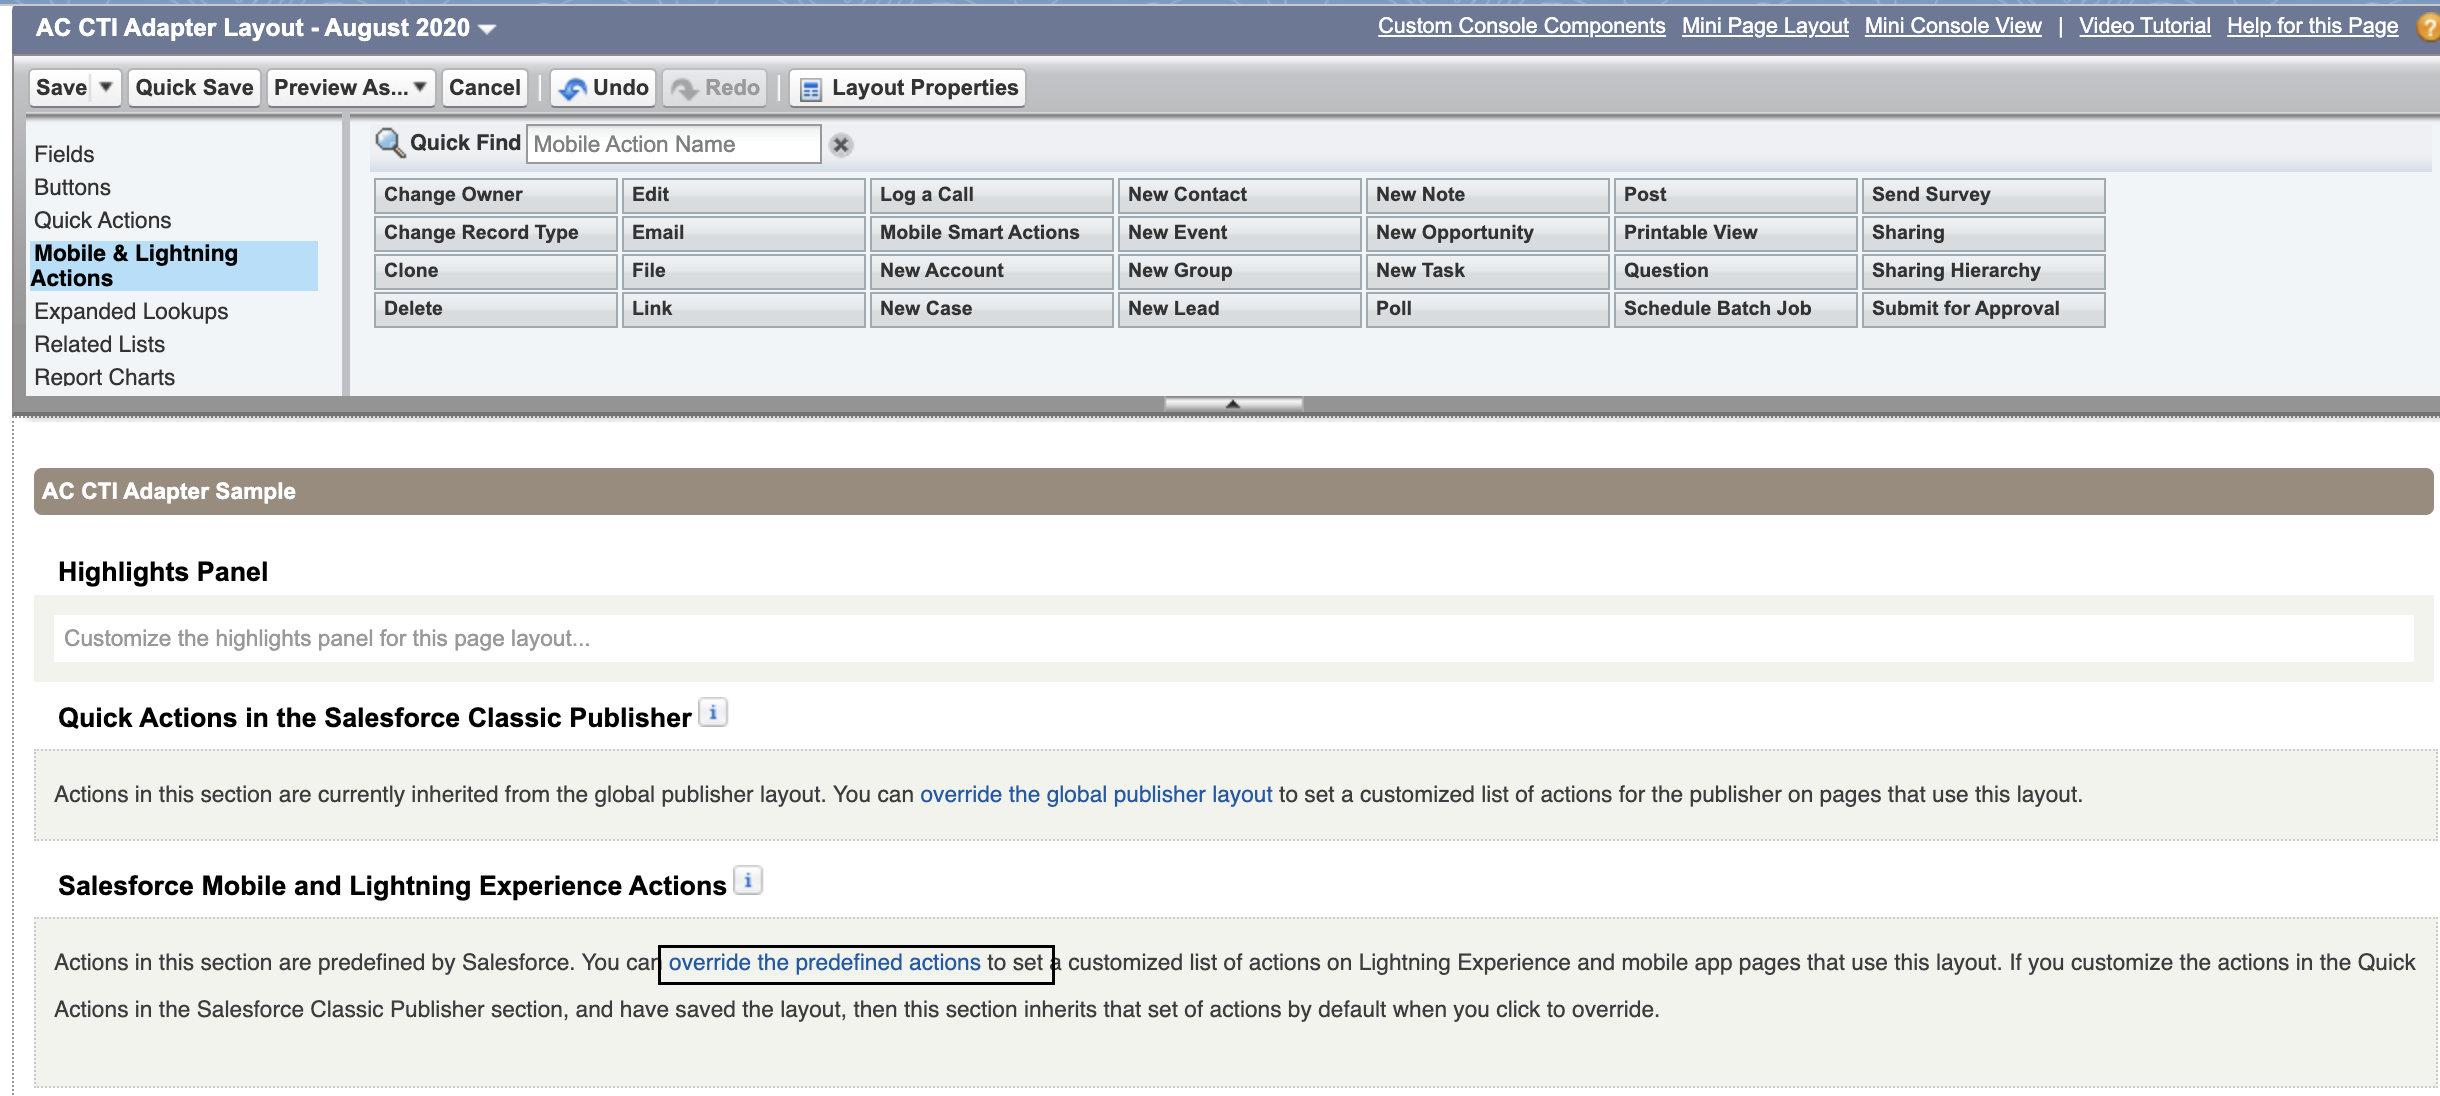
From the Mobile and Lightning Actions, drag the newly created action to the lightning experience actions section, and save the layout.
In the Service Console, under the AC CTI Adapters from the menu, choose the
ACLightningAdaptervalue been used in your Salesforce environment.From the drop down on the top right of the Cti Adapter, click on the newly created action Schedule Batch Job.
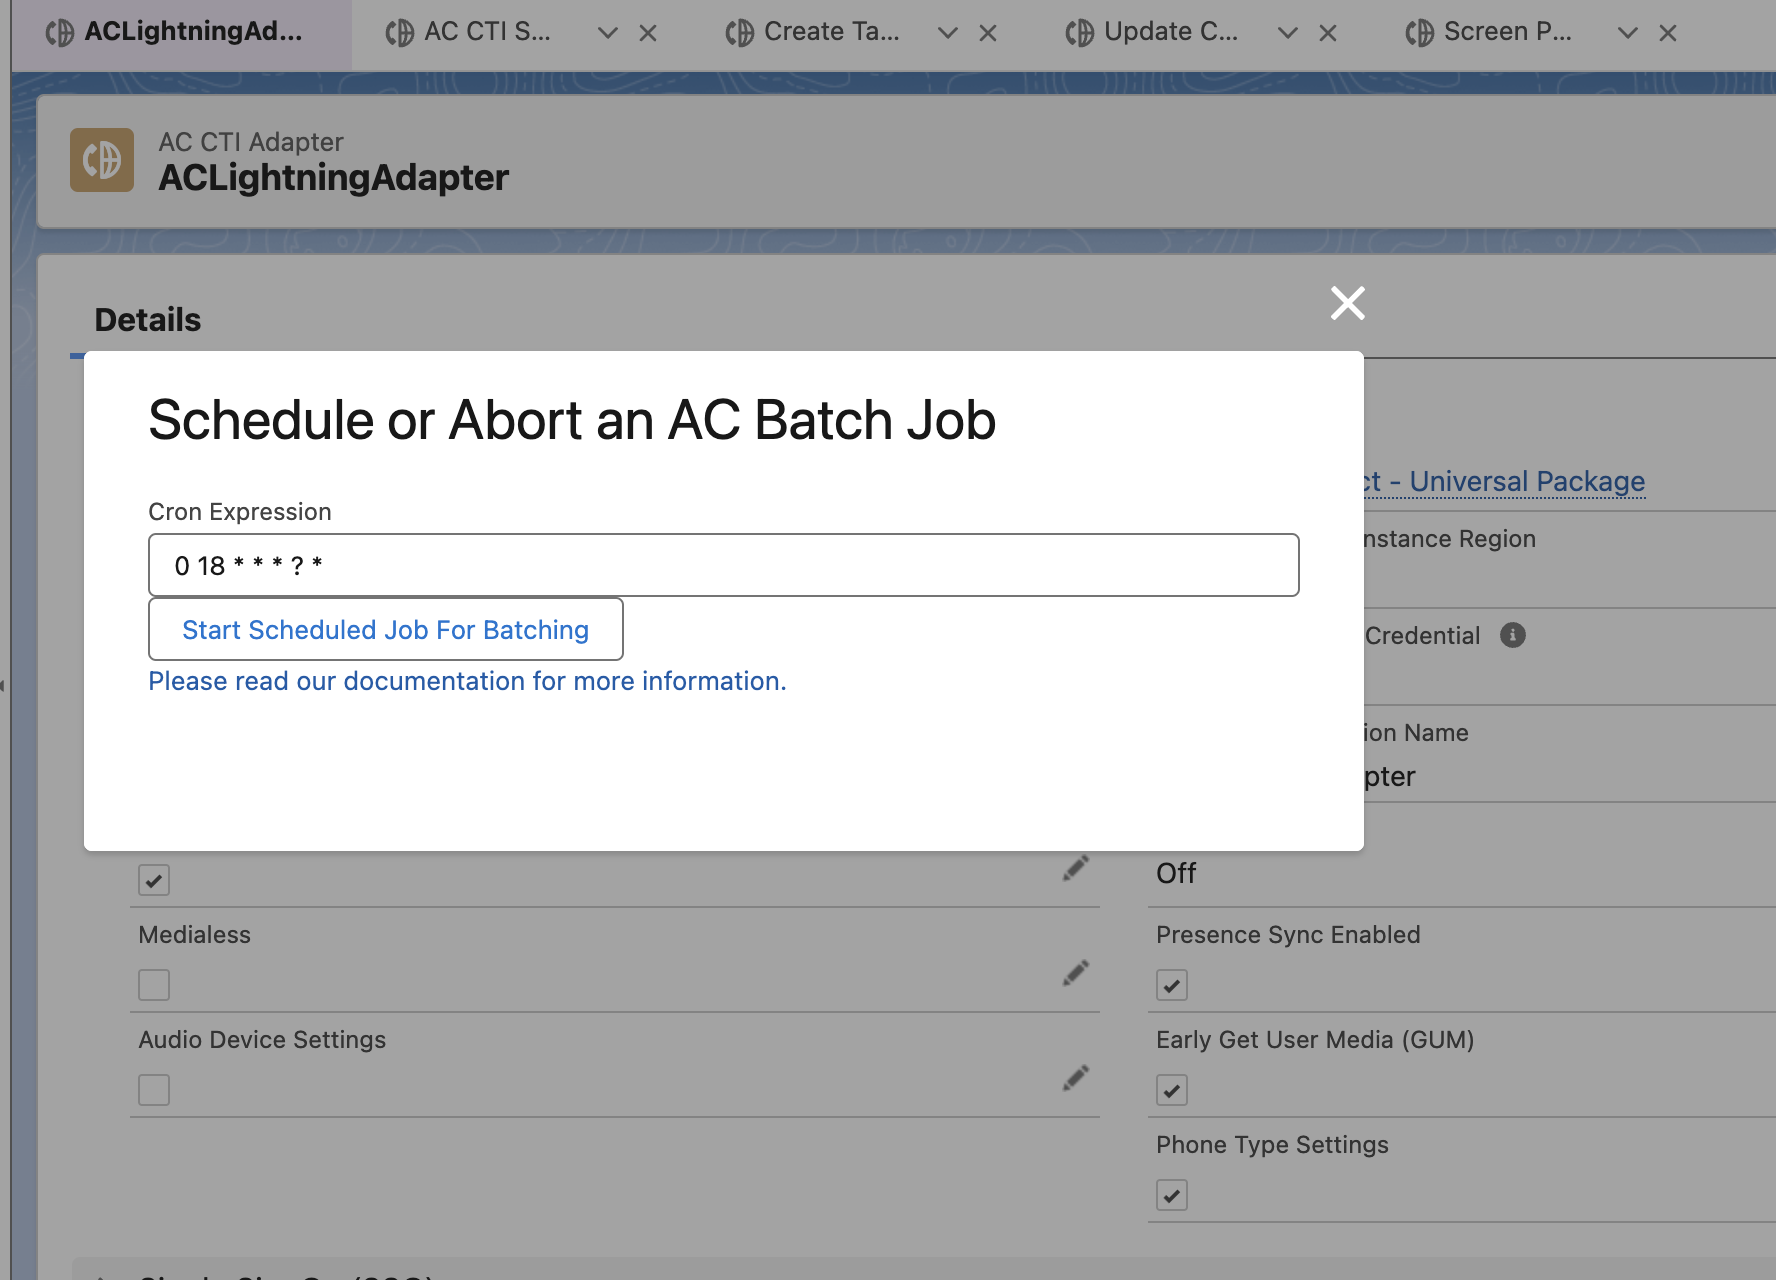
A pop up will open that allows you to set the schedule for the batch jobs to run. If required, you can use any available cron generator (such as this) to create a cron job schedule.
Finally, click on Start Scheduled Job For Batching to save the schedule and start the batch jobs.
Create the Softphone Layout
Next, we need to create a softphone layout for the solution. The softphone layout settings will tell the console what resources are available for screenpop by default and what to do under different match conditions.
Log in into your Salesforce org and go to Setup
In the Quick Find box, type Softphone, then choose Softphone Layouts from the results
If you are presented with the Get Started message, choose Continue
On the Softphone Layouts page, choose New

- Enter a name for the layout, such as AmazonConnectDefault, then select the Is Default Layout checkbox.

- Expand Display these salesforce.com objects and select objects that CTI Connector should be able to search, for a screen-pop query. In this example, Case has been added to the default selection, allowing search and screen-pop by CaseID.

- If desired, configure the search behavior to your requirements

- Additionally, validate the Screen Pop settings. Please note that the default behavior is to not pop a screen if there is more than one result
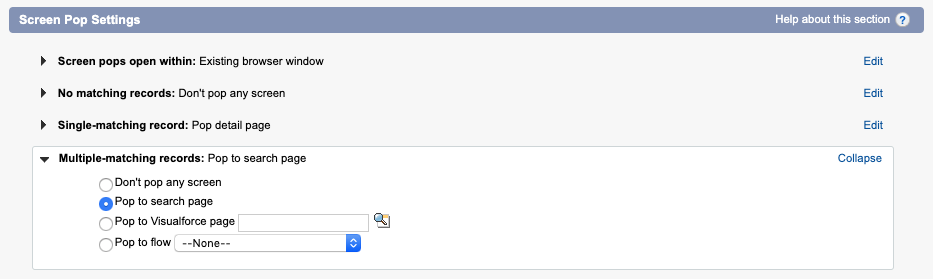
- Once you have configured the search behavior, choose Save
Initial CTI Adapter Configuration
Once we have setup the Call Center, we need to do a final configuration of the CTI Adapter before we can test the basic configuration. This will tie the Lightning CTI adapter settings to the Call Center.
Add the CTI Adapter Console App
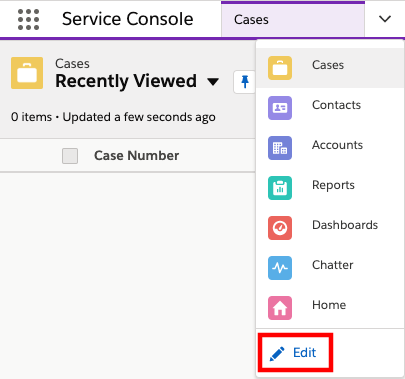
Log in into your Salesforce org and go to the Service Console
Expand the navigation menu by selecting the down arrow and choose Edit.
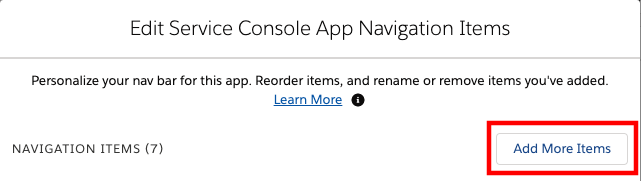
- On the Edit Service Console App Navigation Items page, select Add More Items
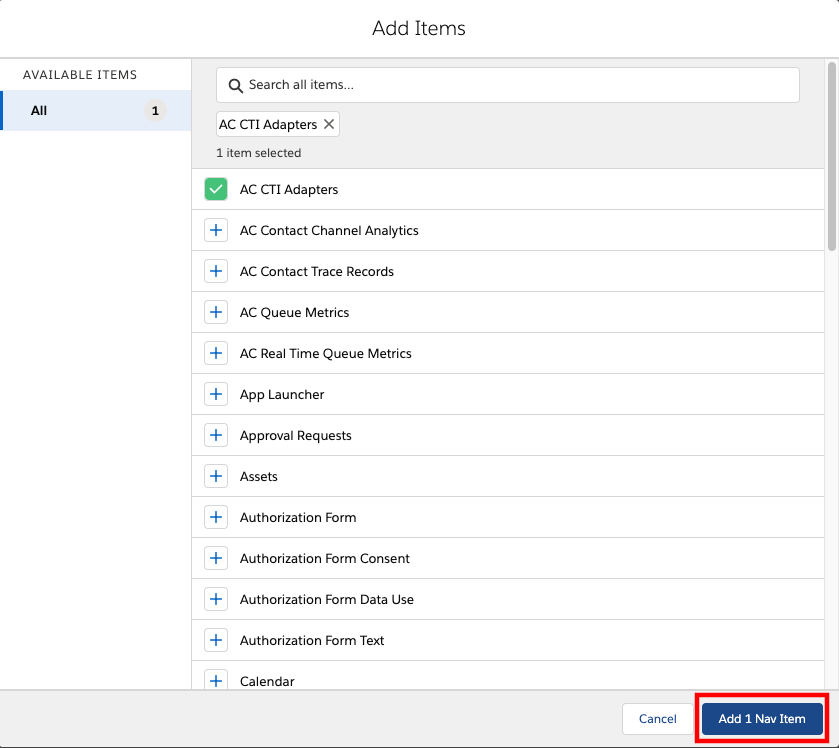
- Select the + next to AC CTI Adapters and select the Add 1 Nav Item button
If desired, move the AC CTI Adapters button up in the navigation Items menu by dragging it up or down the list, then choose Save to save changes
Select AC CTI Adapters from navigation menu
If Recently Viewed is selected, select the drop-down and select All from the List Views menu.
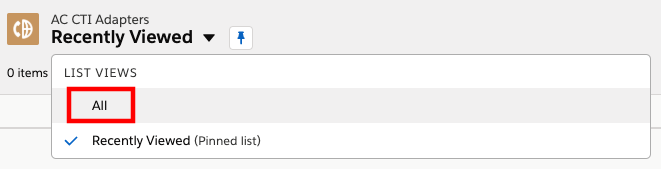
If no ACLightningAdapter entry exists, then select the new button to configure your AC CTI adapters, otherwise select the ACLightningAdapter
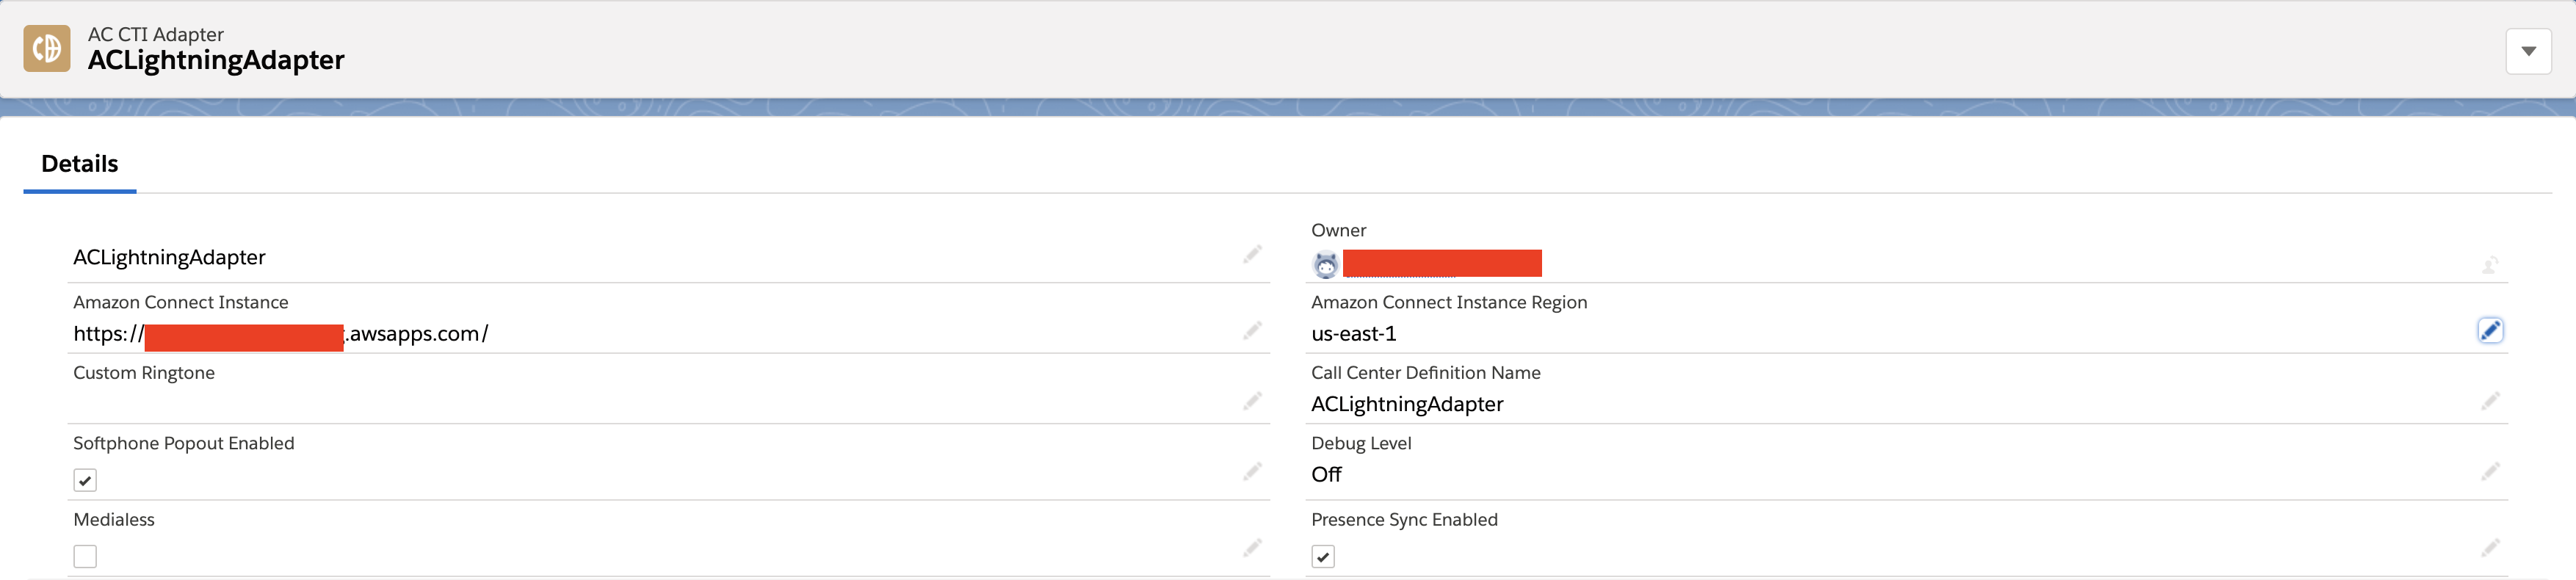
Fill out or confirm the Details as follows:
CTI Adapter Name: ACLightningAdapter
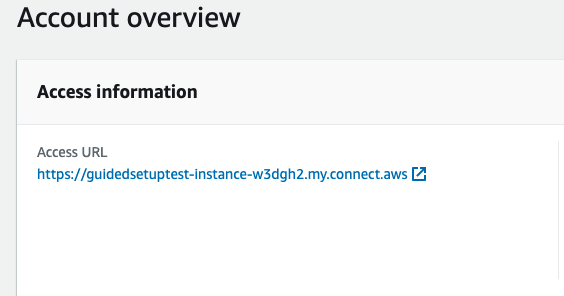
Amazon Connect Instance: The url of your Amazon Connect Instance. You can find this in the Amazon Connect Console as shown below (if your Amazon Connect instance uses the
https://(instancename).awsapps.com/connect/logindomain, then remove everything after ".com"):
Amazon Connect Instance Region: This is the region that your Amazon Connect instance is deployed in. For this field, you will enter the region code. For example, if you have deployed your Amazon Connect instance in US East (N. Virginia), you would enter us-east-1. For a list of region codes, please refer to the AWS Service Endpoints reference
Call Center Definition Name: ACLightningAdapter Note: This is the value of the Internal Name in the call center in the Call Center definition
Leave all other settings at the default for now, and choose Save
Refresh the browser
In the bottom left corner of the Service Console, select the CTI Softphone icon

- Select the Sign in to CCP button. A new window will pop up. Enter your Amazon Connect login credentials and select Sign In. Make sure to allow Microphone access (if asked by browser) NOTE: At this point, this process will only work for Amazon Connect instances configured for local user storage. If you are configuring SAML, please follow the SAML setup process in the Single Sign On Settings section before continuing.
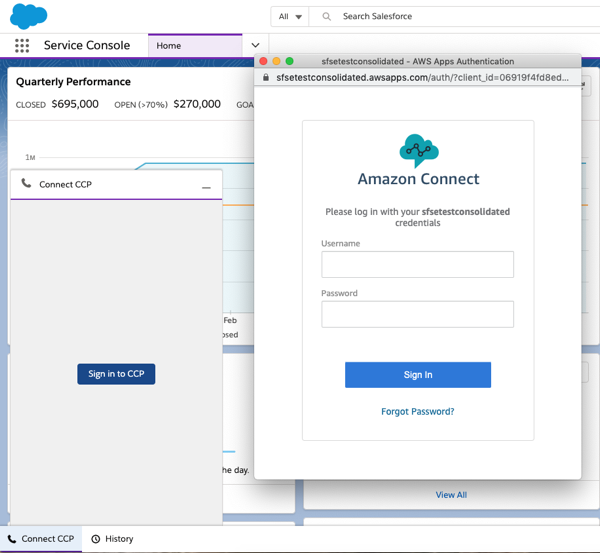
Once Login is successful, the pop-up window will automatically close.
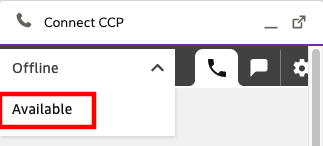
Expand the status menu and choose Available
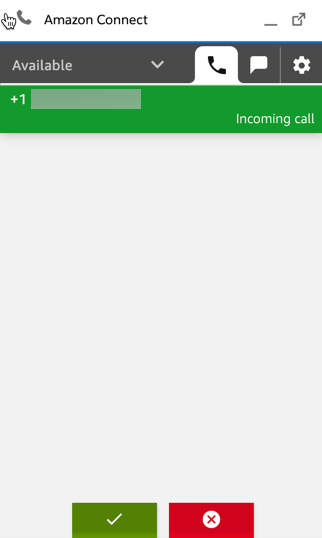
- Make an inbound phone call to your Amazon Connect instance. The CCP will alert you to the incoming call and allow you to accept it. Once you do, the call will be connected
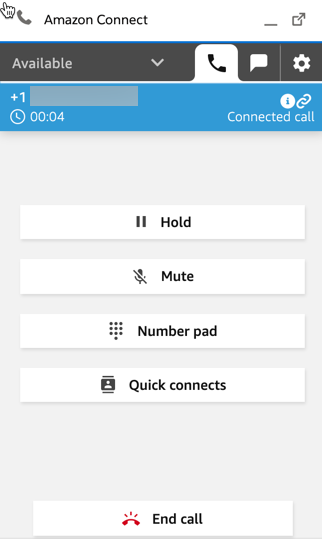
End the call and clear the contact
Set your agent back to Available
Enhanced Agent Logout
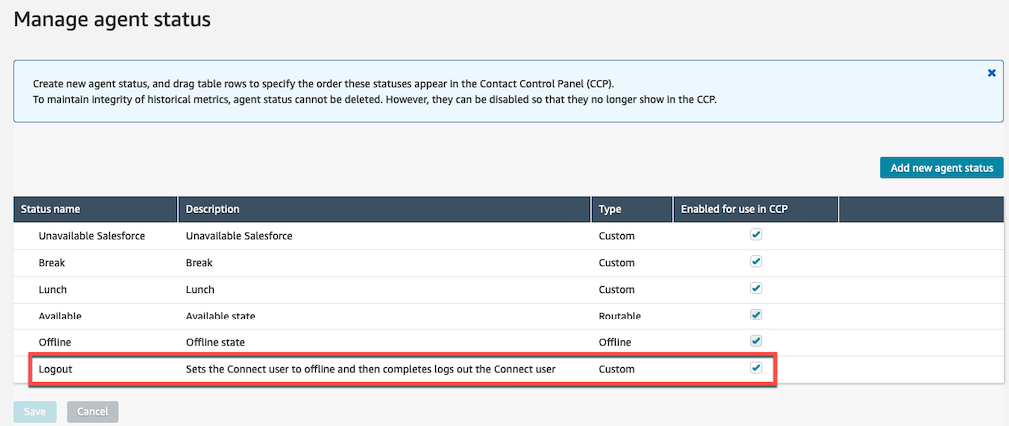
You can configure an agent status within "Manage agent status" with "Logout" (case-sensitive) in the status name to enable enhanced agent logout. When the agent selects that logout status in the Contact Control Panel, it will first set the agent in an offline status. It will then logout the agent in Connect and the AWS Console. Here is an example of the agent status configured within Connect:
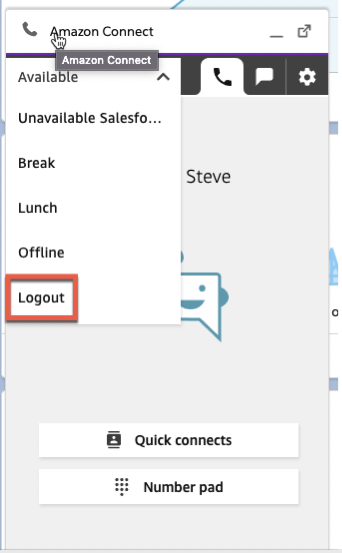
Here is an example of an agent selecting the "Logout" status within the Contact Control Panel:
See how you can add custom agent statuses here.
Validate Basic Screenpop
Next, we will add a contact to Salesforce that has your phone number assigned to it. This will allow us to validate the basic screenpop functionality that is provided with the CTI adapter.
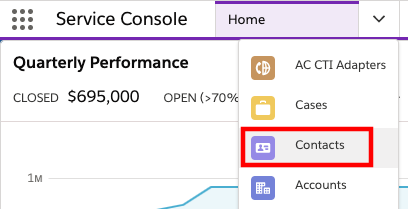
- Select Contacts from the dropdown menu
Select New from top-right corner
Complete the required fields. Make sure that your phone number is entered for the Phone field.
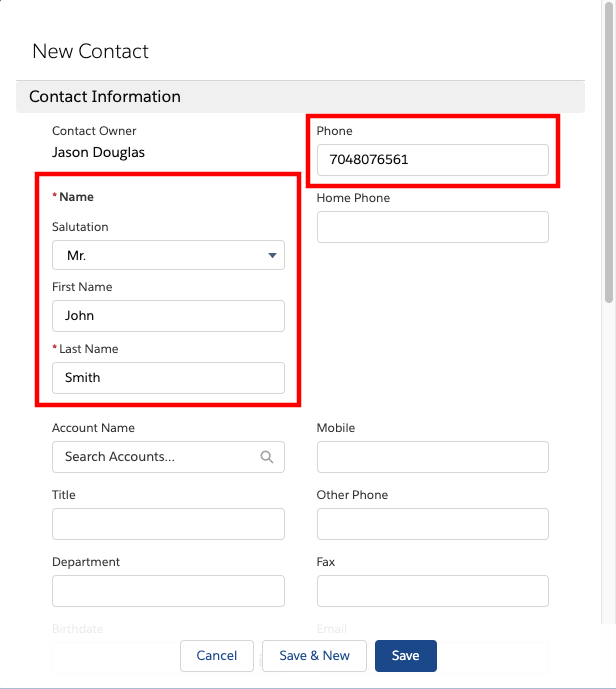
Select Save
Close the Contact tab by selecting the X next to the name of the contact that you just created

Refresh your browser
Place another phone call into your instance
The new contact should automatically pop-up as it has been recognized by incoming phone number.