CTI Flow
The CTI Adapter provides a mechanism to customize the behavior of the adapter based on your business needs without needing to edit the underlying Visualforce pages, which could negatively impact overall adapter function. This is accomplished through CTI Flows.
A CTI Flow consist of "actions" that represent an API call to parts of Salesforce or Amazon Connect API. Like a JavaScript function, each action can take inputs and provide outputs, or returns values, that you can use from other actions.
Create CTI Flow
To create a new CTI Flow, log in into your Salesforce org and go to the Service Console. Expand the navigation menu by selecting the down arrow and choose AC CTI Adapters.

Select ACLightningAdapter. Scroll down to the CTI Flows section and select New to create a new CTI Script.

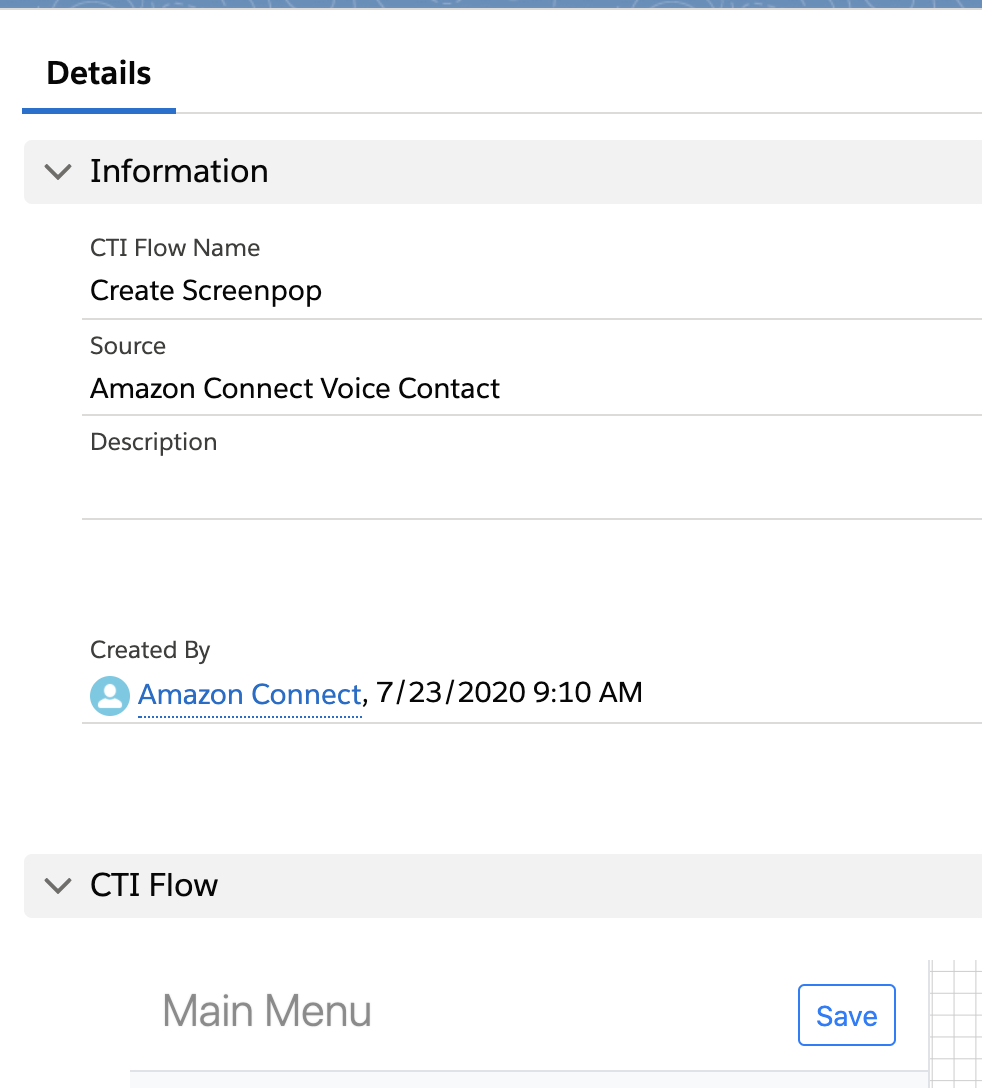
Provide a user-friendly name in the CTI Flow Name field. And click Save.
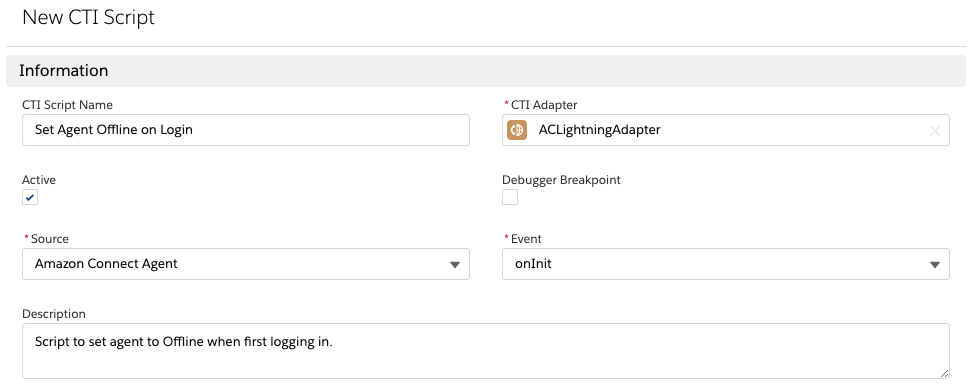
This will take you to a form where you can fill in name and adapter of the CTI Flow. There are a couple of fields that you may be unfamiliar with: Source and Event.
Let's look at Source field first.
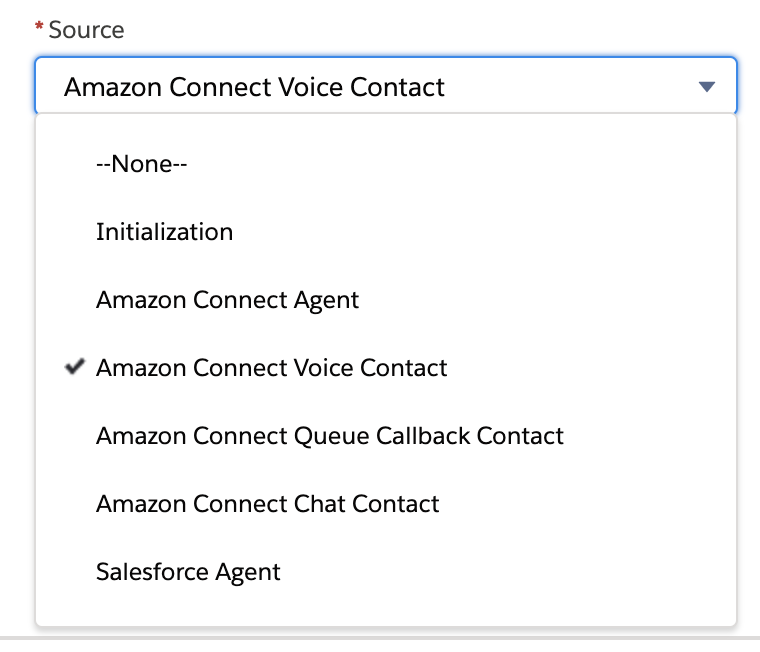
You can think of Source as the "origin" of the CTI Flow. There are currently 7 sources: Initialization, an Agent on Connect, Voice Contact on Connect, Queue Callback Contact on Connect, Chat on Connect, Salesforce Agent or Salesforce UI.
Each source comes with a set of events that you can hook into, i.e. your CTI Flow will be executed when one of these events fire. Typically, you will have only one flow for a combination of a source and an event. (You can find out more about sources and events in Appendix C - CTI Flow Sources and Events.)
For the purposes of this example, we selected Amazon Connect Voice Contact source and onConnecting event. Now click Save and on the next page scroll down till you find the CTI Flow section.
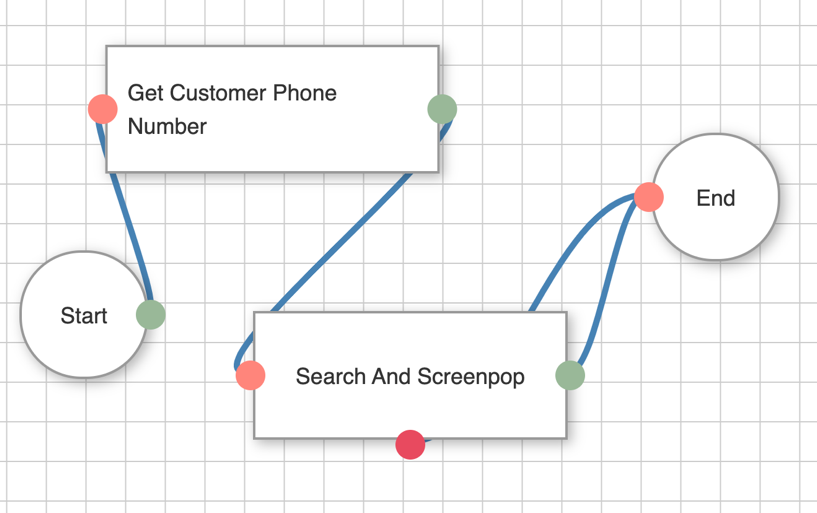
Let's build a CTI Flow that opens a screenpop in Salesforce when a voice call comes.
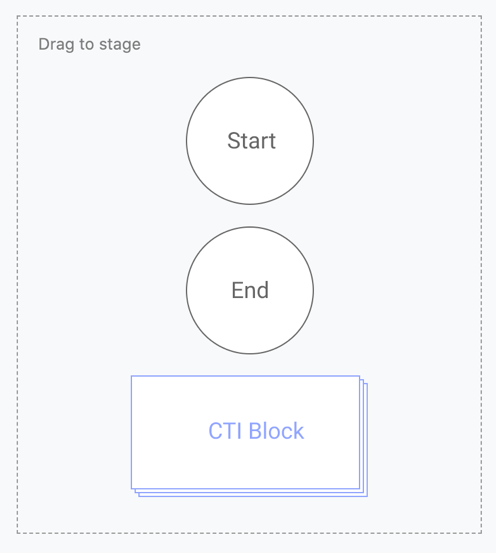
You can start using by dragging the item called CTI Block from the sidebar in the Main Menu over the stage, which is marked by a grid pattern.
When you drop the block, you will see a modal titled Explorer. This modal contains a list of actions you can choose from.
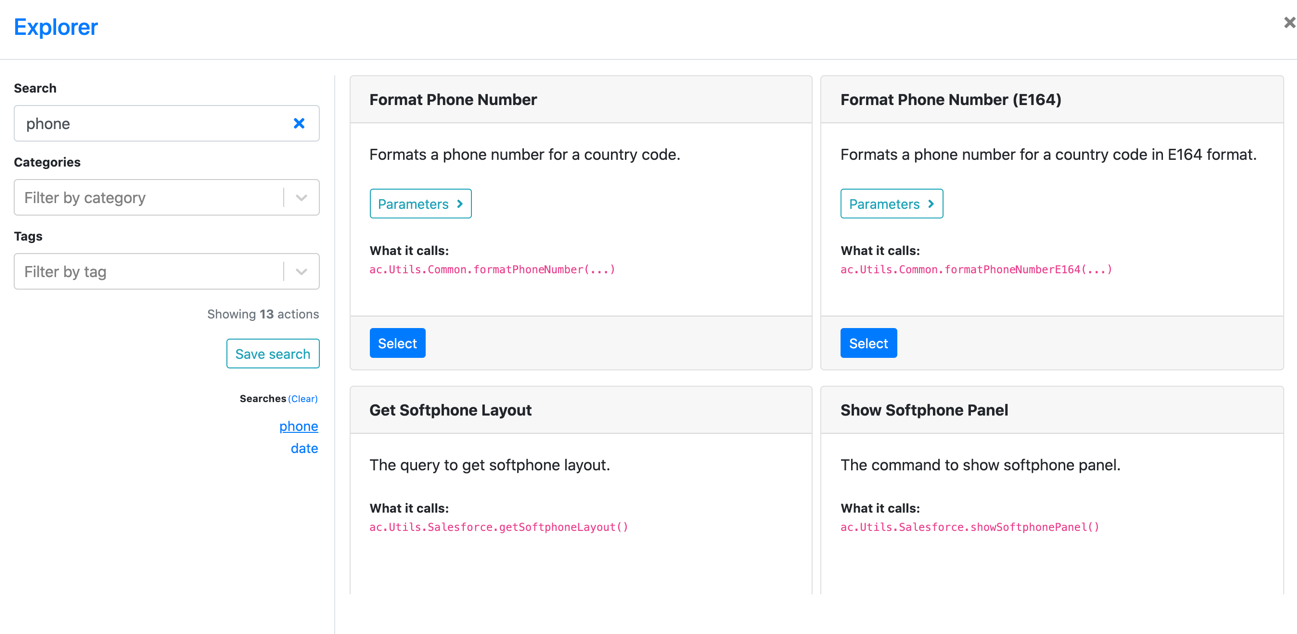
In the Search field, search for Phone and Select the action called Get Customer Phone Number from the results on the right.
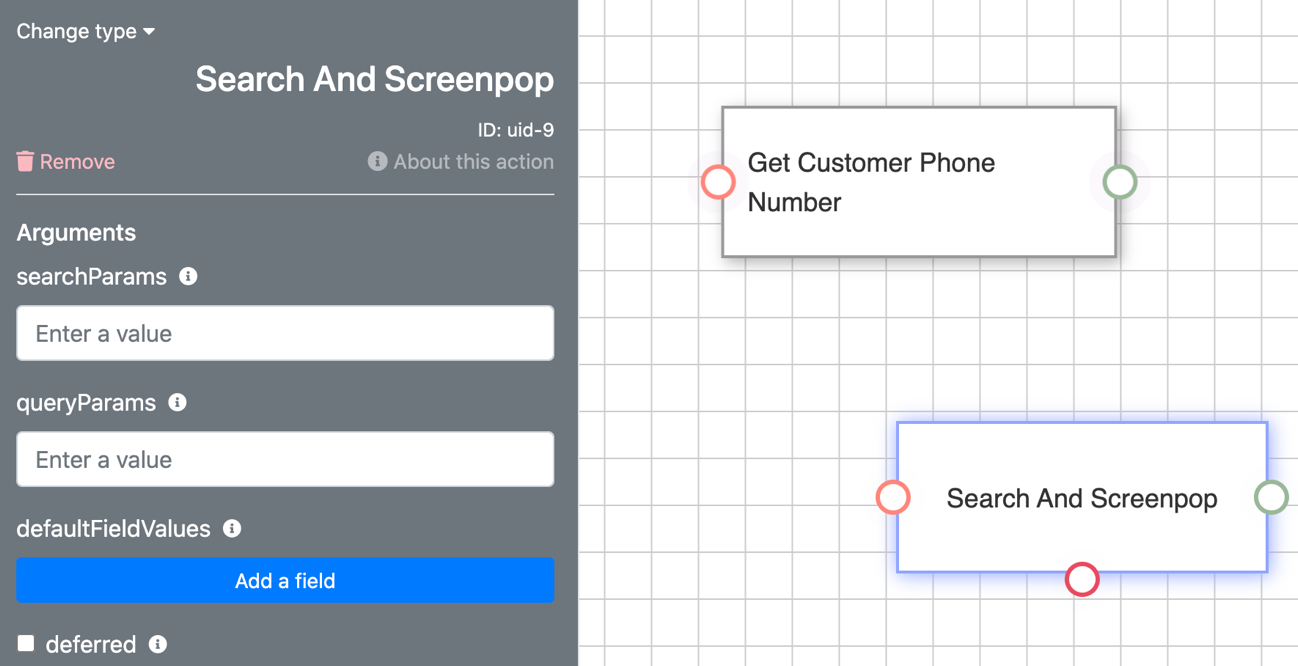
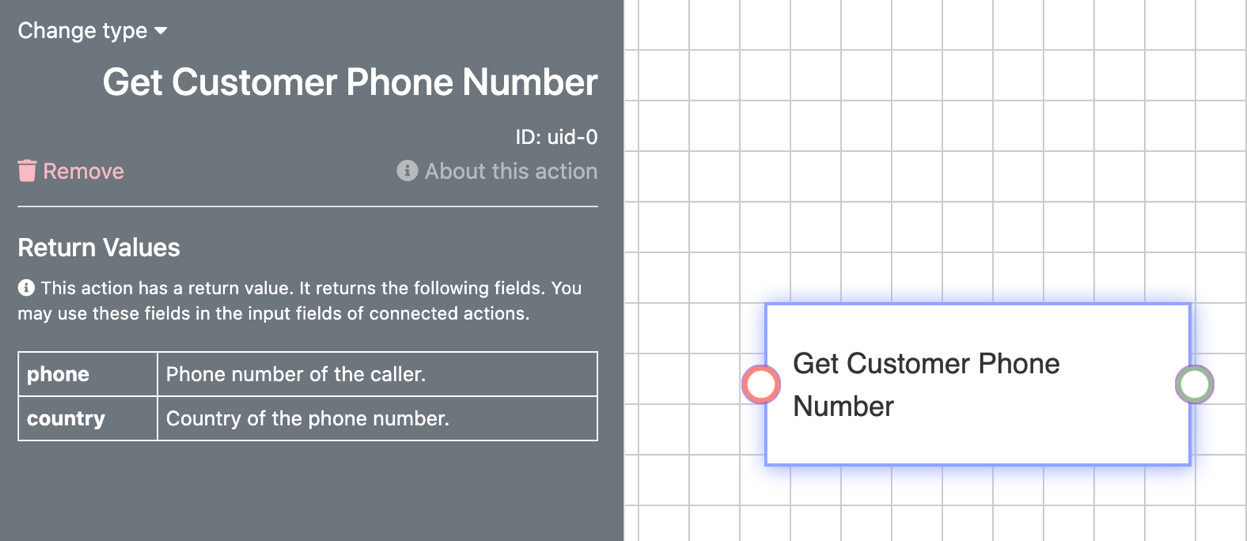 You should now see a block on the stage for the action you selected, and the sidebar will display some information about this action, including its return value.
(Note: If you'd like to change the label of the action, doubleclick on it. This will open a text editor. Make your changes and when you're finished click outside the node to save your label.)
Some actions can be configured using input fields to provide arguments to function calls, as well. This action does not have any input fields, and returns two values ---- phone and country.
Now let's drag another CTI Block over the stage and find an action called Search and Screenpop.
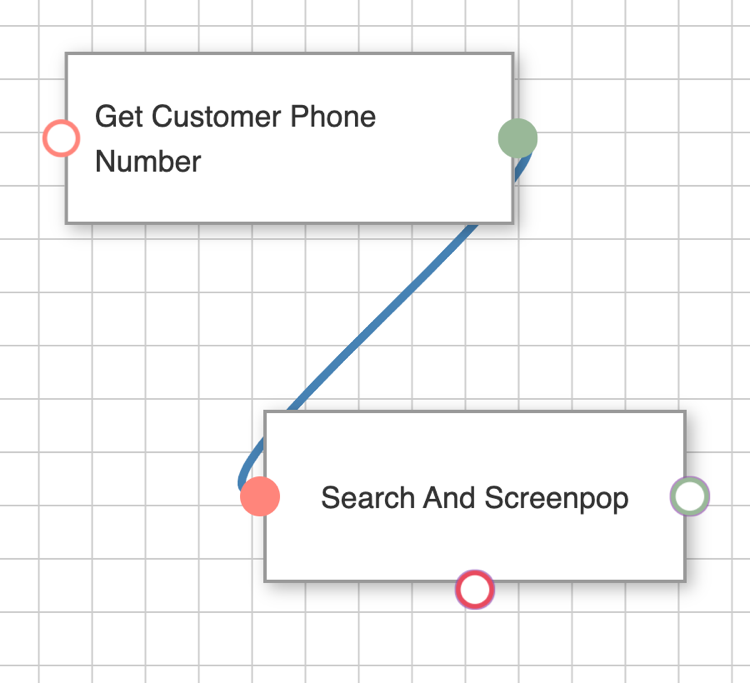
Connect these blocks by clicking the green socket (green means "done") on Get Customer Phone, which will display a blue line that tracks your mouse cursor around the stage.
Now, click on the pink socket, i.e. the input socket, which is to the left of the Search and Screenpop block. If the connection is successful, the sockets fill turn into a solid color and the blue line will connect them. (There are some restrictions on which sockets you can connect together. For example, you cannot connect output of an action to its own input socket or connect two inputs.) If you are not happy with this connection, you can hover over it and double click to remove.
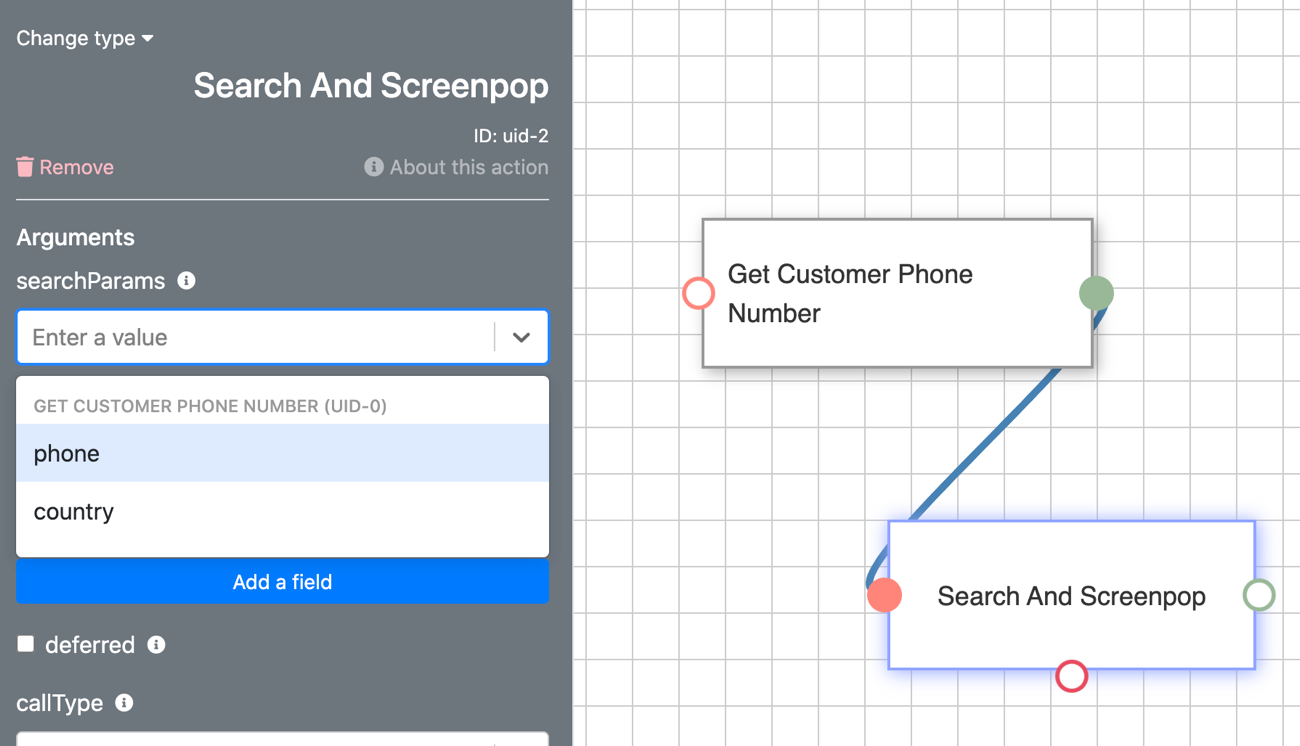
Now we'd like to get the phone number of the customer and use it in Search and Screenpop. Here is a tip: if two actions are connected, you can use the return values of the first action in the input fields of the next action. (You can even use the return values of actions connected to the last action, and the ones connected to that, and so on.)
This action has only two options, and we want to use the one called "phone" for this field.
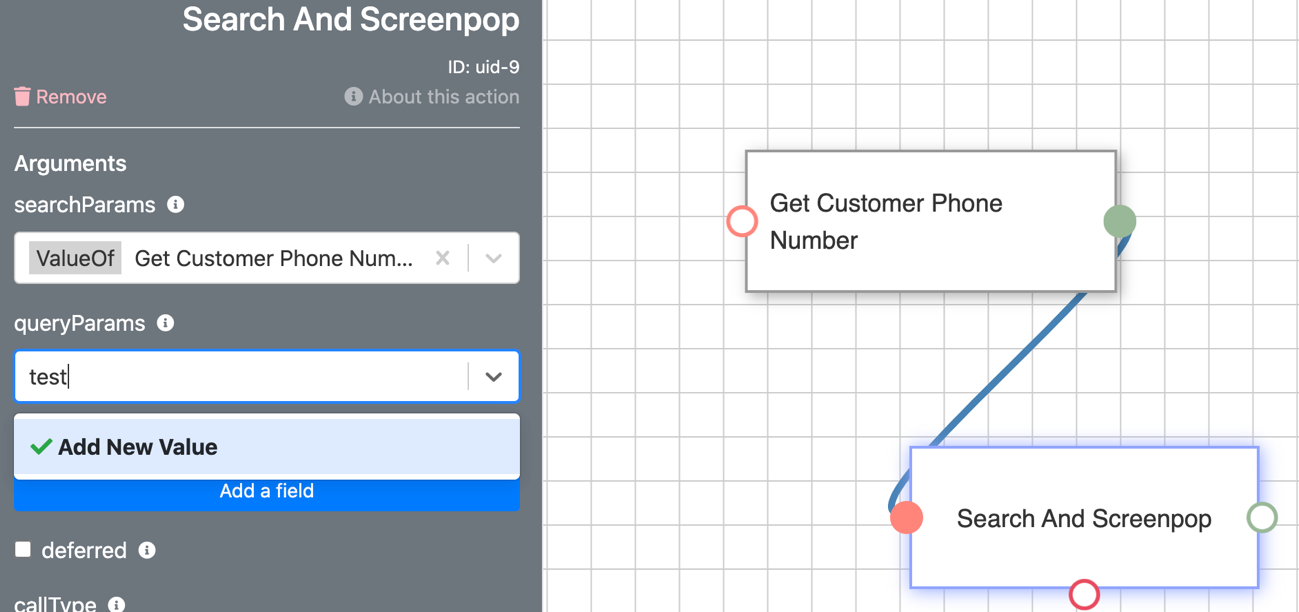 If you want to enter a custom input value, you can type that, and select **Add New Value** from the dropdown.
And make sure to set callType to "inbound." Finally, add the Start and End nodes and connect everything together.
When you're finished, click Save in the sidebar. That's it. You created your first CTI Flow.
To test your flow, go to your Service Console, and make a call from a number that is in the profile of a Contact. As the call is displayed in your CCP dashboard, Salesforce will pop open the contact of the caller in a separate tab.
Accessing CTI Flow Block Values
Internally, CTI flows are organized as JavaScript Object Notation (JSON) objects, and access to them is facilitated through JSON Paths.
JSON Paths
JSON paths help you find specific data within a JSON structure, similar to giving directions to locate hidden treasure on a map.
Basic Syntax:
- Use dot notation (.) to traverse through object properties.
- Use square brackets ([]) to index into arrays.
Accessing Object Properties
Consider this JSON object below:
{
  "name": "John",
  "age": 25,
  "address": {
    "city": "New York",
    "zip": "10001"
  }
}
To retrieve the value of the "name" field in this JSON object, you would utilize $.name. The same approach applies to accessing the value of "age" through $.age. If you wish to access the "city" value, you would use $.address.city.
Consider this next JSON Object:
{
  "fruits": ["apple", "orange", "banana"]
}
To access the different fruits, you should use the following format: $.fruits[0] or $.fruits[2]. It's important to note that the first element (apple) is accessed with "0" rather than "1" due to arrays starting their indexing from 0.
Accessing CTI Flow Object Properties
Having covered the fundamental concepts of accessing JSON objects, here is an illustration of a CTI flow JSON:
LogUtils.ts:41 [CTI ADAPTER]: [FLOW] [AC_clickToDialFlow]: actions: {"uid-0":{"success":true,"results":null,"exception":null},"uid-39":{"success":true,"results":{"value":{"number":"+12345678900"}},"exception":null},"uid-29":{"success":true,"results":true,"exception":null},"uid-16":{"success":true,"results":{"value":"+12345678900"},"exception":null},"uid-54":{"success":true,"results":{"endpointARN":null,"endpointId":null,"type":"phone_number","name":null,"phoneNumber":"+12345678900","agentLogin":null,"queue":null},"exception":null},"uid-44":{"success":true,"results":null,"exception":null},"uid-18":{"success":true,"exception":null}, uid-17":{“success”:true,“results”:{“value”:{“type”:“Task”,“Id”:null,“CustomField__c”:“RandomMessage”}, "uid-20":{"success":true,"results":null,"exception":null}}}}
It is presented in this format typically, but for this demo, it will be more convenient to conceptualize it like this (condensed for brevity):
{
   "actions":{
      "uid-39":{
         "success":true,
         "results":{
            "value":{
               "number":"+12345678900“
            }
         },
         "exception":null
      },
      "uid-29":{
         "success":true,
         "results":true,
         "exception":null
      },
      "uid-54":{
         "success":true,
         "results":{
            "endpointARN":null,
            "endpointId":null,
            "type":"phone_number",
            "name":null,
            "phoneNumber":"+12345678900",
            "agentLogin":null,
            "queue":null
         },
         "exception":null
      },
      "uid-17": {
         "success":true,
         "results": {
            "value": {
               "type":"Task",
               "Id":null,
               "CustomField__c":"RandomMessage"
            },
          }
      }
   }
}
Similar to the approach used for accessing values in smaller JSON objects, you can apply the same methodology here. To retrieve the phone number in the CTI flow block with "uid-54," you can use the following syntax: $.actions.uid-54.results.phoneNumber.
For certain CTI flow blocks, the return values can be more intricate. Take, for instance, the CTI flow block with "uid-17," which generates a Task record in Salesforce. To access the values type, Id, or CustomField__c, you need to use the format: $.actions.uid-17.results.value.[0].CustomField__c. The use of "[0]" is essential in this case, as the particular CTI flow block can return multiple Task objects stored as an array.
Note: It's crucial to verify the return values of a CTI flow object before attempting to access its value, as not every CTI flow block returns a value. Otherwise, you may receive undefined, indicating the requested value does not exist.
Why Would I Use This?
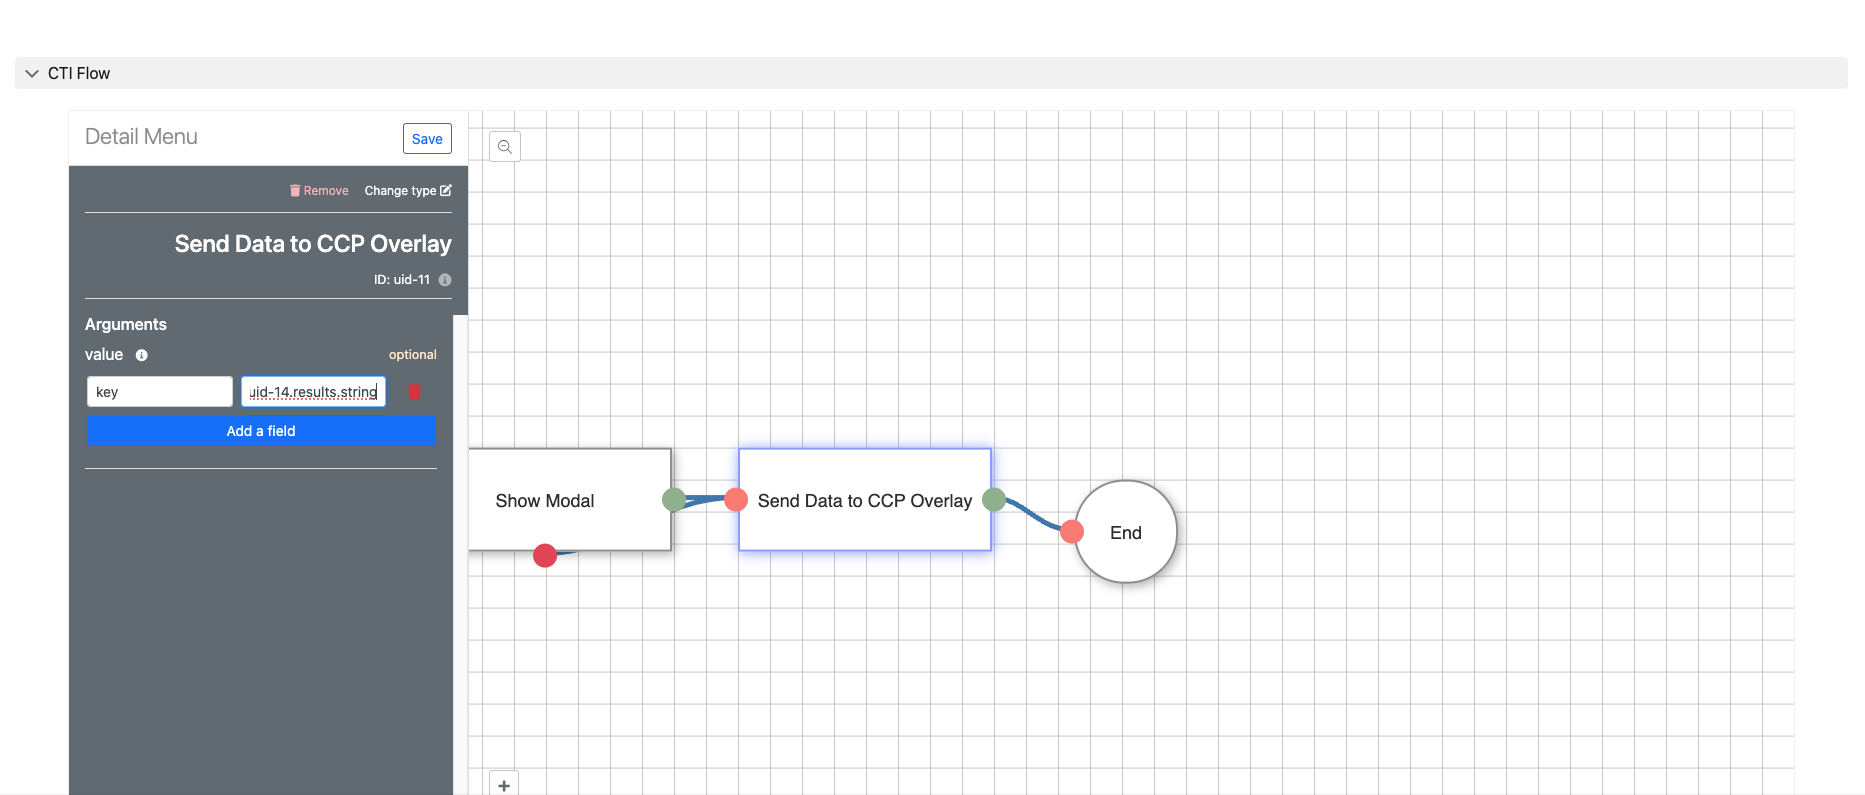
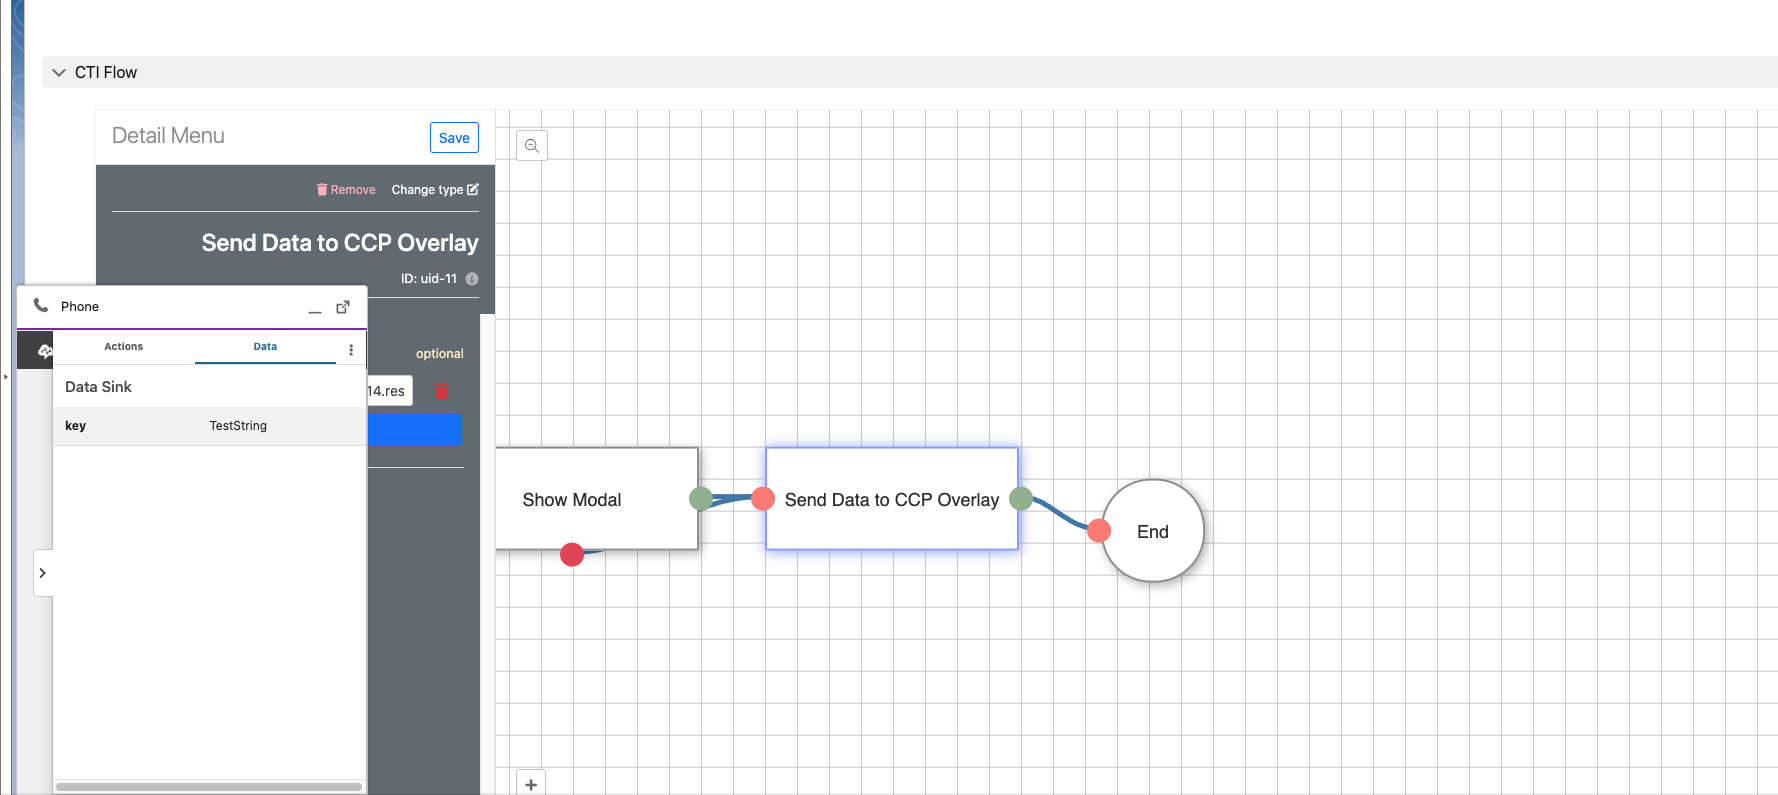
In most instances, direct access to CTI flow values is unnecessary, as return values are selectable through a dropdown menu in the CTI flow block.
However, for scenarios where the dropdown menu is inaccessible, such as with CTI flow blocks like "Send Data to CCP Overlay," accessing the value directly becomes more practical.